I am really happy with the way it hovers, now to add some elevons to help stabilize high speed forward flight
crystal garris's Posts (61)
Sort by
That's right I am back with some new UAV designs and old favorites. I started A youtube channel to show off my stuff. please check it out and subscribe if you want to see more.
To show just how stable the techwing is while flying slow, I made the following video.
Specs:
WS: 43 inches
all up weight:37 oz
motor: 370 watt 1100 kv
prop: 9*7
battery: 5000 mah 3s lipo
battery weight:14.8 oz
flight duration: 20 minutes
ma used: 1007
As you can see the techwing handles extremely well while flying slow, even with enough battery for a 1.4 hour flight. I am making a limited amount of techwing RTF alfa aircraft available to interested parties. I am putting 6 up for sale on my store at hobbyuav for $350 each. it includes a fully assemble techwing airframe with motor,ESC and servos fully installed. I hope to have the project ready for kickstarter after the first of the year.
Thank you for your support.
Hey everyone,
The newly updated techwing design has achieved its maiden flight.


unfortunately, the flight was cut short due to a bad ESC. It handled very solidly the small amount I was able to fly it.
Hey everyone,
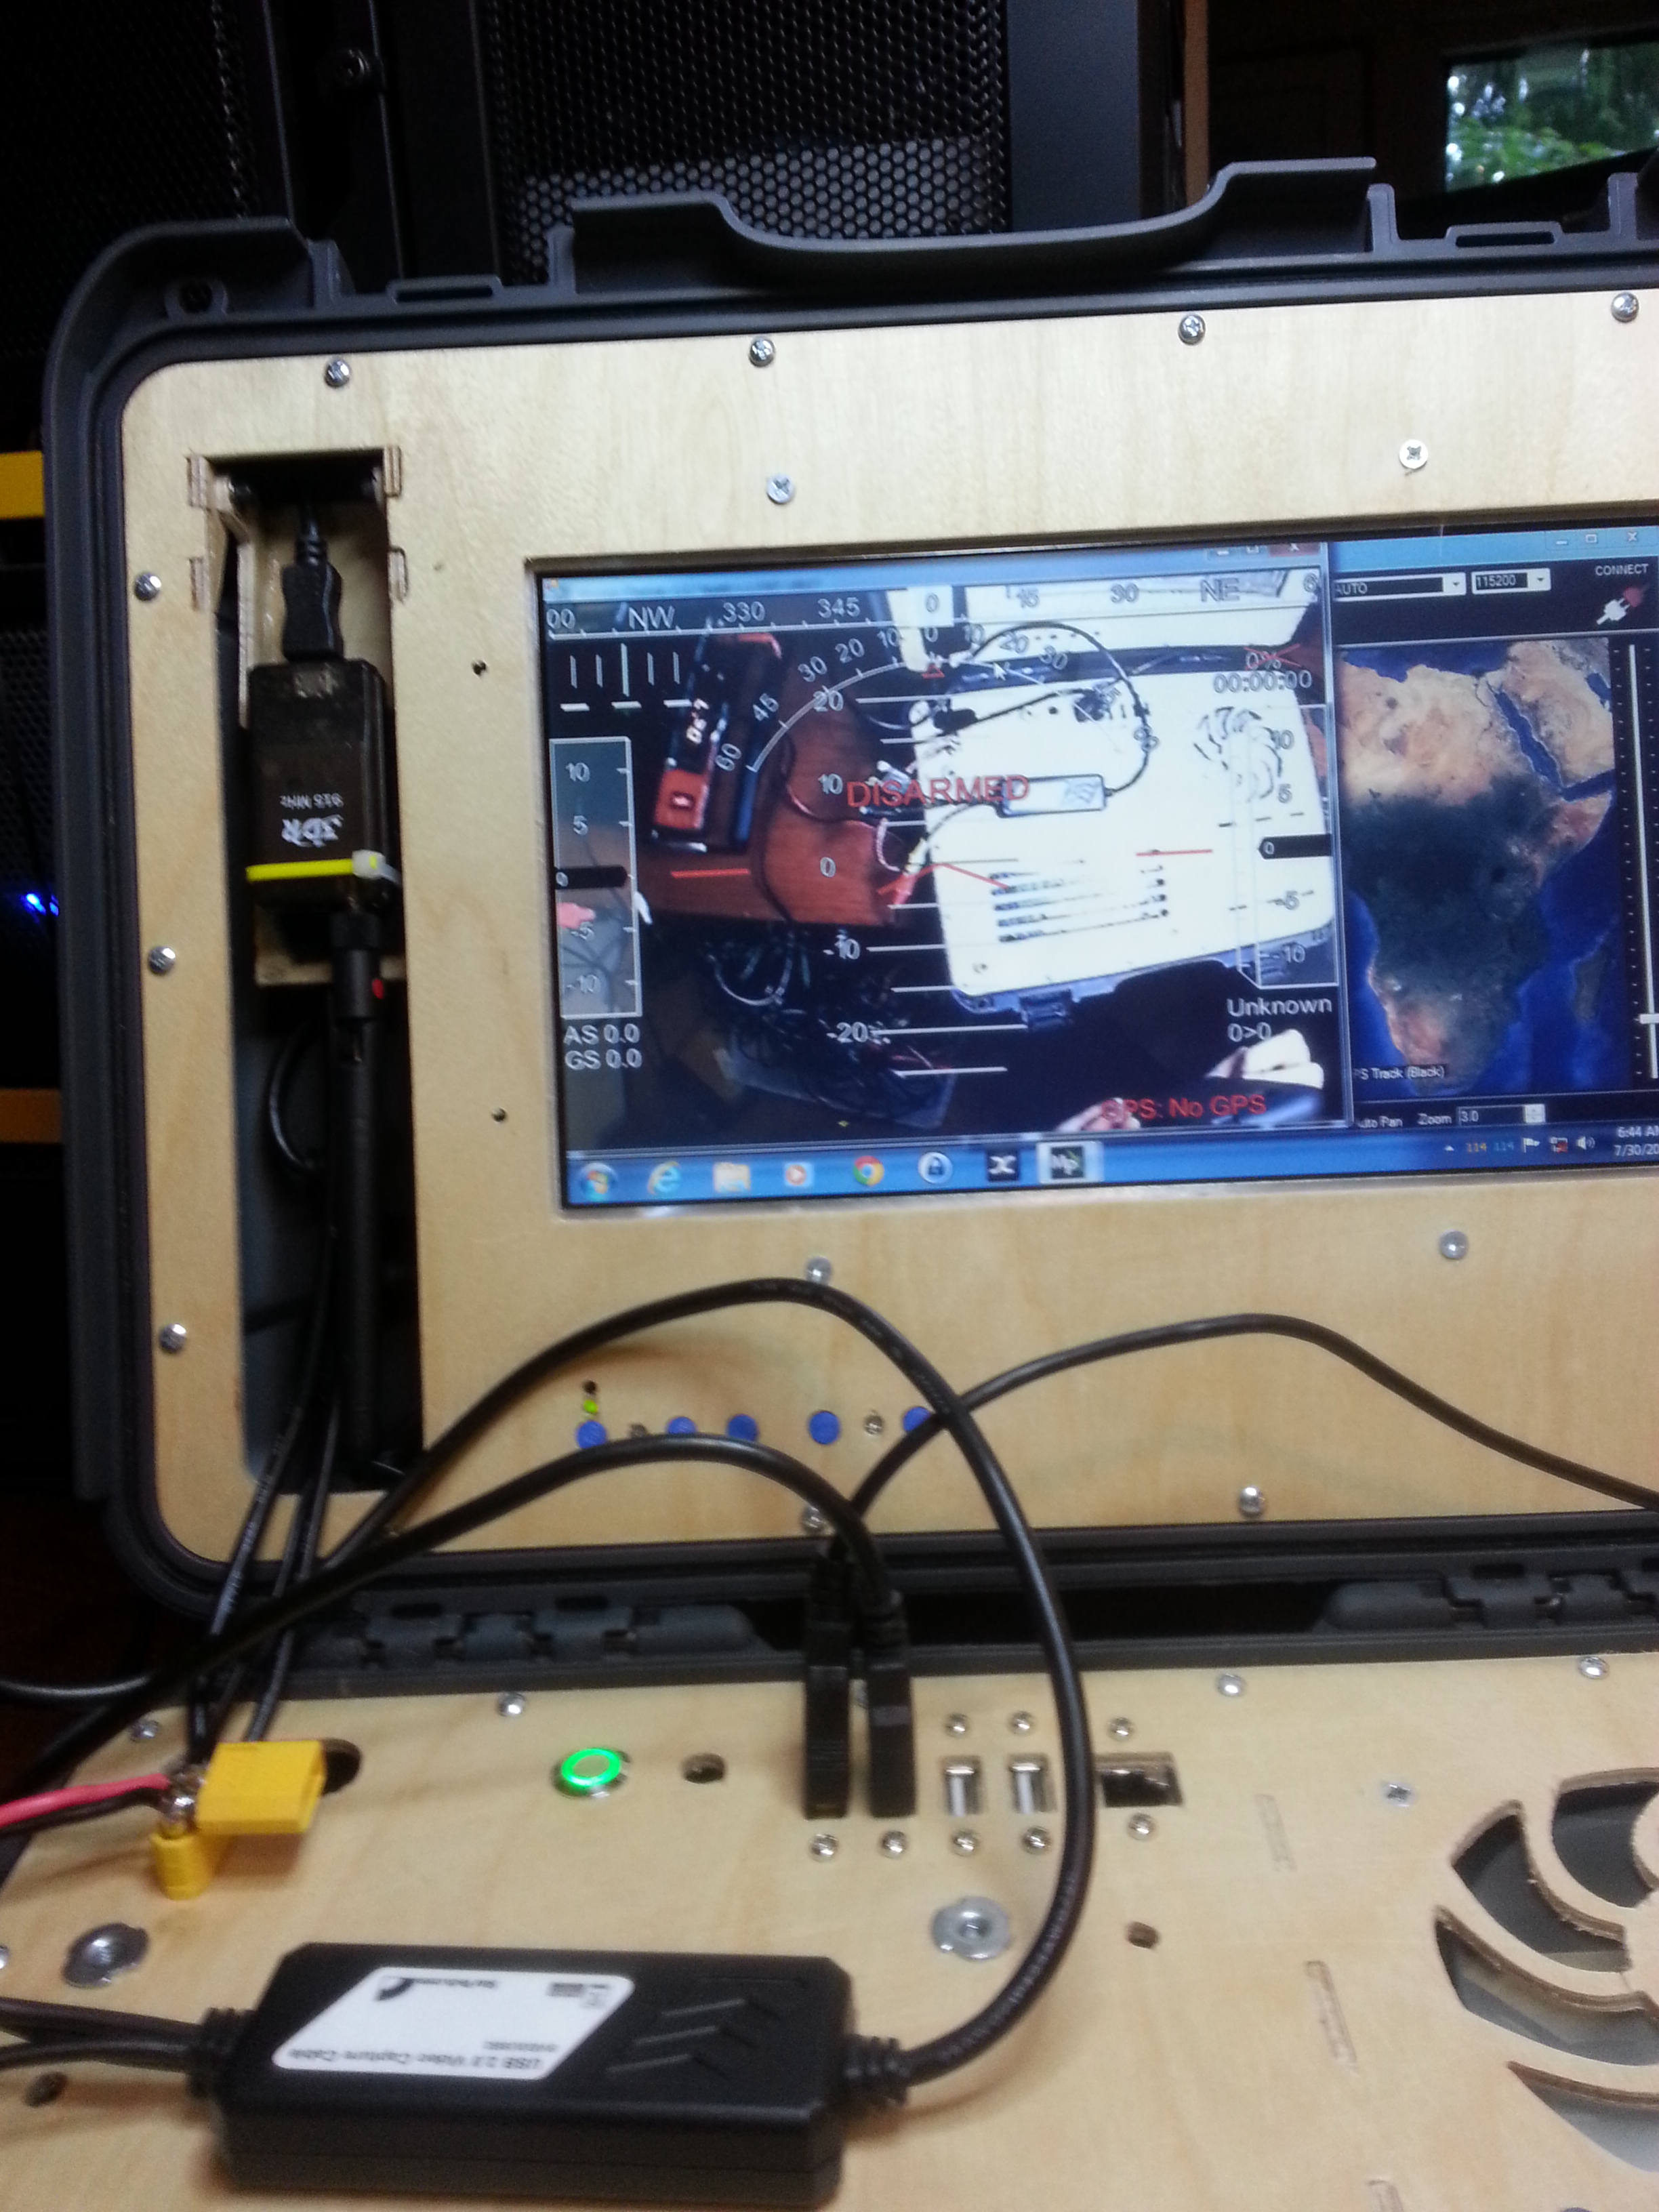
I have to admit, I am a little fed up with the "ground stations" available on the market today. First off, good luck seeing most laptops or tablets at all outdoors. Second, good luck modifying or repairing your laptop / tablet. It can be done but its usually a major pain with a good chance of breaking something.


I used a nanok 910 for the outer case.The techstation features a 10.1 inch display from Pixel Qi. What makes it so special is that it changes from a bright, normal LCD display to a reflective, E-paper like grayscale display, like above, that actually becomes more visible with ambient light. I Combined the screen with a Gigabyte GA-E350n motherboard. for only ~$75 you get a motherboard and embedded AMD E-350D APU with Radeon HD 6310 graphics. Together with 8 GB ram and a 120 GB SSD, There is plenty of power to run mission planner and a USB video frame grabber. All while only drawing about 2.5 amps@ 12v.

The power supply is The M-4ATX from mini-box . It accepts power from any unregulated 30-6 V dc source. It also provides reverse current and over voltage protection.

For a complete screen solution I used the screen and LVDS driver combo from Adafruit. The driver board gets power from the 12v accessory line coming from the M-4ATX so it is protected as well
 You can access different inputs to the screen here. It even has a direct RCA jack for video display.
 You can even tell your significant other it is a new media center for the family. It streams 1080p movies!
 If that fails Just say "I got it for the kids"
The plan is to provide a simple DIY solution it the form of a kit consisting of the mounting plates, hardware and front panel connectors so you can build one yourself on the cheap. the kits will be somewhere around $50 -$100. You will need to provide:
Mini ITX motherboard/cpu/gpu/ram
SSD
10 inch LCD screen preferably this
Hey everyone,
I wanted to post an update on the work I have been doing on the techwing design.

The new design is scaled up some to a 40 inch WS. It also includes real Grantz type winglets, a longer tip cord and fixed LE slots.
Flat plate:

With winglets:

By reducing the vortex, you can expect less drag, greater lift, and better stall characteristics.
The next thing I did was add fixed LE slots to the outboard panel. LE slots allow the wing to fly at much higher angle of attack .
This is the techwing at a 13 degree AoA. Dark blue is the most negative pressures.

Here you can see the slotted airfoil at a 13 deg AoA. It achieves a 1.19 CL normally this airfoil would have a Cl max of ~0.75.

The slots also help to increase aileron effectiveness. I just finished the first mold for the prototype. this is the bottom of the fuselage.

Techpod kits are going on sale from today until july 31st They will be available for $140 to all US and Canadian customers.

All newly shipped techpod kits will be shipped with these great upgrade parts which make the tail and wing very easy to remove and transport.
 .
.


For those of you who already own a techpod and want to purchase the upgrade kits, they are available separately here. Techpod upgrades.

Hey everyone!
So I have finally emerged from home built CNC machine purgatory. I finally have the new machine running, and it rapids @ 1000 IPM and gets around +- .003 accuracy. But anyway thats not the point of this post. I have been working on upgrades to the basic techpod. Upgrades that make it much easier to transport and assemble at the field.

The mod includes a large diameter carbon fiber tube that the wing tubes slide into. You can see its black outline in wing stub.
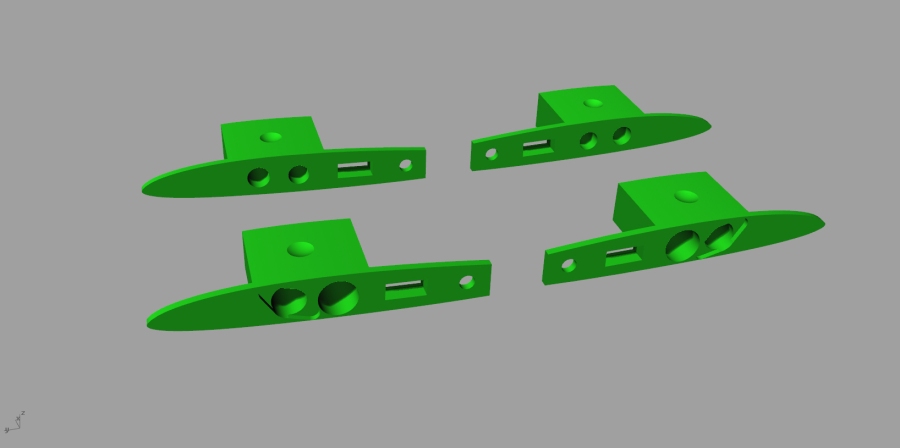 The upgrade includes 6 pin multiplex servo connectors and a wing retainer system from esprit models

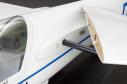
They hold extremely good. Maybe a little too good but with a careful grip you can pull them right off without denting the wing.

Also, The removable tail modification works well. Its not tool-less but removes quickly with a couple screws. I am finishing the prototype for these mods and should be out testing them tomorrow. If all goes well, my goal is to have these upgrades available for purchase by the end of the week.The files are available over at grabcad if you would like to print out your own.
Hey everyone!
So this is something I have been wanting to do for a while.

![]()
I am ready to pull the trigger and publish the techpod design for everyone to modify or make for themselves. I would like to seek the communities advice. Basically I would like to use CC NY-SA. I am fairly certain it should give me the protection from dis-attribution while at the same time I can give back to the community, but I am no lawyer. So I would like to here what you guys think about the license and it's application to the techpod.
So, you may be asking, what is the point?
well the point is I may be very talented but I have only so much time and resources. I get a lot of interest from academics etc wanting to learn from and some who want to get involved.
Whats is it for me?
Basically I would like to create a group of developers to help further along the project. I intend to create a system by which people can help out and receive serious financial rewards. 3DR is a great example of what I am talking about in this realm. Although you will be free to develop the techpod on your own all you like, only this group will have access to the teams upcoming releases and plans.
What does the future hold for the Techpod and dev team members?
-composite techpod
- techwing
-techpod 2.0
- high endurance helicopter uav
- large gas burner UAV
- infinite endurance electric/solar techpod
So, If you are interested in being part of the team, drop me a PM. I can only allow so many to join the group in the beginning, candidates will be selected on the basis of there skill sets and the projects needs.
here are some areas of expertise that are open:
aerodynamics/CFD analysis, mechanical stress simulation, CAD draftsmen, PCB board design, code development.
I have some housecleaning to do on my files and I would like to hear some feedback but I will be making the files available in a day or two.
Thank you guys so much for helping make my dreams come true and believing in me!
hey everyone,
So, I have been working on a few upgrade modifications that will be available in about a week.
removable tail:

working belly/camera bay doors:
 ]
] ]
]
Plug and play, tool-less wings. No more dealing with plugging in servo wires and hunting for a screw driver. There will mating plywood plates and 6 pin connectors it will look something like this:
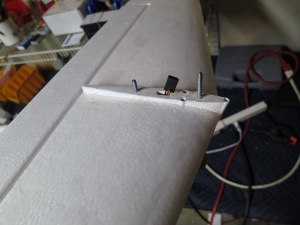
this is the present state of the upgrade prototype.

it has a large diameter CF tube that the wing tube slide into. simply slide it on and the electrical connections are made and a clip holds it all in place.

I also have installed in this model another upgrade. G10 plywood replacement. It will help the techpod take much more abuse on hard landings.

Hey everyone!
I am really getting a handle on openFoam. I have figured out the scale and mesh resolution problems I have been having. I can now produce highly detailed data sets of the air flowing over the current techwing design.

this is the airflow over the wing tip. Needs improvement.

here is another look from the side the surface is colored with the local pressure numbers. red is highest blue is lowest

This is a view showing the negative pressure contours, represented by colored points.
 This shows the positive pressure contours.
Now I can make some minor changes to the geometry and see exactly how it will effect performance and flyabilty. Check hobbyuav.com for the latest techwing news.
I wanted to share my experience with openFoam.

I am using openFoam as part of the free linux distribution CAElinux. CAElinux makes it a snap to get a copy of openFoam up and running. CAElinux also comes with a plethora of open source CAE packages. After going through many of the available tutorials, I can now import my own geometries and run a case. I still have much to learn as openFoam is extremely powerful and flexible. The interface is mostly through setup files so it is not very intuitive or point and click.

the first step is to produce a computational mesh. this is a screenshot of gmsh an open source meshing program for mesh generation. it is very tricky adjusting the mesh densities. set things a little too fine and you can end up with millions of entities and take days to complete. set it too low and your computations will not be as accurate. I can successfully generate all the meshes required but still working on getting from gmsh to openFoam.
After the mesh is generated( I used snappyhexmesh for the photo at the top) you must configure the dictionaries and folders in your case file ( I modded the motorBike tutorial case folder). After this is all set up and the code in the dictionary files makes sense, a quick "./Allrun' in the terminal to execute the run script. After a while the case will be done running and you can enter "paraFoam' to open up paraview with your newly created simulation data. paraview has a nice GUI interface and does not take long to produce some nice pictures of the 3D pressure and velocity fields of the airflow around the model.
I still have much to learn before I can start making highly accurate performance predictions with openFoam, but I know I will get there. it is great to have access to such a powerful and open CFD package
Hello everyone,
I just wanted to show off what I've been working on lately for the techpod. Is a mechanism to at automatic doors to the camera bay of the techpod. This will allow people to mount a camera in the belly of the techpod and gather unobstructed vertical photos and still keep the camera protected during landings etc.

Hello everyone!
A few months ago I recieved an email from Lorenz, main developer of the Pixhawk research project and the PX4 autopilot. He urged me to create a small flying wing platform. Around 35 inch wing span and around 500 grams. capable of carrying a small camera like a gopro or canon s100.camera and an autopilot. I thought it sounded like an excellent idea. I could make it very portable and it could operate out of much more confined spaces then the techpod.
So I got to work. After about 4 weeks of analyzing airfoils and reiterating designs I finally came up with this wing set up.


I cut the wings out of EPP with a 4 axis hotwire CNC machine. I glued the sections together with goop and covered it with laminate material. I made some balsa elevons and vertical stabs. It came out to be 20 oz which is a little over the target weight but this is a prototype and a fully molded EPO version will be much lighter. I put a couple small holes in the bottom so it could be easily launched two finger style. hear is the video from the flight.
other than the roll trim being out a bit with it pulling to the left, the launch went very well. a little bit of left trim and it was flying flat and level. there are a couple obvious changes i need to make. one is I need to move the motor down to center with the wing. The other is to turn down the throws. It was pretty twitchy but I usually set up the first flight with a lot of throw. I put it into a few stalls and it takes a good two revolutions to recover from a spin but I think that is to be expected from a wing. I had a blast flying it and it can take a hard landing. I will be putting an apm in it and I should have much more flight performance data.

you can read more about the techwing and the techpod at hobbyuav.com
- from my blog hobbyuav,com.
For the techpod 2.0, I want to have a high precision camera gimbal capable of continuous rotation in two axis. I have always likes the brushless gimbals that are so popular today. The control and drive systems are very nice but are not setup for continuous 360 degree rotation. furthermore the IMU algorithm is very CPU intensive and prone to needing the gyros calibrated frequently etc.
I decided to replace the IMU with a AS5048B rotary magnetic encoder for position feedback. The AS5048B outputs the 14 bit absolute position of a magnet rotated near the IC. After you include noise, it is good for about 0.06 degrees of accuracy. Here is a short video of it going from 90.5 degrees to -90.5 degrees every 10 seconds.
Here is a quick hack of the brushless gimbal software.
Hey everyone, so I don't have the APM tuned very well but at least its hitting waypoints and holding altitude and airspeed. I decided to get it flying and see just how long it would go. Here it the result:

this is the equipment list:
APC 12*8 prop
2x Zippycompact 6s 5000 mah lipo
APM 2.5 + telemetry + airspeed sensor
So whats next for the techpod? well, I will refining the gains. After I have it flying smoothly, I have a setup in the works that will be pushing flight times over 5 hours. Stay updated on the lated techpod news @ hobbyuav.com
Hey everyone, Here is something cool that I have been working on that I think you may enjoy.
So, I had been pondering how to make an inexpensive variable prop. I was thinking about using a heli head from a hk450 or perhaps a tail rotor. I eventually saw a post here, on diydrones, where a guy was using a tail rotor from a HK500 (can't find post). I got inspired and found a HK600 tail rotor has the same shaft diameter as the turnigy G10 I use on the techpod. this is what I have come up with.
I measured 15 degree max forward pitch and 12 degree reverse pitch. at 15 degrees forward pitch it drew 40 amps from a 3 cell lipo and puts out just under 5 lbs thrust.
I got the blades here and the tail rotor assembly here. I removed one side of the tail rotor plates and replaced both the shaft in the tail rotor and the shaft in the motor with one long 5 mm shaft. I had to notch it a few times for the set screws.I then made a plate to help support the rotor plate so I could then brace it with some 4-40 all thread rod and nyloc nutsI also made a custom motor mount for the techpod.
After the motor was secured, I cut out a mount for the pitch servo. Then I cut a hole in the foam so I could attach the servo mount to the techpods rear fuselage brace. I grabbed a bell crank from the local hobby shop and mounted it to the rear brace as well.
I have the techpod mostly assembled and should have the batteries for it later today. I hope to be able to start test flying over the weekend. If everything works out well, I plane on offering this as an mod kit for the techpod.
Check out this and the latest techpod news at Hobbyuav.com
Hey everyone,
Got a little free time to get out to the field and do some flying yesterday. got a chance to engage the APM and see what it would do.

I was able to try out stabilize and RTH modes. both worked pretty well. Had problems with the OSD and after the first flight, I was getting glitches from the right aileron servo. I could not track down the problem so I packed up and went home. I was happy with the flight and the APM however.
Here is the parameter file. techpod_perams.param
this is the tlog file frome the flight 2013-05-19%2017-23-52.tlog
hear is what's happening next-


this is a conceptual model. next come aerodynamic refinements then comes the structural design.
I have been working on a 2 axis 360 degree constant rotation gimbal to go along with the new fuselage. I plane to start an open source progect for the gimbal its self I was thinking about calling it "open gimbal"
It will use common servos with a constant rotation hack and 12bit magnetic encoders and $15 slip rings.
here is an example of the servo and encoder in action.
stop by hobbyuav.com for all the latest info on the techpod.
Went and flew at 60 acres today. only had time for a 20 minute test flight. the camera was out of focus and it was getting dark. This was flown with a foxtech 370 kv motor , two 5000 mah 6s lipos, APC 12x8, castle ICE 50 ESC, minum OSD and APM2.5 (data logging only for now)

This is from the logger on the ESC. and full log from ESC from the looks of it I am good for well over 3 hours flight time.
techpods in stock and shipping now. hobbyuav.com
Thanks
wayne