Hello,
An interesting note about placing quality Ground Control Points.
Any other useful tips?
From groundcontrolpoints.com:
To make a quality ground control points to use for georeferencing in drone mapping software, there are 4 key things to remember.
1) Use a Large, Clear Targets
Ideal GCP targets could be a large X marked on the ground, a checkerboard mat, or a circular target with a center point. You want to make sure your target has high contrast colors like black & white and that it is large enough to be easily visible from your flight altitude.
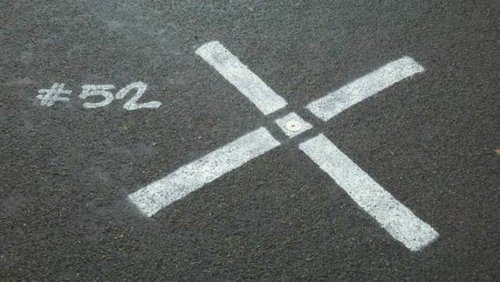
This is an example of a high quality GCP target spray painted onto the ground using a rectangular stencil.
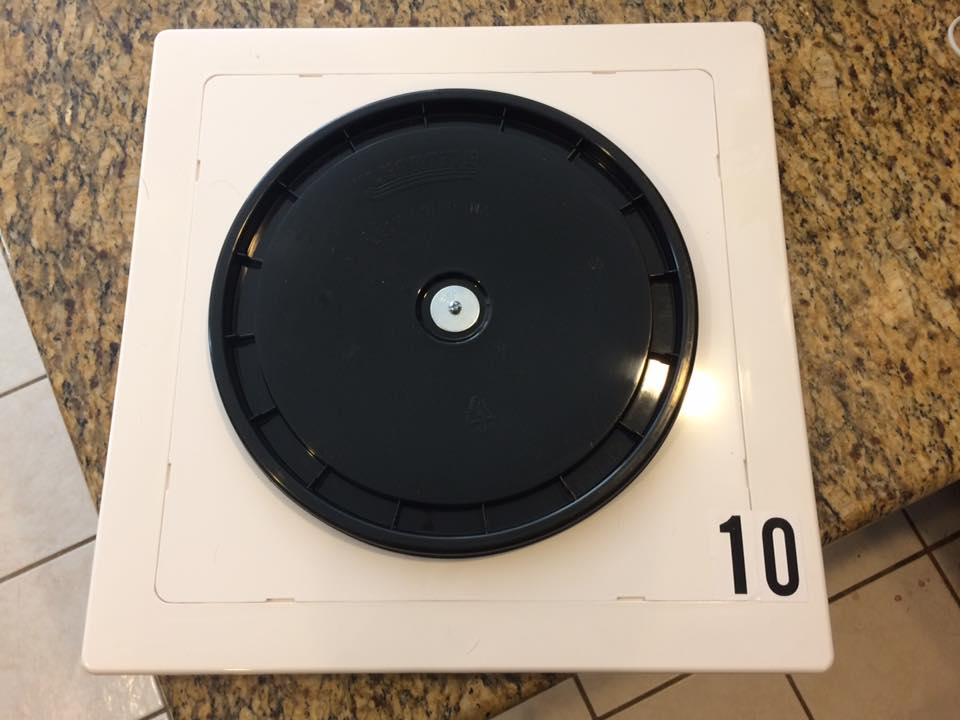
Another DIY approach we have seen is a 12" bucket lid stuck on a white plastic 14x14 access panel. Each of these are available at Home Depot, Lowe's, or your local hardware store.
This gcp was made with a sheet of roofing rubber ($4.66 each) and vinyl stickers ($1 per 6" x 12" sheet) to create a simple checker pattern that is highly weather resistant.
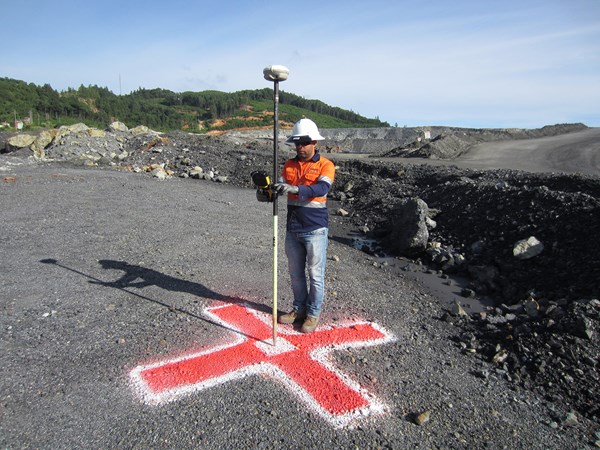
2) Measure Your GCP Center with High Precision GPS
The GPS on your phone, tablet, or drone won't cut it!
You need an extremely precise GPS measurement to create a quality ground control point. To do this you will need a Real Time Kinematic (RTK) or Post Processing Kinematic (PPK) GPS receiver. Traditional examples include the Trimble R family of products (including the Trimble R8 pictured on the right) but recently low-cost alternatives like the Emlid Reach have entered the market.
RTK GPS is required for GCP in mapping contour lines3) Evenly Spread Your GCPs Through Your Map
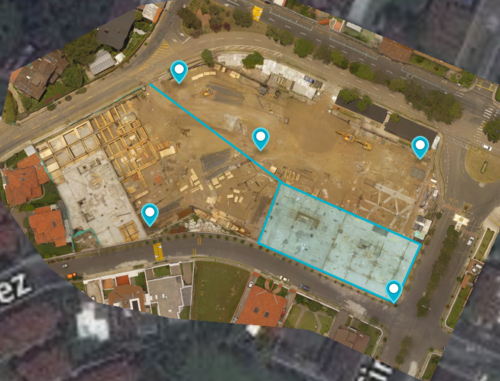
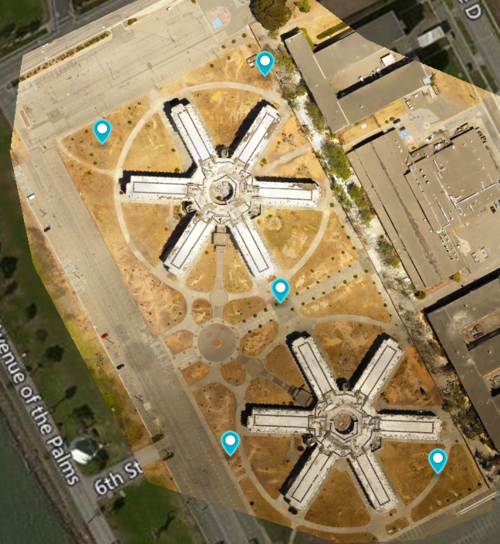
Typically you will need a minimum of 4 GCPs but no more than 10 are usually required even for larger maps. A good strategy is use 5 GCPs located in the 4 corners of your map and the center. As you place your GCPs make sure you leave a minimum 50 ft buffer from your GCPs to the boundaries of your map.
In this example, the subjects of interest are the 2 star shaped buildings so we place our GCP as best we can around the corners and in center of our subjects.In the example, the subject of interest is not a square so we distribute the points as best we can in the corners and center. You can also see some other measurement annotations in blue.
4) Make Sure Your GCPs are Unobstructed and Clearly Visible
To create quality GCPs for drone mapping, your markers must be clearly visible from your flight altitude to be successfully processed. Visual obstructions like overhangs, snow, shade, or glare can make your GCPs difficult to identify in your map photos.
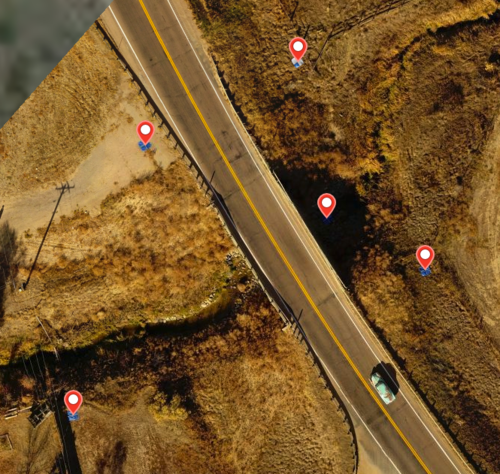
In this example, the center GCP is in a heavily shaded area and nearly invisible in the map photos.
The full article is here:
https://www.groundcontrolpoints.com/mapping-contour-lines-using-gcps/
Comments
Hi
You don't stricly need an expensive RTK to measure your GCPs. A simple Ublox M8P (or M8N) +special equipment ( for <500$ each in IP65 box ) +30min in static position+ Post-treatment, could give you less than 5cm of precision in XYZ. At this cost , you just need 5+1 = 6 box for 5 "rover" GCPs ( the 1st should be positionned in a known XYZ position as "base" ) or even only 5 box if you have Ntrip around your place ( around 50 km is fine ) .
Very good info and proper way of doing GCP.
Im using readily available features on the ground for my GCPs. Also using other GIS data (road layer, river layer, GPS tracking etc.) or corrected Satellite imagery of the AOI for Orthomosaic aerial photo geo-correction.
Very good topic for those who do mapping!!!!!!!!!!