jDrones News: jD-IOBoard v1.0 update
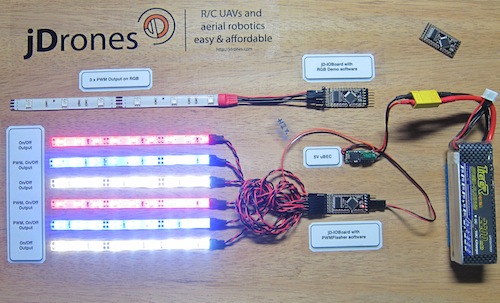
You had some problems on driving LED strips or something else?? Well no problems anymore.... We have seen people making all type of darlington/transistor and similar hacks to drive their LEDs, Sirens and so on but they all need a lot of hacking and they might not be suitable for long term solution.
We answered on this call and made fully Arduino compatible called jD-IOBoard that can run Single LEDs, LED Strips, Loudspeakers, Buzzers, Power switches and so on. It's upto your own imagination on what all you can control with this board.
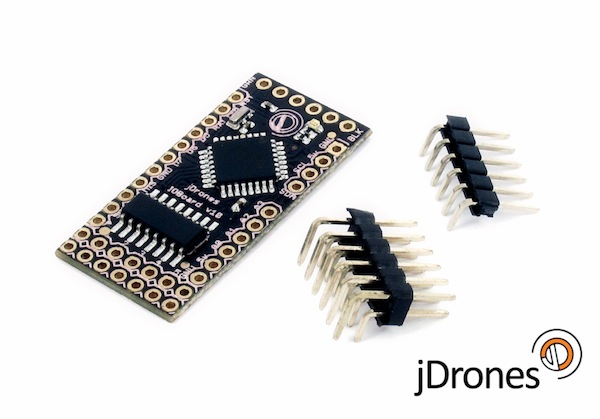
So what does this board actually do?? It has fully Arduino compatible ATMEGA 328 MCU and Darlington array to driver high power outputs. Also I2C pins are exposed and same as many TTL level IO and Analog pins. As you can see from picture above.
Board has:
- 6 x High power outputs, max. 500mAh / 50 Volts
- 4 x Analog inputs (6 if you don't use I2C port)
- I2C port for controlling, listening I2C messages
- 6 x TTL level GPIO pins (8 if you don't use FTDI)
- 1 x FTDI port
3 high power outputs can also be controlled by PWM output while another 3 are just normal "On/Off" outputs
How those Arduino pinouts looks like:
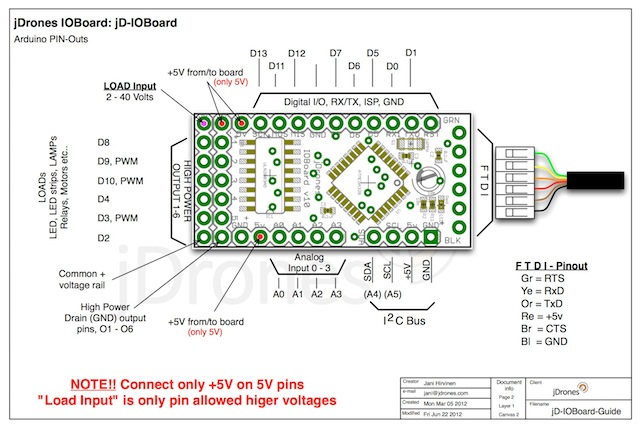
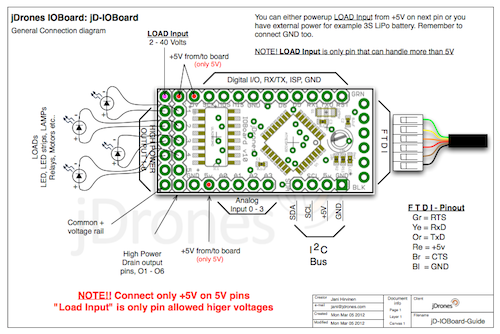
Connecting LED's,Buzzers etc is really simple. Just use one of output pins on end of the board. Below you can see examples on how to connect LEDs or LED Strips on it.
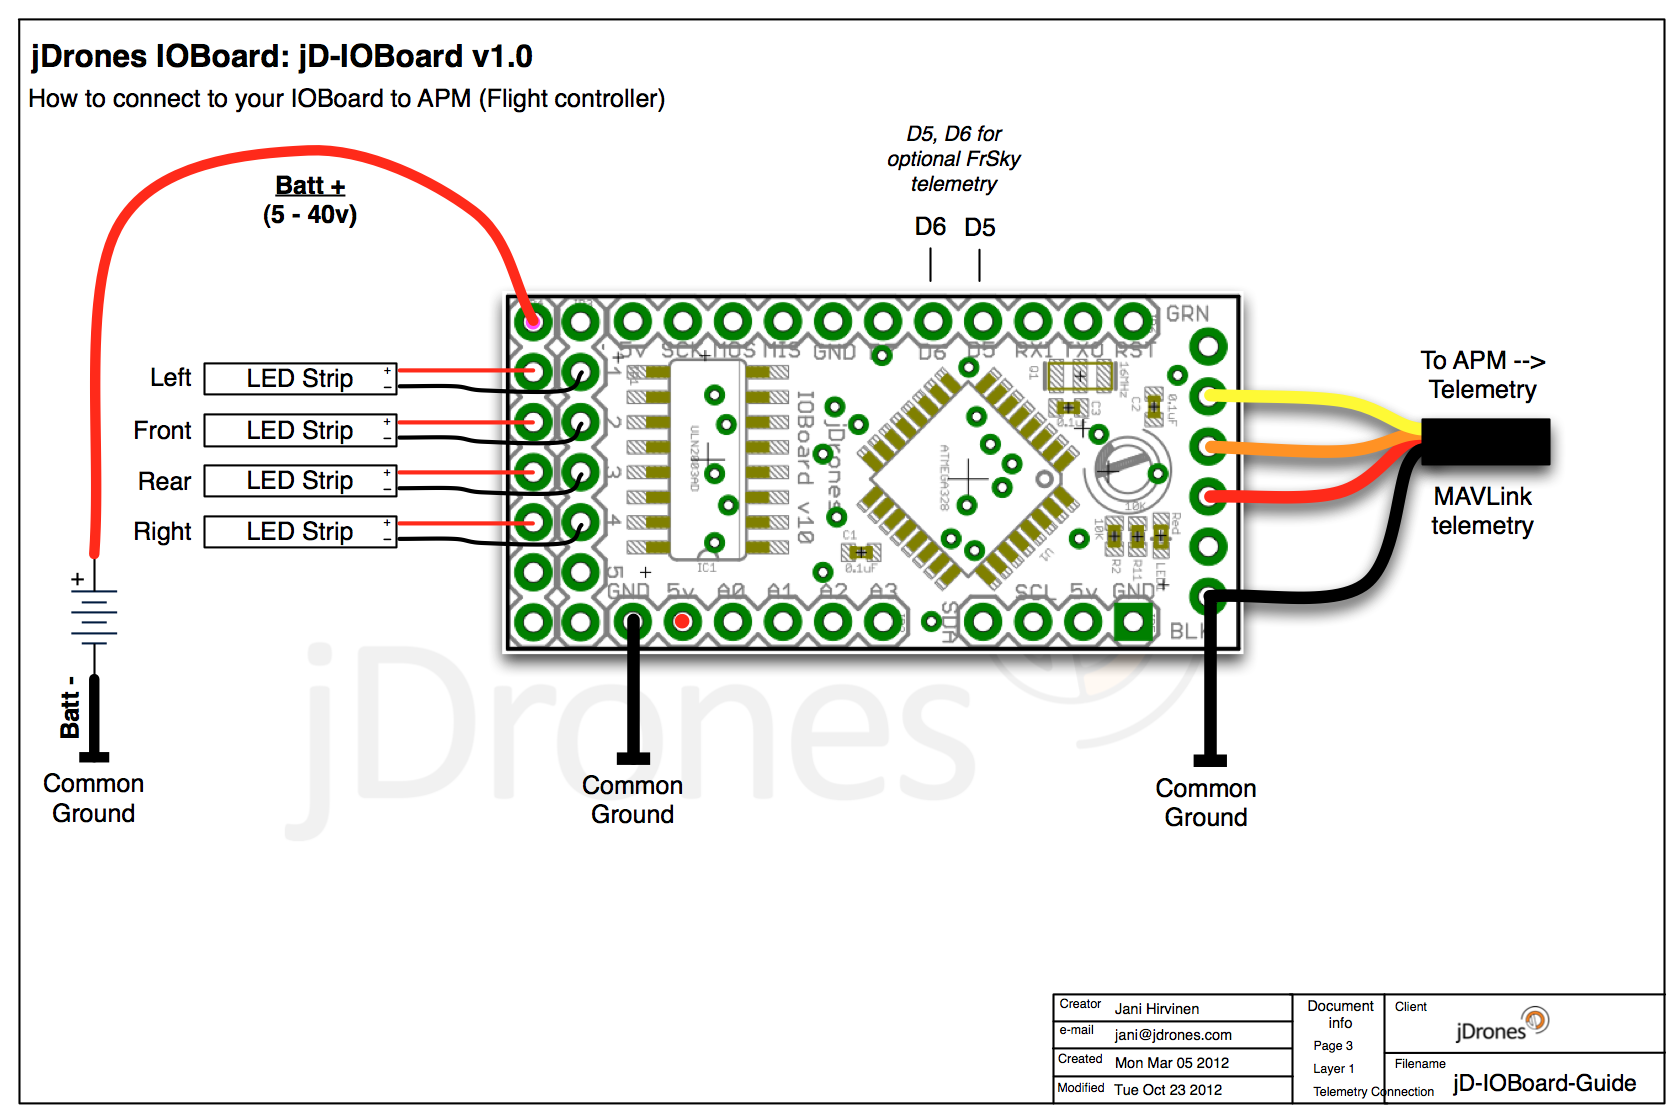
Pictures does not give enough credit for how it works so we made small video to show just few examples on how to use it. There are many other ways to do it but this should give at least some idea what/how to run it. So have fun watching it.
Get yours from jDrones Store: jD-IOBoard and have a blink blink.
Ps. There are some nice features coming to this board shortly...

Comments
Is this board supported? All i get is errors when loading anything to it.
I can talk to it on the configurator and thats about it, anything i load via arduino just comes up as errors every time.
Yes on normal FTDI cable Reset is Green. Like shown in pictures on top of this page (Pinout pictures). If you are not careful with static electricity, it can be that you have corrupted your bootloader on IOBoard. In this case you need to have Arduino board or AVR programming device to first burn bootloader to IOBoard and then you can use FTDI cable to upload new softwares.
https://github.com/jdrones/jD-IOBoard
Have a look here as the thread has continued and firmware is now on GitHub
Ah that.. that was bug in old example software.. it does save but softwares had debug mode on and it erases patterns on every reboot. Try that FrSky software, it's been fixed on that. Our new software engineers are starting on next week so you can expect soon some new updates on both configurator and main software.
Steven can you be a bit more specific about "load and stay". First what software you try to load, how, errors, how to detect it and so on.
Some people have been having problem with bootloader, mostly that has been due old FTDI drivers. IOBoard has same bootloader inside as in normal Arduino Mini Pro board. So first thing if you have problems to connect to board with Arduino IDE is to check and update to latest FTDI drivers. Latest drivers can be download from here.
Nick, yes D7 and D2 have changed their location so you can either just swap strips on output pins or modify code. We will have soon new code guy working with us and then bigger updates can be made on Configurator and others.
Steven, I know that my girls are answering tickets everyday. Really technical issues usually ends on my table and I try to answer them as fast as can. PM me your issue and I can check from girls at downstairs...
Nick yes that is correct way to connect your high power/battery source to drive for example 12V LED strips.
BUT this is ONLY for v1.1 boards. On v1.0 boards extra lipo + (Red wire )would connect on same way but lipo - (Black wire) would go another way or would just connect on common ground.
@Jani & @Arseni thanks for explaining....
I have the AttoPilot, the 3DR Power Module and the Fas100. I was curious if you were tapping into the Power Module to send signal to FrySky... I thought that only 5V was coming from the Power module and knowing that the FrySky was sensitive to 3V... its all good... With the IOBoard, i get Telem on the Radio now... but before I had to have another way to send V/A to the Radio Telemetry. I was just wondering if someone had tapped into the Power Module.
Thanks again, Great work on the IOBoard updates...
@LTMNO, i think Arseni means A2 pin on FrSky receiver. Yes that is one way but you need to be careful not to burn your FrSky receiver. It's A1 and A2 pin inputs can only handle 3.3 volts so you need to have voltage divider that matches this output voltage.
To do that you need to have this type voltage divider and if we want to scale max 0-14volts to be 0-3volts we can use for example R1 = 10kOhms, R2=2.72kOhm resistors
@Stefan great :)
-
1
-
2
-
3
-
4
-
5
of 15 Next