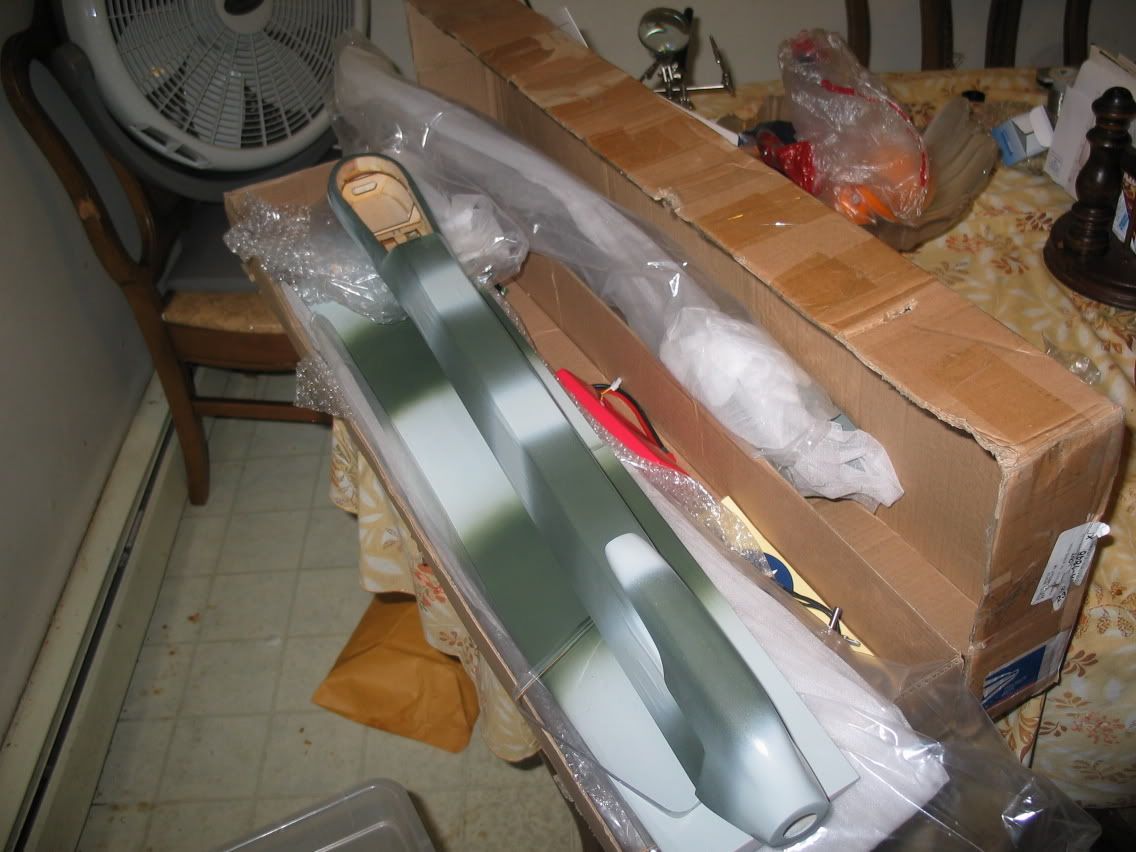
so i got my pred today. Thanks again to helomix. Let's just say a whole bunch of mixed emotions arose when i saw it, from happiness that it was finally here, to the nervousness set in when i realized that i'm truly at the point where i need to put my skills where my mouth is, i mean, I already did it with money, to disappointment when i realized i have to cut back on a few items i my project :-P.
There are two things i realized when i saw the pred- its is smaller than i imagined and there is less open space in the fuselage. I still love it though, but i think i will DEFINITELY need to get a smaller camera lens for panaoramic. In fact, i'm pulling it from the project for now. I will try again with a broken solid state camcorder when funds allow. At least then i have the option of recording
There are now TWO 14oz objects that need to go into this pred- the battery and the computer. Suddenly, a 5000mAh battery didn't seem like such a good idea as now i have to fit it OUTSIDE of the body (pics of that monster later). This means two things- i need proper placement. To do the CoG and moment equations correctly, all my engineering training says that i should build the basic plane first (motor, servos, stuff like that) and then find the "empty" CoG. After i do that, i weight what i want to add, run the equations in again, and see exactly where i need to put that to put the CoG 2" behind the wing. The problem is i am thinking i should put the battery directly over the computer, on top of the fuselage, in order to make sure that the CoG doesn't go to where the computer is and move outside of the body of the plane. I learned a big lesson today- Get the plane first before you build on it.
That being said its time to quit whining, and do what i set out to do.I bought some fiberglass cloth to do reinforcements along the fuselage and the body. Sure, no more spiffy camo detail, but whatever. I will also have to cut into the body where the servos go because the ones i have are about a 1/4" too long. I'm not going to change though, because they have a 2Kg/cm torque, which may be necessary. I'll waterproof certain components with some sort of plastic wrap, while building a box for the computer. I'll take pics when we're done building.
As for the software side, progress is slow until i get some action on the DSS front. Basically, i am close to completing the 2 main services that i need, one for a parallel port and SPI, and one for the serial port for the servo controller, but since i'm not done, i can't do squat. Very frustrating. I have completed the networking aspect, thanks to Vincent M., AKA Agashka, using winsock. it sends 8 variables (x,y, z, throttle, zoom in, zoom out, tilt up/down, tilt left/right) and receives two basic streams of data (NMEA data, and Altimeter data). Hopefully this will keep data transmissions fast and light, while also doing it simply. Camera will still be held by VLC.Future developments that i have been intensely looking into have been laser range finding and then LiDAR. I now know almost exactly what i need to do to make the thing work...sadly, it will be too heavy and expensive for this plane, and maybe any other of my projects. Also, the MAXIMUM range of the rangefnder is 1.2Km. Funny thing, i realized that there is a MUCH easier way and cheaper way to get rangefinding. It may not be 100% accurate, but it will be a decent approximation and suffice for the time being. You know your the height, your orientation, and you know the angle of the camera. Pretend the earth is flat (for Long Island, that's actually not something you need to pretend). Where your center pixel lies, you have your distance, +/-20 meters.Pics will be added later.
hehe, i had edited my edit. i was sayign i have this box of camocrder parts i stripped for an near eye device. The camcorders were broken in different ways. I got one to turn on. and heard it autofocus, so i'm going to see if i can get it to output to AV out and, if it does, and i can get the "no tape" warning off the screen, life is good:)
i got the 4 channel one with the alierons :). Sorry about your original Pred. Do you know where i can find this VeeTail mixer? they are discontinued and ebay and google are no shows for anything i can purchase.
Your cockpit is making me realize other things that i can do, and i might try to figure out a way to get some sort of panoramic camera on there.
EDIT--DUDE, it works! I have all these broken camcorders in parts and i pieced on togehter, without the tray of course, and it works. It's a shame that it doesn't take any memory card media for pictures, but what i can do is stream the video directly and possibly save form there. best thing is that i don't need to program focus and zoom and it weights so much less than the original lens. i probably won't have night vision though. I'll make a blog post with my findings.
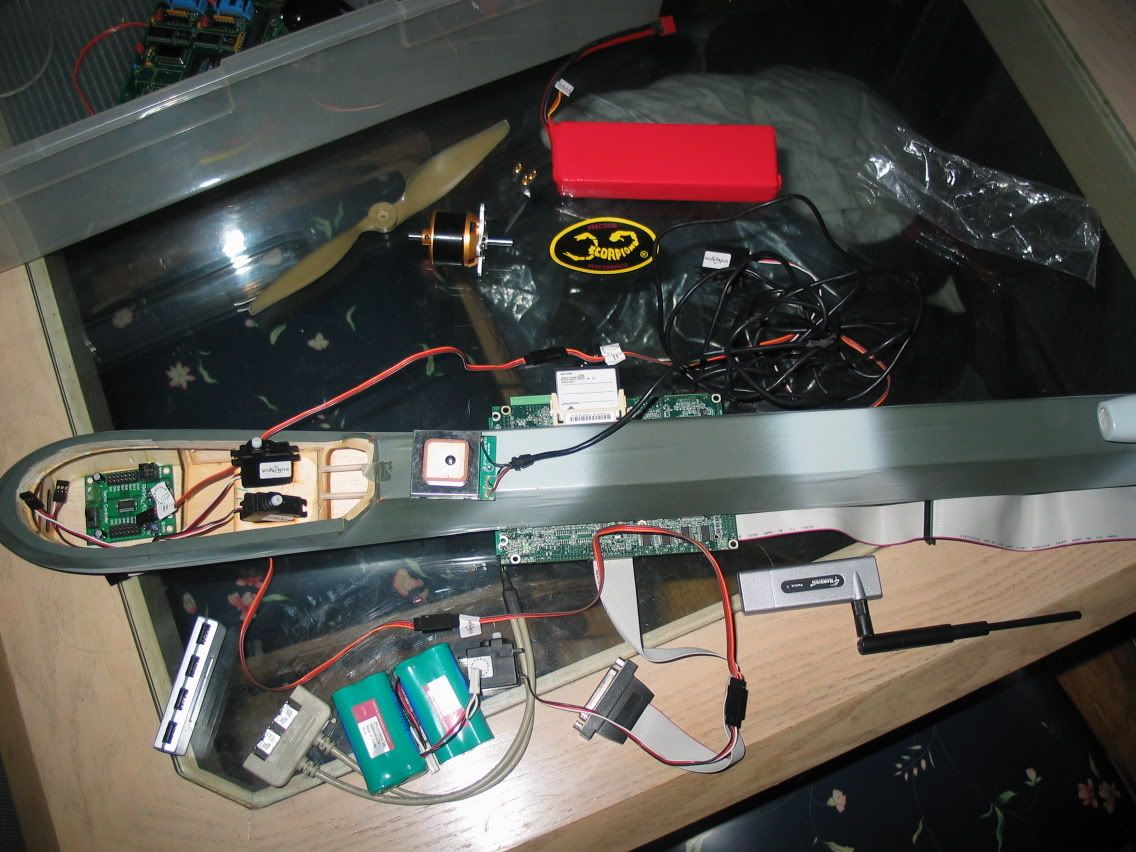
I know what you mean! It's definitely tight in there. I crammed the autopilot and battery inside the fuselage in two layers and put the camera underneath. Pics:

Comments
Your cockpit is making me realize other things that i can do, and i might try to figure out a way to get some sort of panoramic camera on there.
EDIT--DUDE, it works! I have all these broken camcorders in parts and i pieced on togehter, without the tray of course, and it works. It's a shame that it doesn't take any memory card media for pictures, but what i can do is stream the video directly and possibly save form there. best thing is that i don't need to program focus and zoom and it weights so much less than the original lens. i probably won't have night vision though. I'll make a blog post with my findings.
Here's my build log for the aileron version. Is that the version you have?
Did you have GPS problems with it being on the inside? I was going to mount it on the outside because i wasn't sure.