All Posts (14039)

Sort by

AUVSI - Conference

I went to the AUVSI (Association for Unmanned Vehicle Systems International) conference In Washington DC from Febraury 27-29. Each day focused on a different type of unmanned system. The first day was exclusively ground systems, the second day was maritime systems and the third day was air systems.For the most part, the presentations were military related. One point that was repeated again and again during all three days was the need for integration and interoperability. The military wants systems that can work easily with other systems, and they are pushing for the development of standards. They want standard controls, interfaces, and procedures for unmanned systems, so that soldiers do not need to be retrained for each system.

The picture above is BAI Aerosystems EVOLUTION_XTS. It is an ~8lb aircraft. It has a modular design, the nose and wings detach quickly. It fits in a large backpack, and can be launched by hand, bungee cord, or with a rifle style pneumatic launcher.

These are commercial automated pilot systems made by Athena Controls. The small orange object on the bottom left is a starburst candy included for scale.

Also, here is the SWIPER from Emman Aerospace

Read more…
3D Robotics

TED Report: Foiled by Air Conditioning!

Yesterday Jordi and his wife drove up with the BlimpBot to Monterey, where I was attending the TED conference, so I could demo it. This was a pretty high-stakes demo, since not only would there be 2,000 of the most influential people in the technology, entertainment and design (TED) worlds watching, but they included Al Gore in the FRONT ROW, Google's Sergey Brin and Larry Page and movie stars such as John Cusack and Cameron Diaz. The bot worked great in the hotel room, and then we took it the the auditorium during a break to test it on the main stage. Yikes. We were getting IR interference from everything, from LCD screens to the bright stage lights, and our reception range dropped to something around three feet. Even worse, the air currents were overcoming the blimp's ability to fight them. So we gave up on the idea of a fixed IR beacon on the ground, and I decided to hold it in my hand to keep it near the blimp. Even then, the motors couldn't fight the currents well enough. So we rushed back to our staging area (my hotel room) and Jordi updated the firmware to give more power to the motors even at the cost of battery life (this demo only had to run three minutes) . We tested it again in the hotel room, it worked fine, and then it was time to go. When we got to auditorium and waited in the wings to go on, it was clear that something bad had happened in the firmware update. The vertical motor wasn't coming on at all sometimes and it wasn't clear why. Then Jordi realized that in changing the power settings, he'd also changed the timing of the loops, and we weren't resetting the motor controllers at the right time, which meant that the chance of them working when needed was random (and low). We'd just been lucky in the hotel room, but clearly weren't now. Still, I crossed my fingers and went on, carrying the blimp. Disaster! It turns out that one big thing had changed since our test run in the auditorium: 600 people had arrived. All that body heat had raised the temperature of the room, kicking in the air conditioning, which came out of huge ducts right over the stage. Basically I was under a raging waterfall of cold air, and the poor blimp sank right to the floor, its little vertical thruster completely overcome.
  • Lesson 1: Little blimps need still air
  • Lesson 2: If you can't find still air, you need WAY more powerful thrusters (which means more battery power, which means more weight, which probably means a bigger blimp)
  • Lesson 3: Don't update your firmware five minutes before you're going to fly an autonomous robot ten feet away from a former Vice President of the United States.
  • Lesson 4: Hey, it's a tech demo on stage, and they *always* go wrong--don't let it throw you. So I didn't. I just stood there holding the blimp, as you can see in the picture above, and went on with my talk and slides as planned. Points made, time limit met, applause gained. I looked a bit awkward, I'm sure (although hopefully not always as unhappy as I look above), but at least I got the sympathy vote! Now on to San Diego for Etech on Tuesday, where we get to do it again for an hour in front of the smartest geeks in the world. So much for the sympathy vote ;-) Jordi's hard at work fixing the firmware problems, so fingers crossed...
[Photo credit: Red Maxwell]
Read more…
Developer

ArduBlimp (minimum Blimp) V1

Finally we have the final version of the first prototype of ArduBlimp, wells know as the "Minimun Blimp".Capability's:* Hold altitude with PING))) sensor...* Fly around the infrared beacon...* Use Arduino Lilypad, for low power consumption ...
Some High res pictures:

CIMG0201.JPG

CIMG0203.JPG

CIMG0205.JPG

CIMG0206.JPG

CIMG0207.JPG

CIMG0209.JPG

CIMG0210.JPG

CIMG0211.JPG

Parts used:-The Blubberbot-The pololu motor controller x 2, used to control the motors of the blimp-The pololu infrared beacon, used for navigation-The Parallax Ping))) sensor, for hold altitude-And offcourse, the arduino LilyPad...Source code click here...
Read more…
3D Robotics
Tomorrow Jordi and I will give everyone at the TED conference in Monterey the first public preview of the Minimum Blimp UAV. I did the design and Jordi did all the work! Jordi has more detail in his post (apologies for the repetition!), but basically we took a BlubberBot, kept the envelope, two motors and the plastic motor mounts, and threw everything else out. We added IR position sensors, ultrasonic altitude sensors, an Arduino "Lilypad" and a third motor for vertical control. Our autopilot, sensor and thrust package looks like this:

And it works! Here's a video of it circling a ground-based beacon and maintaining altitude. Extending that to full-room autonomy is simply a matter of adding beacons as waypoint markers.
Read more…
3D Robotics
If you want an autopilot for less than $1,000 today you only have two choices: Do it Yourself or buy a PicoPilot (Dean Goedde's AttoPilot isn't out yet). The PicoPilot, which has been out since 2003, is small, light, and simple, and comes in varieties that range from simple one-axis rudder control to barometrically controlled elevator and/or throttle (prices ranges from $500 to $800). We have a couple of them, and we've found that once you've gotten over the slightly tricky setup, they're reliable and easy to use. I thought I'd continue this interview series by talking with Dave Perry, the owner and President of UNAV. Q: First, a little about you. What's your own background and how did you get into this? A: I'm the owner and president of UNAV, LLC. My background has been in aerospace, working as an electrical engineer in the Seattle area . Positions held include, hardware engineer, software engineer and engineering manager. My credentials include a BSEE and a Commercial pilots license. My almost 40 years of experience in electronics includes both hardware and software design, specializing in embedded projects. I've also flown Cessna's and other light planes in Alaska and have been active in the RC hobby since 1973. Q: What's the history of UNAV? A: I got started in the UAV business back in 1990 when a RC buddy asked me to help him with the electronics on a government contract for some large RC helicopters ( UAVs ). It didn't take long before the customer was asking for custom electronics. In those early days, I was doing business as "PDC", but the company name was changed to UNAV, LLC in 2000. Today we operate as a virtual company with six people on the team. Richard and Mark are my old RC buddies and Mark is our technician and tech. support guy. Jodi and Charles handle manufacturing and Brad is our business consultant. Q: Although we know your professional-quality 3500 product line is excellent and the recent price reduction make it very attractive, we're focused on the sub-$1,000 space, and that means the PicoPilot line. It was first released in 2003, and although it was revolutionary in the price/performance at the time, it's now starting to show its age, especially on the software side. What's next for this line? A: PICOPILOT was specifically designed to be simple and easy to use with a low price-- not all UAV customers have the skills necessary to deal with a more sophisticated system. One of the most common complaints we hear from former CloudCap and Micropilot customers ($5K to $10K autopilots) is that they are are just too complicated ! We've sold many PICOPILOTs to former "high-end" users. UNAV does offer a much more sophisticated autopilot, the 3500FW with a feature set comparable to the ($5K to $10K) autopilots out there. Some notable exceptions: a lot of time was spent making the 3500 system user-friendly and it's priced at $2500. The first PICOPILOT was sold in October 2003. PICOPILOT has become the benchmark for low cost autopilots because it's been around a long time and developed a good reputation. Like most software based products, the design has evolved over time, in-fact my software notes show that we are currently shipping firmware revision 23 for the NAV2. The history of the PICOPILOT firmware can be traced back even farther to the PDC10 which was first released in March 2000. We've sold about 250 PICOPILOTs to date.

Even the $500 PICOPILOT-N provides a lot of capability. Last fall we demonstrated our EasyLander electric motor-glider (24oz gross) flying a 17 mile route over Baker Lake in the North Cascade mountains. Our chase boat could barely keep up with the little plane. I don't think PICOPILOT is starting showing its age, we've successfully tested installation on VISTA and a RS232 port can be added to any computer that doesn't have one. UNAV has an on-going R&D program and we are currently developing new products, including in the sub-$1,000 space. Watch for announcements on our website. Q: What do you think of Dean Goedde's thermopile approach, as opposed to your own IMU technology? A: PICOPILOT does not use an IMU or IR sensors, it uses our proprietary rate control system . I know most low cost autopilots use the FMA Co-Pilot for attitude control but anyone that's used it knows it has limitations. Unlike the CO-PILOT, the PICOPILOT attitude control is not affected by terrain, weather or surface water. A couple times now we've unintentionally demonstrated PICOPILOT's ability to control the plane and navigate when it flew into a cloud ! Q: Recent export control regs have made it impossible for you to sell outside the US. What are the prospects for export approval for your autopilots, and in the meantime, what do you suggest that non-US customers buy instead? (Obviously, our suggestion is that they DIY, but that's not right for everyone ;-) A: I'll leave the interpretation of US export regulations to the lawyers but you can read them for yourself by looking up 9A012 on the EAR or go to our website and click the"US Export regulations" link . I can tell you that we have successfully obtained export licenses for several of our customers in Europe and have shipped PICOPILOTs to them. Your readers should be aware that the export regulations make no distinction between hobby ( DIY ) or commercial UAV components and any air-vehicle with an autopilot is defined as a UAV.
Read more…
3D Robotics

Lego GPS Autopilot code now less buggy!

For those of you interested in building a Lego Mindstorms UAV, two updates: 1) I've improved the RobotC code for the Bluetooth GPS version, in which I caught a lot of bugs. If you were having trouble with it before, download it again and see how it works. 2) At an event in April (can't say more than that), I'll be unveiling the next version of the Lego Mindstorms UAV, which will be a full IMU-driven autopilot. I can't say more about it now, but you'll be blown away. It's not a toy anymore ;-)
Read more…
Well it has taken me about a month but I think I finally have a plan for a UAV.Please excuse my childlike MS Paint style diagrams! This is what I would like it to be able to do. It is using in the BASIC Stamp and this GPS receiver.1. Have waypoints that include altitude.2. Be able to take Digital Photos3. Have a lost plane alarm after landing (or crashing!) in long grass etc… This could be turned on via Aux channel on the receiver. Alternatively this could turn on landing lights for night or dusk landings.4. Control of the autopilot from the Gear channel that totally bypasses the Basic stamp in manual control mode in case of Basic Stamp Problems.5. 2X16 LCD (optional) to display maximum altitude reached or maximum speed reached, waypoint info etc.. (I haven’t really thought about this bit yet).6. After all that was working…. (and if the thing can still get off the ground from all the extra weight!!) another thing that I was thinking about was having a voltage sensor (Lipo alarm) on the main battery. (I have one of these on my Trex 450 SE V2 Helicopter) It would monitor the main battery voltage, when the voltage dropped (if it was a 11.1 V Lipo) to say 10.5V the battery would be almost 80% depleted. (after 80% the battery will be damaged)The voltage sensor would then trigger a relay that would switch to a smaller backup battery and also trigger the BASIC Stamp to return to home. The home co-ordinates would be obtained when the autopilot was engaged.Here is a circuit I found for a RC Switch, I have not tried this yet. This is the relay I think I will use. (I had to because of the name!) [UPDATE 2/3/8] I am going to use this instead to save space and weight.The other idea I had was for altitude control. If the Basic Stamp is controlling the elevator for altitude I can see that it might be easy for the UAV to get into trouble as it does not know the angle it is climbing or descending. It could be resolved by adding more sensors but I thought this might be easier and less programming.I am going to mount the FMA Co-pilot onto a see saw mount that is controlled by a servo. The Basic Stamp would then just control that servo. If you wanted the UAV to climb at an angle of 10 degrees, just move the FMA servo by 10 degrees.The FMA Co pilot would then control the elevator to keep the FMA co pilot level, which means the UAV would be climbing by 10 degrees. (I think)Also in the altitude subroutines I was planning to turn off or turn down the throttle channel when the UAV is descending to save power. And then switch it back to where it was when it reached the desired altitude. Maybe even add a bit more power for climbing. After a few tests I should be able to work out what percentage the throttle channel would need to be at to hold altitude.This is the Plane I am planning to use for this project, There seems to be more room inside for electronics that a foamy.If anyone has any better ideas or reason why they think this wont work too well please let me know. As I start building I will post some pictures.Thanks!
Read more…

New Concept

Ok bear with me here because i have no drawings or diagrams. Basically this is a device designed [thought up] to transmit or receive or tranceive (im not sure how to spell it). Basically this will transmit information about your aircraft from speed to altitude to lat-long basically this is connected to a receiver attached to an OLED screen so you wear it on your wrist and get all of your information on your wrist instead of a ground station in a big van thats wasting gas. If it happens to be a transceiver inside of the airplane you could say activate your emergency return home in case of an emergency. So if anyone with good programing knowledge and some decent funds should try this it just might work out.
Read more…

MAKING A UAV FOR WEATHER SPOTTING OUT OF JUNK

SPEC OF PROJECTBuild an airframe to be able to travel aprox 900 miles.Use a ENT pnd as the controller and gps platform.Comunicate with the UAV via cellphone modem to laptop.Use Google Earth as the mapping and position indicator.Photograph the area of interest storing info on board UAV to be downloaded when recovered.AIRFRAMEUsing a SMD Accipiter Badius as a basis,enlarge the airframe by 2.5 times.Using a weedeater motor, centre mount the engine at the centre of pressure.This will allow the UAV to stay in balance as the fuel is used.Airframe to be filled with fuel and also 2 inboard drop tanks.The airframe selected has displayed good performance in recovering from unusal attitudes with no control inputs.Need about 100km per hour airspeed.Have a small wind generator for power with battery backup.Will start construction of airframe this week and supply more info and photos as it happens.ps The last UAV i had seen and was involved with was in the airforce in the 80s.This craft was shot down and landed in Maputo Harbour Mozambique during our bush war with the ANC in those days.
Read more…
3D Robotics

New autopilot/IMU board from SparkFun

Some of you may have noticed that for quite a while SparkFun has been listing a "UAV Development Platform - ET312 + IMU" that's always been out of stock. I backordered one out of curiosity last year, and pretty much forgot about it. Then, last week, SparkFun called and said that they'd "finally got it working" and it was now available for backorder customers. Did I want one? Sure! It showed up today and it's going to take me some time to figure it out properly, but here are some first observations:
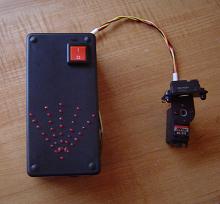
  • It's a "development platform", not a fully-featured working autopilot. Although there is firmware available for it, it's designed to be a standard hardware package around which you can develop your own autopilot code.
  • The firmware comes pre-loaded, and works pretty much as advertised. I tested it on the ground, so it was hard to tell how well it actually stabilizes a plane, but the elevator seemed to respond properly to tilting. The rudder didn't, but that was probably because it was trying to turn the "plane" to a destination and I wasn't playing along ;-)
  • That firmware is written in assembly, so good luck to you! It seems to do pretty much the basics of what you'd want an autopilot to do (and I mean basics--there's no provision for waypoints, and it's just a "fly home" autopilot at the moment), but if you want to tweak it you'll have to do learn PIC assembly (not super hard, but still: what's wrong with C?!)
  • It includes a 4-degree-of-freedom IMU: two gyros and one two-axis accelerometer.
  • As the two-axis configuration suggests, it's designed to control just two channels: elevator and rudder. A third channel is used to turn it on and off.
  • It's got a good SiRF III GPS module on board, although you'll need to add your own antenna through the included SMA connector.
  • At $299, it's not cheap. But when you consider that a simple set of accelerometers and gyros will set you back $109, the addition of GPS and a PIC processor, all nicely integrated on a board, is probably worth it. But it still seems about $100 overpriced to me.
  • You need some additional hardware to work with it: the main thing is an ICD2 interface to program the onboard PIC chip and for debugging. That will set you back another $120.
  • The documentation looks excellent, with a lot of theory on control and aerodynamics as well as a lot of help on PIC assembly language and development suggestions for the platform.
  • Bottom line: this looks like a good, albeit expensive, way to learn about IMU-based autopilots. It's not really an autopilot itself yet, but could be made into a relatively low-featured one pretty easily. I think it's accurately described as a "development platform", so if you're in the market for that and can afford a $300 lesson, I can recommend it as a unique and well-made way to get started.
Read more…
3D Robotics

Minimum Blimp UAV bench testing

Jordi and I have been hard at work on the Minimum Blimp UAV and things are coming together nicely. Here are some videos: First, a test of the Ping))) sensor that we're using for altitude hold. Don't you love the tray-table simulation platform? ;-) The Ping))) sensors are strapped to the far end of the table. Next, a test of the location-spotting IR tranceivers. In this test we've done a few interesting things. First, you'll note the LEDs turn off for part of the trial. That's because the onboard IR tranceiver doesn't need to have its LEDs on (which consume a lot of power) because it's only receiving data on the position of the beacon transceiver. (The ground-based beacon doesn't need to know where the blimp is) So we take a reading every second, then disable the board for the rest of the second--it's easy to do in software and the board comes back in 75ms each time. Like this: -Set the Enable pin to High (turn on the beacon) -Wait 75 milli seconds to give time for wake up -Read and store the 4 inputs (depending on how noisy the data is in the real world, we make take a dozen readings at 200Hz here and average them to create a direction vector) -Turn off the beacon (Enable pin low) -Process the data, and return the result for navigation... The second thing we've done is boost the voltage going into the ground-based transceiver to extend its range. We got 10 feet at 5v, but the boards can take up to 16v. We'll do a proper test over the next few days, but I'm hoping to get at least 20ft with higher voltage. And since that's 20ft in each direction, it potentially gives us a working blimp range of 40ft, centered around the beacon.
Read more…
3D Robotics
In an earlier post, I discussed the importance of having a redundant failsafe board so you can regain control in the advent (likelyhood!) of an autopilot failure. Basically, what that board does is sits in-between your autopilot, RC receiver and servos. You switch it between receiver and autopilot with a spare channels on your transmitter. If your autopilot fails, even if it loses all power, the failsafe board, which is independently powered, will allow you to switch control back to the RC system. Here's a quick tutorial on the board we chose, an RxMux from Reactive Technologies:. You'll need to do two bits of soldering first. The board doesn't come with connectors, so you've got to order those. It's a little funky, but the way to do that is to "build a part" at Smatec. The connectors you need are Samtec TSW-108-25-G-T-RA, and you just enter in the right numbers or letters in each data field, and it then confirms that this is a valid part and lets you order a sample for free! They sent me three of these right-angle connectors, which was just what I needed. Thanks Samtec! Once you get them you solder them on to the RxMux. The second bit of soldering is that you've got to make a couple of female-to-female Y-cables. Simply take three of these cables and cut them in half, then resolder the wires, two connectors on one side, one on the other, with heatshrink tubing at each junction. Then just plug it all together. The channels that don't go through your autopilot can go straight to Input A on the RxMux. The ones that do go through your autopilot will use the Y connectors, with one lead going to the RxMux and the other to the autopilot. And all the servo-out leads from your autopilot go to Input B on the RxMux. It's a lot of wires, but it's actually pretty straightforward. There's no configuration required of the RxMux--whatever RC channel you connect to the Channel 8 input of the RxMux's Input A is the switching channel, and it just transfers control of the servos from Input A to Input B and back again as desired. Here's a video of it at work:
Read more…
3D Robotics
We love FlightGear and all that it stands for, but the truth is that it's a bit complicated for beginners. For the rest of us, there's the old stand-by, Microsoft Flight simulator. There's a free plug-in for MS Flight Simulator 2004 called GPSOut that simply outputs GPS of the current flight to the serial port of your choosing, with whatever NMEA sentences you want. If you've got FS 2004, download that, copy the dll and ini files to your Flight Simulator modules folder and edit the following lines in the GSPout.ini file so that they read like this: Sentences=RMC,GGA [add any others you want] Port=COM2 [change to whatever port you're using for your serial connection that substitutes for your GPS] Speed=4800 There's no sign of the plug-in in the FS program when it's running, but if you've copied it to the right directory, it should be silently outputting the GPS in the background while you're flying. So fly to the area where you'll be testing your real UAV and you should see the correct GPS data streaming into your Basic Stamp autopilot. Here's a video of this working (that's me and my ten-year-old):
Read more…

Short Range I.R. Radar

Basically here is the site it is a short range inferred radar that could be used for a failsafe in case your uav gets close to the ground. However it is slightly bulky but that can be easily modified because it was made for parking cars. This includes a servo with an inferred transceiver or receiver and transmitter separate, i haven't really looked into it very far. If you are board and want to serf the web go to "Hackaday.com". Thats where i found the range finder and is a great place to hack if you want to.

finished.jpg

Read more…
3D Robotics

How college Blimp UAV contests work

The main existing US Blimp UAV competition is the Indoor Aerial Robot Competition (IARC) held every year since 2005 at Drexel University in Phladelphia. The contest is designed mostly as an exercise in remote control, both human and computer. The blimps appear to be all RC, with wireless cameras pointing down. The robotics part is either an image processing and control task, where the ground-based computer analyzes the video and transmits commands to the blimp via a trainer cord to a standard RC transmitter, or one in which a human operator does the same thing (looking only at the video stream). Examples of the computer-driven tasks are line following and fighting gusts of wind, while the human-driven tasks include following a maze and spotting objects in a certain order. The basic platform is a $850 52" envelope with three motors, servo vectoring (meaning the motors are on a shaft that tilts them up or down), and no onboard intelligence, either processing or sensors (it's just RC, with a wireless camera). The contest description includes the possibility that teams could add ultrasonic sensors or gauge speed and direction with optical flow calculations from the camera, and some have done that with ultrasonic and IR sensors, but all the data is sent to the ground computers, processed there, and turned into RC commands back to the blimp. Here's a paper that describes how one team's blimp works. The main difference between this approach and the one we're pursuing with our Minimum and Maximum Blimp UAVs is that we're entirely focused on onboard intelligence and sensing. Our blimps have two-way wireless links, but not conventional RC ones, and they're not designed for manual control. At the moment, we're making the autonomous navigation job easier with ground-based beacons, but the aim is to do away with those eventually and navigate like our outdoor UAVs do, entirely on their own. Here's a video from last year's competition, which was held in April (presumably this year's will be announced soon--I've emailed for more info):
Read more…
3D Robotics

Blimp UAV update: Minimum and Maximum versions

We've forked the Blimp UAV into two projects, a minimum and a maximum one. The maximum one is the one that's using the NorthStar "synthetic GPS" directional system and all sorts of other goodies to be a real indoor UAV, with full room sense and navigation ability. That's moving ahead really well, and I hope to have PCBs and code to show you soon. But we also wanted to create a "minimum" blimp UAV that was the cheapest, simplest robotic blimp possible. Here's what the Minimum Blimp UAV consists of: * A BlubberBot envelope and dual thruster motors and mounts (we cannibalized a few other bits from this kit, such as the battery holder and voltage regulator). * A pair of Pololu IR transceivers (one a beacon on the ground, the other onboard) * A third motor for vertical control * A Parallax Ping))) ultrasonic sensor for altitude sensing. * A Boarduino board with ATMega168 chip (Arduino clone). * Two Pololu twin motor driver microboards All that this Blimp UAV is designed to do is to maintain a constant altitude and navigate around a stationary IR beacon on the ground (it just heads towards the beacon, overshoots, turns around and heads back at it). But that's the beginnings of real autonomy! Target price: <$100 (we're not there yet). Here's a video that shows how the Pololu IR transceivers work (and here's some BS2 code to test them):
Read more…
3D Robotics

Some upgrades/changes to the site

As some of you know, this site is based on the Ning platform, and they've just rolled out some changes. Relevent parts for us include: --Mass Uploader for Photos, Videos, and Music/Podcasts You'll now be able to upload up to 100 photos, 30 videos or 100 songs/podcasts in one fell swoop. That's not to say that adding all of this stuff won't take forever, but go grab a snack or five and you'll be all set. --Blog "Improvements" - Round 1 Frankly, this is a huge downgrade, but thankfully it's only temporary. They've replaced the fancy yet buggy rich text editor with the standard text editor, whose only benefit is that it works in Safari. They also added blog tags (so you can add keywords related to your blog post for search purposes), previous/next links (so you can quickly page between that member's blogs), and pinging of 3rd-party update services (so you can submit your blogs to all the popular blog search engines. The loss of the rich text editor really sucks, since you now have to hand-code things like bullet lists and other formatting and the page looks like crap with all the HTML showing, but I'm assured it's not for long. -- Higher Video Quality They've updated the video player to set on a fixed size which will result in better-looking videos, while eliminating the options to have small and medium size videos. The good news of being based on a hosted platform: in general, things get better over time as technology improves and features are added, without much effort on my part. The bad news: I can't control the pace or quality of those.
Read more…

added duct to coaxial rotor

Big improvement in stability with the addition of a simple duct made from a sheet of 2.5mm RCF (extruded polystyrene) foam from rcfoam.com. The RCF is similar to depron that was recommended by another forum member, but somewhat more flexible and higher density. I was able to bend the RCF sheet to a 12-inch diameter, while a similar thickness depron sheet broke when bending.There is some yaw rotation at the beginning of the clip, but you can see toward the end that I got that under control, actually overshooting by a bit. Now that I have some semblance of control, it has become obvious that the current motor/prop configuration (CR2805 w/12" props) can't develop enough lift to get more than a few inches off the ground (i.e. out of ground effect), probably because there aren't enough windings on the motors (1430 rev/V), so I will have to return to the earlier CR2816 coaxial motor set, which weighs more but does have sufficient power.One other lesson which I mentioned on the forum - pre-flight inspection now includes a check that the electronics are secure. On the first test flight, the camera module worked itself loose and dropped onto the props -

Here's how things looked after I rebuilt the duct and replaced the camera (now secured with a cable tie)

Read more…