luke cooke's Posts (8)

Sort by

Why the need For an 2,4ghz RC uplink?

2015-05-02_001.jpgHi all,

I Have a plan to build my own handheld groundcontroll station and was thinking about the 2,4ghz rc side of things... With having  a 433mhz telemetry uplink is there any need for a Traditional RC link?

If my Thinking is correct the 3DR Solo uses the Telemetry signal for RC controll Too, Correct me if im wrong! If they can do it why cant we? I know mission planner has an option for a "joystick" but there is also a need for the rc link aswell, Maybe the code would have to be tweaked?

Just an idea at the minute but What I would like to do is have a android stick on a 7" HDMI monitor runing droidplanner with a joystick conected for RC. (something similar to my image, just diy)

What do you guys think?

Read more…

Is DIY Dead?

maxresdefault.jpgI remember a time a few years back where we DIYer's where leading the way in drone advancement, It was here where I  was first presented with an autopilot, Before that It never even crossed my mind that commercialy affordable autopilots would ever be available. Since then There has been a huge advace in the technology, both from us diyer's and comercialy.

Im not really electronicly minded or any good at coding, but I have a CNC and good CAD knowledge, So I spent my time designing a inovative frame which works great, but due to the current lack of interest I saw my website traffic fall month after month and just didn't see the point in renewing my hosting. I made the project opensource at the begining in the true spirt of DIY, so its still available to the people who are interested.

However today I feel we have reached a point where the commercial entities are taking over and puting the diy side of the hobby in the shade. Take the new mavic from DJI for example, It has so many features that we simply can't get in that package at that price point.... 27minutes flight time, tiny camera and gimball, extremly portable, long range HD video and RC link just to name a few.  Now althogh I may not personaly agree with how DJI market these as if they where toys... serious toys but still. I dont want to focus on how I disagree with DJI as a company but the fact that I now find myself in a position where I am concidering selling my current (DIY) Quad with APM, In favor of the new mavic.

So my question is..... IS DIY DEAD?

Read more…

The MK.2 Explorer4, Result of an open source frame.

Hey Folks,

I would like to show you the Explorer4 MK.2.

This quad is the result of everyones feedback from the First version about a year ago, I have taken all the input and ideas from the comunity and incorperated them into the design, While still keeping the Unique Vibration dampening aspect of the frame.

Some of the new features are:

  • Hatch on top for better access

  • Easy acces to USB Ports

  • Storm32 gimball controller

  • Improved gimball

  • Optional parts for mounting a 3 axis gimball up front for Yaw stabilisation

  • Larger Battery compartment

  • Center of gravity issue resolved

  • Option to use Aimdroix Extended Arms and larger props

  • Solid bottom mounting plate

Below is a sample video of what to expect with Default settings on the quad and gimball, no pid tuning what so ever. There is also no stabilisation done in the editing process, what you see is what you get.

Take a look at the Website:

www.explorer4-quadcopter.com

Thanks to everyone for the great feedback making this quad frame what it is!!!

Read more…

Explorer4 frame is now open source

Hi all,

I posted here a while back about my Quad frame and thought it would be a good idea to post a quick update.....

For those that missed the first post this is a Quadcopter frame in the Spider style but the difference being that the bottom plate has a Dirty/clean setup ( The FC, Gimball and battery are on the clean section) , this means that the effects of vibrations are greatly reduced.

I have decided to make the Explorer4 Quadcopter Open source, I have been getting lots of great sugestions but dont have the time to impliment and test them all.

I have put links on the website to Github where you can download the drawing files and cut one for yourself. There is also alot of Info that I have added over the past few months, Including a build guide with videos and a parts list with links.

www.explorer4-quadcopter.com

Read more…

Building a great Quad on the Cheap.

3689615556?profile=originalA few weeks ago I made Public my latest project The Explorer 4, Since then I have had many emails asking how to build it even cheaper. How to save money on the Electronics?

Many people who are just starting out dont need a Taranis radio or FPV gear with gimball, they just want to learn to fly. I have Put together a Different parts list to be used with my frame that will get the quad flying for about 450usd including Transmitter/reciever and charger.

Due to the fact that the quad is designed to be a DIY project you can start with this basic setup and slowly add the Different motors, FPV gear and gimball as you wish.

Here is the link to the Parts list I have made: http://explorer4-quadcopter.com/?page_id=230

Let me know what you think.

Read more…

I would like to share my latest project with you guys, Above is a Short video montage I made.

If you would like to build one, here is the link to my build log that I made:

http://explorer4-quadcopter.atwebpages.com/

I originaly wanted to buy a TBS disco pro but when I priced up everything I would need I came to quite a shocking amount. I also wanted to use Arducopter purely because its great!! which the Disco pro isn't designed for.

I have already built copters before and am able to CNC cut carbon sheet, So I thought to myself Why not DIY. I priced up all the parts I would need from Hobbyking and Himodel and started planing. This is the result:

3689615556?profile=original3689615507?profile=original

The quad itself costs about 500€ excluding the TX and Gopro, which is quite a saving. I also designed the frame with a dirty/clean setup, The middle section of the bottom plate is on rubber dampeners, the Flight controller, Brushless Gimball and most importantly the battery are on this plate. This setup drasicly reduces the vibrations on the flight controller and gimball, mostly due to the mass of the 5000Mah Li-po.

3689615581?profile=originalAbove: Vibrations Log data

Overall I am really happy with it, Its so easy to fly thanks to the hybrid mode of arducopter and this being my first pure FPV model has made that step alot easyer. The Flight times are great too, I normaly land at about 15 mins after FPV "exploring" and there is normaly about 25-30% still left in the battery, I have had a flight in loiter mode just hovering and I got up to 20 minutes before the failsafe kicked in. There is also no problems with jello on the gopro or fpv cam, which was one of my main worries.

Specs:

  • Weight: 1725g without gopro.
  • Width (motor axis): 44cm
  • Length (motor axis):27cm
  • Length of body: 32cm
  • Props: 10×4,5 carbon fiber
  • Flight time: ~20mins hover or ~15mins fpv flying.

I made Build videos as I built it and have shared them at the link above, there is also a full parts list on there with links. If you like the idea and want to build one for yourself all the info you need is on there.

Let me know what you think!

Read more…

General Flight safety Website Idea

3689606061?profile=originalHey all, I am normally more of a reader on here than a writer but I can see that we Have a Problem here with drone (hate that word) safety and reckless pilots.

I had an idea to create a website purely informational on drone safety, the do's and dont's. No spam, no blog posts, just the info that people need to know.

  - Don't fly over people

  - Don't fly over 400ft.

  - ......

  You get the idea.

Fact is there are too many people buying ready to fly quads that have no idea on the risks, or are just reckless pilots. Just look at some of the recent stories on here, the FAA ban on FPV........

In my opinion there is enough man power on here to build a website where people can go and check the general rules and Laws in there country and get flying responsibly.

We could get in contact with some of the big manufacturers and ask them to put a link on their purchase page to get the info where it needs to be.

This needs to be a group effort, we need to get the ball back in our court. I have built basic websites before but im not the best, at the moment it is just an idea.

Who's interested and how can you help?

So there it is, my idea. let see if we can get the ball rolling.

____Edit: 14.07.2014

Main Rules to be On webite:

1. Dont fly over Crowded or urban areas

2. Allways fly within visual line of sight (VLOS)

3. Dont Fly above 400ft. or 120Meters, normal air traffic starts at 500ft.

4. Dont fly near airports, flying withing 8km or 5 miles of an airport is extremely dangerous.

Read more…

Octocopter Scratch Build

IMG_6670_zps5b79706f.jpg?width=650

Hello Diy-droners,

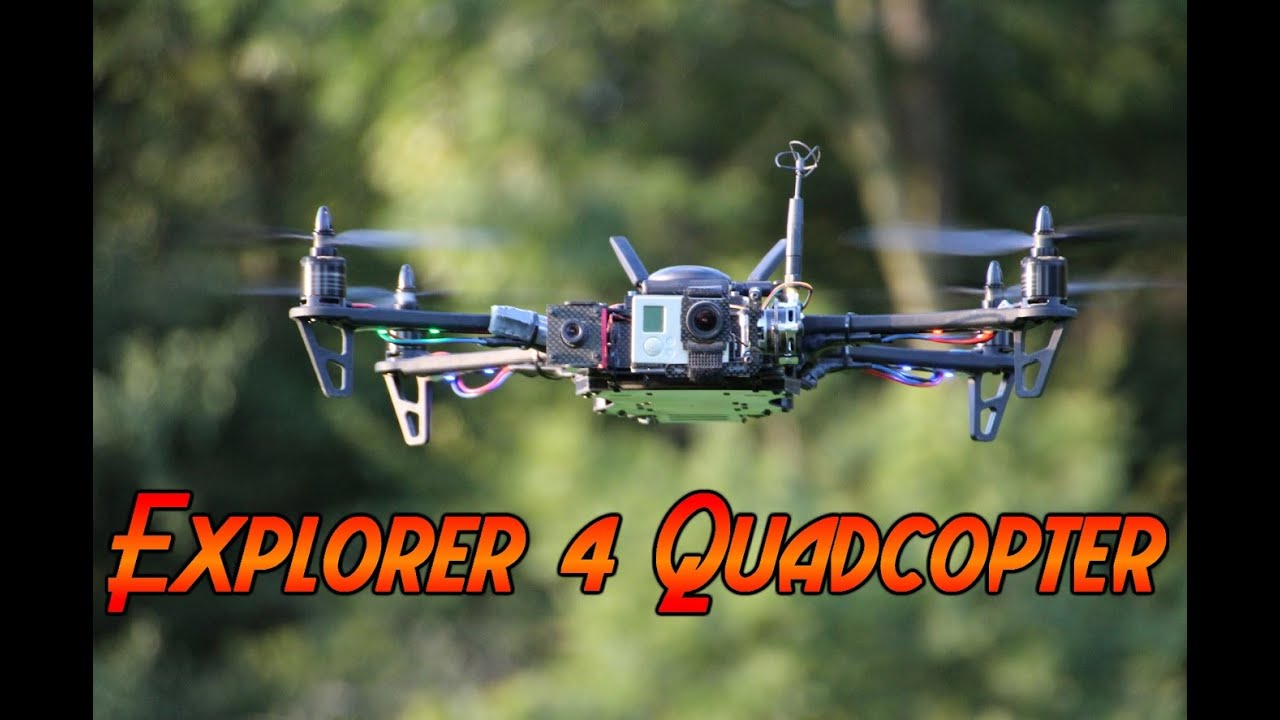
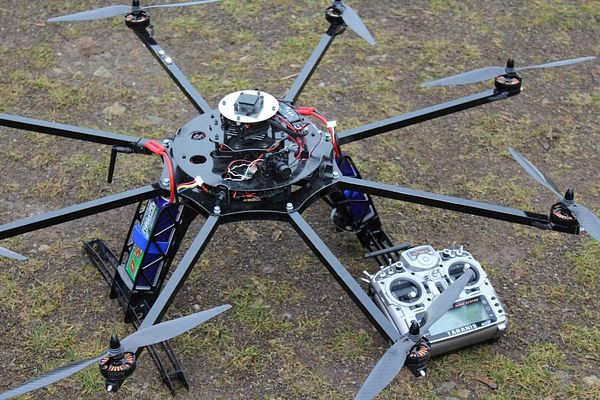
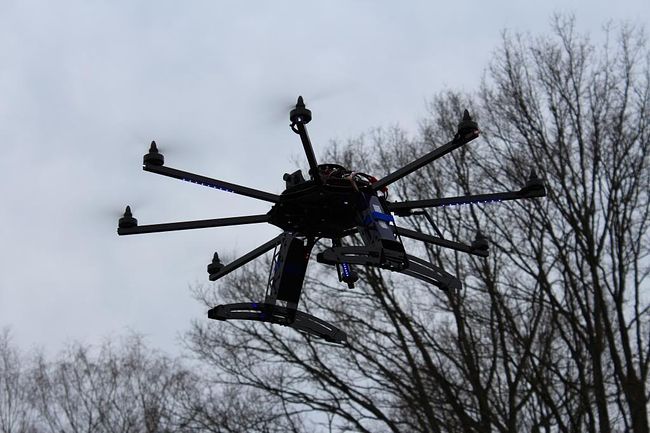
I just wanted to share my latest completed project and some of my experiences. As you can see in the photo it is a large octocopter. It is designed for aerial photography with a canon 650d DSLR camera and a Small FPV Cam on top with the osd data, I can switch between the two with a switch on the TX. I also designed the Brushless gimball and it is detachable from the copter itself. I have broken the Parts down into sections below with further information:

Motors: The motors I used are from Sunnysky (Motor X4108S) They come in a small cardboard box and are well protected. I am very impressed with these motors the quality is great and best of all They come perfectly balanced, I checked them all using the laser pointer technique and there was no balancing to do on any of them. I especialy like the Propeller mount, it screws to to Outrunner outer case, I Just wish they would make them with the thread running both ways for the counter rotating props. My props are 13x4,3.

3689575955?profile=original3689575944?profile=original3689575889?profile=original

http://www.rcsunnysky.com

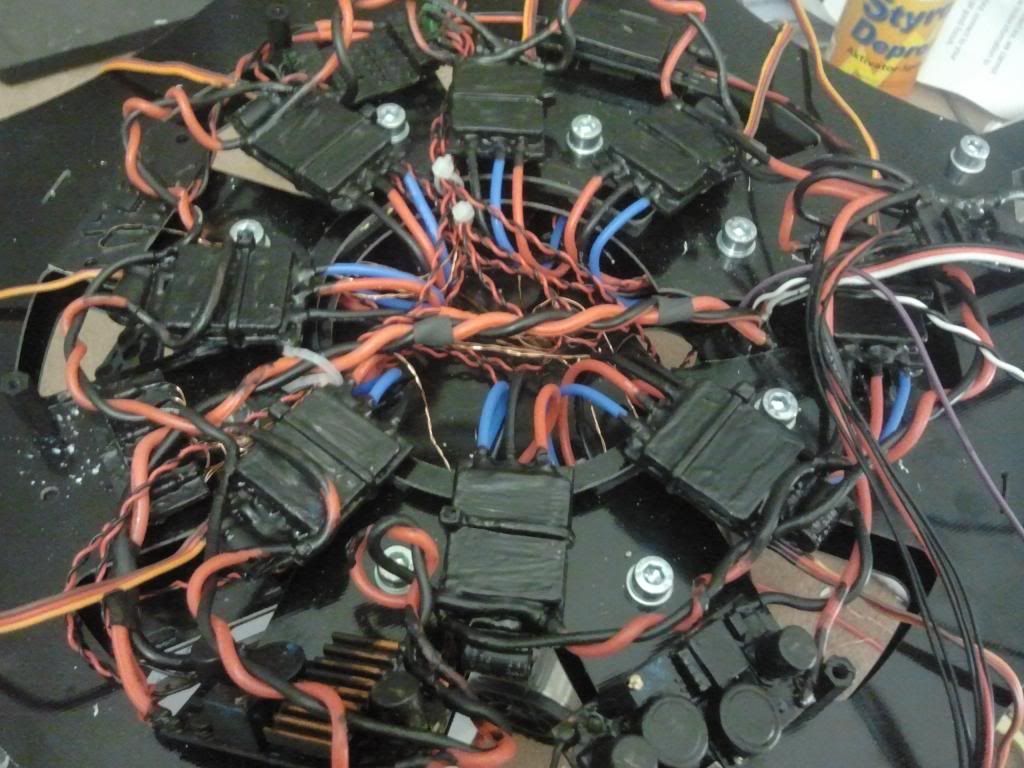
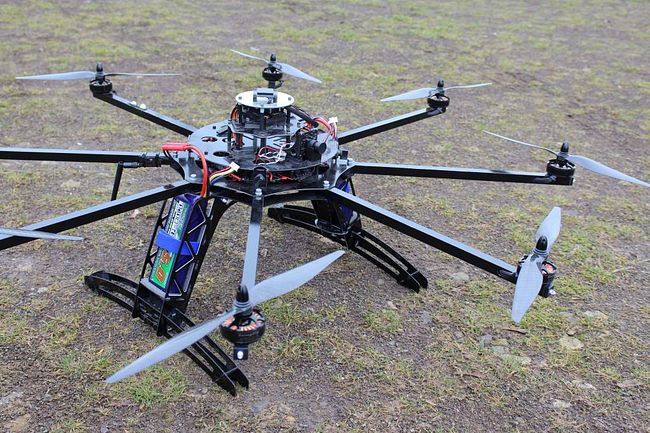
Speed controllers: I decided to use Opto25A speed controllers from maytech they come preflashed with the SimonK firmware which I like, I really didnt want to be flashing speedcontrollers mayself. I must say from the eight ESC's, I did have problems with one. I removed them from their heatshrink and solder motor wires directly to the board, so the fault was most likly caused by me. However Maytech where very quick in replying to my mails and sent me spares within one week. In the pic below you can see how they are mounted, they are also covered in PlastiDip.

3689576019?profile=original3689576033?profile=original2013-09-15180701_zps36bf30b2.jpg?width=200

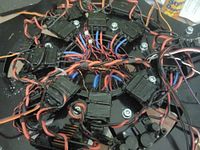
http://www.maytech.cn

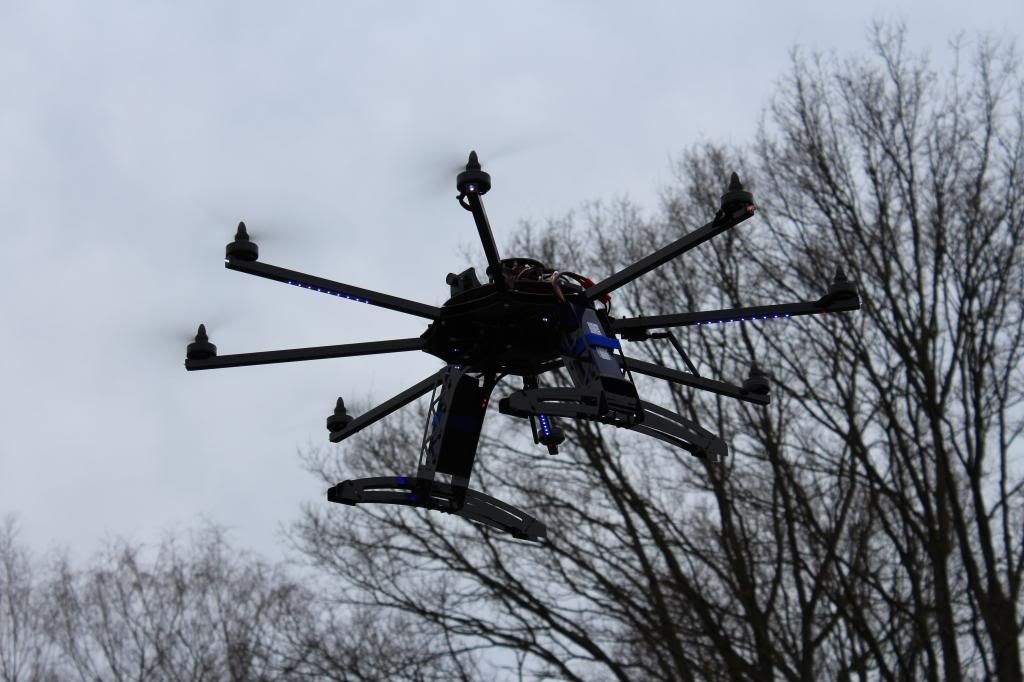
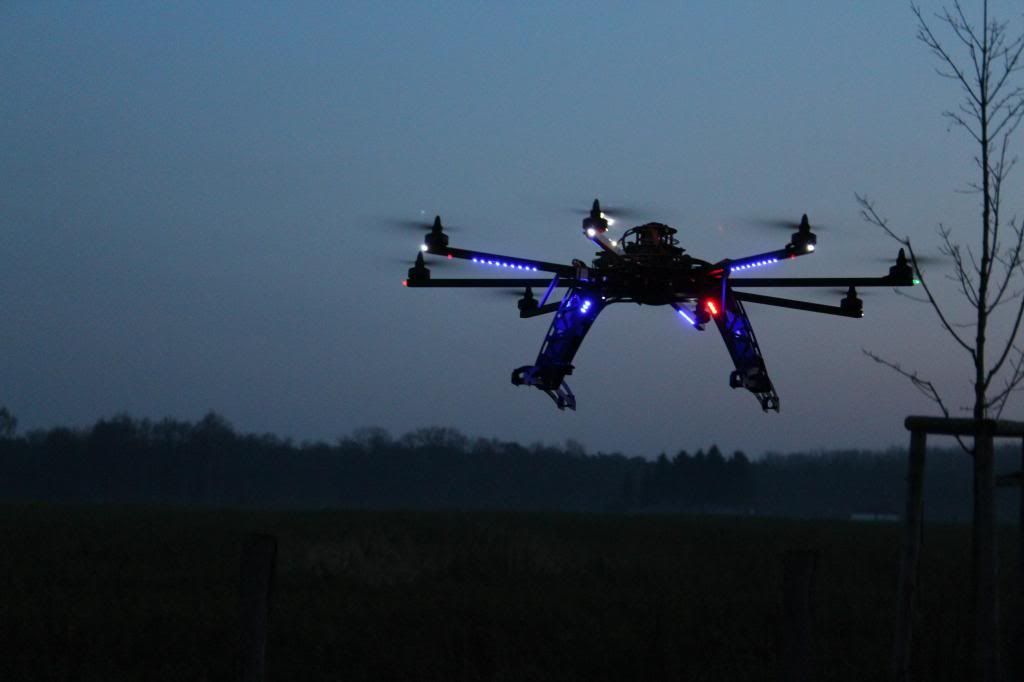
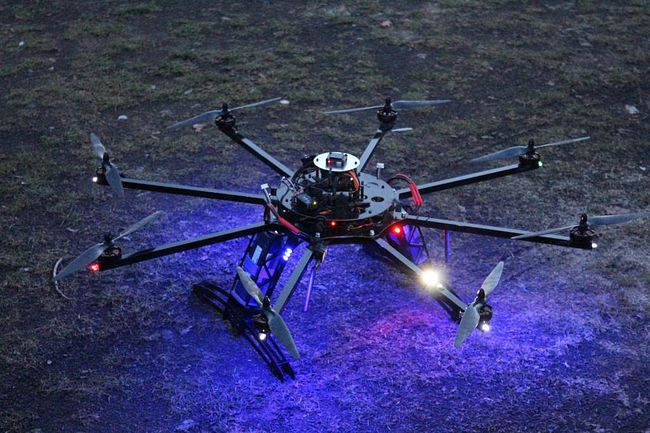
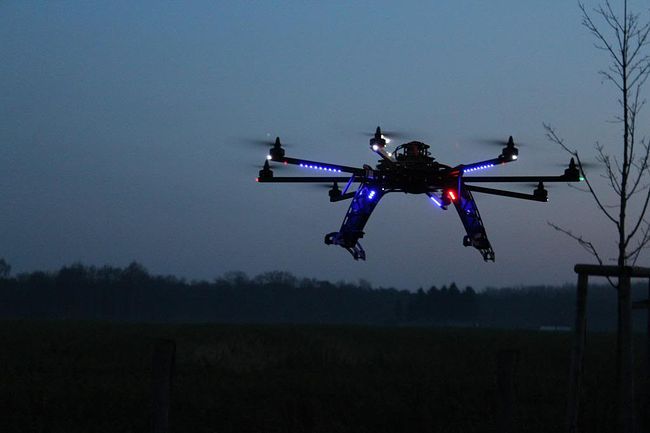
Lighting: I wanted the copter to be well lit so I could fly in the evenings and at night and still be able to see exactly what position the copter is in. Underneath I have Blue stick on light strips, On the tip of each arm is a 5mm white Led and the left and right arms are Red and Green leds aswell. On top of the rear arm is a 10mm Ultra bright white Led and a10mm Red Strobe. Ive put some Photos further down the page.

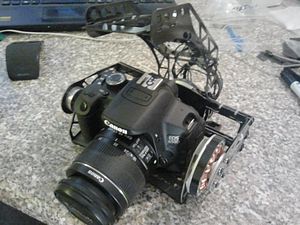
Camera gimball: The Gimball is also my own design, I wanted it to be easyly detachable light but strong. All the Electronics come from I-flight the motors are and im using a Martinez controller. It is designed for a Canon 650D. Tuning was a major headache, It took me days of testing to get something worthy of a test flight. As for the electronics; The motors are built to a high standard but the windings look like they have been done by hard, they are not uniform. Flight controller is from them aswell and the quality of soldering what should be expected. I Still have more flight testing to do with this and will make a separate post for it at a later date.

2013-05-24153502_zpsf1e8f583.jpg?width=300http://www.iflight-rc.com/

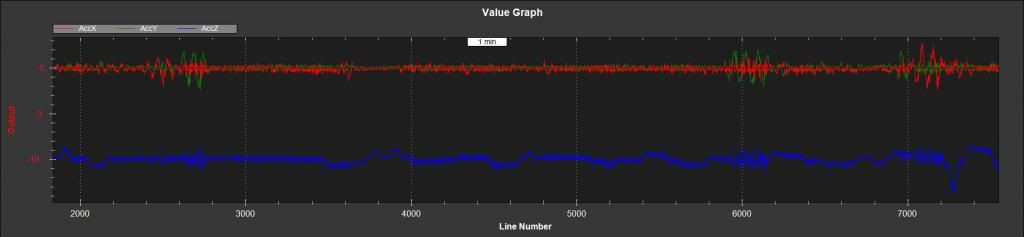
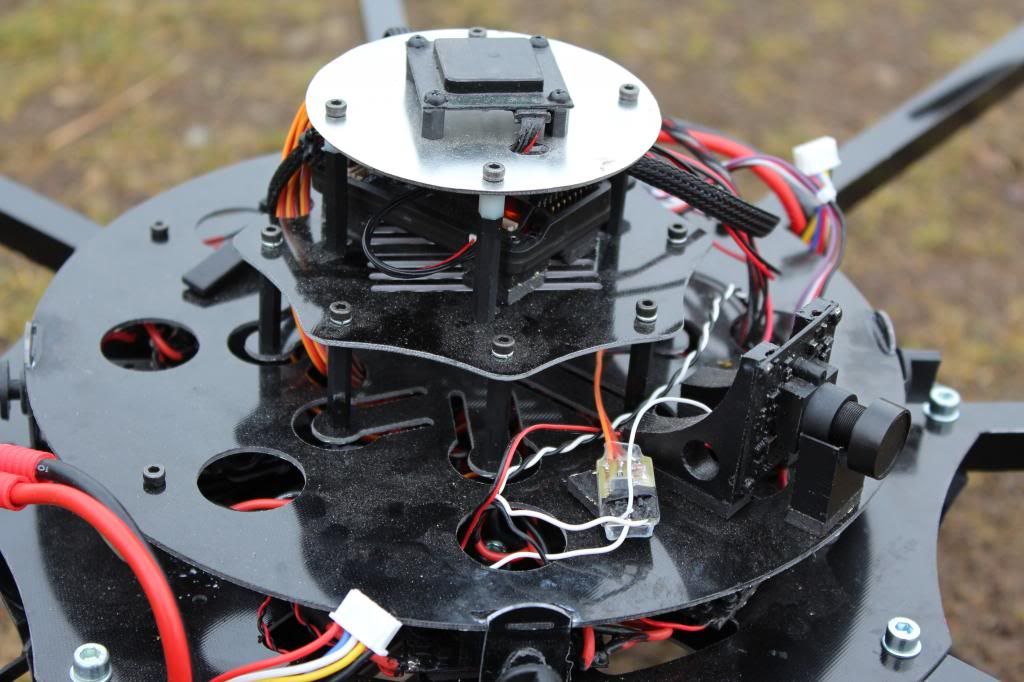
APM setup:I am using 3DR APM 2.6 with internal magnetometer. Ive Mounted a 3DR Ublox GPS Right on top, I used the shielding out of a hardrive to sheild the GPS from interferience. The sonar is a MB1200 EZ0 And is mounted on the bottom of one of the legs. I fitted external LEDs for the GPS fix and Armed/disarmed status. The APM has a Piece of lead glued to the bottom to add mass and is mounted using normal double sided tape on the corners, This proves to be quite effective when checking the logs. My Radio is the FrSky Taranis, I am quite impressed with the radio and all its features, I also made a six button mode switcher as listed here and have assined speach output to each button.

vibrations_zps4c7683b1.jpg?width=600

The spikes are me bouncing the copter on the ground.

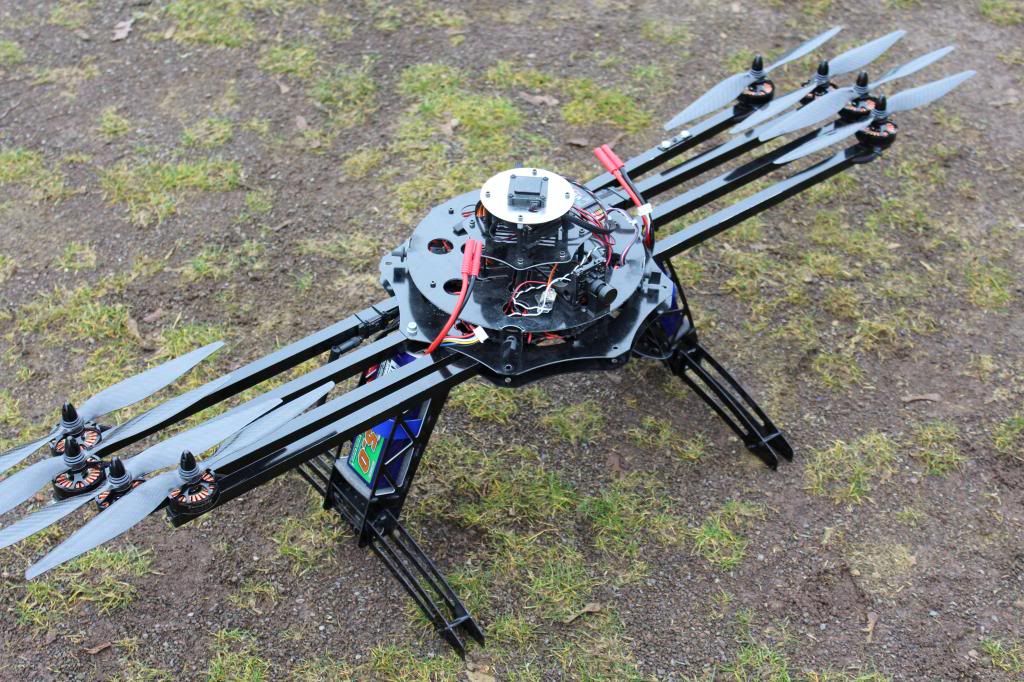
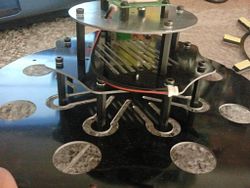
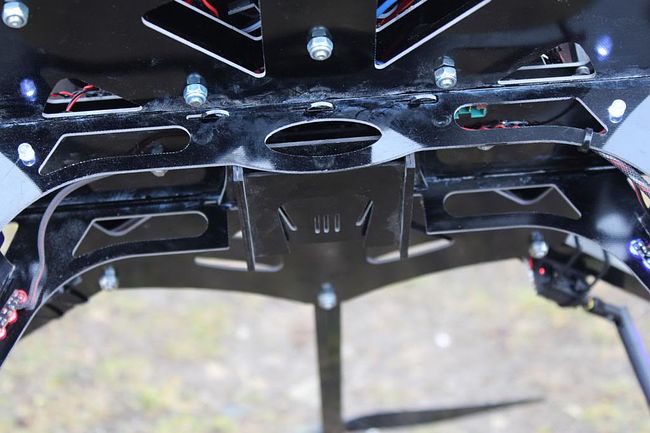
Frame design: I designed and CNC cut the frame Myself, It is made from 1.5mm black glassfiber plate. The arms Are 15mm Square Aluminium profile and are about mm long, They all fold inwards to make transport easyer. I can also remove the feet if I need to with 4 small screws. I Also wanted to be able to remove the camera gimball if needed so i designed a clip system where the gimball clips onto the bottom of the copter.(Photo below) This way I can basicly clip anything i want to the bottom, I plan at a later date to add Floats and a gopro on a long arm for underwater footage. :)

One thing I Would change and still might is the arms, they are quite heavy at about 120grams each. I could save alot of weight by using carbon arms. Antivibration was also taken into account when designing the frame. I designed it so that the mounting screws for the tower where the APM is mounted are Flexible, Its best it look at the photos to see how i did it. The speed controllers are mounted just above the Arms and the Glassplate that covers them has aluminium tape stuck to the underside. The idea of that was to reduce the interferience, Im not sure if it works but i thought for the few grams extra weight to was worth a try. The copter is powered by 2 5000Mah 4s nanotech Batterys parallel, they are mounted in the legs on each side.

Weight is about 6kg with Camera and im getting flight times of about 15mins. Up to now I have tested alt hold and Loiter and they where both rock solid with the default PIDs. I Just need to make a Protective dome for the top now.

IMG_6673_zpsac69ec6f.jpg?width=250

2013-09-12190913_zps511c6ee5.jpg?width=250

I would like to thank all the developers and the whole comunity for making this Tech possible and avalable to us all.

Lets keep it going!!

IMG_6682_zpsb145a96f.jpg?width=600

IMG_6687_zpsd4223bf6.jpg?width=650

IMG_6676_zpsda8e1ae7.jpg?width=650

IMG_6657_zps229cbbc2.jpg?width=650

IMG_6658_zps78da442b.jpg?width=650

IMG_6605_zpsf41efb24.jpg?width=650

IMG_6608_zpsf47229ac.jpg?width=650

Here is a short video of me testing the PIDs in stabilise mode. It wasnt meant for here hence its not long and all that good, But you can see the copter in flight. (Weather depending ill make a half decent video next week)

Read more…