Daniel Chote's Posts (8)

Sort by

My aluminum Nexus 7 TX mount


3689599608?profile=originalEbay was running a great deal on refurbished 2nd gen Nexus 7's, so I thought it would be a great time to step away from my HoTT telemetry (and the headache of constantly making the module work with the arducopter code) and upgrade to DroidPlanner2 and the new 3DR radio!  

There were a few posts about people doing this, with some very great ideas with varying complexity. Hobbyking also has a carbon fiber solution for this (I ordered, but decided I couldn't wait).

I am in the process of building myself a CNC (but I also couldn't wait to be finished with that). The mount is pretty simple, I have a lot of aluminum flats of varying sizes that I got from Lowes for some frame builds, with a little bit of measuring, a pencil, bandsaw, sander and file I crafted this.  It turned out to be very rigid, even without any horizontal bracing.

More at my project blog!

3689599569?profile=original

3689599594?profile=original

Read more…

3689516544?profile=original

I have been working on a fork of the Arduino IDE for use with the Pinocc.io project. With all the improvements I have made, it became my default go to for any Arduino code uploading, so it was inevitable that I would bake in ArduPilot HAL as well!

My current focus is on the OSX build, but I am fairly sure it will build alright on windows, probably wont look too great until I focus on that.  I wanted to remove the ugliness from the IDE and improve the UX.

The main big thing that I added was the concept of "Workspaces", this allows you to maintain completely separate sketchbooks for each of the platforms. Right now I have them hardcoded, but I intend to make it configurable via a new preferences window I am about to start on.  The workspaces currently are Arduino, Ardupilot and Pinoccio.  These default to ~/Documents/{workspace name} such as ~/Document/Ardupilot.  

I integrated the HAL classes that Pat Hickey worked on with the community fork of Arduino, and adapted them to work within the new 1.5.x setup. 1.5.x introduced platforms.txt, which makes the whole thing a lot simpler.  The ArduPilot HAL menu is enabled if you select an ardupilot board from the boards menu. This allows you to build standard, or coreless for the HAL codebase. (just like the community fork does).

This is very much alpha quality code, I am no java developer, but apparently I am more of one than the original authors of the Arduino IDE ;)

The project source is located here: https://github.com/dchote/pinoccio-ide

Latest binary for OSX is located here: http://cloud.chote.me/2I3z2g2S0u3i

I would love feedback on this, also if there are any feature requests, please let me know (preferably via ticket on github!)

Read more…

My EDF TriCopter Project

tumblr_mjcuprKQ3a1rgpsuzo2_1280.jpg?width=600

Primary outline of parts/components are on my tumblr blog: http://projectable.me/post/44872817314/project-edf-tricopter-assembled-plus-first

I really wanted to build something with ducted fans... And I also really wanted a tricopter for its yaw control (great for video).   So after contemplating a hover tank quad for a while, I decided that a tricopter would be smarter (also way less involved!  I will probably come back to the hover tank at some point :P).

I had the basic frame design come to me after I started to shape the front section.  I decided, since I had so much space in the front portion, that I would put the tail control servo up the front and articulate the entire tail.

Summary:

  • All aluminum hand built frame, with full tilt tail boom (bearings for smoothness)
  • 3x 70mm ducted fan units (CW & CCW) powered by 2300KV motors + 60A ESCs on 6s battery!
  • APM 2.5 running Arducopter 2.9-dev (git 3/8/2013) + hott-for-ardupilot classes (for telemetry)
  • Graupner GR-24 receiver running PPMSum (yay 1 wire)
  • Weight: 3lbs 4oz (4lbs 4oz with 3200Mah 6s battery)

I am amazed that this flew with default 2.9 PIDs… One thing to note, which I am sure some tuning will help, is it starts to pitch and that pitch builds until stick correction is no longer enough (which is what happened in the vid).  I hope its not electro magnetic interference from the motors… I would figure the aluminum around everything would act as a shield to some degree.

For my full build log of the project, check out my blog: http://projectable.me

Read more…

2.9 + hott-for-ardupilot modules !!WOO!!

tumblr_mgood0JKaB1rgpsuzo1_1280.jpg?width=320

I finally rebuilt my ATG-700-AL Hexacopter, and got around to moving my QAV500 over to the Graupner receiver.  Now that both platforms were functional, I decided to get stuck in to 2.9 and hott-for-ardupilothott-for-ardupilot is some code and user hooks to send telemetry data from APM back to the Graupner transmitter, its fairly light, and Graupner has a fairly well documented protocol.  

Graupner is no stranger to most non-US people, but has very little penetration in the US market due to lack of distribution (i think).  I have been thoroughly impressed by the build quality of the TX, all the components are firmware upgradable via USB and windows software (hooray vmware).  Following the instructions on the hott-for-ardupilot wiki, and putting in the extra UART headers on the APM, things were very much plug and play.  

tumblr_mh6zhnjDMH1rgpsuzo1_1280.jpg?width=320

2.9 compiled with the hott-for-ardupilot module without issue, after firmware was done, i reset both boards and proceeded with the 2.9 first run process (level, then accelerometer calibration). Of note, the mission planner UI button didnt work for me, it just stuck on "Initializing APM", however using terminal worked without a hitch both times.

The hexacopter has a camera gimbal, it took me a while to figure out how to make it work right, as the instructions on the wiki and the settings page in mission planner isnt exactly straight forward, but I eventually figured it out and got it pretty spot on as far as the bubble level was concerned.

Both maiden flights on 2.9 were straight forward, the hexacopter required no auto trimming, it was solid. The QAV500 took quite a bit, about 5 minutes of flying to trim it out correctly, but the autotrim function worked great. When I re-armed and took off it was solid (as you can see in the vid below)

Please excuse my N00b flying skills... Im still pretty fresh with flying!

Hexacopter:

QAV500 Quadcopter:

Overall, my first impressions of 2.9 are awesome, its a great advancement for the project, and im sure all the developers are excited by this.  My thanks goes out to them!

You can find the build posts for both projects on my project blog.

Read more…

tumblr_mekbu1vcsk1rgpsuzo1_1280.jpg?width=640

tumblr_mekbu1vcsk1rgpsuzo8_r1_1280.jpg?width=200

With the 3DR black friday deals, and the release of their power module, I took the opportunity to get another couple of APM2.5s, the cases that we have been anticipating, and some power modules.  I got it all assembled yesterday and I must admit I love the simplicity it adds to the build.

I now just have signal leads coming from the ESCs in to the APM directly. 

The 3DR power module sits in line before the distribution board, and that supplies the 5v for the APM to run from, as well as providing voltage+amperage readings from the battery.

With the case, and my QAV500 frame, I decided to use only the top portion of the case and mount through to the risers I already had. I also made a minor mod on the case for the UART pins, but everything else was smooth.  I cant wait to take it out for a flight.

The issue I was having with 2.8.1 not reading the amperage from the attopilot sensor is not an issue with the 3DR sensor (glad to see).

More photos can be found here: http://projectable.me/post/37261340554/yesterday-i-received-my-black-friday-specials-from

Read more…

My QAV500 quad progress

tumblr_mdftqaJpP31rgpsuzo1_1280.jpg?width=640

I have been poking this build with a stick occasionally as I was working on my Power Wheels Rover project in the meantime. But now I am back to working on this quad.

Build list:

  • QAV500 frame
  • APM 2.5
  • SunnySky 2814-10 motors
  • Hobbymate 40A ESCs
  • Graupner E-Props 10x5

I have had a hard time getting this thing to play nice, and last night while reading more about ESC timing I realized that may have been my problem.  I was having occasional motor spurts, and sometimes one or two motors wouldn't spin up initially, they would pulse and behave strangely.  Early this morning I set the timing on the ESCs to low, and unsurprisingly it fixed the issues I was having.

I did a full config reset running 2.8.1, with motor size set for medium (0.110).  Flight is a LOT more stable than it has ever been, and had a slight breeze too.  All is left for me is to get more flight time, and practice, practice, practice!


More photos etc at: http://projectable.me/post/35643555854/more-tweaks-to-the-qav500-platform-i-moved-all

Read more…

Project Power Wheels - Ardurover endeavor.

For the month my father-in-law and I have been working on a Power Wheels conversion to RC+Rover+Drive by wire.   I have an 18 month old son and we wanted to build something he could enjoy before he can physically control the vehicle by himself.   So far we have been focusing on the mechanical+drivetrain aspects of the build, but last night I finally got it to a point where we are ready to use the APM2.5 with ardurover code.  

tumblr_manfhouN8I1rgpsuzo1_1280.jpg?width=480

I am going to be heavily modifying the ardurover code to support local "drive by wire" via analog inputs. The steering wheel assembly now drives a 10k ETI pot, and the throttle controls a linear motion 10k pot (pictures will be posted on the blog shortly).  I would really like to hear some suggestions as to where I should implement the output channel insertion code. I have a few ideas after reading over the current codebase, but would obviously like to implement this in a way that a) can be reused by other people, b) fits within the code guidelines as defined by primary ardupilot developers.


My project blog is here at: http://projectable.me I would love to hear some feedback on this.

Read more…

Joining the DIYDrones community, My hexa build

20120829-20120829-4K4X6589.jpg?m=1346253553

I have been following DIYDrones for years now, and have gleaned lots from other people's efforts along the way.  I recently decided (after finding some cost effective frames on ebay) to get started for myself.

I started the heli hobby 2 years ago with a trex-450 in which i learnt pretty quickly, start small... much smaller than a 450 class heli!  Constantly breaking various parts of the 450 was too expensive, so i gave up for a while.  After some more reading online, and deciding I needed to push on, I purchased myself a Blade mSR to learn how to fly. It was nice, I got to use my DX8 transmitter during the learning process, its a bulletproof little fixed pitch heli which taught me how to compensate, and eventually I got very used to the flying process.

I purchased another spektrum receiver, and an initial cheap hexa kit (from GoodLuckBuy) which had frame/motors/esc's and a kk board.  When it arrived it was missing parts (which they did quickly send me), but coming from china it took a while to get it all.  I had also ordered an APM2 board at this point, but due to the popularity it took a while for it to get out to me, during that time APM2.5 came out, so I opted for the upgrade.

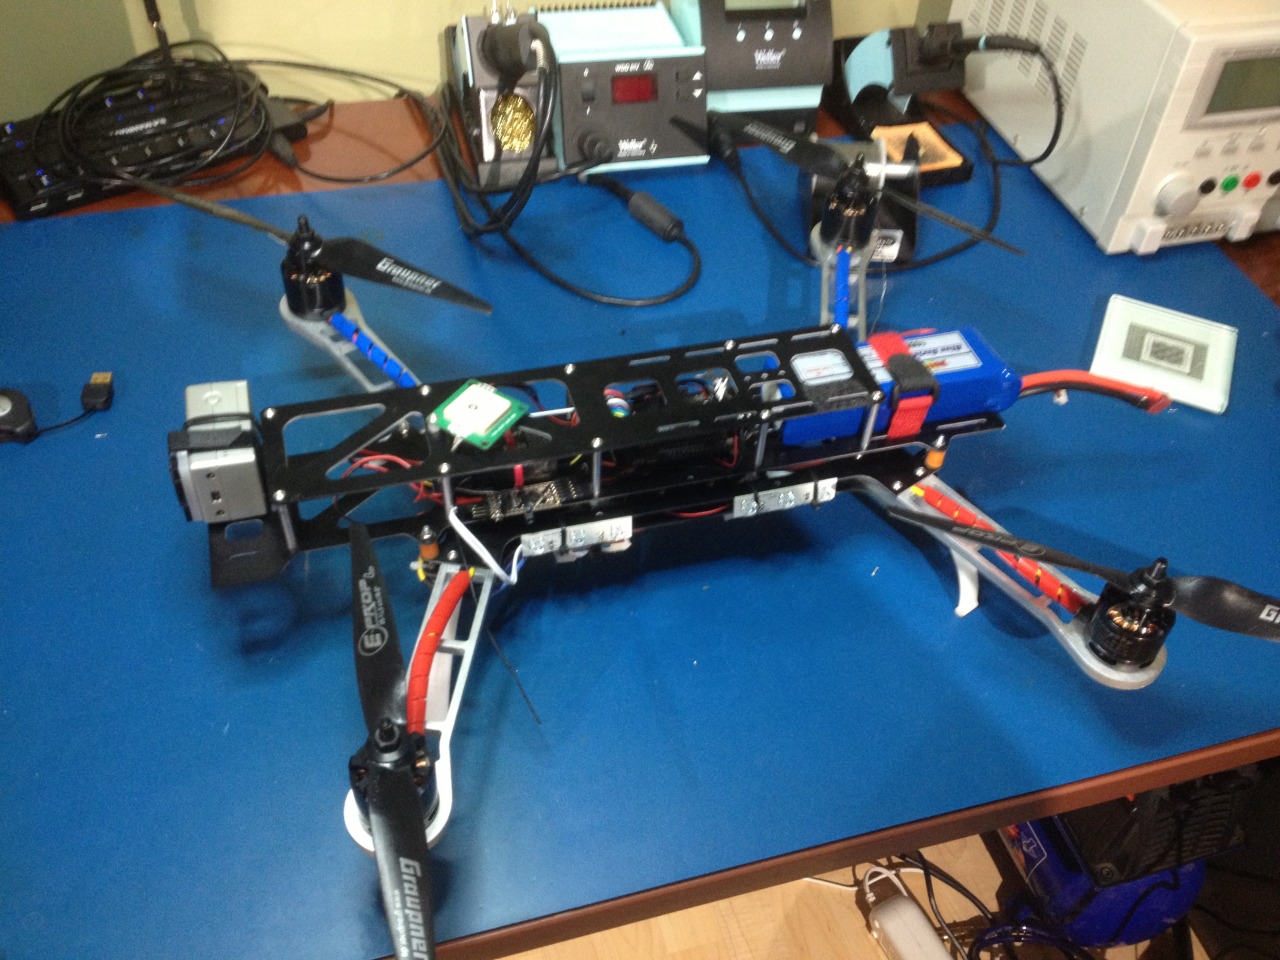
With the flimsiness of the initial hexa frame, I decided to get something a little more substantial.  I went with the ATG 700-AL frame (which was cheapest at GLB, maybe I should have known better)... It arrived, missing 1 piece... Not a big deal, it was just the top plate of one of the motor mount assemblies. (I have ordered the missing part, and some extras from omgfly.com).

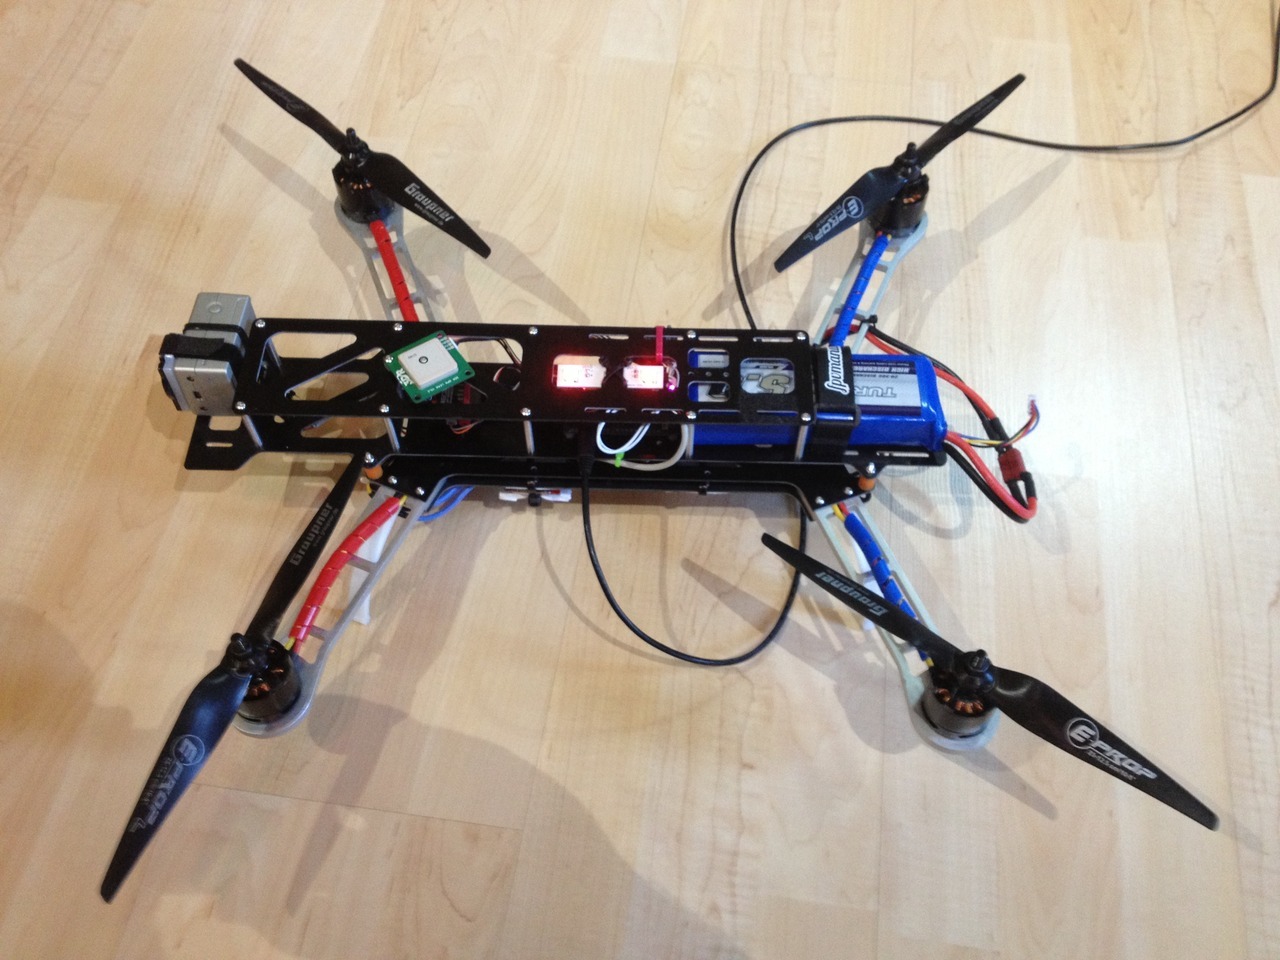
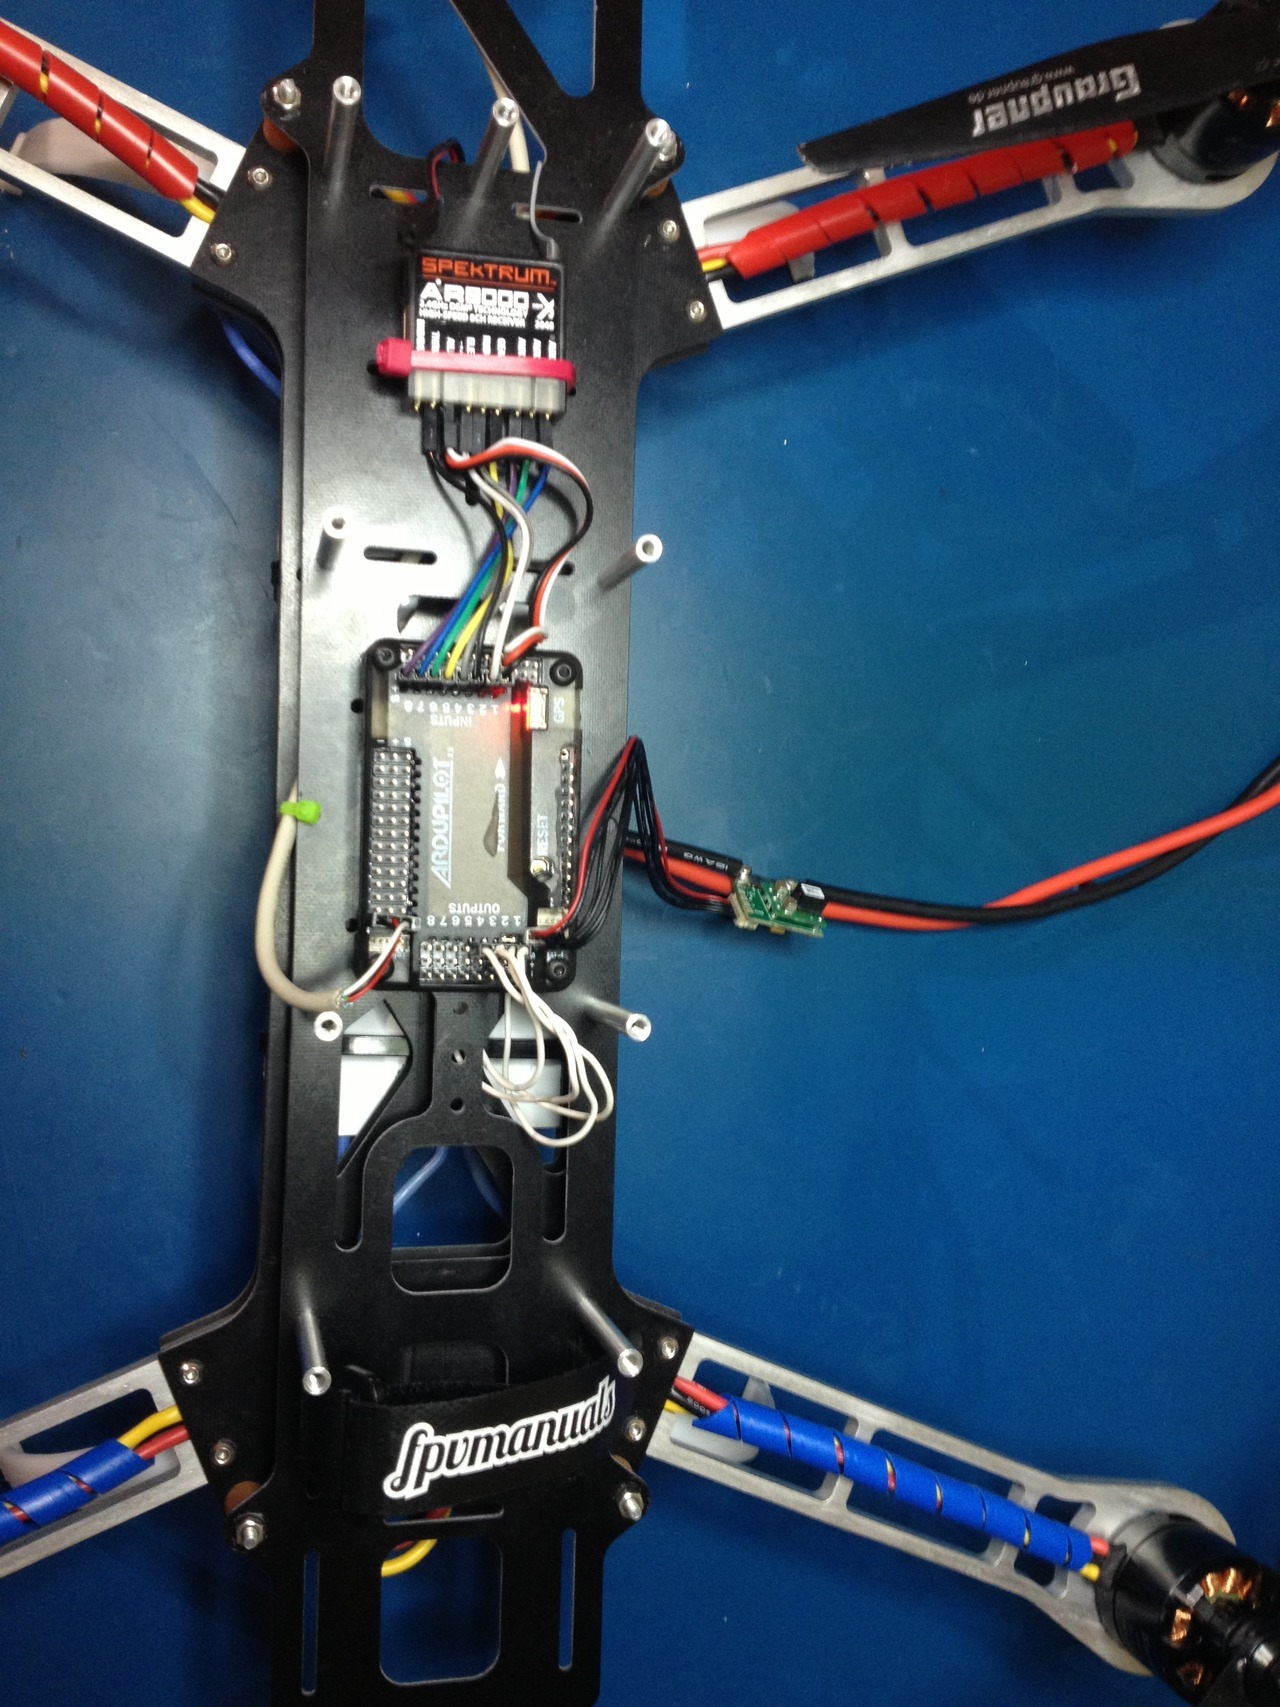
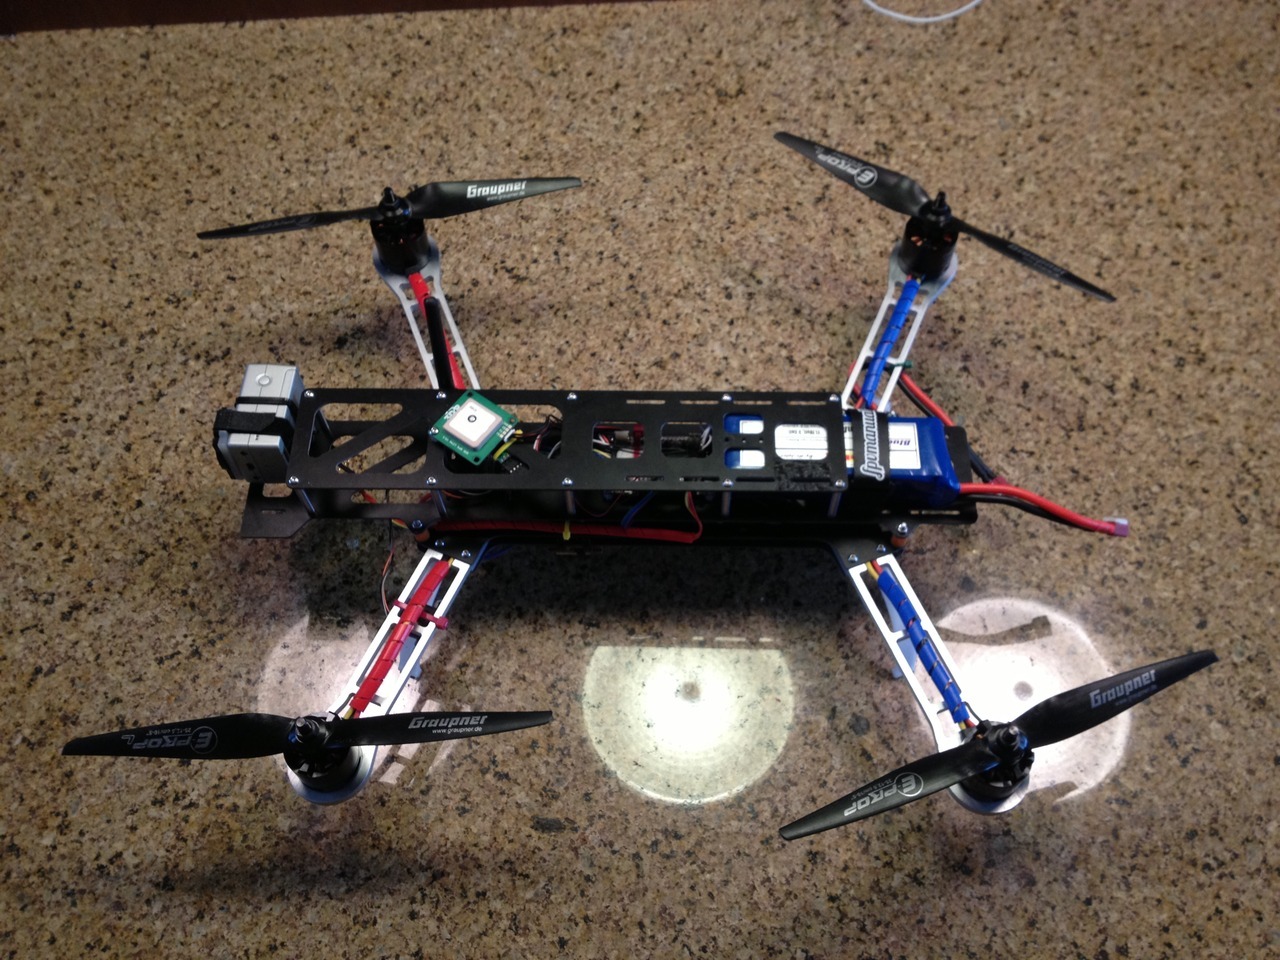
Over the course of the last 2 weeks I have assembled the new hexa with the APM2.5 board, GPS, Sonar and OSD.  Power distribution is done via the Hexacopter power distribution board (available via the store here), with the deans connectors on whips, instead of directly to the board.  This let me deal with the size of the frame, and short ESC power leads.  I have a 2 Y setup from battery to the distribution. Y setup for 2 batteries feeds a Y setup breaking off power to the attopilot voltage+current sensor, which then feeds the distribution board and a separate UBEC to power the video gear (camera+transmitter).

I have had a few test flights and with defaults it is VERY stable... Loiter works perfectly with no wind, when its a little windy it seems to drift and have weird altitude drops.

I have some photos of the assembled hexa on my gallery here: http://g.chote.me/Multirotor/Hexacopter

I will continue to update with my progress, and get some videos together also.

Read more…