All Posts (14048)

Sort by

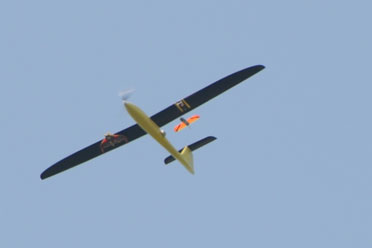
Today we finally got bored of waiting for the windy weather to subside so we took ArduWot out anyway. In the couple of weeks since our last flight we've written an interface between APM and MATLAB/Simulink utilising the MAVLink protocol. For anyone not famliar with Simulink its basically a tool used by control engineers to prototype control systems in a (reasonbly) friendly graphical way. We've used Simulink to control helicopters (T-Rex 250) indoors using a Vicon visual tracking system to determine position/attitude at 100Hz and a conventional RC transmitter. By utilising APMs fly-by-wire mode as the inner loop controller we can command roll, pitch and thottle at a fairly low rate from Simulink over Zigbee. This functionality lets us move outdoors (where we don't have the luxury of a VTS to give us 0.1mm/deg resolution!) and conduct some more interesting research activities, such as optimal control, formation flying, target tracking, etc...

Todays flight was a simple proof of concept test where we used a Simulink based PID controller to perform heading hold. It worked remarkably well but it was too windy to perform any meaningful performance assessments. The biggest issue we have is that using the RC_CHANNELS_OVERRIDE message takes command away from the RC transmitter (in FBW mode) so when we terminate the Simulink model if APM doesn't receive the message to stop overriding (setting all commands to zero) then it freezes on the last signal it received. As we're currently using XBee modules with whip antennae we do regularly lose connection for short periods so occasionally can not get control back (without switching to manual mode, which is undesirable in strong winds!). However, it seems that APM times out after about 20-30s and defaults back to the RC transmitter.

We are using RC_CHANNELS_OVERRIDE at the moment because the SET_ROLL_PITCH_YAW_THRUST message doesn't seem to be implemented on APM. I think for our purposes we may implement this message instead as this would allow us to command the nav_pitch and nav_roll angles on APM directly and utilise the mixing of RC transmitter and APM control if we ever need to get out of trouble quickly!

If anyone is interested in control of APM from Simulink I'd be happy to release the code (after a bit more testing!). Also if anyone has an interest in sending attitude commands and implementing the relevant MAVLink messages, let me know and I'd be happy to help!

Read more…

FrankenCopter build coming soon! 1 of 1 ;)

Have just finished ordering all the parts I need to build an aerial platform capable of carrying a Nikon D5100 SLR camera.

I have spec'ed up the power for some future heavy lifting projects.


The components are as follows:

---------------------------------------------------------------------------------------------------------------

FRAME: MikroKopter Okto XL + AltiStream: ventilated transparent dome

3689435598?profile=original

---------------------------------------------------------------------------------------------------------------

FC: Ardupilot V1.0 + MB1200 Sonar + Mediatek GPS + Magnetometer + Xbee Telemetry + Optical Flow Sensor

3689435695?profile=original

---------------------------------------------------------------------------------------------------------------

PDB: Photoshipone PDB

3689435755?profile=original

---------------------------------------------------------------------------------------------------------------

PROPS: EPP1245 CF (Chopped glass fibre)

3689435817?profile=original

---------------------------------------------------------------------------------------------------------------

MOTORS: Turnigy G10 Brushless Outrunner 810kv (.10 Glow)

3689435770?profile=original

---------------------------------------------------------------------------------------------------------------

ESCS: Turnigy dlux 55A SBEC Brushless Speed Controller

3689435789?profile=original

---------------------------------------------------------------------------------------------------------------

LIPO: Turnigy nano-tech 5000mah 4S 35~70C Lipo Pack

3689435910?profile=original

---------------------------------------------------------------------------------------------------------------

CAMERA: Nikon D5100 18-55+55-200VR

3689435826?profile=original

---------------------------------------------------------------------------------------------------------------

CAMERA MOUNT:  Photoshipone mkTR

3689435857?profile=original

---------------------------------------------------------------------------------------------------------------

CAMERA MOUNT BEC:  UBEC 5A

3689435843?profile=original

---------------------------------------------------------------------------------------------------------------

GPS GEO-TAGGER: Solmeta GPS Pro

3689435868?profile=original

---------------------------------------------------------------------------------------------------------------

TRANSMITTER: Spektrum DX8 with telemetry

3689435928?profile=original

---------------------------------------------------------------------------------------------------------------

FPV TX/RX: 5.8G High Power 200mW AV TX and RX Systems

3689435877?profile=original

---------------------------------------------------------------------------------------------------------------

FPV GOGGLES: Fat Shark Dominator 3rd Generation modular FPV System

3689435957?profile=original

---------------------------------------------------------------------------------------------------------------


As soon as I receive the parts, I will start a build blog...


G :)

Read more…
3D Robotics

DIY Drones passes 20,000 members!

3689435730?profile=original

As is customary and traditional, we celebrate every new 1,000 members here and share the traffic stats. This time it's a big one: 20,000!

We've been over a million page views a month all year. It just took us six weeks to get this latest 1,000 members--we're averaging about one new member per hour.


Thanks as always to all the community members who make this growth possible, and especially the moderators who approve membership applications and blog posts and otherwise answer questions and keep things ticking here. We've got about 40 moderators now, but if anyone would like to join this group, please PM me. If you've been here for a while and have been participating, you'll fit in great.

Read more…
3D Robotics

More fun from the supercool (and super expensive) motion tracking lab at ETH:

"Fast, safe transitions of multiple quadrocopters are often required in the Flying Machine Arena. In this video, we use an algorithm based on convex optimization to plan collision-free trajectories.

In the first part of the video, the destination points are selected ahead of time and collision-free trajectories are pre-computed. All the trajectories are stored before execution. In the second part of the video, however, the next set of destination points is picked at random while the vehicles are still en-route, demonstrating that the algorithm is fast enough to be used in real-time.

* Project by
Federico Augugliaro, Angela Schoellig and Raffaello D'Andrea
Institute for Dynamic Systems and Control, ETH Zurich, Switzerland

* Based on the work by
Yang Wang, Ekine Akuiyibo, Stephen Boyd
Information Systems Laboratory, Stanford University, USA

* Filmed at ETH Flying Machine Arena
http://www.FlyingMachineArena.org"

Read more…

This device is no match for an Randy's sensor, but it does (minimally) work. Think of this little project as a fun hack more than anything else. But with some tweaking and size reduction someone could probably implement an occasionally working altitude hold sensor for a fixed-wing RC aircraft.

This optical flow sensor uses CdS cells as light sensing elements. Recall that a CdS cell is basically a resistor whose value changes with illumination- more light results in less resistance. The fundamental sensing structure here is a pair of CdS cells connected in series to form a voltage divider. The middle node between the CdS cells forms the output. When both cells are equally illuminated, the output voltage is midway between Power and Ground (assuming the CdS cells are matched). If one cell is illuminated more than the other, the output voltage varies accordingly. An interesting quality of this CdS cell pair is that if you, say, double the amount of light striking both cells, the output changes very little.

Nine of these CdS cell pairs are laid out in a row, as shown in the video. Pay attention to the photo below to see how the CdS cells are placed and how they overlap within the array. The nine resulting outputs go to ports A0 through A8 (analog inputs 0 through 8) of an Arduino Mega. This project required a 'Mega because of the number of analog input signals.

3689435623?profile=original

For those of you with an image processing background, you can say that a CdS cell pair forms a simple analog edge detector, and that adjacent edge detectors are 120 degrees out of phase.

As light patterns travel across the CdS array, the nine analog signals will vary accordingly and can be interpreted by a basic one dimensional optical flow algorithm. For example, if a shadow moves left to right across the array, a pulse or step function will appear in sequence across ports A0 through A8 in sequence (or the other direction) which indicates visual motion.

To obtain an image, I just used a slit opening, which is a variation of a pinhole camera. This slit opening was oriented perpendicular to the CdS array, which preserves visual information parallel to the CdS array and smooths out information perpendicular to it. This helps make the array more sensitive to 1D visual motion in the desired direction. (For a rough metaphor, think of a bar code.)

I mounted all the electronics into a shoebox using masking tape. (For a more professional and durable version, use duct tape!) I also placed dark construction paper on the inside of the box to prevent light from bouncing around. I cut a slit opening in the box top as shown to be positioned over the CdS array.

The output can be read in two ways- The Arduino port D3 generates a PWM signal that, when connected to the RC network shown, can generate an analog output representing the optical flow (5V = max positive, 0V = max negative, 2.5V = zero). Alternatively you can read it out using the Arduino environment's Serial display.

The sensor is crude but does work. It needs a lot of light to function- it should work in a bright indoor environment but works better with natural outdoor lighting, say several hundred lux and up.

The Arduino sketch is attached here: CdS_OF_Sensor_r1.pde

Have fun!

Read more…
Moderator

This seems very DIYD

tempestdrop.jpg

Not sure if this is in the military category or not...

WASHINGTON, Dec 05, 2011 The Naval Research Laboratory Vehicle Research Section has successfully completed flight tests for the Autonomous Deployment Demonstration (ADD) program. The final demonstration took place Sept. 1 at the Yuma Proving Grounds, Yuma, Ariz., and consisted of a series of eight balloon-drops at altitudes of up to 57,000 ft, delivering sensor-emplacement Close-In Covert Autonomous Disposable Aircraft (CICADA) vehicles within 15 feet of their intended landing locations.

The ADD concept is to enable small unmanned air vehicles (UAV) equipped with sensor payloads to be launched from aircraft (manned or unmanned)

cicadamk3.jpg?width=200


A custom autopilot for the CICADA, both hardware and software, was developed by the Vehicle Research Section to be both inexpensive and robust. The only flight sensors are a 5Hz GPS receiver and a two-axis gyroscope. Although
having minimal sensors, the navigation solution and the flight controller proved to be quite robust during in-flight testing, routinely recovering from tumbling launches. The flight controller also included a custom NRL algorithm that accurately estimated wind speed and magnitude, despite having no air data sensors onboard.

More 

Read more…
3D Robotics

Project to clone the Neato Lidar

3689435665?profile=original

This guy is reverse engineering the Neato Robotics Lidar system, which is by far the lowest-cost Lidar availalble. Neato has so far not made the Lidar available as a stand-alone product, thus this effort to clone and open source it.

A cheap and light Lidar system could open up a whole new class of UAVs that could navigate indoors and outside of GPS coverage. One way or another, it looks like that's on the way.

Read more…
3D Robotics

Univ of Nebraska starts a Drone Journalism lab

3689435446?profile=original

From the announcement

The College of Journalism and Mass Communications at the University of Nebraska-Lincoln established the Drone Journalism Lab in November 2011 as part of a broad digital journalism and innovation strategy. Journalism is evolving rapidly, and journalism education must evolve with it, teaching new tools and storytelling strategies while remaining true to the core principles and ethics of journalism. The lab was started by Professor Matt Waite as a way to explore how drones could be used for reporting.

In the lab, students and faculty will build drone platforms, use them in the field and research the ethical, legal and regulatory issues involved in using pilotless aircraft to do journalism.

Journalists are increasingly faced with two problems: a growing appetite for unique online video in an environment of decreased budgets; and restricted or obstructed access to stories ranging from disaster coverage to Occupy Wall Street protests. The technology behind autonomous and remotely piloted vehicles is rapidly moving from military applications to the point where private citizens can own and operate their own drone. At the same time, high definition and 3D video cameras are getting smaller, cheaper and lighter. Paired with global position devices, they make ideal additions to an airborne platform.

In short, drones are an ideal platform for journalism.

Picture of a Gatewing X100 shown because the announcement randomly chose it as an example of platforms available. Once the students find out how much it costs, they may start looking for something cheaper ;-)

(Via The Verge)

Read more…

another way to set modes on turnigy 9x

as it was kind o difficult to me setting up flight modes on APM the way Gordon discribed,  I tried to find an easyer way (but still Gordon did a good job and my way based on his...)

Big THX to apocolipse, as I forgot to write which firmware I`m using. It`s the er9x (lates trunk)

I show on an examples, as it is real easy. What I did is to use the custom switches 1 to 6 (csw1 - csw6) and the mixers.

Goto to mixer and add a line  with the setting (in my case ch8 but it`s up to u, which ch u use)

CH08    100%    MAX   SWITCH    (SW1)

            100%    MAX   SWITCH    (SW2)

            100%    MAX   SWITCH    (SW3)

            100%    MAX   SWITCH    (SW4)

and so on....

Ok, now I go to Switches an assign the following values  to SW1:

CSW1 function: and   /  value1:ID0   /  value2: !AIL (if u`re not use to,  ! means not active)

CSW2 function: and   /  value1:ID1   /  value2: !AIL

CSW3 function: and   /  value1:ID2   /  value2: !AIL

CSW4 function: and   /  value1:ID0   /  value2: AIL

CSW4 function: and   /  value1:ID1   /  value2: AIL

CSW4 function: and   /  value1:ID2   /  value2: AIL

Now you hook up APM in cli mode, going to pwm test. Taking the radio and adjusting the 100% value on SW1 so, that I get the recommended 1165 for normal mode (in my case: CH08   /   -65%   /   MAX  /   SWITCH(SW1).

Do this to all mixers.

Then I set the modes, like shown on diy google codepage.

That`s it.

c u in da sky

Read more…
Developer

I've seen that ArduPPM 0.9.87 has been downloaded about 2 hundred times.

It seems that we have no negative reports with this version.

This is a very good result and does confirm the good results we had at initial testing in the lab and through the development team.

I feel that we could now push this firmware to the realease 1.0 status.

If you have any decoding problems, please report it, so that i can include it as a note in the manual.

If you are happy with it, let us know as well. It will help to push it to 1.0 release.

There will be no modifications for the 1.0 release. We need rock solid massively tested code here because it is a very important link in the APM system.

ArduPPM binary is available in the Ardupilot-Mega Downloads section.

http://code.google.com/p/ardupilot-mega/downloads/list

More informations about ArduPPM here :

http://code.google.com/p/ardupilot-mega/wiki/Encoder?wl=en

If you don't know what is the ppm encoder, if you have no idea about how to program an AVR chip or if you have simply no need for it, then it's ok to keep your actual version.

Thanks, and happy flying.

Read more…

Pushing DJI to limits

Just further pushing what DJI wookong M can do

What I did is removed one motor from standard Jdrones motor with Gaui 500X GM412 and used 11 X 5 Graupner prop. Rest of the threee motors are standard jdrones motors with 10" props.

The only difference was controls became more sensititve. Maybe a PID setting would have helped more. This video was made when the DJI was in Manual mode

Read more…

DIY Drones meets at Make: Tokyo Meeteing 07

3689435498?profile=original

This flight is took place before to open to the public.

Real demonstration has been done at football field of the university. 

3689435519?profile=original

Randy and my self show off DIY Drones at Make: Fair at Tokyo on December 3 and 4.

We have very good feedback from visitors and exhibitors.

It will very good start of DIY Drones in Japan.

Read more…

My First UAV Project

Hi All

Been reading thru this site for awhile & have taken the plunge of making my own UAV the Scaneaglet by Le Phan.

Things in work have gone very quiet so if "she who must be obeyed" leaves me alone i hope to complete it in a couple of months.

Below is Le Phans completed rc uav.

3689435422?profile=original

Have had the drawings for sometime now & just waiting for delivery from laser cutter :)

Here are the specs of the project:

Camera Plane: ScanEaglet
Design/Drawn: Le Phan
Wing Span: 60.25"
Length: 28.5"
Wing Area: 300 sq in.
Flying weight: 28 oz.
Wing loading: 13.4 oz/sq ft
Motor: Mega Brushless 16/15/5
Batteries: 3 cell 1200 Lipos,
two packs in parallel
Prop: Kavan 6x4
Servos: 2 Hitec HS-55 Servos
for elevon controls.
Video Camera: 2.4 Ghz Mini Wireless
R/C Video Camera
Radio Req’d: 3 Ch, Elevon Mixing

But knowing me i'll probably change something :)

I've also purchased the following:

ArduPilot Mega

ArduPilotMega IMU 

Remzibi's OSD

& God knows what else.

Read more…
3D Robotics

3689435486?profile=original

Everyone in the New York City area is invited to join me for a DIY Drones meetup at the Wired Store in Times Square at 6:00pm this Wednesday, Dec 7th. It's free, and we'll have free drinks, plus a cool DJ party starting at 7:30. I'll have the new APM 2.0 board to show and to play with.

We're calling it "Drinks and Drones". Alcohol and flying robots--what could possibly go wrong?

Come, bring your friends, or bring a drone for show and tell.

Just send your name and how many people you're coming with to rsvpstore@wired.com. Subject line: "Drinks and Drones"

Read more…
Developer

First ArduPlane flights with APM2

IMG_20111204_110227.jpgI've been working on the ArduPlane code for the new APM2 boards for a while now, so I was delighted to watch it loitering above my local flying field today for the first time. I'd flown it once before two weeks ago, but that was a very short flight as I had the aileron controls reversed (I don't have much experience with elevon planes!), so it was quite tricky to steer. It 'landed' in a tree that time. I also had no telemetry for that flight as we hadn't yet worked out the MUX switching needed for the telemetry UART in the APM2.

Pat and I fixed the MUX switching problem last weekend, so this weekend was my first chance to fly APM2 with a ground station and full telemetry. The weekend started off with an interesting problem. I took it out to the field yesterday and got it ready to fly, then waited for GPS lock. It takes a while to get GPS lock in Canberra, so I was waiting a few minutes. As soon as it got GPS locked I was surprised when the ground station reported that the board was rebooting! Time to take it back home for more bench testing.

added a patch that faked up GPS lock after a specified period of time, which allowed me to reproduce the bug on my bench, and after a couple of hours of false starts I finally found and fixed the bug this morning. Time to flight test it!

Since I'd last flown my SkyFun (with an APM1 board) I had replaced the hinges, put in a bigger motor and a new ESC, so I was expecting the tuning to be a bit off. It sure was! I only switched to manual once in the flight and it dived hard - it looks like my CoG is a bit off with the new setup. I did the rest of the flight with the APM2 stabiliser enabled, letting the code take care of the trim. It's easy to get lazy with trim when you have an autopilot :-)

I did two flights today, of about 10 minutes each. It can probably fly for 20 minutes or more, but I don't have a current sensor fitted, so I didn't want to push it. In both flights I did a few minutes of LOITER, which is a good test that everything is working well in the code, as it needs all the sensors and logic to be working to keep it going around in circles in one place.

loiter.jpg

As you can see, the LOITER went perfectly, despite quite a strong wind and poor tuning.

The APM2 really is a great board, and the smaller size makes it perfect for little foam planes. I also like the fact that the inputs and outputs are at opposite ends of the board, making wiring neater.

Of course, best of all, the APM2 can fly!

Read more…

This week I'd like to announce the Nova - a scratch built RC airplane with a specific focus on carrying FPV and AP gear. This episode (while a little boring) details the design specifications and functions of the various sections of the airplane. A few key qualities/improvements over the GeekStar:

-Large interior (2.25in x 4.5in x 14in = 141 cubic inches, over 6 times larger than my GeekStar)
-Larger Tail Section (increased control for larger payload)
-Longer Tail Section (increase control authority over payload)
-Larger Control Surfaces
-Ailerons
-Taller fuselage to supper a 8x4 prop
-Reduced angle of incidence (to 3 degrees) of both motor and wing
-Top mounted wing (allow for various wing types/sizes)
-Large area directly under CG point for heavy gear
-Canopy covered with clear plastic to allow a good view for FPV gear while not reducing aerodynamics
-Tons of other small improvements in the build process for a stronger, lighter, higher quality build. 

Equipment Used:

Estimated Stats:
Weight: 26oz
Thrust: 21oz
Wing Area: 3.33 square feet
Wing Loading: 7.8 oz per sq ft

Will be building over the next 1 - 2 weeks...

I'll be posting these plans on MyGeekShow.com in a few weeks after it's maiden flight (I want to make sure I've got the CG point properly located, etc.).

What do you think? Anything I'm missing?
Read more…
Developer

Here a video of a new serie of tests of my quadcopter (QRO) during a full autonomous flight in RTL and LOITER mode (GPS position Hold)  with the firmware Arducopter v2.0.54 + stability patch. The altitude is only locked by a barometric pressure (no sonar and no optical flow sensor).

The quadcopter autonomous flight is really stable and safe, the Jason' stability patch on the firmware arducopter v2.0.54 is a great improvement.

Wind: W-N-W at 13 km/h

3689435250?profile=original

Avionic setup:
 - Ardupilot Mega (Atmega 2560 @16 MHz), 32 Mips
 - Full 9DOF IMU,
 - Built-in 16 MB Data Logger,
 - Airspeed and absolute pressure sensors (Bosh),
 - triple axis magnetometer HMC5843,
 - 10Hz Mediatek GPS.
 - firmware Arducopter V2.0.54 (original version + stability patch)

 - Receiver: Turnigy 9X8C v2
 - Transmitter: Turnigy 9x
 - uBec 5V @ 5A Turnigy

Hardware Setup:
- four brushless motors RC Timer BC-2836/11 (750 KV)
- two CW propellers  12 x 4.5
- two CCW propellers 12 x 4.5
- fours ESC 40A RC Timer speed controllers
- one Lipo battery 3S Turnigy Nano-Tech 2200 mAh

- Take Off Weight (TOW): 988 g without payload

- Flight time: about 10 min

3689435471?profile=original

more infos at:http://diydrones.com/profile/JeanLouisNaudin


Read more…