Many have been asking for this belly protection for the Skywalker platform. Finally we decided to make this in big numbers so it can be available for the people who ask for it. It's made in glass fiber and only weight 55 g.
All Posts (14048)
Sort by
Patrick Egan has recently made a freedom of information (FOIA) request to the FAA to find out who sat on the last committee that met to make rules for flight in the NAS in the USA.
It makes for interesting reading and should be of some concern if you are planning on commercial flight ops any time soon.
 I am beginning to think that the genie might be out the bottle on this one and the process is so slow that many many people have just started anyway but it seems that its only big business that gets a say and the AMA as we had previously said was not at the table.
Patricks request and article is here http://www.suasnews.com/2011/11/10245/uas-arc-2-0/
Whats needed to satisfy the FAA are community based standards.
Having been sat in a country where rules have been proposed and adopted and commercial flight in the UK NAS is happening I can't help but wonder why its not so simple there.
Thank you Jason and everyone else in the ardu team for the great job done in this project!!
I've finally got Hexa to work, the setup is as follows (v2.0.49):Jdrone frame Hexa, Jdrone engine 880, jdrone 30 amp esc, 10x3, 8 prop, 2x4s lipo main batteri(6000 to 10,000 ma), Spektrum DX8 with telemetri, 2xcastlec becs connected to two blocking diodes one of the becs have his own 2s lipo to keeping the voltage stable if the main battery is overloaded. I have worked extensively with the sonar "alt hold" but now it works perfectly. Looks like sonar does not have to stand close to the iron/aluminum because it produces disturbance to the barometer, among other things. I measured the voltage to 4.6 V from apm to sonar, apm is powered with 5.1 v. I have now taken power directly from the 5v bec to sonar with a shielded cable, have also made a low pass filter on this line. Sonar signal goes from apm to the sonar with its own shielded cable grounded in sonar outlet. I have flown several battery packs now and "alt hold" works very well, it follows the ground smoothly, no surprises there. Loiter is also 100%, it is rock solid. If the weather is good tomorrow I'll try waypoint and rtl because I have such good faith in the hexa now. I put some pictures, log and pids. Has almost no adjustment on the pids than the original. If someone is good to read the logs, I would appreciate feedback. I think "alt hold" and "altbaro" looks a little noisy, but everything works very well in the air. The Drone pulled to the left in the beginning, but I moved the batteries to the right, Then CG was good so it hover completely still. Maybe I test RTL and AUTO to morrow if weather is good. I forgot to say that the sonar is coated with silkon. I have also tryed wrapped the sonar with aluminium foil and groundet it, but it makes lots more noise. 1,5 degree outside when flying.
Best regards
Arnt-Inge
Hello,
I've just built our arducopter named "Mugen" and so I can share a little timelapse video showing the building process...
Next step will be in fact to learn how to flight properly the arducopter and use the different modes...
Then, later, it'll get some FPV upgrade!
Nicolas.
Here's my quad copter flying with my 1.7 kg 3/4" plywood bench testing jig designed to prevent it from flying.
I was in the backyard yesterday testing my failsafe settings and decided to give it some throttle, much to my surprise it actually lifted off. I'll have to try lifting something in the near future... and I'll have to clamp the test jig down from now on.
(Yes, I am concerned about prop safety and the motors are not powered up most of the time. The test jig is for those rainy days when I want to power up the ESCs and not launch into the rafters).
This week I did testing on my scratch built clark y airfoil to compare it to the Easy Star's wing.
The new wing:
-Generated more lift, and consequently more drag.
-Required an increase in rudder size and throw to get the proper control
-Could carry more weight while maintaining good flight characteristics
-Flew slower and more stable
-Was less prone to tip stall
-Was more active in correcting when experiencing rudder roll
-Used less energy to maintain flight
Next week I'll announce and detail my next airplane!
Check out Shapesmith, a brower-based open source parametric modeling program created by DIY Drones member Benjamin Nortier. As explains in this MakerBot interview, he created it to design UAV parts!
Excerpt:
I’m a software developer with an Engineering background and I’m also a 3D printing enthusiast. Shapesmith is a browser-based 3D modeling tool that I’ve been working on, and am very excited about. It is aimed at users who want to create high-quality parametric models for 3D printing, but who don’t want to spend thousands of dollars on expensive 3D CAD software.
I wanted to design an Unmanned Aerial Vehicle (UAV) after being inspired by DIY Drones. I realised that it would be very attractive to 3D print aeroplane parts and I was using tools like Blender and Sketchup to design some airfoils or wings.
Catagory: Fixed Wing- 125cm Flying Wing
Total Time: 1:40.
This is the 3rd or 4th time I've flown my wing with the APM. (And my first experience flying with the APM.) Tuning is still in progress, but I've been very impressed with the system thus far. The stock PID gains have worked pretty well. For the run entered here, the speed was set to 12 m/s.
KML: CarlsonT3.kml
Want the CAD Models and Drawings for this plane? This page has the details: SC-UAV
Hi DiyDrone,
my name is Piotr. I live in Poland. I was born 36 years ago... Since 21 years I'm designing various devices.

Currently I work as a team leader and project manager in the RCConcept Flying Technology:
For two years, our team is working on a flying multicopter platforms. All platforms are called the HORNET:
 My favorite platform is the Hornet-X4S-XS:

Below a picture with me and my first triHORNET:

A few days ago I received a package from the diydrones store. I'll build a test hexaHORNET of the following elements:
- Flight Controller: ArduCopter APM
- Frame: RCConcept Hornet-S6L-AHS10180
- Flight Controller: ArduCopter APM
- Frame: RCConcept Hornet-S6L-AHS10180
- Landing gear: RCConcept HLG220
- ESC: RCConcept easyESCU30A
- BL Motor: EMAX GT2215/12
- BL Motor: EMAX GT2215/12
- Propellers: APC 10x4.7
If all goes according to plan at the end of next week HEXOhornetAPM will fly. I will share with you my impressions of the flight. I wonder how the APM module will work with our electronic speed controllers easyESCU:


I know that English is not my forte, but I tried to write correctly what I mean. More info (for example: who is my wife, how many children I've) can be found in the section "About Me" ;-).
If you've read to the end my post thank you very much ;-).
Yours Sincerely,
Piotr Kleczynski
I look on myself! Drones flying everywhere...
A very interesting architecture web site has a short blurb on a sculpture that will be assembled by quad copters.
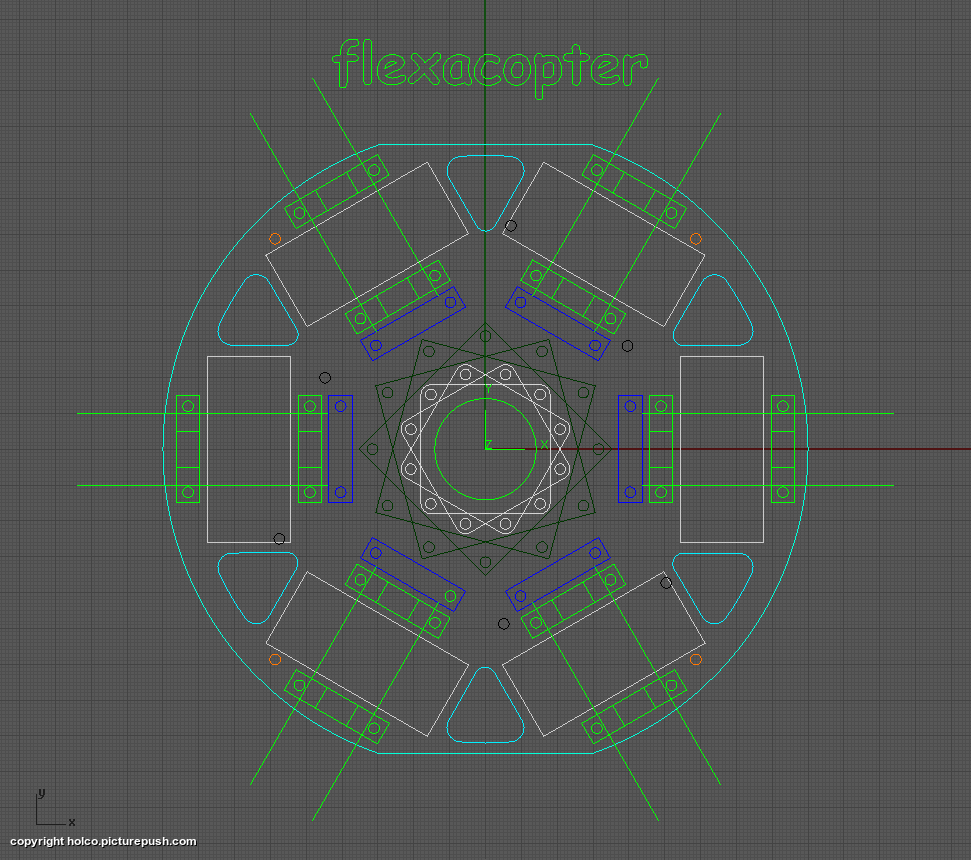
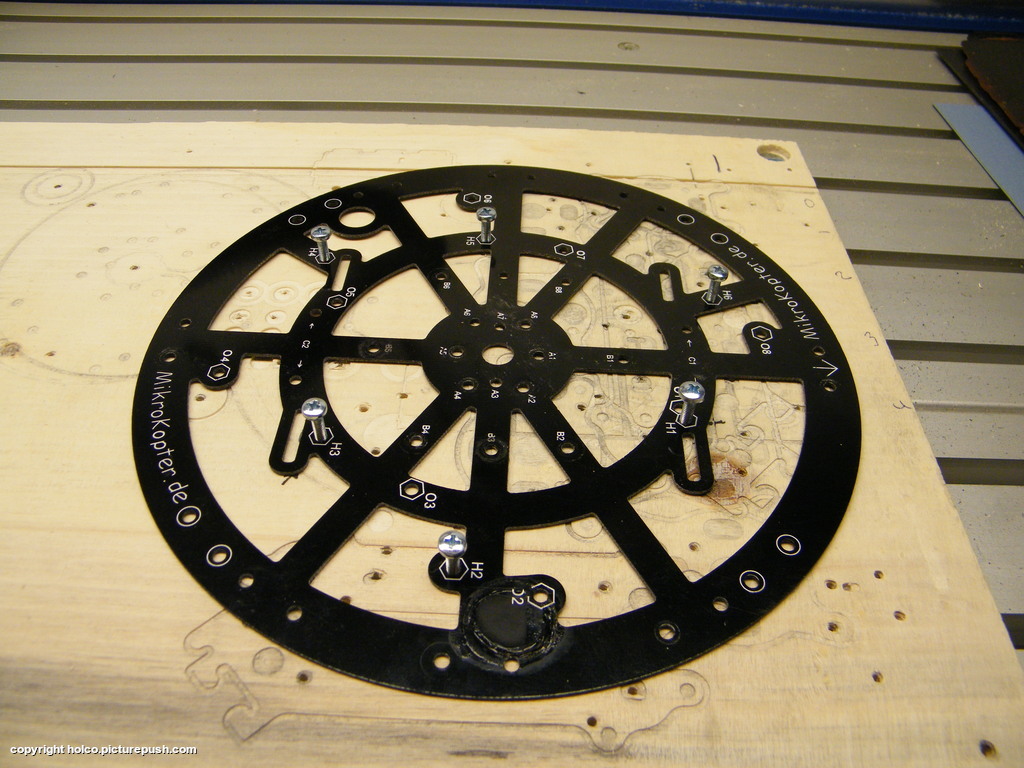
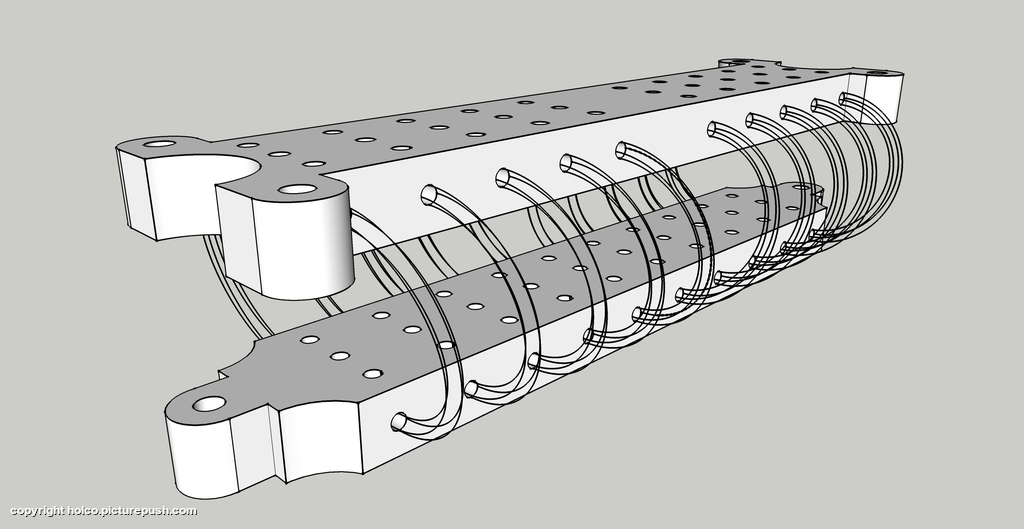
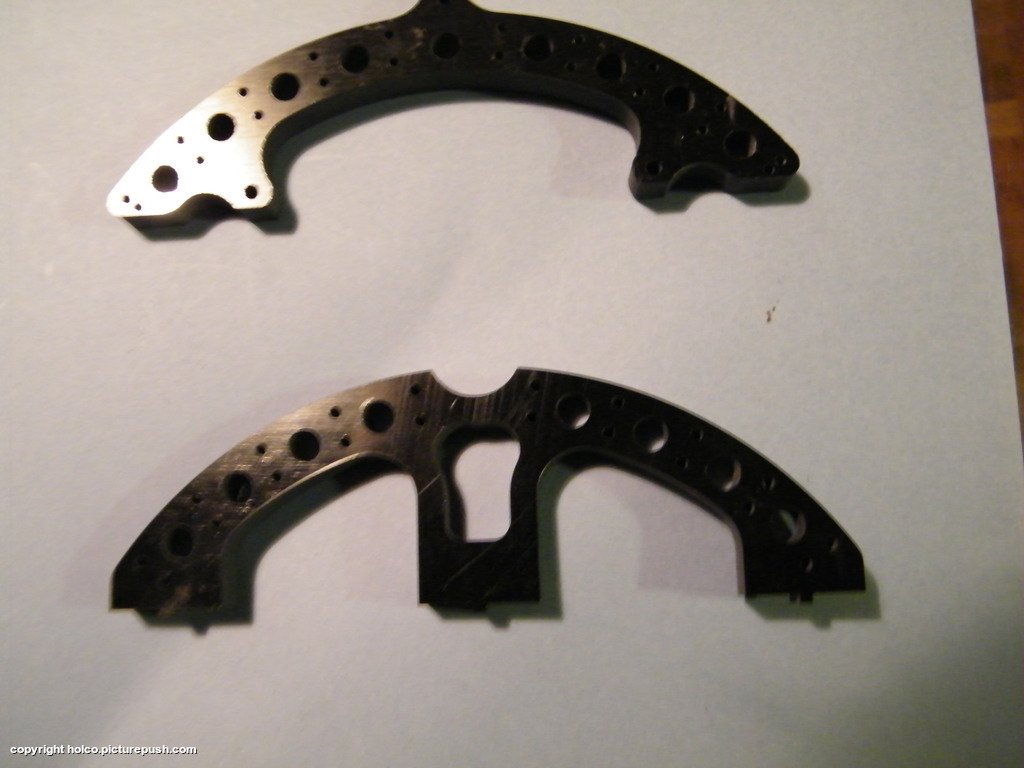
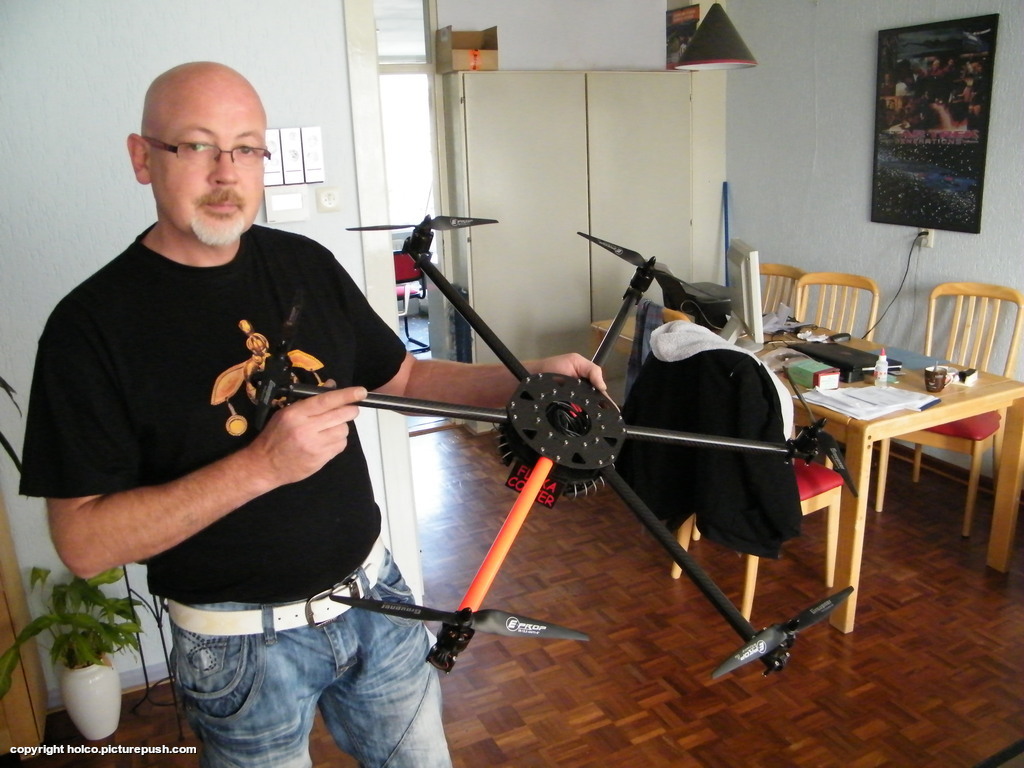
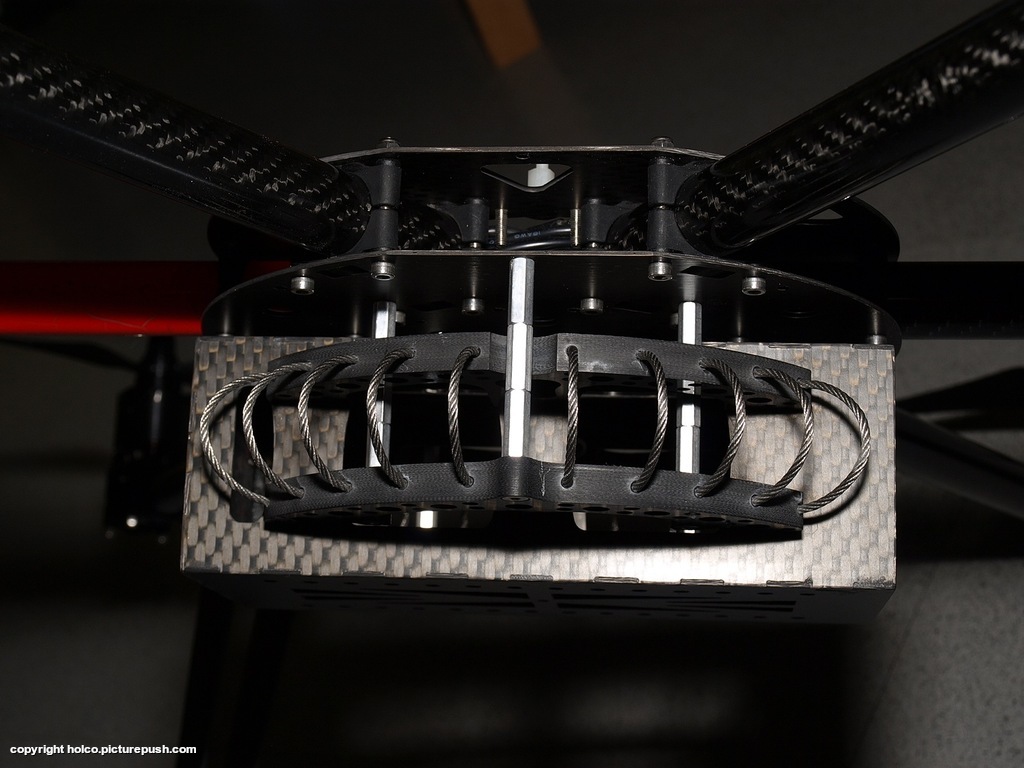
After creating the Arduspyder. We decided to create a real hexa. These are pictures of the making, maiden will be this weekend. Because of the purpose this frame is build for we sadly did not opt for an Arducopter but the frame will take an Ardu, Openpilot CC, Microkopter or any other hexa capable electronics.
The baseplate design in Rhinoceros
Finding the stupid MK BL-controller holes.
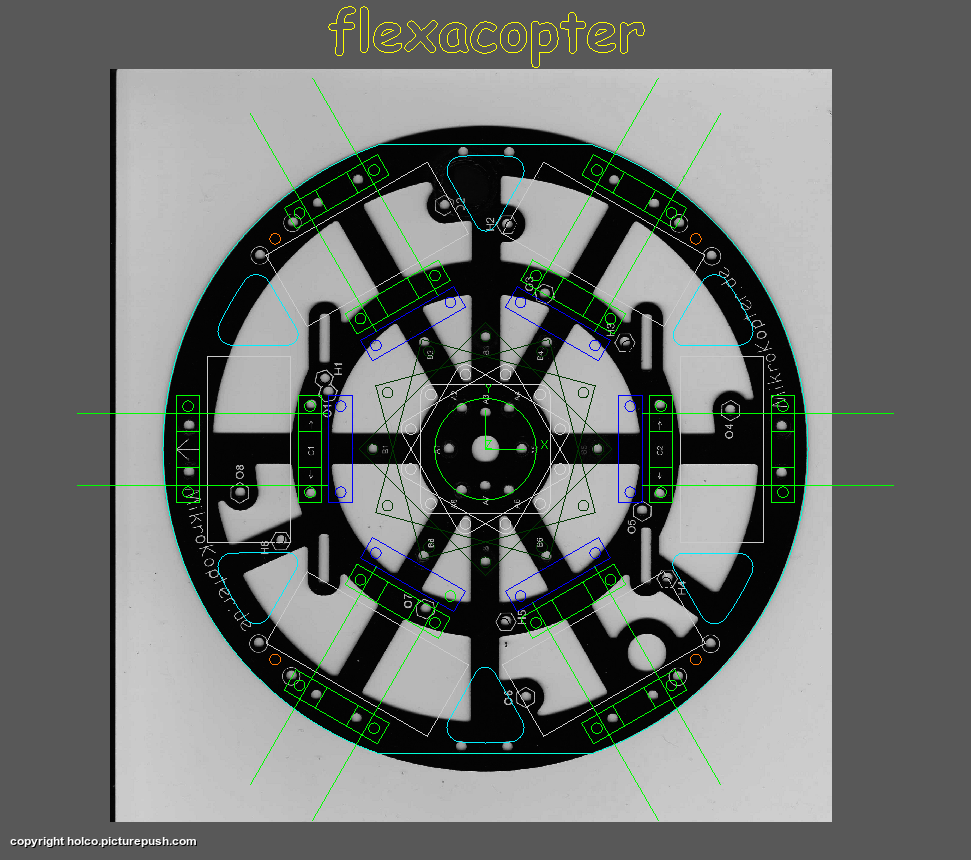
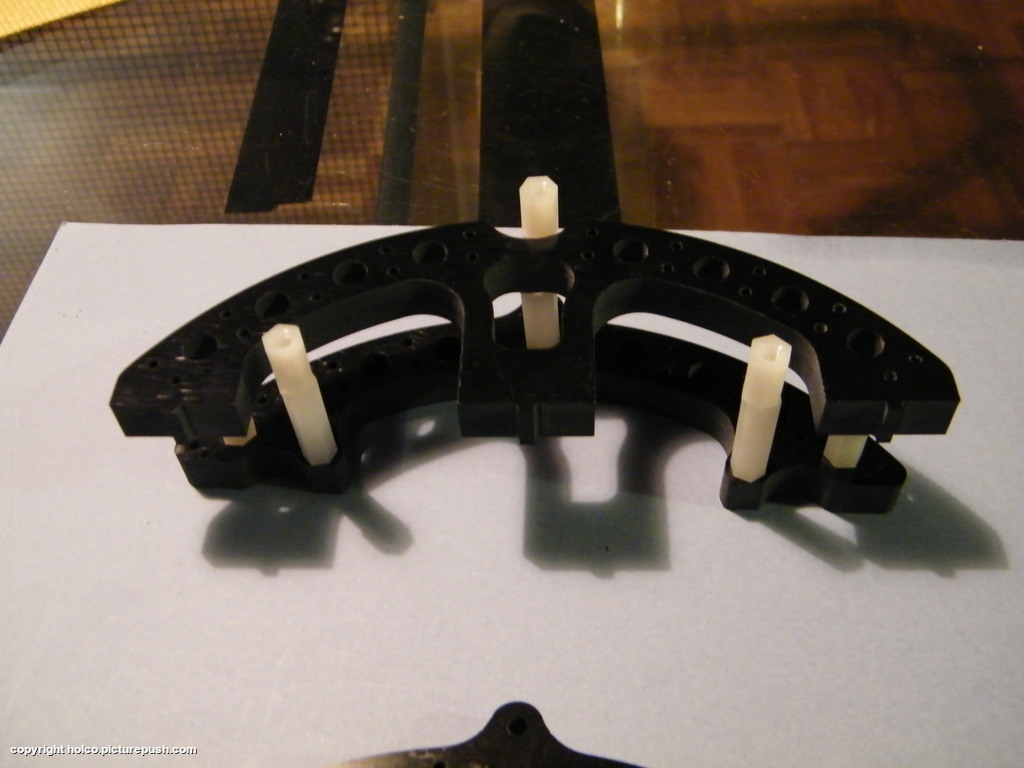
Testfitting the holes
Testrun upper plate. 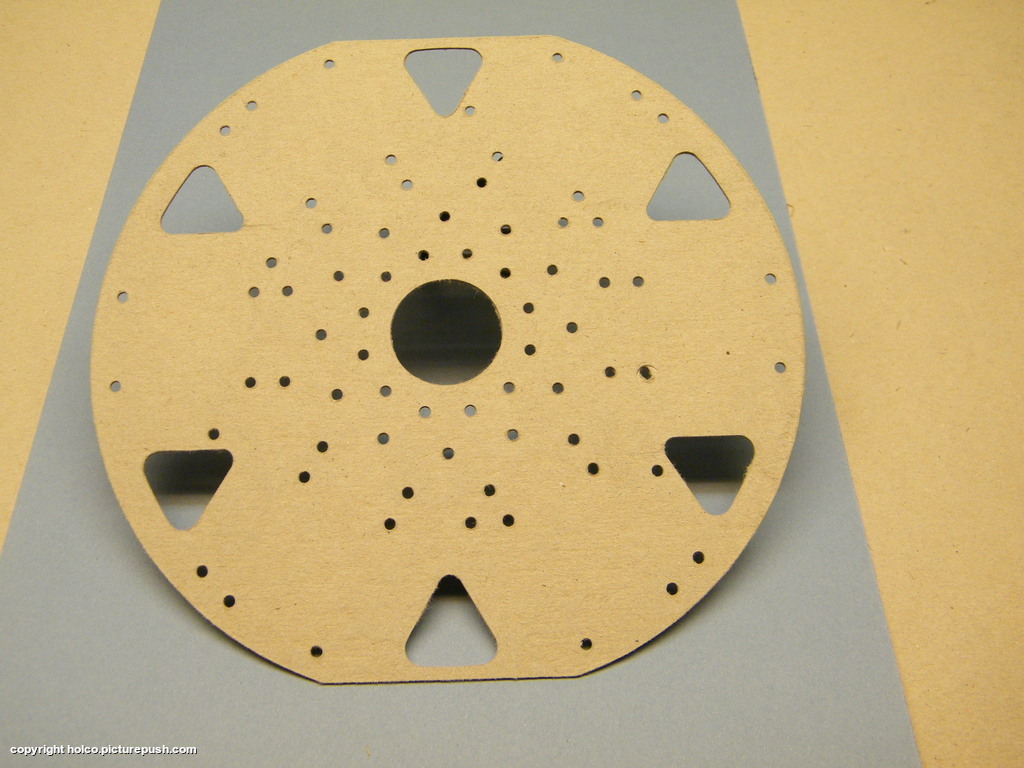
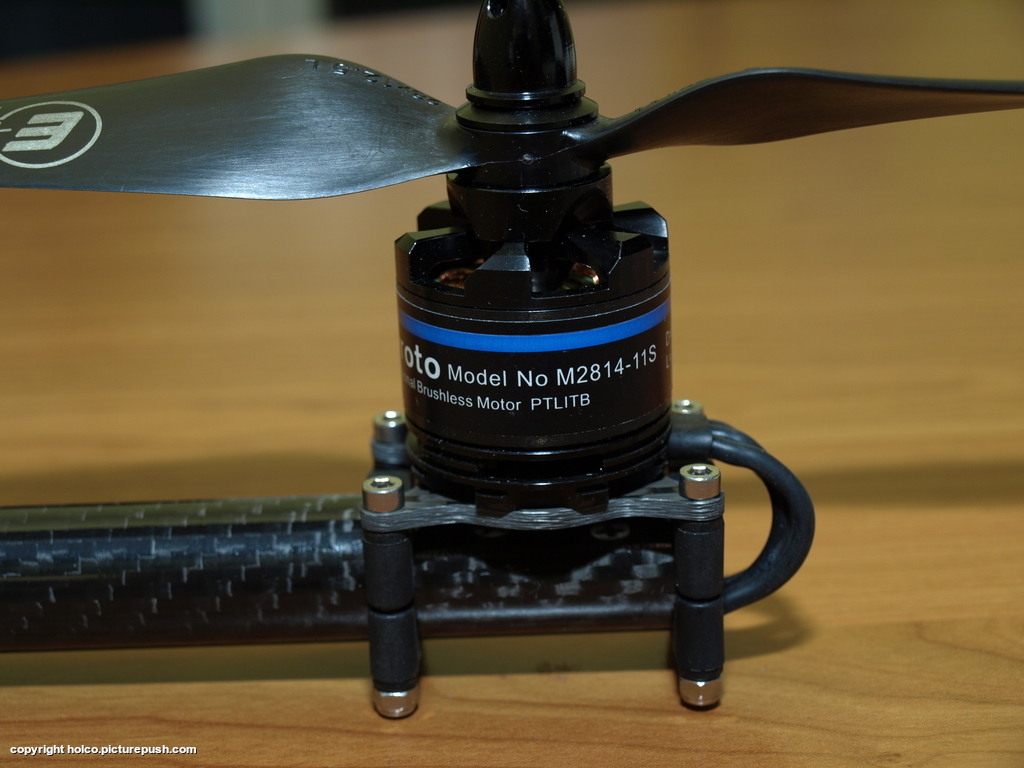
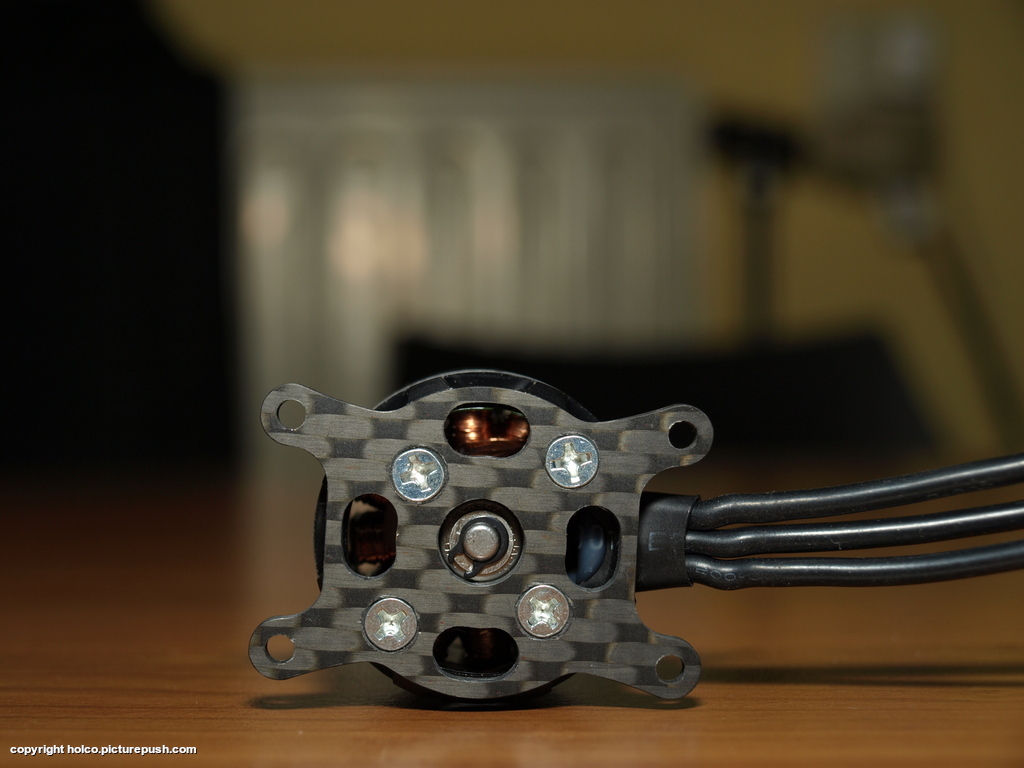
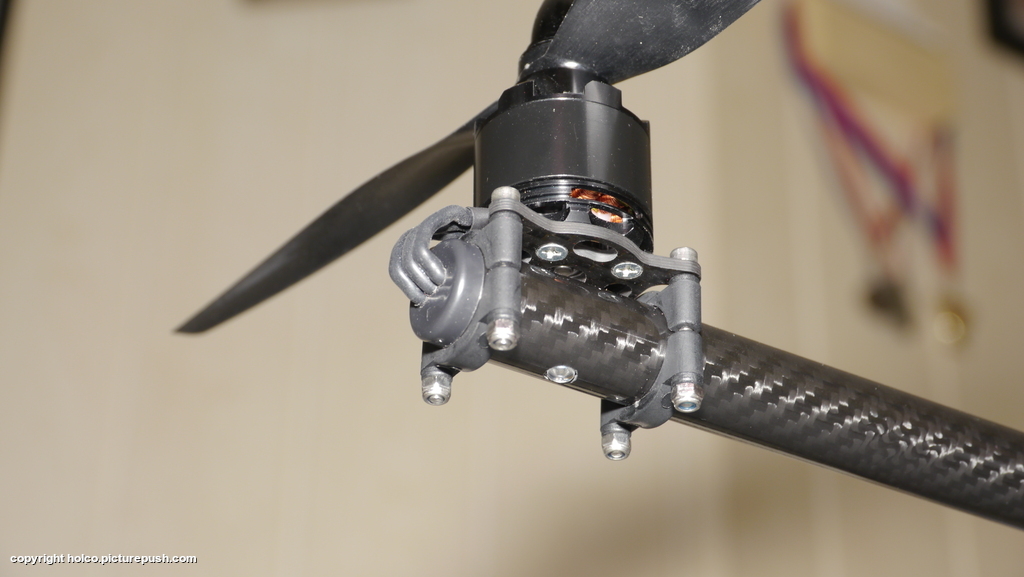
Routing the motormounts.

Video
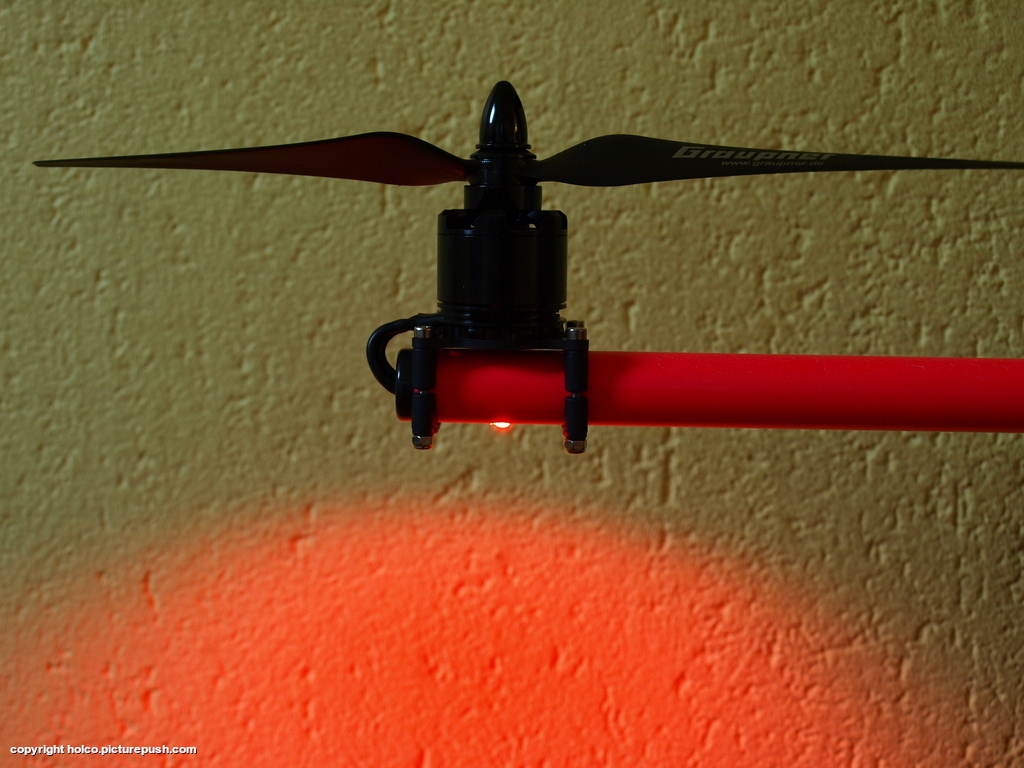
Mounted motor.
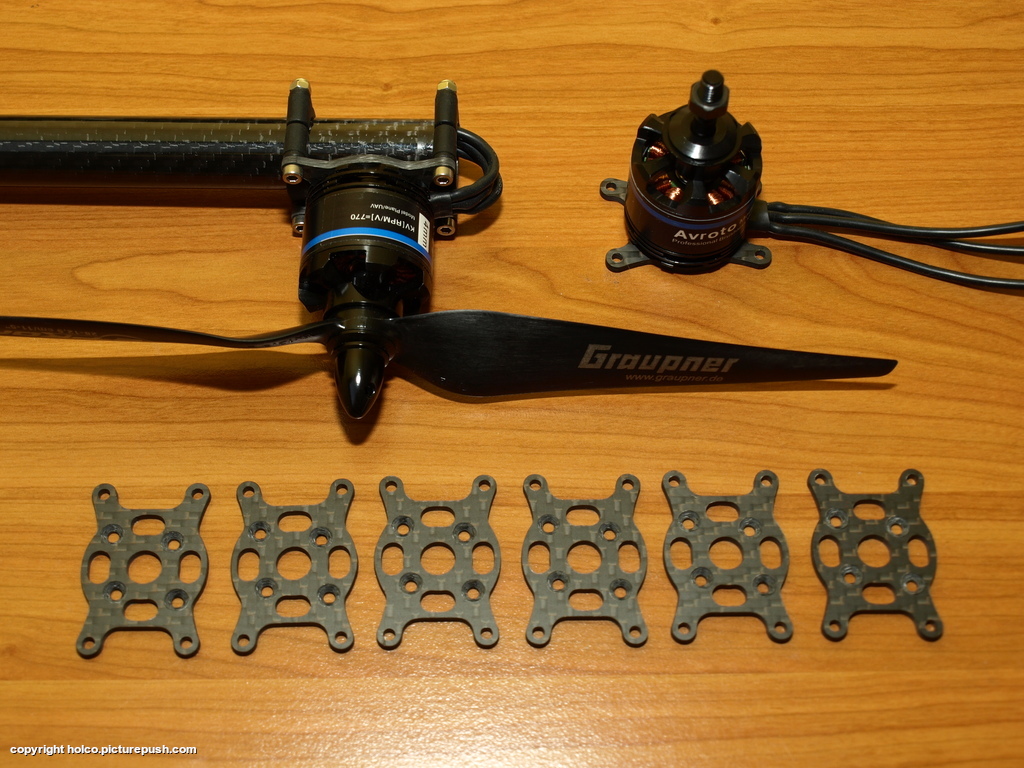
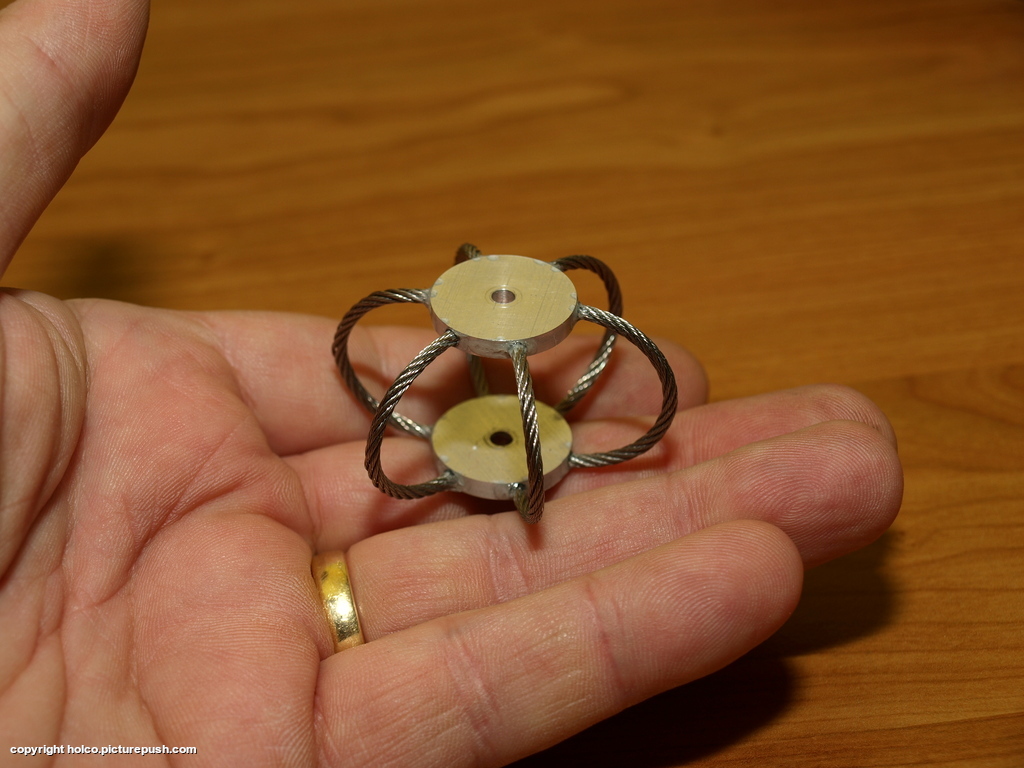
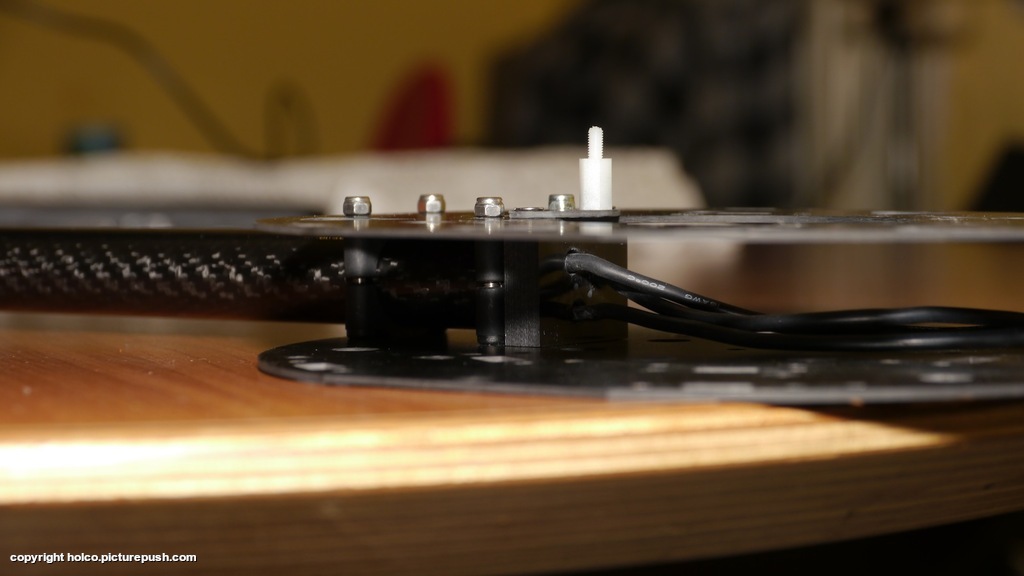
Proto wiredamper.
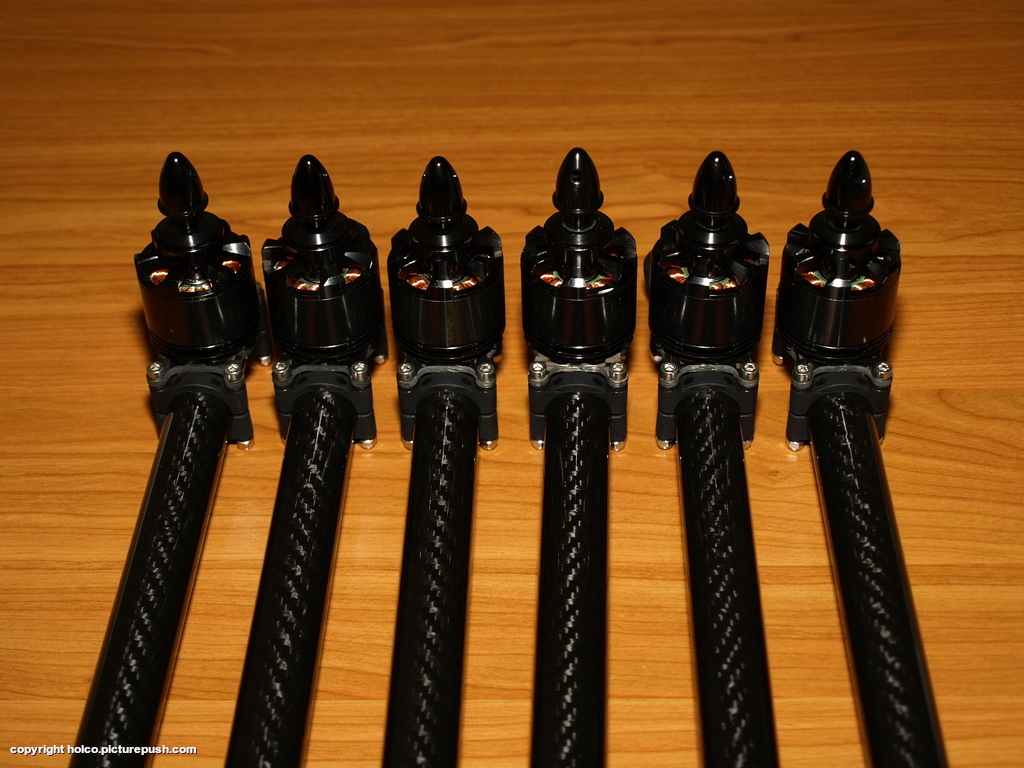
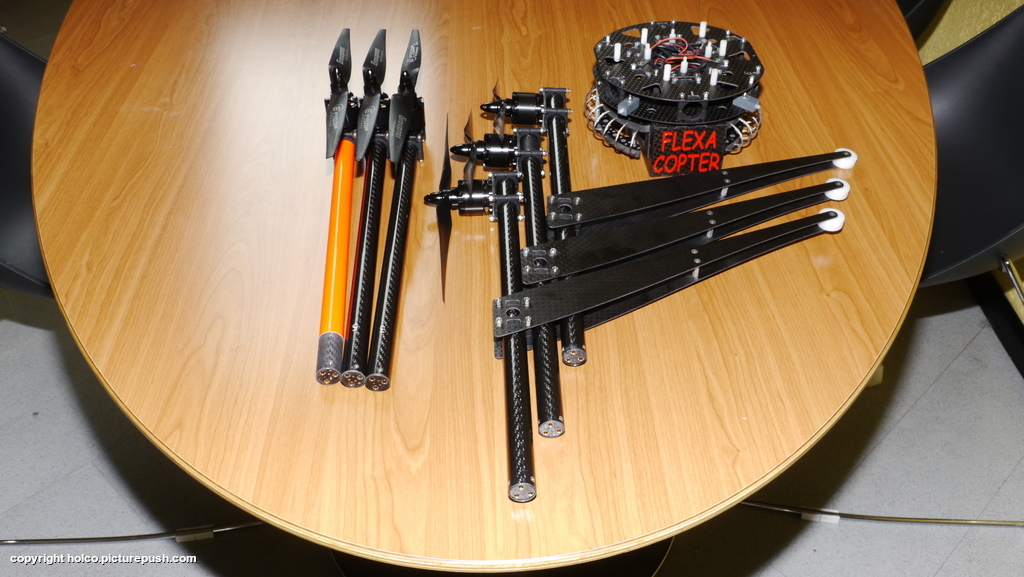
6 booms & motors
First mockup
Wiredamper study.
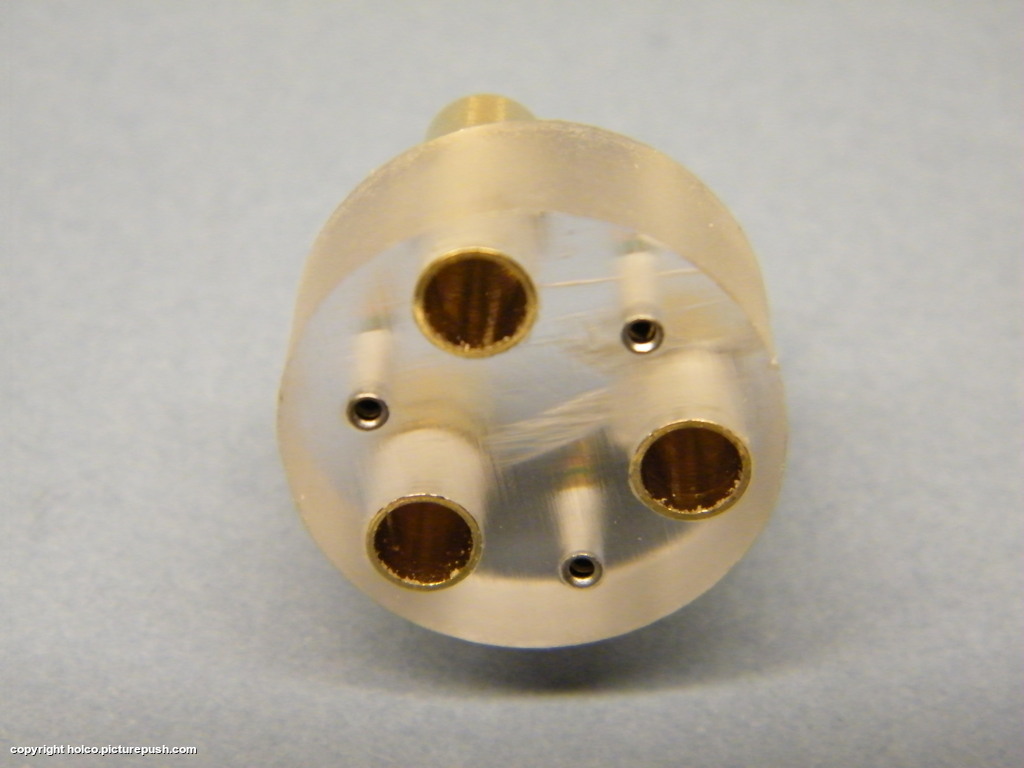
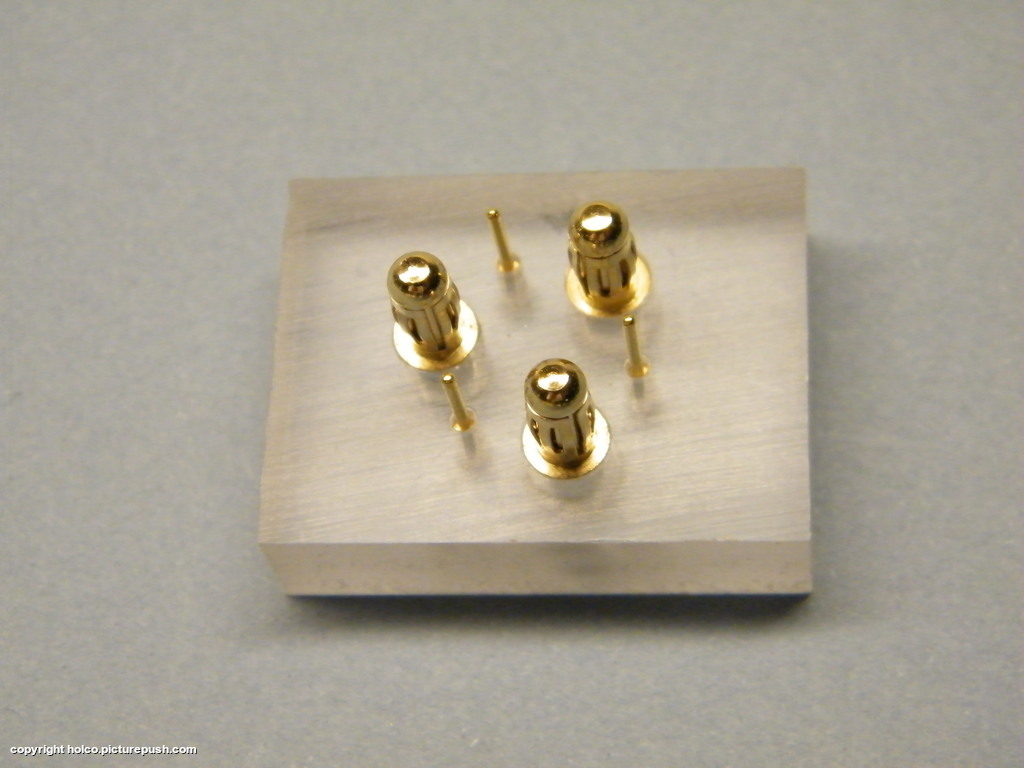
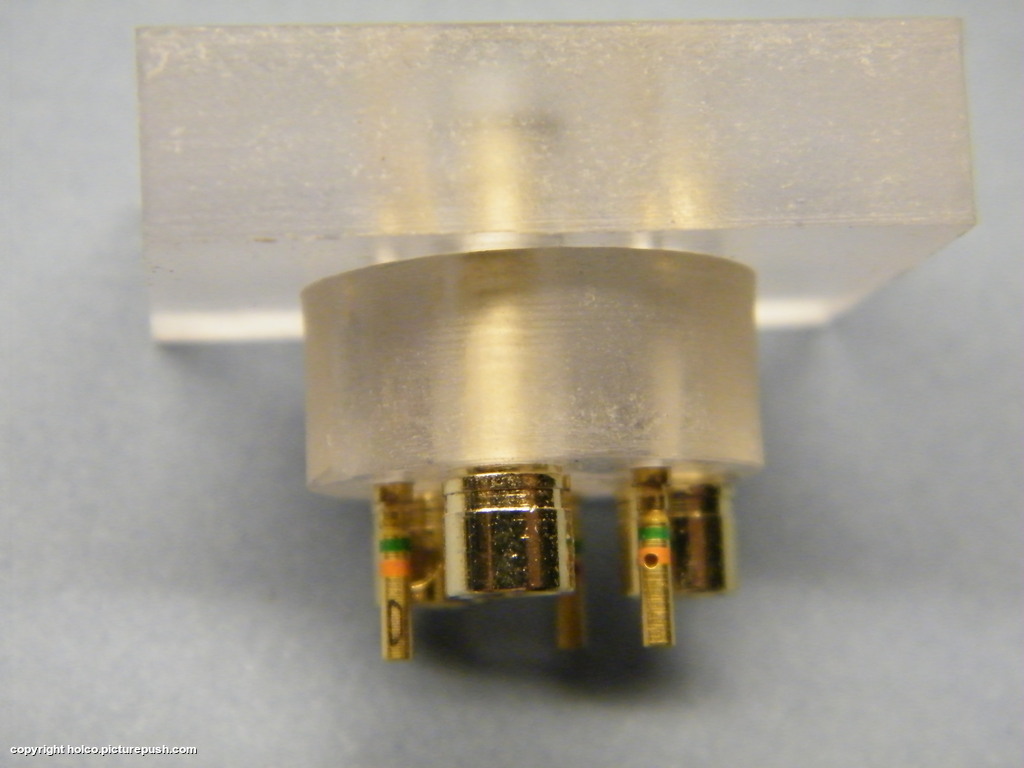
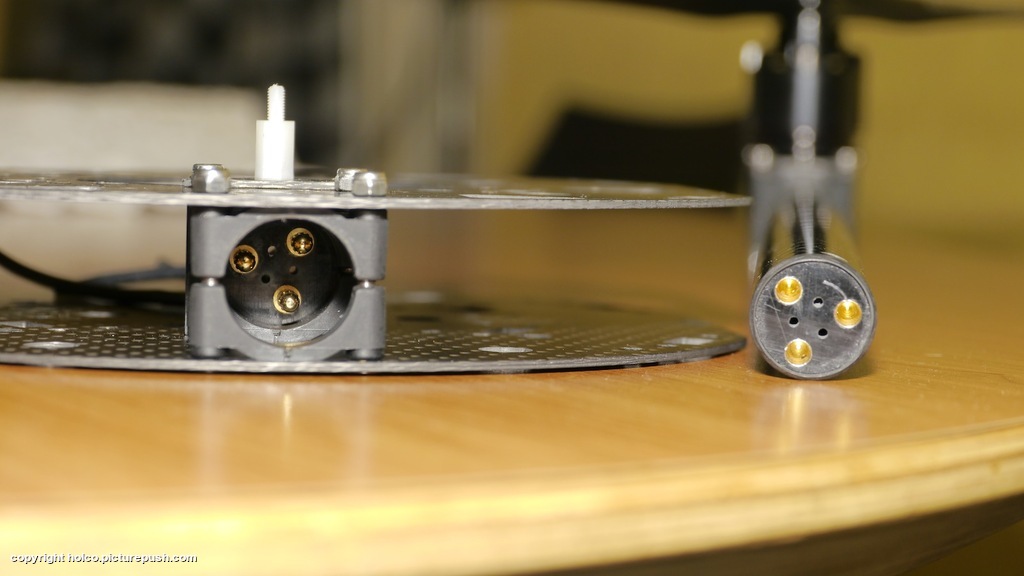
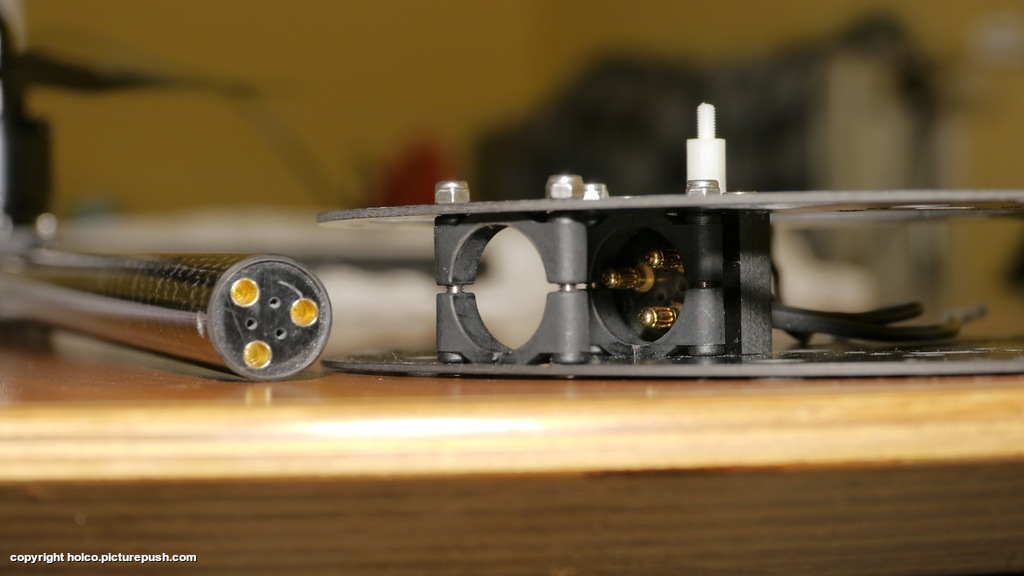
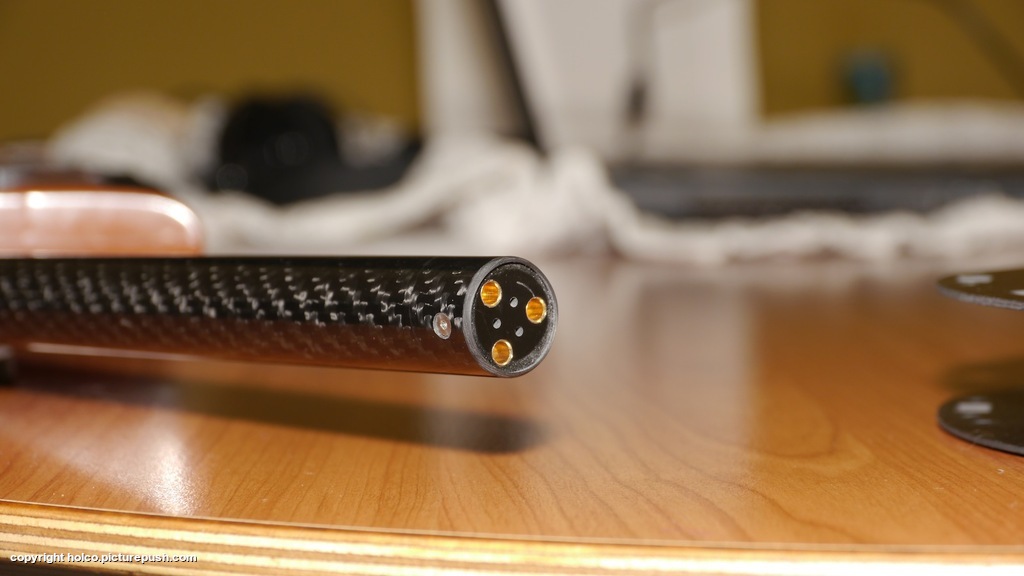
Easy on - off connectors tryout.
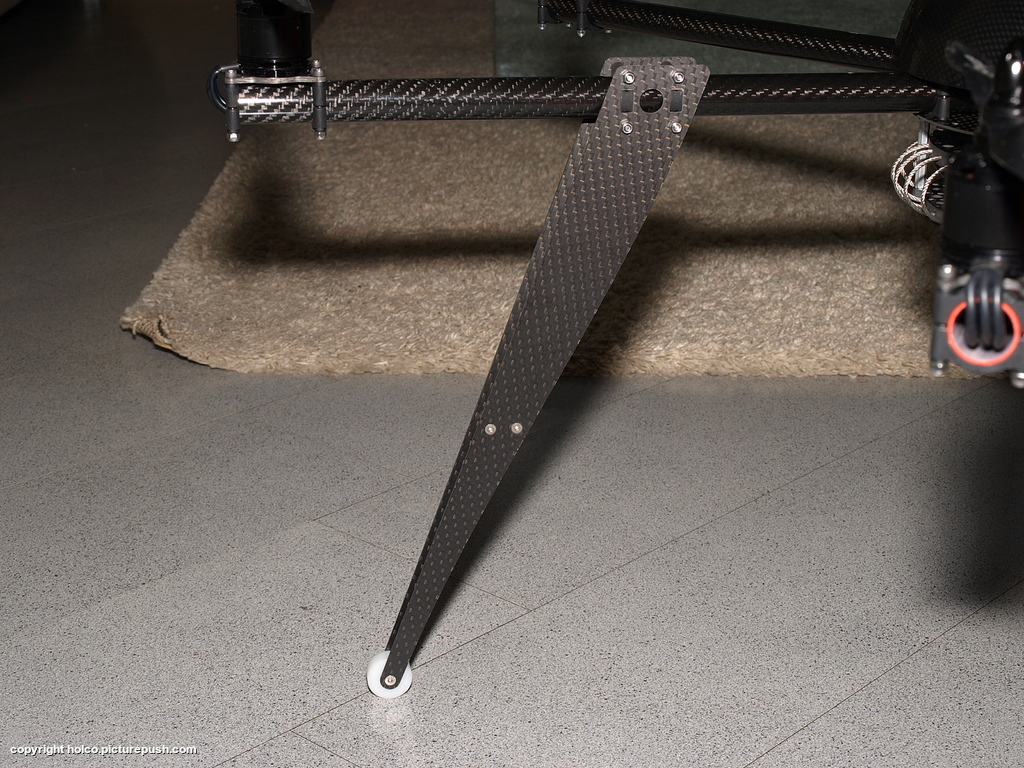
Final wirde dampers.
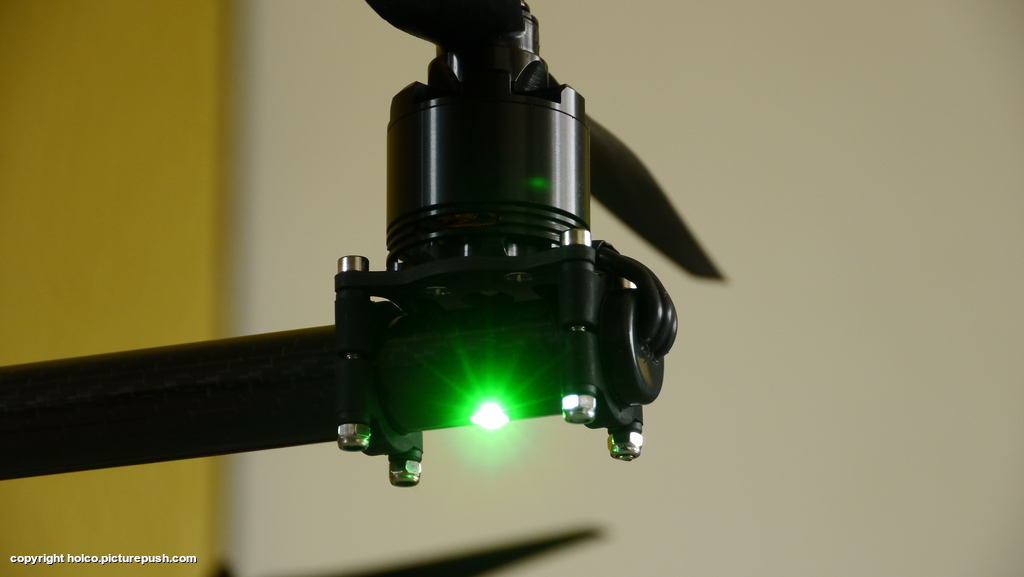
Buildin LED's
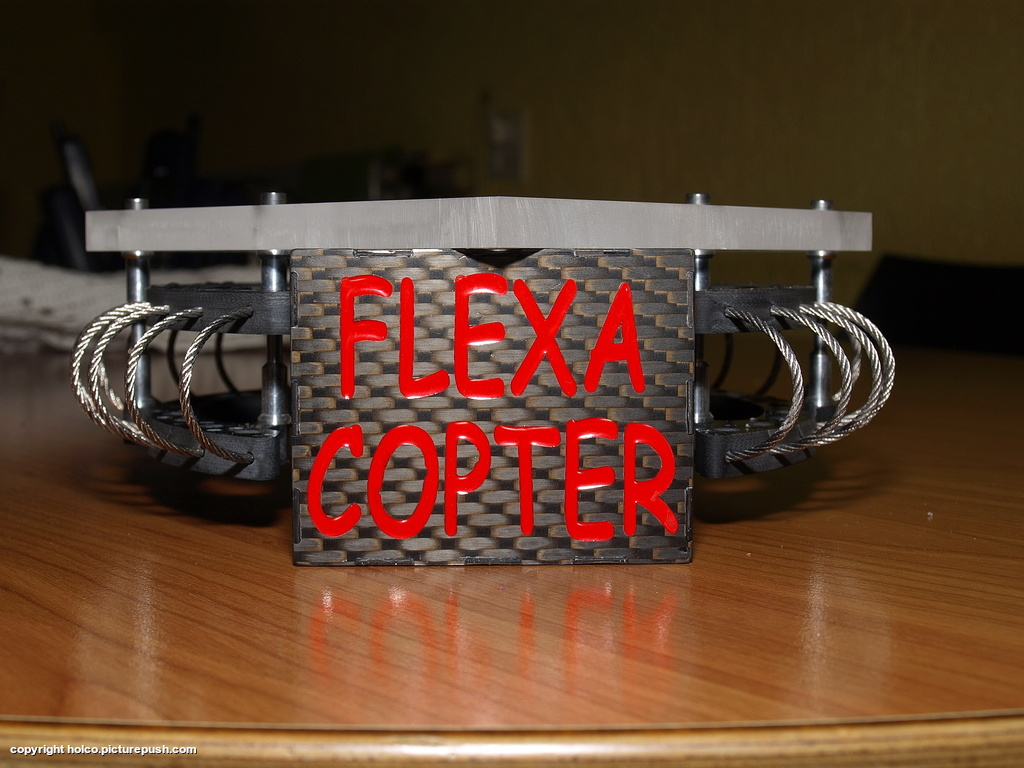
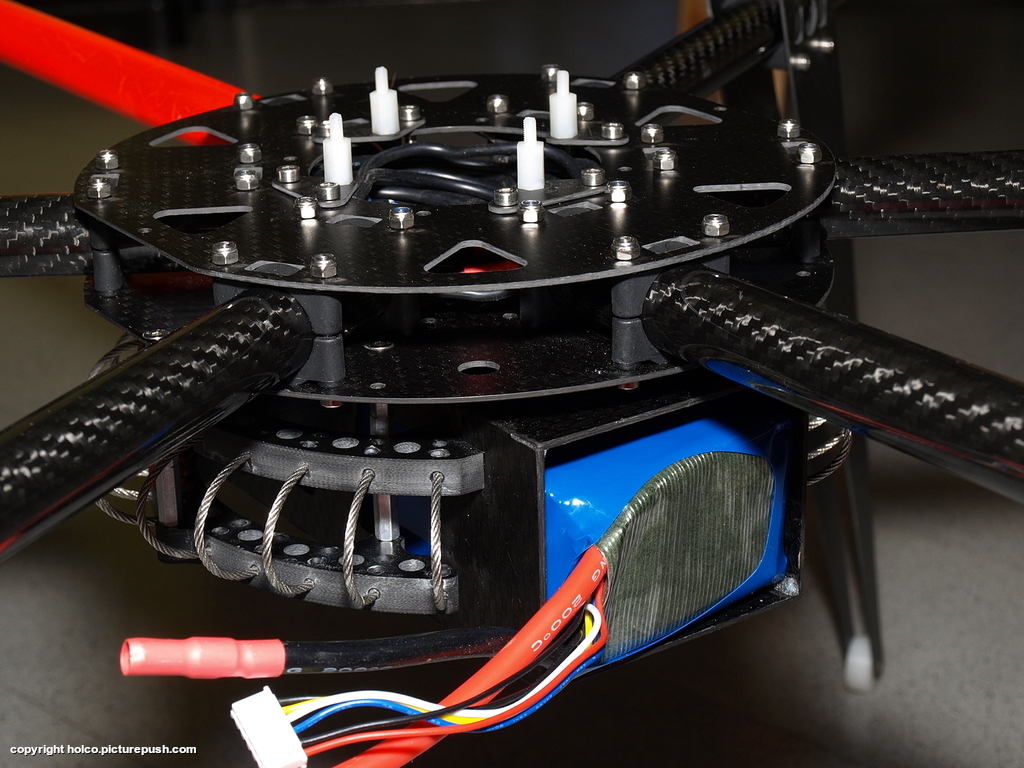
Batterybox with integrated damper.
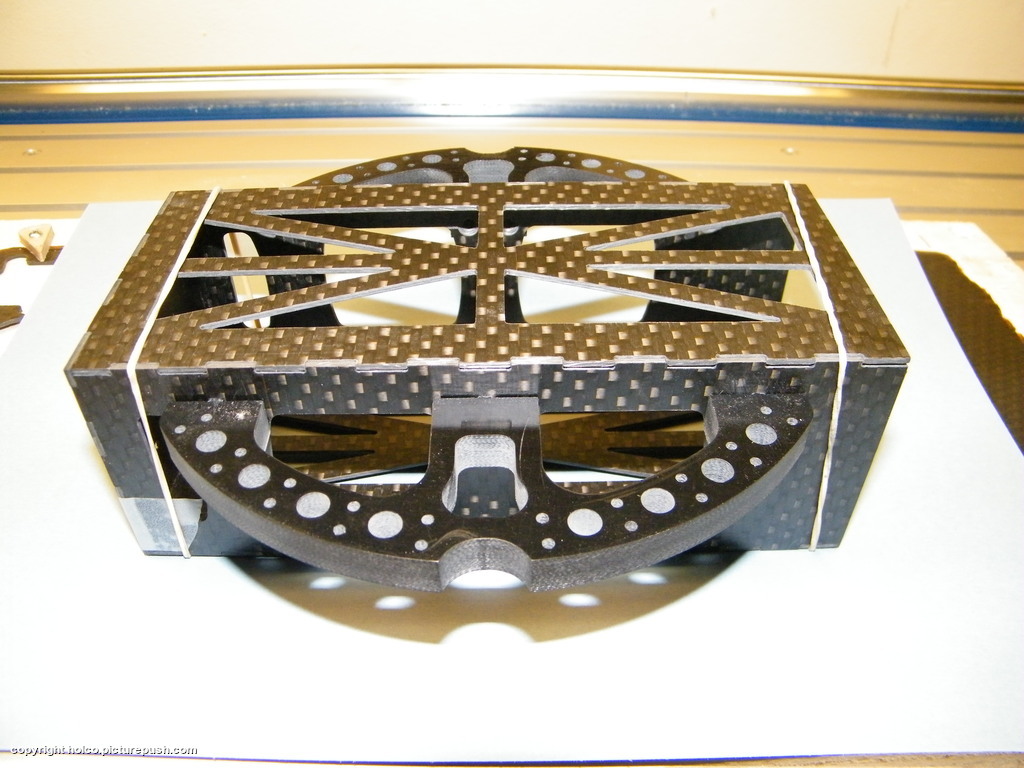
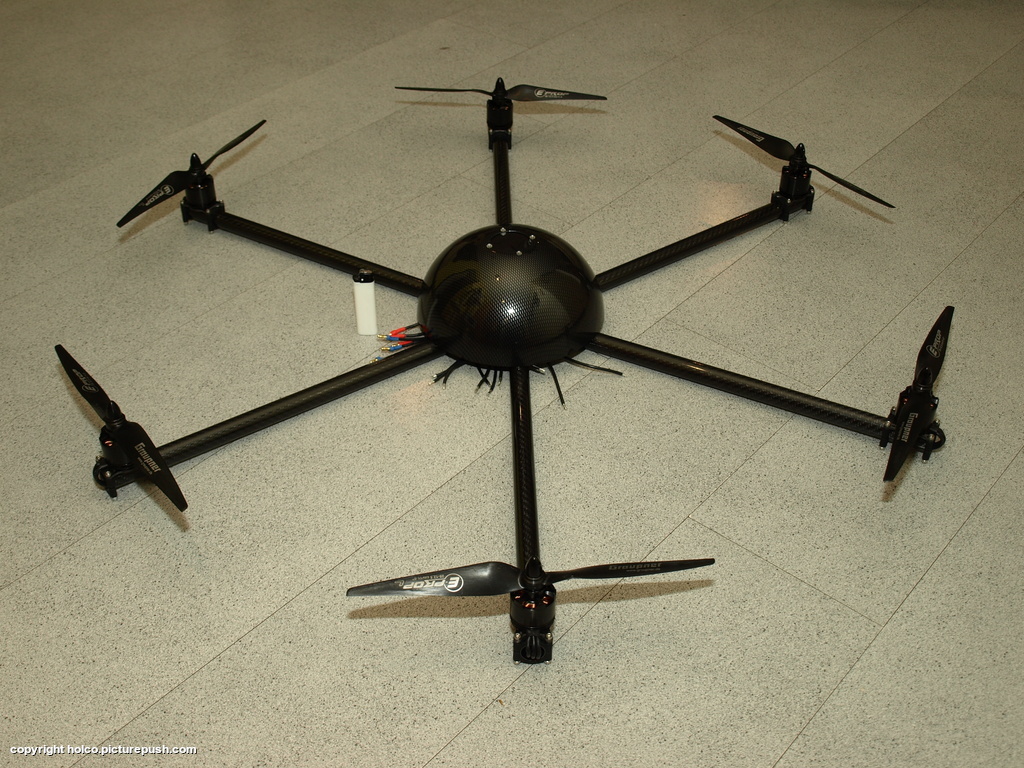
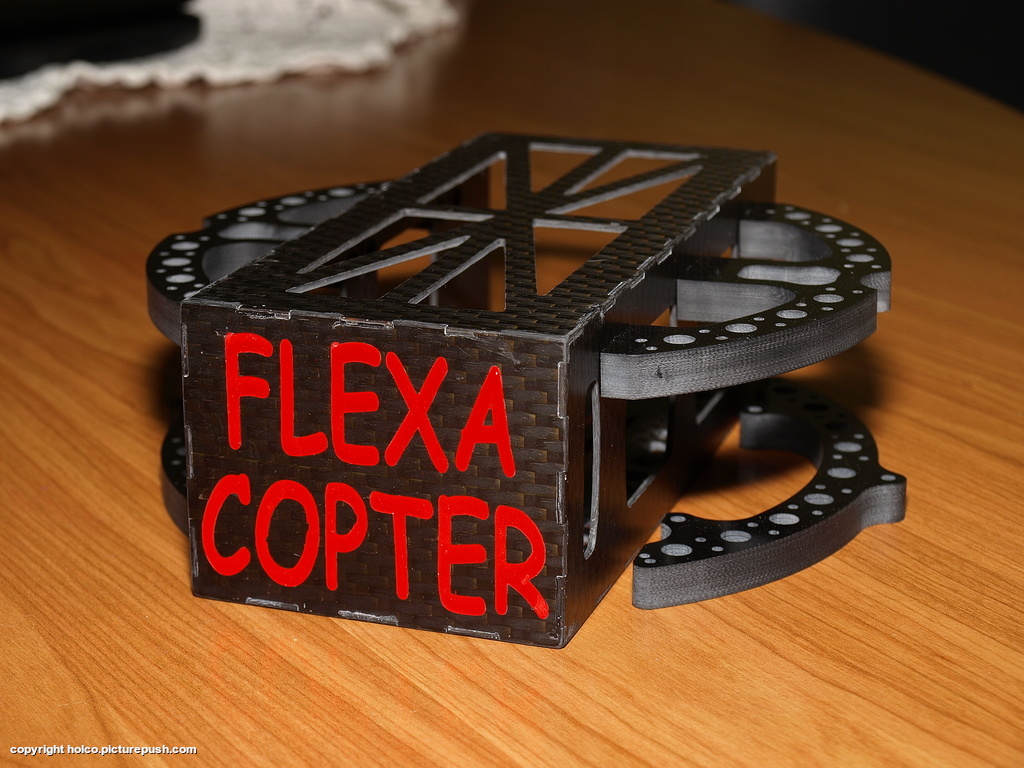
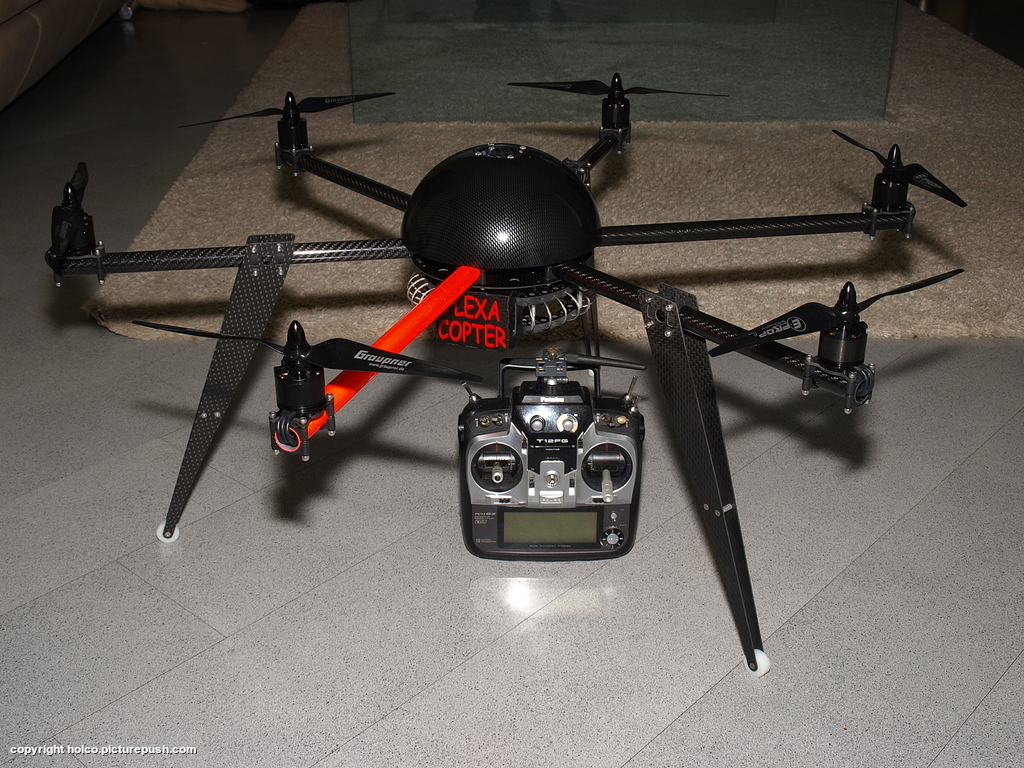
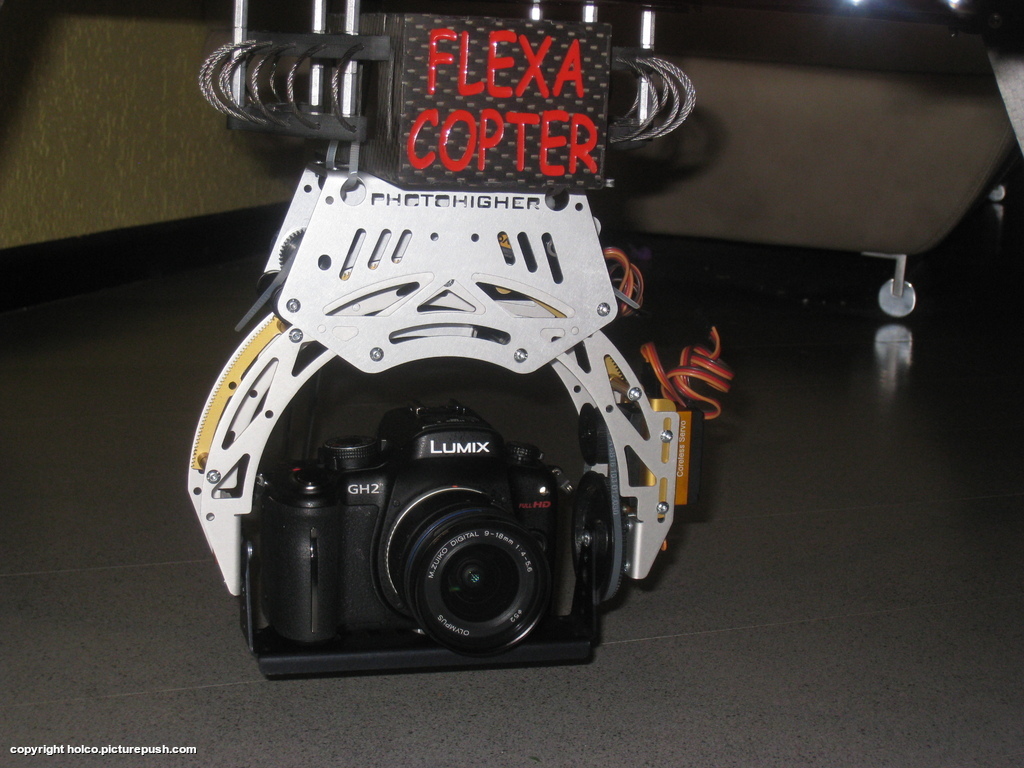
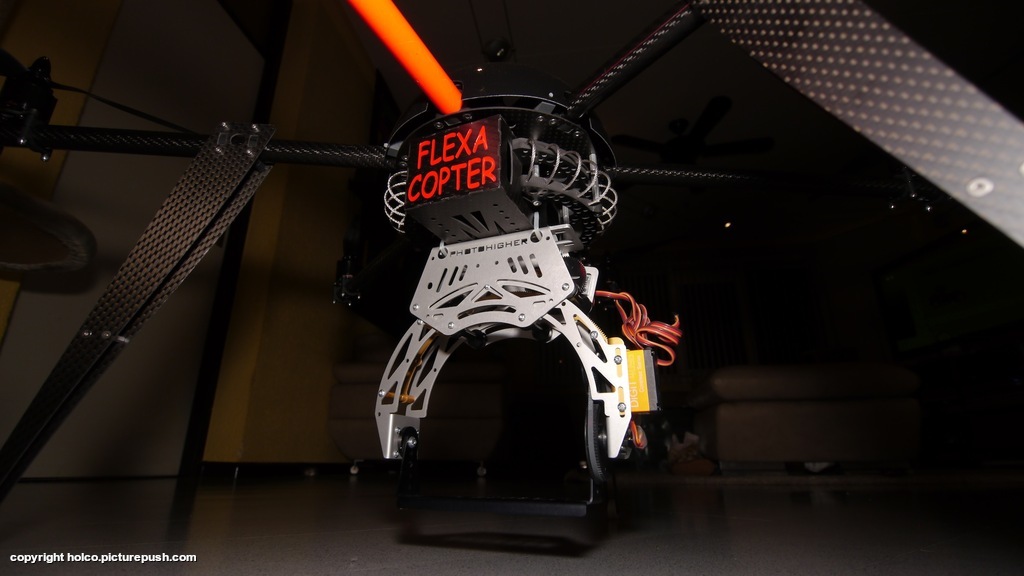
Flexacopter is born.
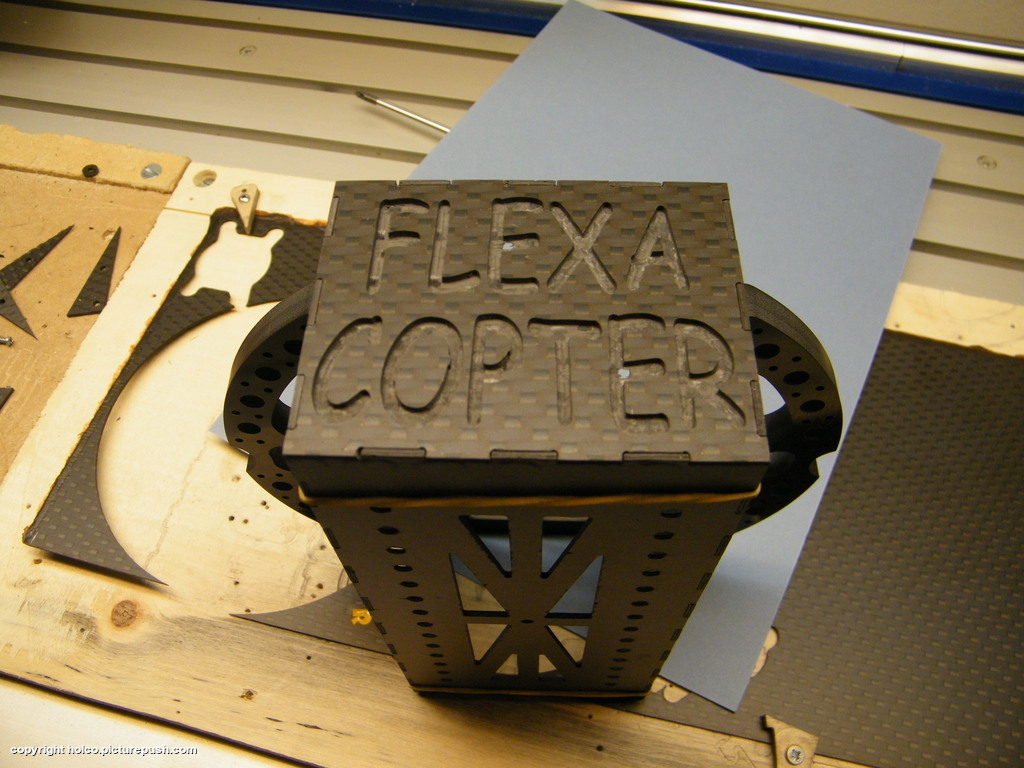
I love red.
Mounting the wires.
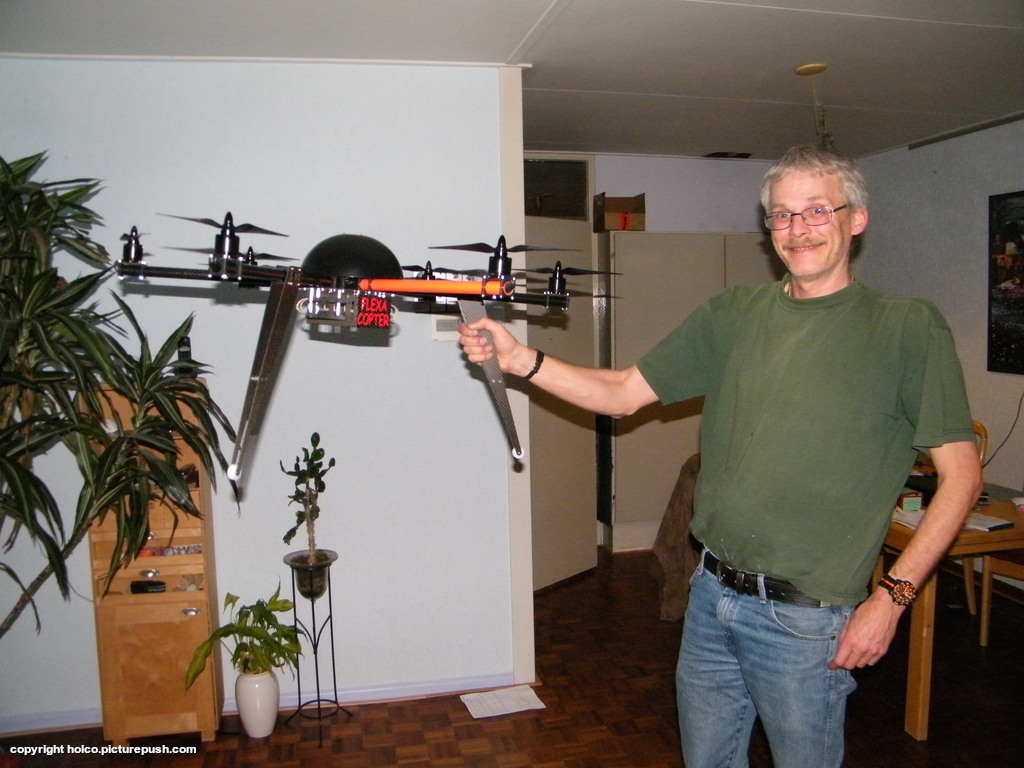
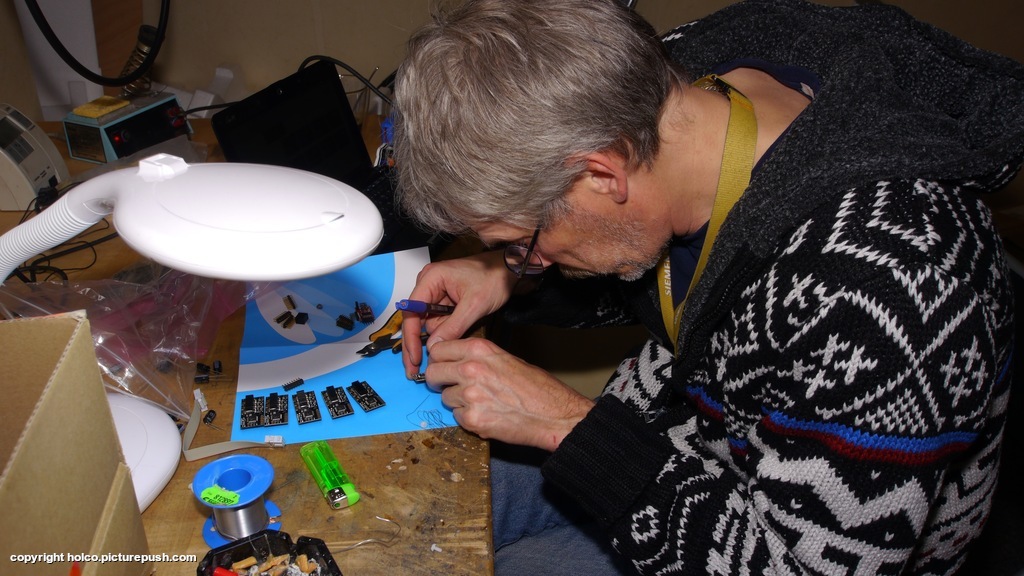
Me.
Mario.
Nice picture.
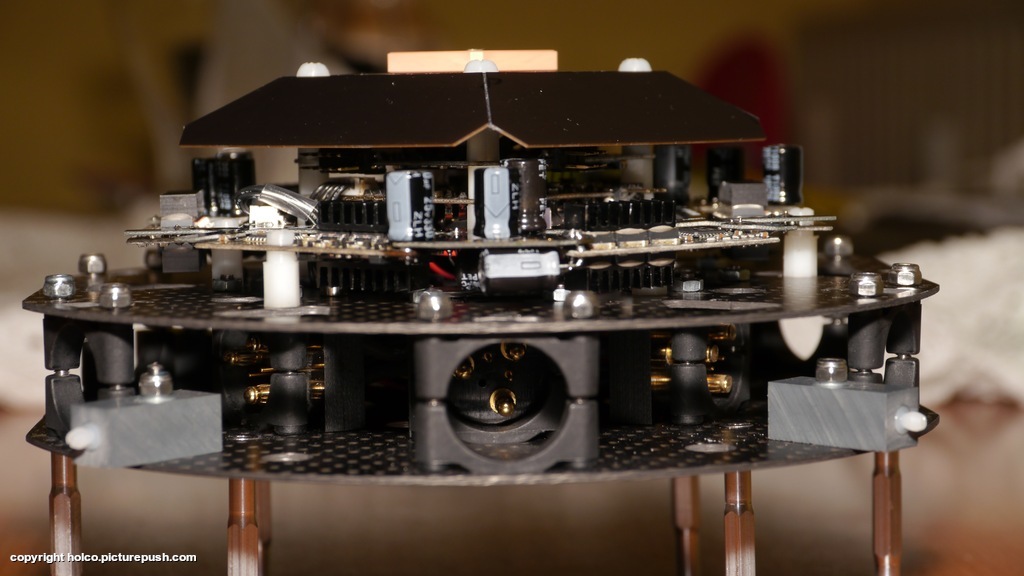
Up close.
The easy on - off's
Assembly.
The dampers.
What a set.
Detail.
Green.
Testfit.
If you build a hex you got to do 6 controllers .....
The whole MK setup.
Even before maiden people believe in our design. MASS PRODUCTION

First customer frame ready for shipment.


and now? .....Tomorrow we will complete the Flexacopter build. And if all is ok saturday will be maiden day.
FeiYu Tech is ready to release the new FY31AP autopilot.
FY-31AP FPV Inertial Attitude Stabilizer(Basic Edition) includes :
1. FY-31AP Module
2. FYGPS (10HZ) Module (better module)
3. Related Wirings
The FY-31AP have some new functions more then the FY-21AP:
1. Can set the path fly, max for 8 waypoints!
2. Support the PTZ control!
3. Auto gyroscope and vibration testing.
4. Firmware update by yourself!
The new Hornet OSD
Price:
FY31 AP is j US$ 199,-
Hornet OSD us ~ US$ 99,-
Complete FY31AP with Hornet OSD 288 USD
It is with GREAT pleasure that I am launching CANADADRONES.COM
Your Canadian source for UAV gear.
It is a Canadian Distributor web store where you will find all your ArduCopter needs!
After being bitten by the DIYDRONES bug nearly 2 years ago and ran into all the possible issues there could be with a Quad (Crashes / rebuild and Crashes cycles... you all know the drill)
I finally got tired of wait for my parts to get delivered to me and sometimes getting hit by the “surprize” duty fees!
So I’ve contacted all our friends with the BIG stores around here, jDrones.com, DIYDRONES.com and BuildYourOwnDrone.co.uk to get the ball rolling on opening my own distribution channel. (Sorry world, Canada only for me!)
As expected the feedback and help from these guys was awesome and I need to say that I am so proud to be part of this amazing community! Thanks Jani for the countless hours of discussion, Thanks Martin for the hints and inside bits of your store plus the encouragement words. And all the staff at 3DRobotics (Yvett and all) for their supports on setting up the official distributor agreement.
Ok enough Oscars type speach... Although I need to say thanks to my wife and familly for the long hours of moral support they gave me while building what I know will be a real sucess story!
You know why I think it will be a great adventure? Because of YOU here, always happy to help around, educate and improove our products. So without further ado, Canadian customers welcome to my store!
Inventory is humble at the moment as this is considered “testing the water” but I have parts in stock to support all your Quad/Hexa needs, from the AutoPilot IMU to the full Original ArduCopter/Hexa and 3DR kits you will find what you need.
I will get regular restock from the real DIYDRONES suppliers so quality is there and it will grow with the demand just lilke Martin did over the pond!
Just like his mode of operation I will put Customer Service at the center of my business model.
This is just the begining of a wonderfull ride!
* as any new website launch there could be some bugs/glitches so please report any broken links/images or strange behavior to dany@canadadrones.com
Dany
I finished building my Bixler plane and did some test flights. I was just flying in an anticlockwise circle with these tests (I have not been flying a plane for almost over a year and my last flight ended in a crash). Yet with the ArduPilot flying is very much more easy..... Landing is a breeze....
I am more familier with the heli's (multirotors, Quad, Hexa and Octa) but believe this plane could also be helpful to me in FPV flying.
Still learning the trade.....and love the ArduPilot projects.
I think the ArduCopter, ArduPlane.....ect.... Teams are Great people.
On this occasion I only tested the Stabilize mode but will do more testing (waypoints, RTL....) soon.
Specifications:
Bixler
Motor Turnigy2836 brushless Outrunner 2350kv
Prop 6x4
40A ESC
4400mA 3 cell Battery
default parameters for Bixler frame.
ArduPlane 2.24 firmware.
Flying weight with this big battery and GoPro Camera is about 1.25kg and it was still flying smoothly. The motor and prop gives about 1kg of thrust (according to some info I got).
I would like to show what we have done here in Namibia in developing Inexpensive UAV systems which we are beginning to actively use in conjunction with Namibian Ministry of Environment and Tourism, tasked with wildlife conservation in Namibia, and also for photography missions for the local quarry mines and Salt mines.
.
Shown , in order, are three aircraft, GUPPY, fully designed from the ground up and built by me, HORNBILL, built from a semi built kit, the Lanyu-100, and the third, KIWIT, an electric flyer of unconventional wing design.
HORNBILL is fitted with an RF tag tracking system and antenna and flew many autonomous, beyond visual range flights tracking tagged animals, especially Rhino as an aid to the National Parks anti-poaching campaign. The next trial will be with an Infra-Red camera fitted to aid the detection of poachers at night.
Hornbill basic Specifications.
- Wing Span - 2.4meter
- Engine 55cc Twin Boxer.
- Weight 15kg with 3liter gas
- Max TOW - 17Kg
- Endurance 1H 40minute with 0.5 liter spare @ 24m/s
- Min safe speed 14m/s @ 16deg AoA.
- Stall speed 10m/s @ 25deg AoA.
- Max flight speed - 34m/s
it was a lot of fun! See the report: waterberg_report.pdf
GUPPY was designed from the ground up, a full 3D model developed on CAD, and designed to be made from good aircraft grade ply. However, it was built with plain Marine ply in the end, as and exercise in cost reduction. It was designed to carry a hi resolution camera , which was subsequently flown to create geo-referenced imagery for the Quarry miners, as well as for the Salt Works. GUPPY has tremendous STOL performance and can land/takeoff anywhere.
GUPPY Basic Specifications:
- Wing Span - 2.8meter Clark Y 14%
- Wing Chord 600mm +80mm for Junker Flaperon
- 2 Flaperon per wing, each with own servo
- Horizontal stabiliser - 450mm each half span Clark Y 12%
- Horizontal Stab Chord - 220mm
- Each stab half fitted with own servo
- Engine 100cc Twin Boxer. (3W)
- Weight 26kg empty
- Max TOW - 42Kg
- Max Fuel - 8.5liter
- Endurance 5hours with 0.5 liter spare @ 35kg @ 24m/s
- Min safe speed 12m/s @ 20deg AoA.
- Stall speed 10m/s @ 25deg AoA.
- Max flight speed 42 m/s
The electric flyer was actually two Aircraft, PiPiStrello, and KIWIT. Both share wing profile type, Jedelski, and both are V tail. Both are made fully from composite materials.
PiPiStrello has straight wings with dihedral, and was fitted with ailerons, not normal on Jedelski wings – resulting in excessive adverse yaw so was canned…
KIWIT and its prototype flew many flights tool to verify the existence of a Vulture Chick in a nest in a tree out in the desert. We annually undertake a conservation mission where we currently fly in a Cessna 180, spotting Vulture nests in the Sparse Namibian desert regions. When we spot a nest, we fly closer to see if there is a chick, and if so we GPS mark the spot. Often the tree is among a dozen others, so the exact spot is 'close by'..but not easily found when we return in ground vehicles to capture, ring and tag the chick. So we used KIWIT to overfly the nearby area and find the chick again.
See the article in Raptor News - (page 2) Raptor_News.pdf
We have also perfected fully autonomous land and takeoff with KIWIT.
Have a look at these videos for the Auto Launch and land:
https://www.youtube.com/watch?v=dOEVQG9ORuE
https://www.youtube.com/watch?v=exaabnihKhM
Kiwit Basic Specifications:
- Wing Span : 2.4meters
- Weight excluding payload - 3.5Kg
- Max payload capacity - 1Kg
- Endurance - 1hour
- Cruise speed - 14m/s
- Max speed - 20m/s
- Stall speed - 6 m/s
- Takeof in 3meters in still air.
- All composite construction, cabon fibre and glass
And these videos for the flights of GUPPY and HORNBILL:
https://www.youtube.com/watch?v=8iC0jDPDxjc
https://www.youtube.com/watch?v=_3wELMrG3Go
https://www.youtube.com/watch?v=KwQ5QyFnFQI
https://www.youtube.com/watch?v=rdUwaeE-T5c
Have a look at the postings under Aircraft Platforms and Autopilot Hardware for more info.
The autopilot fitted to all these aircraft is called the 'NamPilot' and is based on multiple modules, namely:
AUTUPILOT: an AVR processor based module, 8 PWM inputs from RCS, 7 PWM outputs to servos. This module does the full flight stabilization and navigation/guidance for auto flight, and stabilization for manual flight with autostabilization - mostly used when tuning the control loops.
IMU - Also AVR based, with 3 axis Gyro's, accelerometers and a Bosch I2C pressure sensor.
AIRDATA UNIT: Also AVR based, a smaller processor, with another Bosch I2C pressure sensor, and an analogue static pressure sensor ( Freescale) and a Dynamic pressure sensor for airspeed. (Freescale)
MAGNETOMETER: Also a smaller AVR processor, with a Honewell 3 axis magnetomet, configured in a balancing bridge circuit, ie, the null strap in the device is used to balance out the ambient magnetic field in a control loop. This gives VERY accurate performance, with almost no temperature drift at all, the bain of magnetometer performance!
The Ground Control Station - This is a PC based system and can be anything from a simple, reduced functionality Laptop based system, to the one depicted in the PDF files listed below. This system interfaces to a datalink antenna, with optional autotracker for the antenna, tracking theUAV in flight. It also interfaces to a dual video receiver, built into the video RX antenna. The video from the UAV camera is available in real time on the GCS, and can be recorded. A dedicated configurable Payload control panel is on the GPS operator position, allowing control of the UAV stablised camera, steering, setup, etc. All flight plans are prepared on the GCS, with a map of the flight regime, and all flight paths are shown, as well as the track flown. Numerous flight patterns can be selected, figure 8, square, straight line, circle, loiter, point to point flight plan, etc. Aircraft control loop tuning is also done in real time, during flight, from the GCS.
Take a look at these PDF’s for more info:
imu_flyer_full.pdf autop_flyer_full.pdf gcs_flyer_full.pdf
THATS IT:
This is far too much fun for just two people!!
"Quad 12" Prototype ( Dodecacopter ) from Screen Multi Copter on Vimeo.
I while ago I was asked to keep a small presentation about my plane in the workplace event. Here’s the slide set that I made for the presentation. Feel free to use the pictures to your own purposes, as long as you credit me.
- PDF-Slides: Maja presentation.pdf
- Keynote presentation: Maja presentation.key
Ive been doing some testing with the new GoPro2 HD video camera. I bought it out of necessity after loosing my GoPro HD in flight :( But, having the HD jump ship was a blessing in disguise, because the new GP2 boasts some impressive features.
While shooting in 1080P, you can choose 3 different field of view (fov) settings: Wide at 170, medium at 127, and narrow at 90. Heres a video I made testing the different fov settings on a Skywalker foam airplane.
The Gopro2 also shoots at 120fps for some pretty impressive slow motion footage. I usually drop the frame rate down to 24fps when doing slow motion footage. Heres a video testing the WVGA-120 setting.
mwc quad // mt2208 motor from warthox on Vimeo.
So.. Full scale next? :)
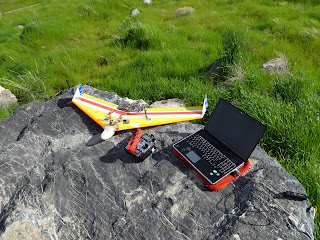
Every now and then it's good to pack light and leave the laptop at home and just enjoy flying. Running out of battery at inconvenient time is however a concern of mine. I just recently finished a project to display telemetry data from APM on Aurora's screen. I'm not particularly proud of the technical side of the implementation, but this seems to work fine.
Hitec's Optima receivers interface with "Sensor station" via I2C, receiver being the master. APM has I2C-bus and it should support multiple masters, but I could never get it working reliably. My solution was to use ATMega88 to receive data via SPI from APM and relay the data to forward by answering queries send by the receiver. The circuit itself is really simple, just the avr, two resistors and a decoupling capacitor.
All the information that could be get from the sensor station are emulated from the data from APM, even including fuel meter, which tells how much mAh are remaining from the rated capacity of the battery. Only thing that I haven't implemented is GPS position and time, since they are not really useful without a map. One nice thing is that on Aurora, you can rename temp and rpm labels. I'm using rpm-1 value for mAh's used and rpm-2 for airspeed. Temp-2 is used to show the current throttle (0-100). Temp-3 and 4 are still left for some other data.
I'm really happy to get this working, since all the important data is available from transmitter screen with one glance and since the APM sends the data via xbee, this is a nice to have backup feature.
If somebody wants to use this too, I can provide sources and schematic later.
br,
Janne