All Posts (14048)

Sort by

OpenLRS + wii motion plus

Hi there,
I know openLRS was slowest opensource project ever and i didnt release it since 5 months. But i will do that in 24 hours.
Today i tested the I2C functions for direct stabilization applications. OpenLRS receiver including serial and I2C ports for GPS and Sensors. Add a gyro / acc / magnetometer and you have an multicopter controller (or autopilot). you dont need an external receiver / autopilot or extra cabling between rc equipments and telemetry coming internally too :)

Here is the wii motion plus test video. It's stabilizing Aileron/Elevator and rudder on current setup.


Tomorrow, first products will be in stocks for few lucky Arduino programmer.I will share the schematics and codes too.

Cheers
Melih
Read more…
Developer

Arducopter Beta update.

3689405810?profile=original

Found some good bugs already. An issue with auto trimming being activated due to unusual Radio configurations fixed. Mavlink support is now up to par with APM. and A compass bug in the library squashed.


I revved the firmware's EERPOM fingerprint. You must redo the setup completely. (except ESC calibration.)


Thanks for the feedback!

Jason

Read more…
3D Robotics

"Cloud Robotics" at Google I/O

3689405793?profile=originalIf anyone's going to Google's I/O conference this week in San Francisco, make sure to check out the "Cloud Robotics" session on Wed. You might see something interesting from the DIY Drones dev team ;-)


Cloud Robotics

May 11, 10:45AM – 11:45AM / Room 5

Robots are all around us, although they are easily camouflaged. We describe how we can accelerate the pace of robotics research and development and make high functioning robots affordable and universally accessible.


Hint: Note the Android tag on the session.
Read more…
Moderator


In this video you can see the first flight doing with Virtual Robotix IMU , in the test i only check the sensor board , Gyro and Accelerometer , in the next test i check navy and input output functionality.


Today was a windy day , after solve with Randy a problem on the YAW control .. i doing the preflight check , all seem to work fine and so decide to going in the sky.


I'm using the same PID used with oilpan , there're not significant difference ... In the next day i try to use 300 °/s gyro ADXL 610 to check the difference respect of Inversense.

I think that the new board will be available in the next week for the people that are interest to evaluate it .

3689405450?profile=original

3689405292?profile=original

3689405477?profile=originalThis board is an upgrade of original Oilpan board , it's compatibile at 80 % with the original dirver , my idea was to improve it and put my experience on gps and uav on it. I add some feature as subsystem power control , gps battery backup , improve temperature compensation on gyro , add gyro that i used on MP8 the same of mikrokopter.

In these days i doing small upgrade to adc driver and to the code .. i think that tomorrow i can doing a first flight for test it , On Artificial horizon yet is ok .. i need to upgrade the driver of compass .. and right projection.

My idea is to have only one board put on MP32 or APM without , cable to or header to connect the device togheter .. if you need can disconnect the sensor imu and put it where you want and can connect it by cable to navy board.

Do you like VR IMU ? This is tech info :


Preliminary VR IMU 1.0 (Dominate the Sky) Technical specification:


Imu Sensor :

  • 1 Gyro Z : Inversense ISZ500 500 °/s resolution 1 axis.
  • 1 Gyro XY : Inversense IDG500 500 °/s resolution 2 axis.
  • 3 Gyro ADXL 610 300°/s resolution same used on Mikrokopter (option).
  • 1 ACC ADXL 335 3G resolution.
  • 1 Magnetometer 3 Axis HMC5883 compass functionality.
  • 1 ADC 12 BIT ADS7844 8 channel. 2 channel used for temp compensation.
  • 1 FET for ON / OFF subsystems.
  • Possible to disconnect the Imu sensor and connect to Navi by a cable.

Navi Sensor:

  • Barometer : BMP085
  • GPS Mediatek all in one (Default) protocol MTK16 10 Hz update integrated Aerial.
  • Locosys GPS (optional).
  • UBlox GPS (optional).
  • GPS Battery Backup.
  • 1 FET for ON / OFF subsystems.

Input Output:

  • 6 12 Bit analog input available for Board Setup or for interconnect accessories.
  • 4 Digital Output
  • 3 Status Led available
  • Differential pressure sensor for air speed. ( possible to disconnect from in-out board and connect it by cable)

Product page : http://www.virtualrobotix.com/page/vr-imu-10

Best Roberto

Read more…
3D Robotics

3689405733?profile=originalOn the occasion of the first beta release of ArduCopter 2, I wanted to take a moment and talk about the teamwork that was required to get to this milestone.

There are many quadcopter projects out there, some of them excellent. But they are all, with the exception of the commercial Mikrokopter (which is impressive, but expensive and closed source), just RC aircraft. They're not UAVs, capable of fully autonomous flight with waypoints, mission planning, etc.


We're DIY Drones. We do UAVs, not just RC. Our multicopter had to be the real thing.


Going from RC to full UAV is no small task. Along with the basic RC functions, you need navigation algorithms, mission planning, comms, datalogging and analysis, all sorts of extra sensors and payload controls and desktop utilities that make this easy to use. So in this post, I wanted to credit all the teams that came together to make it happen.


What's different about ArduCopter 2 (as opposed to ArduCopter 1) is that it's built from the ground up on the APM codebase, which is a mature full UAV system that has been in development for several years. That means that it inherits all the sophisticated mission planning and comms technology that is in use already by thousands of APM users. It also means that ArduCopter 2 includes the works of scores of people from many teams around the world. Here are just a few:


  • The ArduCopter 2 team: Led by Jason Short, with heroic focus and vision. Much testing help from Jani Hirvinen and Jack Dunkle
  • The APM team: Led by Doug Weibel, this team includes Michael Smith, James Goppert, Jason Short, Andrew Tridgell, Ryan Beall and many others
  • The ArduCopter 1 team: Jani Hirvinen, Jose Julio, Sandro Benigno, Ted Carancho, and others
  • The ArduPirates team: Led by Norbert Machinek, who took the original ArduCopter 1 code and made it much better.
  • HK GCS: Paul Mather
  • Mission Planner: Michael Oborne
  • MAVLink team: Lorenz Meir et al
  • ArduCopter Heli team: Randy McKay et al
  • APM hardware team: Jordi Munoz, Jeff Taylor, Lorenzo Lopez et al
  • APM32 team: Led by Roberto Navoni


There are countless others who have made major contributions, but I wanted to give you just hint of the scale of teamwork that's required to release something as advanced as ArduCopter 2.  My huge thanks to everyone who got us here today!


Read more…
Developer

Arducopter 2.0 Beta first release!

3689405696?profile=originalMark Grennan


We're finally comfortable enough with Arducopter 2.0 to release it as a beta!

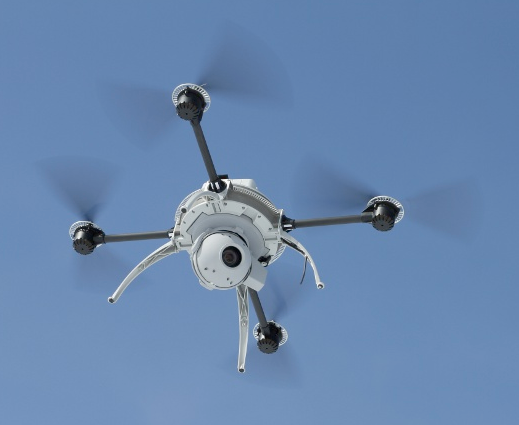
AC2 is a complete system for a range of Multi-Copters. It started out as a side project for me and turned into an obsession. Oh Well! Copters turned out to be even more addicting than I ever thought. 

AC2 doesn't bring over any code from NG, but I tried to make the transition fairly easy. It should fly virtually the same and the default PID values are equivalent. 

I think it's pretty close and fairly bug free, but I know there are a few left and that's why we need the community to help us find them and submit patches that improve performance. If you have an issue or something to contribute, please use the Google Code Issues list for prompt responses. I won't be tracking bug related comments in this thread. If you can, please include a log file from you flight with an indication how many seconds in you had a problem.


Google Code issues list


And one last note before we talk features: Safety first! Don't load this and expect it to work exactly like NG or that it will work out of the box with no issues. Don't calibrate your ESCs with the props on. Don't turn off your radio while it is armed. Test in your hand before adding props. Test in your hand after adding props. Always be prepared to put it back into stabilize in case an Auto mission behaves unpredictably. etc... Simple stuff, but you are in control and take the responsibility of flying when you load this code. 


Now that's out of the way: Download here [UPDATE: The Mission Planner now supports direct AC2 firmware uploading, so please use it to get the code instead. No need for Arduino or compile source code anymore! That said, if you want to fiddle with the code, you can always get it here and use Arduino as usual.]


The full ArduCopter 2 Manual is here. Please read it before using the code!


What's New:

Simple mode allows the user to save the orientation of the copter while arming the motors. This means the copter can yaw in any direction and the sticks will reference the original orientation. Great for learning or  - emergencies in the air.

Position Hold is now called Loiter to be compliant with Mavlink Ground control stations.

RTL will fly the copter home and hold the position

Auto will fly a mission stored in EEPROM.


Copters supported:

+, x, tri, hexa+, hexax, y6


AutoPilot commands supported:

MAV_CMD_NAV_TAKEOFF   - Copter will takeoff and rise to a defined altitude.

MAV_CMD_NAV_WAYPOINT - Copter will navigate towards a waypoint. (Beta 1 disabled options: altitude minimum, time delay)

MAV_CMD_NAV_LAND - Copter will immediately go into Loiter (position_hold) and begin a controlled decent.  Mission scripting ends after this command.

MAV_CMD_NAV_LOITER_UNLIM - Copter will Loiter at current location.  Mission scripting ends after this command.

MAV_CMD_NAV_LOITER_TIME - Copter will Loiter for N seconds. (disabled for this version)

MAV_CMD_NAV_RETURN_TO_LAUNCH - Copter will return to Launch (home position) 


MAV_CMD_CONDITION_DELAY - will delay the execution of next conditional command

MAV_CMD_CONDITION_DISTANCE - will delay the execution of next conditional command until the copter is within a minimum distance to next waypoint

MAV_CMD_CONDITION_CHANGE_ALT - will send copter to desired altitude, overrides next waypoint altitude.

MAV_CMD_CONDITION_YAW - controls how the copter will yaw. Angle (relative or absolute), speed, and direction are inputs. 


MAV_CMD_DO_JUMP - sets the next waypoint to the desired index - for conditional loops

MAV_CMD_DO_SET_HOME - changes the home location

MAV_CMD_DO_SET_SERVO - outputs servo channel number to desired PWM

MAV_CMD_DO_SET_RELAY - sets the relay to postion 1 or 2

MAV_CMD_DO_REPEAT_SERVO  - toggles servos

MAV_CMD_DO_REPEAT_RELAY - toggles the relay


In flight tuning:


You can tune aspects of flight with your channel 6 flaps knob. To enable this, you need to compile and update AC2 directly with Arduino.


See AP_Config for options.


How to setup your radio:

ch1 = roll

ch2 = pitch

ch3 = throttle

ch4 = yaw

ch5 = mode switch - use your 3 position switch

ch6 = used for in-air tuning - not currently active, see AP_config.h for options

ch7 = use to set throttle hold value while hovering (quick toggle) - default position should be a low PWM value!

ch8 = NOT used!!! - this is the hardware manual - it's dangerous to use for quads BEWARE!!!


How to use the CLI:

You must go through each item and set the values to match your hardware


"setup" menu:

erase - when installing AC2 for the first time, run this to erases bad values from EEPROMS – just in case

reset - Performs factory reset and initialization of EEPROM values

radio - records the limits of ALL radio channels - very important!!!

pid - restores default PID values - only needed if you have changed them in flight with CGS, not for setup.

frame - sets your frame config: [x, +, tri, hexax, hexa+, y6]

motors - interactive setup of your motors, (X, +, or tri supported) Point your stick towards the motor to make it spin, throttle is passthough.

level - sets initial value of accelerometers - hold copter level, don't move it.

modes - sets the flight modes assigned to each switch position (you have 6 available), toggle roll to change, enter to save.

current - enables an Attopilot current sensor: [on, off, milliamp hours]

compass - enables the compass [on, off]

declination - sets your local declination value – lookup online for accuracy [decimal degrees!]

sonar - Sonar hooks to the "pitot" port which is an analog input [on, off]

show - a formatted output of all the settings


"test" menu:

pwm - outputs the pwm values of all 8 radio channels

radio - outputs the control values of all 8 radio channels in degrees * 100 or other value (see radio.pde)

gps - outputs GPS data

rawgps - outputs raw, unparsed GPS data

adc - outputs raw adc values

imu - outputs euler angles

battery - outputs voltage readings to analog in 0-3

current - outputs voltage and current from an AttoPilot current sensor

relay - toggles the relay

sonar - outputs sonar data in cm

waypoints - dumps stored waypoint commands

airpressure - raw output of absolute presure sensor

compass - outputs compass angles in degrees (0 = north)

xbee - outputs an XBEE sequence used for range testing

mission - writes a default mission to EEPROM [null, 'wp']

- choosing 'wp' option will send the copter 15 meters North and back again.

eedump - raw output of bytes in eeprom


"logs" Menu:

See the APM wiki to better understand how to dump logs and how to set the types of data you want to record.


AC2 Flight modes:

All of the modes allow the user to control the copter with the normal controls. You can get yourself out of a jam sometimes by simply nudging the copter while in AUTO or LOITER modes.


Options include:

ACRO - rate control only. not for beginners

STABILIZE - copter will hold -45 to 45° angle, throttle is manual.

SIMPLE - Remembers the orientation of the copter when arming, allowing the user to fly more intuitivey. Manual Throttle.

ALT_HOLD - Altitude is controlled by the throttle lever. Middle is hold, high = rise, low = fall.

LOITER  - When selected, it will hold the current altitude, position and yaw. Yaw is user controllable. roll and pitch can be overridden temporarily with the radio. Altitude is controlled by the throttle lever. Middle is hold, high = rise, low = fall.

RTL  - Will try and fly back to home at the current altitude.

AUTO  - Will fly the mission loaded by the Waypoint writer

GCS_AUTO - Not implemented


Special notes:

The props will NOT spin in stabilize when throttle is in the off position, even when armed.

Arming is Yaw right for 1 sec, disarm is yaw left for 1 sec. Just give it some juice to confirm arming.


Auto modes will NOT engage until the throttle is above neutral. So if you put the control switch to positio hold while it's on the ground, it will no spin up. Or at leat it shouldn't ;)


Good luck,

Jason


Read more…

3689405682?profile=originalGE announces introduction of their ADEPT3000 small automatic miniature
video tracker for embedded computing applications such as unmanned aircraft
systems and man-portable devices where size, weight, and power consumption
(SWaP) are primary design concerns.

Link;

http://www.uasvision.com/2011/05/06/new-micro-video-tracker-from-ge/


geip_logo.gif


(photo added by moderators to conform with posting guidelines)

Read more…

My project to build a ballon-launched high-altitude automnomous glider as a step up from the normal styrofoam box HAB projects necessitates the development of an airframe.

3689405671?profile=originalInitially, I was intent on using the Skyfun platform but my calculations and other's experiences of it as an FPV platform suggests that it will be difficult to keep the centre-of-gravity in a useable location, especially if I remove the motor to turn it into a glider...

When I spotted the clever www.crashtesthobby.com Assassin finless flying wings, I decided that the simplicity and flexibility of a custom designed flying wing might yield a better optimised airframe for the project, so I began to work through the design

On-board will be the decased HD-170 camera, a Futaba R167FS-driven APM, a MediaTek MT3329 GPS, HMC5843 magnetometer and MPXV7002DP pitot-static system.  I will probably also include a MaxSonic range finder for sonar altimetry for use with Autoland experiments.  All of this will be powered by a 2S 1800mAh LiPo battery.  For flight development, a 25g brushless electric motor and controller will be fitted as a pusher arrangement.  This may also stay on-board for HAB flights (if I get that far) due to weight and balance issues.

Estimated flying weight at 550g, 1270mm wingspan, 0.3m^2 wing area gives a wing loading of 1.67kg/m^2  My current W+B calculations put the CoG roughly in a similar position to the Assassin.

The airframe is intended to be fabricated from EPS, hot wire cut wings and a CNC machined fuselage section. I am still working on the spar arrangment and how I will install and access the payload contents - so far I'm leaning towards a partially PVA glued-together construction with flying leads to access charging and data requirements.  Still some work to be done here...

The camera is oriented to place the horizon at a third of the frame in level flight and to avoid intruding on the 170° field of view.  Obviously I want to give the lens some crash protection as well...

This is all ideas-in-progress, so I welcome all your comments.  I don't promise updates to be very frequent though!

More pictures are available in my album, which will be updated as and when

Read more…

QUEST FOR CONTROL

3689405567?profile=original

Put ghetto magnetometer on Marcy 1 because it only needs 3 wires.  Any I2C chip would need 4 wires.  The trick is moving it away from the motor in such a small aircraft.  Still amazing how sensitive such a small inductor can be, after trying to build one from scratch.


All roads lead to throttle controlled banking, with Marcy 1.  Been testing exclusively on
the test stand, because this airframe is going to disintegrate in flight
#1.  Still getting a disappointing amount of oscillation with 2 wings.
She only seems to want to bank in 3 directions.  Trim tabs get a slight
improvement.  The last segment has it finally banking in all 4 directions.

The future may be a very long balance beam & relatively small wings, but
it would give the slower RPM you need.  A future, high endurance craft
may have a 10' balance beam, 2' kite wings, actuators on the balance
beam, 4Ah battery in the middle.

After years of macros like (ROTORS == 4 && SERVOS == 3), finally decided
the easiest way to handle multiple, exotic aircraft is macros like
MARCY2, MARCY1.  Still, running 3 aircraft off the same code base is
like starting over every time you change aircraft.

After many projects based on shared code bases, we've concluded any cost
savings is a myth.  You're better off with different code bases.

We've never found an exit strategy from PIC.  Now that Atmel finally has
high speed USB, cost is the only factor.  Assembly language can't be
shared.  We've never learned how to drive a chip from an assembly
language listing.

All our batteries are stored at 32F to increase their lifespan &
increase the flight time.  Cryogenic propellant, you might say.  That
requires thermal stability in the electronics. 

Marcy 2 doesn't have a voltage regulator & the 1 thermally stable gyro
is ratiometric.  An LDO regulator would do it.  Doubt the gyro in the
S107 is stable enough to handle cryogenic propellant.

The quest for a stable yaw gyro began in 2009, when nose-in orbits would
throw off the gyro bias calculation & finish with uncontrolled spirals.
GPS heading was really limited in such small spaces.  There was no other
solution besides more stable gyros.

The DJI certainly does nose in orbits.  It looks like RTK.


For all the energy put into helicopters in the last 4 years, great
things have been achieved with common water bottles.  A 2 stage water
rocket can get over 400ft & release a parachute camera, all computer
controlled, for a lot less money.  The only problem is the downrange
clearance required.  We'd be stuck to 100ft anywhere in Calif*.


Also, in the super cheap department, where water is not available,
there's the rubber band powered glider.  That could get over 400ft.  The
best option remains a spin stabilized, vertical propeller booster of
some kind, with parachute recovery.


Read more…

3689405583?profile=original

Thumbsize PCB.


3689405497?profile=original

BBC has run a story on a device that is cheap, small and seems to have a lot of potential for the UAV world. It can run linux, has ARM11 700Mhz, GPIO, SD/MCC-card slot and HDMI. It's the Raspberry Pi.

If this actually comes to market, it can be an interesting option for cheap embedded linux in UAV.

Check out the article and info:
http://www.bbc.co.uk/blogs/thereporters/rorycellanjones/2011/05/a_15_computer_to_inspire_young.html

http://www.raspberrypi.org/

Read more…
Moderator


In this video you can see the first flight doing with Virtual Robotix IMU , in the test i only check the sensor board , Gyro and Accelerometer , in the next test i check navy and input output functionality.

Today was a windy day , after solve with Randy a problem on the YAW control .. i doing the preflight check , all seem to work fine and so decide to going in the sky.

I'm using the same PID used with oilpan , there're not significant difference ... In the next day i try to use 300 °/s gyro ADXL 610 to check the difference respect of Inversense.

I think that the new board will be available in the next week for the people that are interest to evaluate it .

3689405450?profile=original

3689405292?profile=original

3689405477?profile=originalThis board is an upgrade of original Oilpan board , it's compatibile at 80 % with the original dirver , my idea was to improve it and put my experience on gps and uav on it. I add some feature as subsystem power control , gps battery backup , improve temperature compensation on gyro , add gyro that i used on MP8 the same of mikrokopter.

In these days i doing small upgrade to adc driver and to the code .. i think that tomorrow i can doing a first flight for test it , On Artificial horizon yet is ok .. i need to upgrade the driver of compass .. and right projection.

My idea is to have only one board put on MP32 or APM without , cable to or header to connect the device togheter .. if you need can disconnect the sensor imu and put it where you want and can connect it by cable to navy board.

Do you like VR IMU ? This is tech info :

Preliminary VR IMU 1.0 (Dominate the Sky) Technical specification:

Imu Sensor :

  • 1 Gyro Z : Inversense ISZ500 500 °/s resolution 1 axis.
  • 1 Gyro XY : Inversense IDG500 500 °/s resolution 2 axis.
  • 3 Gyro ADXL 610 300°/s resolution same used on Mikrokopter (option).
  • 1 ACC ADXL 335 3G resolution.
  • 1 Magnetometer 3 Axis HMC5883 compass functionality.
  • 1 ADC 12 BIT ADS7844 8 channel. 2 channel used for temp compensation.
  • 1 FET for ON / OFF subsystems.
  • Possible to disconnect the Imu sensor and connect to Navi by a cable.

Navi Sensor:

  • Barometer : BMP085
  • GPS Mediatek all in one (Default) protocol MTK16 10 Hz update integrated Aerial.
  • Locosys GPS (optional).
  • UBlox GPS (optional).
  • GPS Battery Backup.
  • 1 FET for ON / OFF subsystems.

Input Output:

  • 6 12 Bit analog input available for Board Setup or for interconnect accessories.
  • 4 Digital Output
  • 3 Status Led available
  • Differential pressure sensor for air speed. ( possible to disconnect from in-out board and connect it by cable)

Product page : http://www.virtualrobotix.com/page/vr-imu-10

Best Roberto

Read more…

cnet-logo.pngSome may know that cnet does a lot of podcasts on a lot of tech related subjects.One of their shows, called Reporters Roundtable will be doing an episode today all about drones and UAVs. I'm unsure if they are going to get into the amateur side of things, or stick to the commercial or military sector. They record most (all?) of their podcasts live with a live video broadcast with chat room. You can join in here at NOON PT 3PM ET : http://cnettv.cnet.com/live/


All in all it should be interesting!


Read more…

Alternative 868mHz transceiver for Europe

TINY-500.jpg?width=350Hey Folks.

While looking around on the interwebs today for alternatives to the Digi Xbee 868 modules for use in Europe, I found this from http://www.rfsolutions.co.uk.  It's specifically the Tiny Pro with external antenna that caught my eye. (The photo above is from the smd on-chip antenna version)

TINY PRO

  • High Power - Up to 500mW
  • Serial Baud Rate 1.2 to 115.2Kbps
  • RF Baud Rate up to 38.4Kbps
  • Range up to 4KM using external antenna

From the manual for the TinyPro:

"This band is free to use but the module and the user must respect  some limitations. Most of  these restrictions  are  integrated  in  the  conception  of  the  module,  except  the  duty  cycle.  The  869.400  to 869.650 MHz band is limited to a 10% duty cycle. This means that each module is limited to a total transmit time of 6 minutes per hour. It is the responsibility of the user to respect the duty cycle"

It looks fairly expensive, and I don't think the baud rate is as high as the Digi modules, but asking the user to enforce the duty cycle would allow us much more control.  Assuming we wouldn't just ignore the DC entirely, we could allow the APM to control it rather than having to hack it as the current thinking on the digi 868's suggests.

Has anyone tried this, or have any comments on suitability? Perhaps there are other 868mhz modules out there who also have less draconian enforcement of the DutyCycle?


Jim


Read more…

HELI-MOUNT.jpg

FPV Tilt Camera Mount with Landing Gear


I saw one of these a few weeks back, and got to thinking...

How can I easily mount this to a stock AC without making any drastic mods, getting the CG close, and having tilt and roll stabilization possible?

This is what I came up with...going to see if it will take off in the morning.


P1010058.jpg?width=750


Mechanically, the pieces are in the right places. It moves well. It's probably not super robust, but we'll see if it gets the job done.

Three metal pieces bent for the roll hinge with nylon washers.

Easystar rudder horn, control rod and clamp.

Random thumbscrew from Ace that clamps into an alum. bar underneath the two plys of balsa and squeezes the fiber frame. Pretty secure actually.

The kit was $20.  I got it as a weight filler with a 9x from Hobby King. The rest is scrap.

It at least gets the concept going cheaply, we'll see how long it lasts.

Here's the battery outrigger from previous static camera setup.

P1010059.jpg?width=750
Ideas for improvements are always appreciated...


JC

Read more…

3689405346?profile=original


So, what do you do when you have some old hardware lying around, and want to reuse that instead of buying the new ArduMegaPilot: Build you own ground station and modify parts of the code for the Ardupilot.


First of all I got tired of LabView, and the other standard parts, and found later versions of Ardupilot too messy to manipulate. Second, most of the available ground stations are written for Windows, not good at all on a Mac. Third, I needed some functions, that is not obviously available when using Ardupilot.


What I have done is to implement a simple ground station in Java, using standard components. It shows the basic information transmitted by the Ardupilot. It uses Google Earth to show the planes position on a map. Further more, it supports two way communication with the Ardupilot. This means that I am able to adjust gains, upload waypoints from a Google Earth .kml file and so on, while the UAV is in the air.


If anybody is interested I will make the sourcecode publicly available.


Best regards

Niklas


EDIT: I have add'ed the source code for the ardupilot and the source for the Java groundstation. The code is not commented at all, and is highly customized for my setup. Feel free to use any parts you want. Any questions, hit me! The code also contains quite good examples of how to encode at decode binary GPS data. Enjoy.


Ardupilot_25rc.zip

javasrc.zip

Read more…