All Posts (11086)

Sort by

Oculus FPV - First Flight

http://intuitiveaerial.com/home/2013/7/14/oculus-fpv-first-flight

First flight of our Oculus Rift FPV system!

This system is completely digital. A laptop in the air compresses the video from the two cameras in realtime and sends them over 802.11n (2.4 GHz) down to the laptop on the ground.

Latency is around 120 ms - fully usable for flying!

Range is 50-100 m using built-in wifi-cards in laptops. We will increase this by using external APs. Ranges for e.g. Ubiquiti-systems are quoted as several km - using legal frequencies and power levels. When out of range and then back the reconnection is instant (no "connection broken, reconnecting...").

There is a huge difference between this and an analogue FPV system. The all-digital design means realtime HD video from multiple (not limited to 2) cameras can be broadcasted and received. The received images are then combined into a view-sphere which can then be viewed in a below-25-ms latency loop between ground computer and the Rift. Jonathan is working on the code to let the imu of the Rift determine what is seen.

This project is an R&D effort from Intuitive Aerial. We have dreamed of this system since before we heard of the Oculus Rift. It is like a piece of science fiction that just came true. We have plans for how we can go from software running on laptops to small specific-purpose units so no computer is needed (FPGA-based compression and encode, lower-latency camera connection, possibly integrate cameras on pcb). Such units would also be useful for regular FPV and would offer HD resolutions and wifi interoperability. Let us know if you want this to happen - right now Jonathan is the only one working on this, as his master's thesis project :)

Read more…

Build your own Autopilot - tutorial

3689539485?profile=original

I have written a tutorial on how to program your own AutoPilot/Flight Controller from scratch using an arduino/ArduPilot/RaspberryPi.  The tutorial will walk you through everything from reading the RC radio and controlling the motors through to how the PIDs are stacked on top of each other to get stable flight. Information on how to do this is quite hard to find on the Internet, so I hope this article will make the world of flight controllers more accessible and encourage more people to contribute to ArduCopter.

You can find the full article here:

http://ghowen.me/build-your-own-quadcopter-autopilot/

and a video of the code from the article in action (you can download the code and try it on your APM - it'll behave like a KK board):


Note: the code actually flies better than the video demonstrates - my PID settings weren't optimally tuned!

Read more…

Part 2 – Building the Copter

3689535766?profile=original

This is the second chapter in my quest to build a flying machine. If this is your first time in joining me in my project of getting a flying machine in the air, I’d encourage you to have a look at Part 1.

In the first installment in this mini series, I spoke about how difficult it’s been to get in to the world of flying copters, due a many acronyms, assumed knowledge and the complexity of the options available.

As I sit here on a return flight to where I am currently living in Brisbane about to down some complimentary coffee and listening to music on the free headphones given to me for the in-flight entertainment, I’m getting the chance to finally reflect on some of the challenges and discoveries I had when building upon my new found hobby.

I had ordered the 3DRobotics hexacopter with the full electronic kit and was super excited when it ordered no more than 5 days later – from the USA. I know that there have been several comments on my last post made about Hobby King as a supplier of equipment. In good faith I had also ordered parts from them too, expecting parts to be delivered within a few weeks of each other at the most. On a side note, I’ve almost given up on expecting the parts from them in time for when I initially needed them – before this week.

I was at my normal job when the box from 3DR arrived. If you are like me, when you go to a shop, usually the box will get opened in the car – this happened again. I’m like a kid who can’t wait to open his presents at Christmas.


On a side note, just beware that if you use a P.O. Box to accept deliveries that some couriers may have trouble with delivery. Fortunately the courier rang me asking for a local physical delivery address.


So, as the box arrived and I open it up, I quickly discovered there were no instructions in the box, or where to directly find them, and no paperwork saying ‘Congratulations on your purchase, we hope you enjoy flying it. You’ll find more information at X etc…”. I was a little surprised at this. The top of the box had the order and contents/packing slip on the top though.

Because this is a community project that I purchased, I’ll let it slide. Even though projects are community based, I know that model designs change and are regularly improved over time.

To the team at 3DR, here’s an idea. When you make and release versions of the hexacopters, are you keeping an archive of the documentation online for each version of the models that are released? I know this happens with the AurdoPilot board, but what about the frames and kits available too, and including basic documentation?

I’m sure it’s not too hard to keep track of the changes and refinements that go along with the manufacturing.

Why the previous suggestion? Well, The first thing I had to do was find the instructions. This took a little searching to do, because even though 3DR are making it and there are “link placeholders” on their site on the actual product pages they are selling, there are actually no links. (This has since changed – well done.) I needed the specific PDF file which laid out quite well the construction of how to build the new frame. There were random links in the forums, and the Wiki but not easily found.

This is the current link of the 3DR hexacopter instructions.

I also found the photos and step by step instructions from the UK Arducopter site very helpful too.


3689535596?profile=originalUpon getting these instructions I printed them out in colour was able to set to work.

My coffee table at home was covered in bits of aluminum, cables, plastic, cool little blue motors and some things called ESCs.

As a child I enjoyed playing with Lego and Meccano, so assembling this new contraption wasn’t too hard to do and as a newbie, I was able to easily do it in under a standard movie time.

The manual made it very easy to understand what went where and how all of the hardware joined together. This was the fun and easy part.

I did have one slight problem and that was because I was missing a little screw to keep one of the motors on the arms. I made a note of which one it was and did it up slightly tighter than the others. I searched everywhere and was extremely careful not to lose any part. All I can put it down to is either quality control and someone not counting to 12, or a screw falling out of the bag there were packaged in because of an air hole and they were lost in transport. It certainly wasn’t the end of the world, so I didn’t really worry too much, and up until this time I haven’t raised it with 3DR – I have since bought a packet of m3 6mm screws though as spares for the legs and other parts for (*cough* when) if I break the copter.

The next part after the initial frame construction was the electronics of the copter – this is where having the laptop on hand helped immensely.

3689535687?profile=originalConstruction

The manual gave step-by-step instructions for the frame and the distribution board (which was thankfully already assembled), but when it came to the electronics, the manual basically said (and I’m paraphrasing here) “Connect the electronics and you are ready to fly”. What the?

I had my AurduPilot controller (which is known as the APM) with lots of plugs available, and also a distribution board available with many wires. Naturally you can see which plugs go where, however because I’m a person that likes to pull things apart to see how they work and put them back together again, it’s taught me a thing or too.

Even when I was working on acid etched circuit boards in my early days in high school I could easily understand how and where power flowed on circuit boards. Even looking at PCBs you can see the copper lines and how circuits join with each other.

The next part threw me. The 3DR distribution power-board totally confused me. It is painted black and has 7 power plugs coming off it. It didn’t make sense to me as to how it was wired up. As I couldn’t see the paths of the electronics, I wasn’t sure of how this thing was truly wired up. I like to ask questions, find out how things work. Taking things at face value sometimes is hard for me until I’ve got a good understanding of a product/item. My old multimeter had died and so I was stuck.

I did however manage to find a schematic of the board online. (http://stuff.storediydrones.com/Hex_Power_Distribution_Board.zip)

Yes! My research was paying off. Next to find an opensource tool read the strange file. Once I could see the wiring of the board on the screen, I was set and good to go. (http://www.cadsoftusa.com/download-eagle/)

As it turns out, according to the schematic diagram of the board, this is how's it's connected under the paint.

3689535782?profile=original

http://store.3drobotics.com/products/hexacopter-power-distribution-...

Before I'd seem the schematic diagram, I was VERY tempted to start doing extra soldering of all the pins, but also for the power plugs too. The board itself is painted, and so at the time - it just didn't make sense.

Oddly enough, I still bought a $12 multimeter and double-checked all the plugs.

3689535821?profile=originalTo most people who have created a copter of some sort, most of this is all second nature, but when you’ve never built anything like this, you want to make sure you get it right before you start powering things up – just in case you short circuit something. I’m sure you’ve blown a fuse, popped a diode or connected batteries the wrong way. When you pay good money for a hexacopter, this is the last thing you want to do.

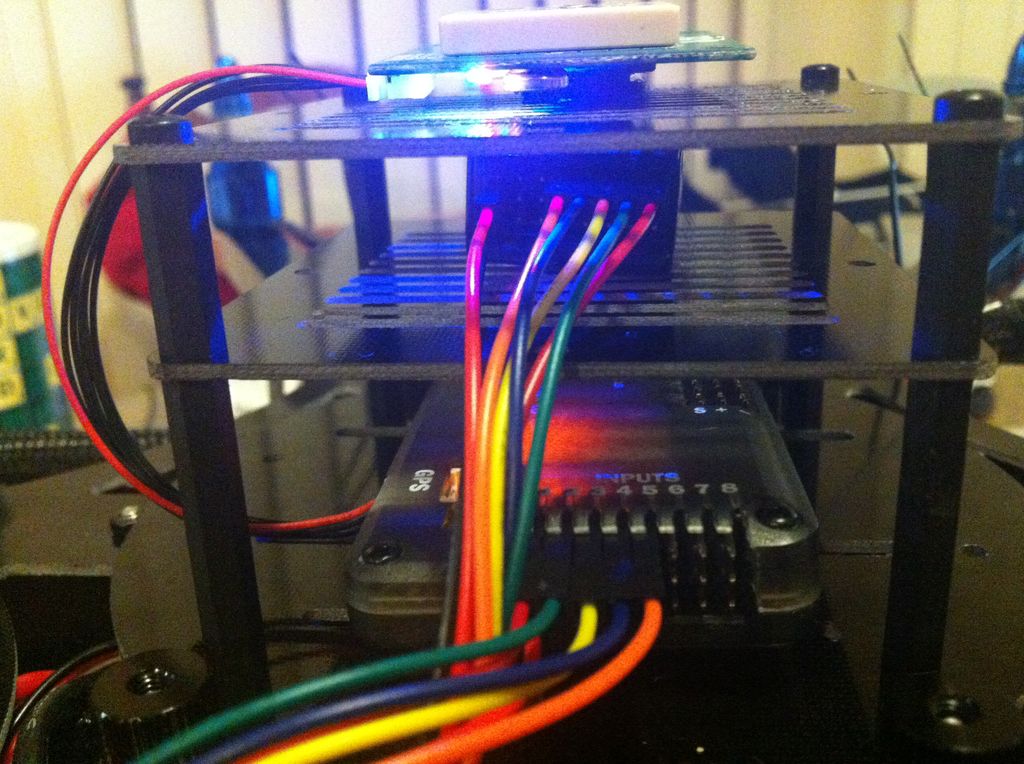
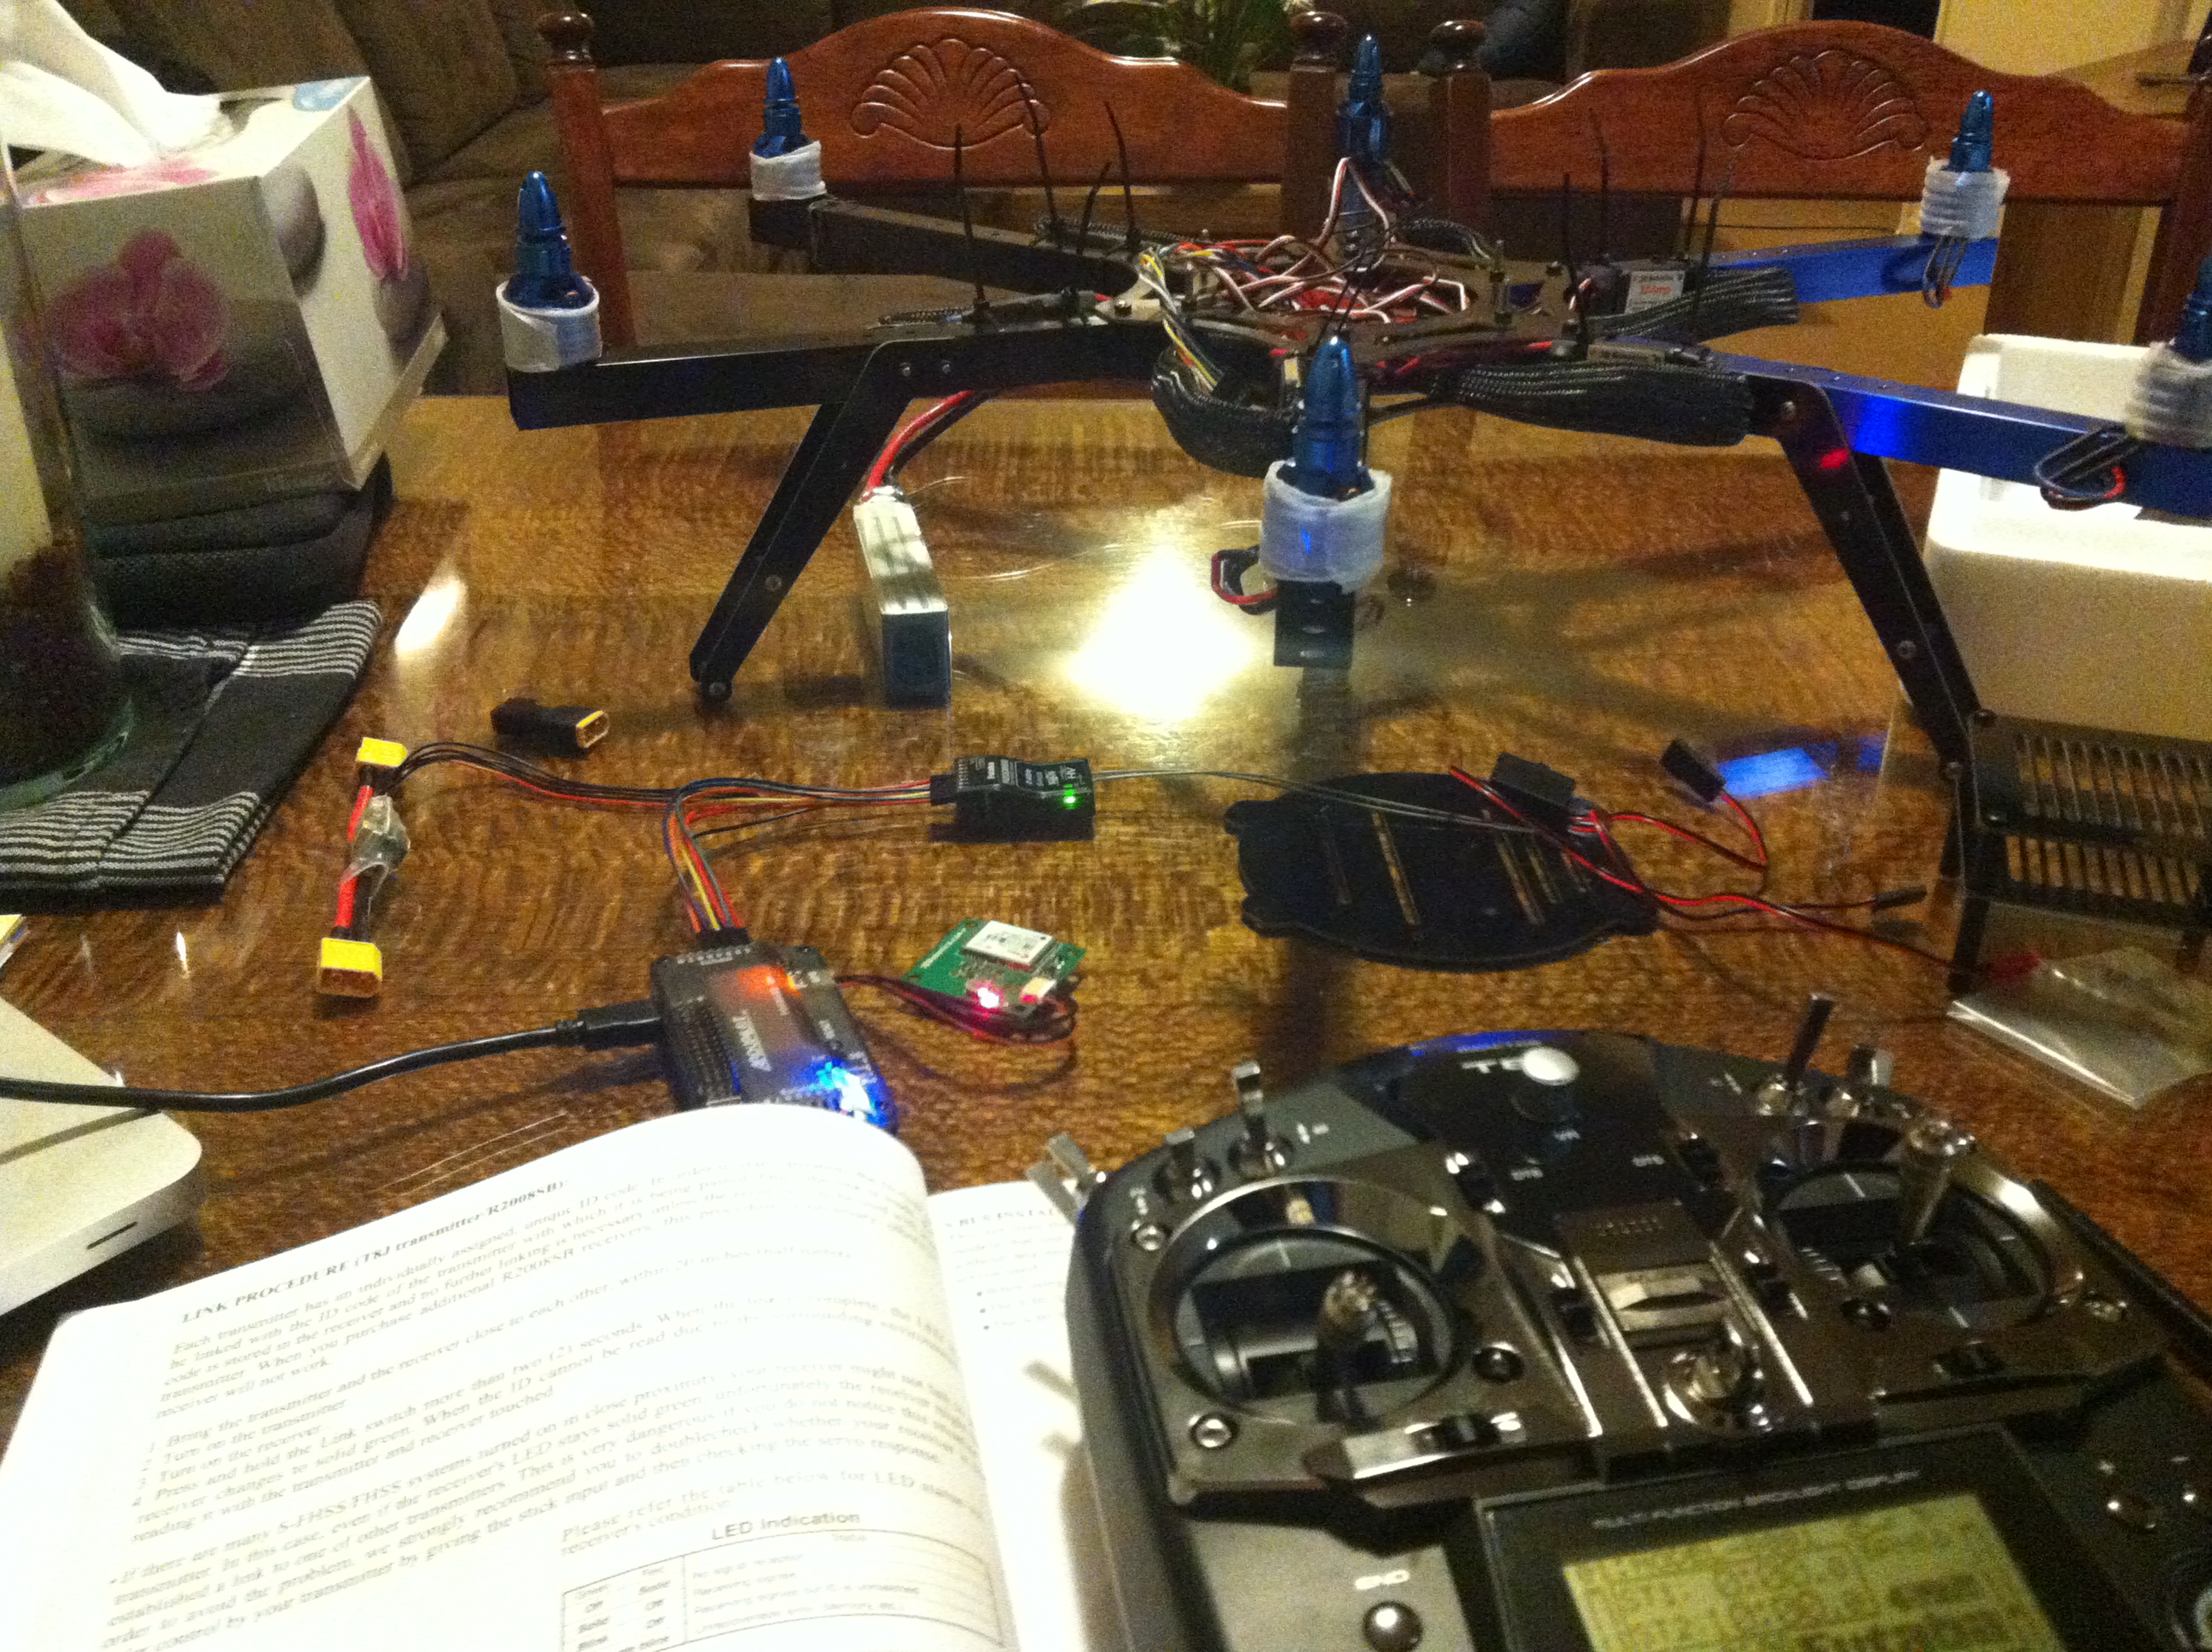
3689535865?profile=originalAfter studying many images and designs of other people’s copters, I was able to finally connect my system together on the table to see how it would look before it was to be fully installed in the copter itself. Everything looked good. GPS plugged in, ESCs in the right place, loose wires everywhere and so on.

I laid everything out to get a good idea too of how the configuration was going to work as well.

The pictures shown are basically how the cables go together.

In Part 1 of this blog series, you'll remember from the design image how it all goes together. This the actual of how it goes together.

As mentioned before, my order from Hobby King hadn’t arrived and so I had a kit that was half built. I couldn’t do anything else and it was getting to me. I had no battery, or radio system to use the copter. This was really frustrating me – having a half built machine sitting there being unable to progress further because of a lack of parts.
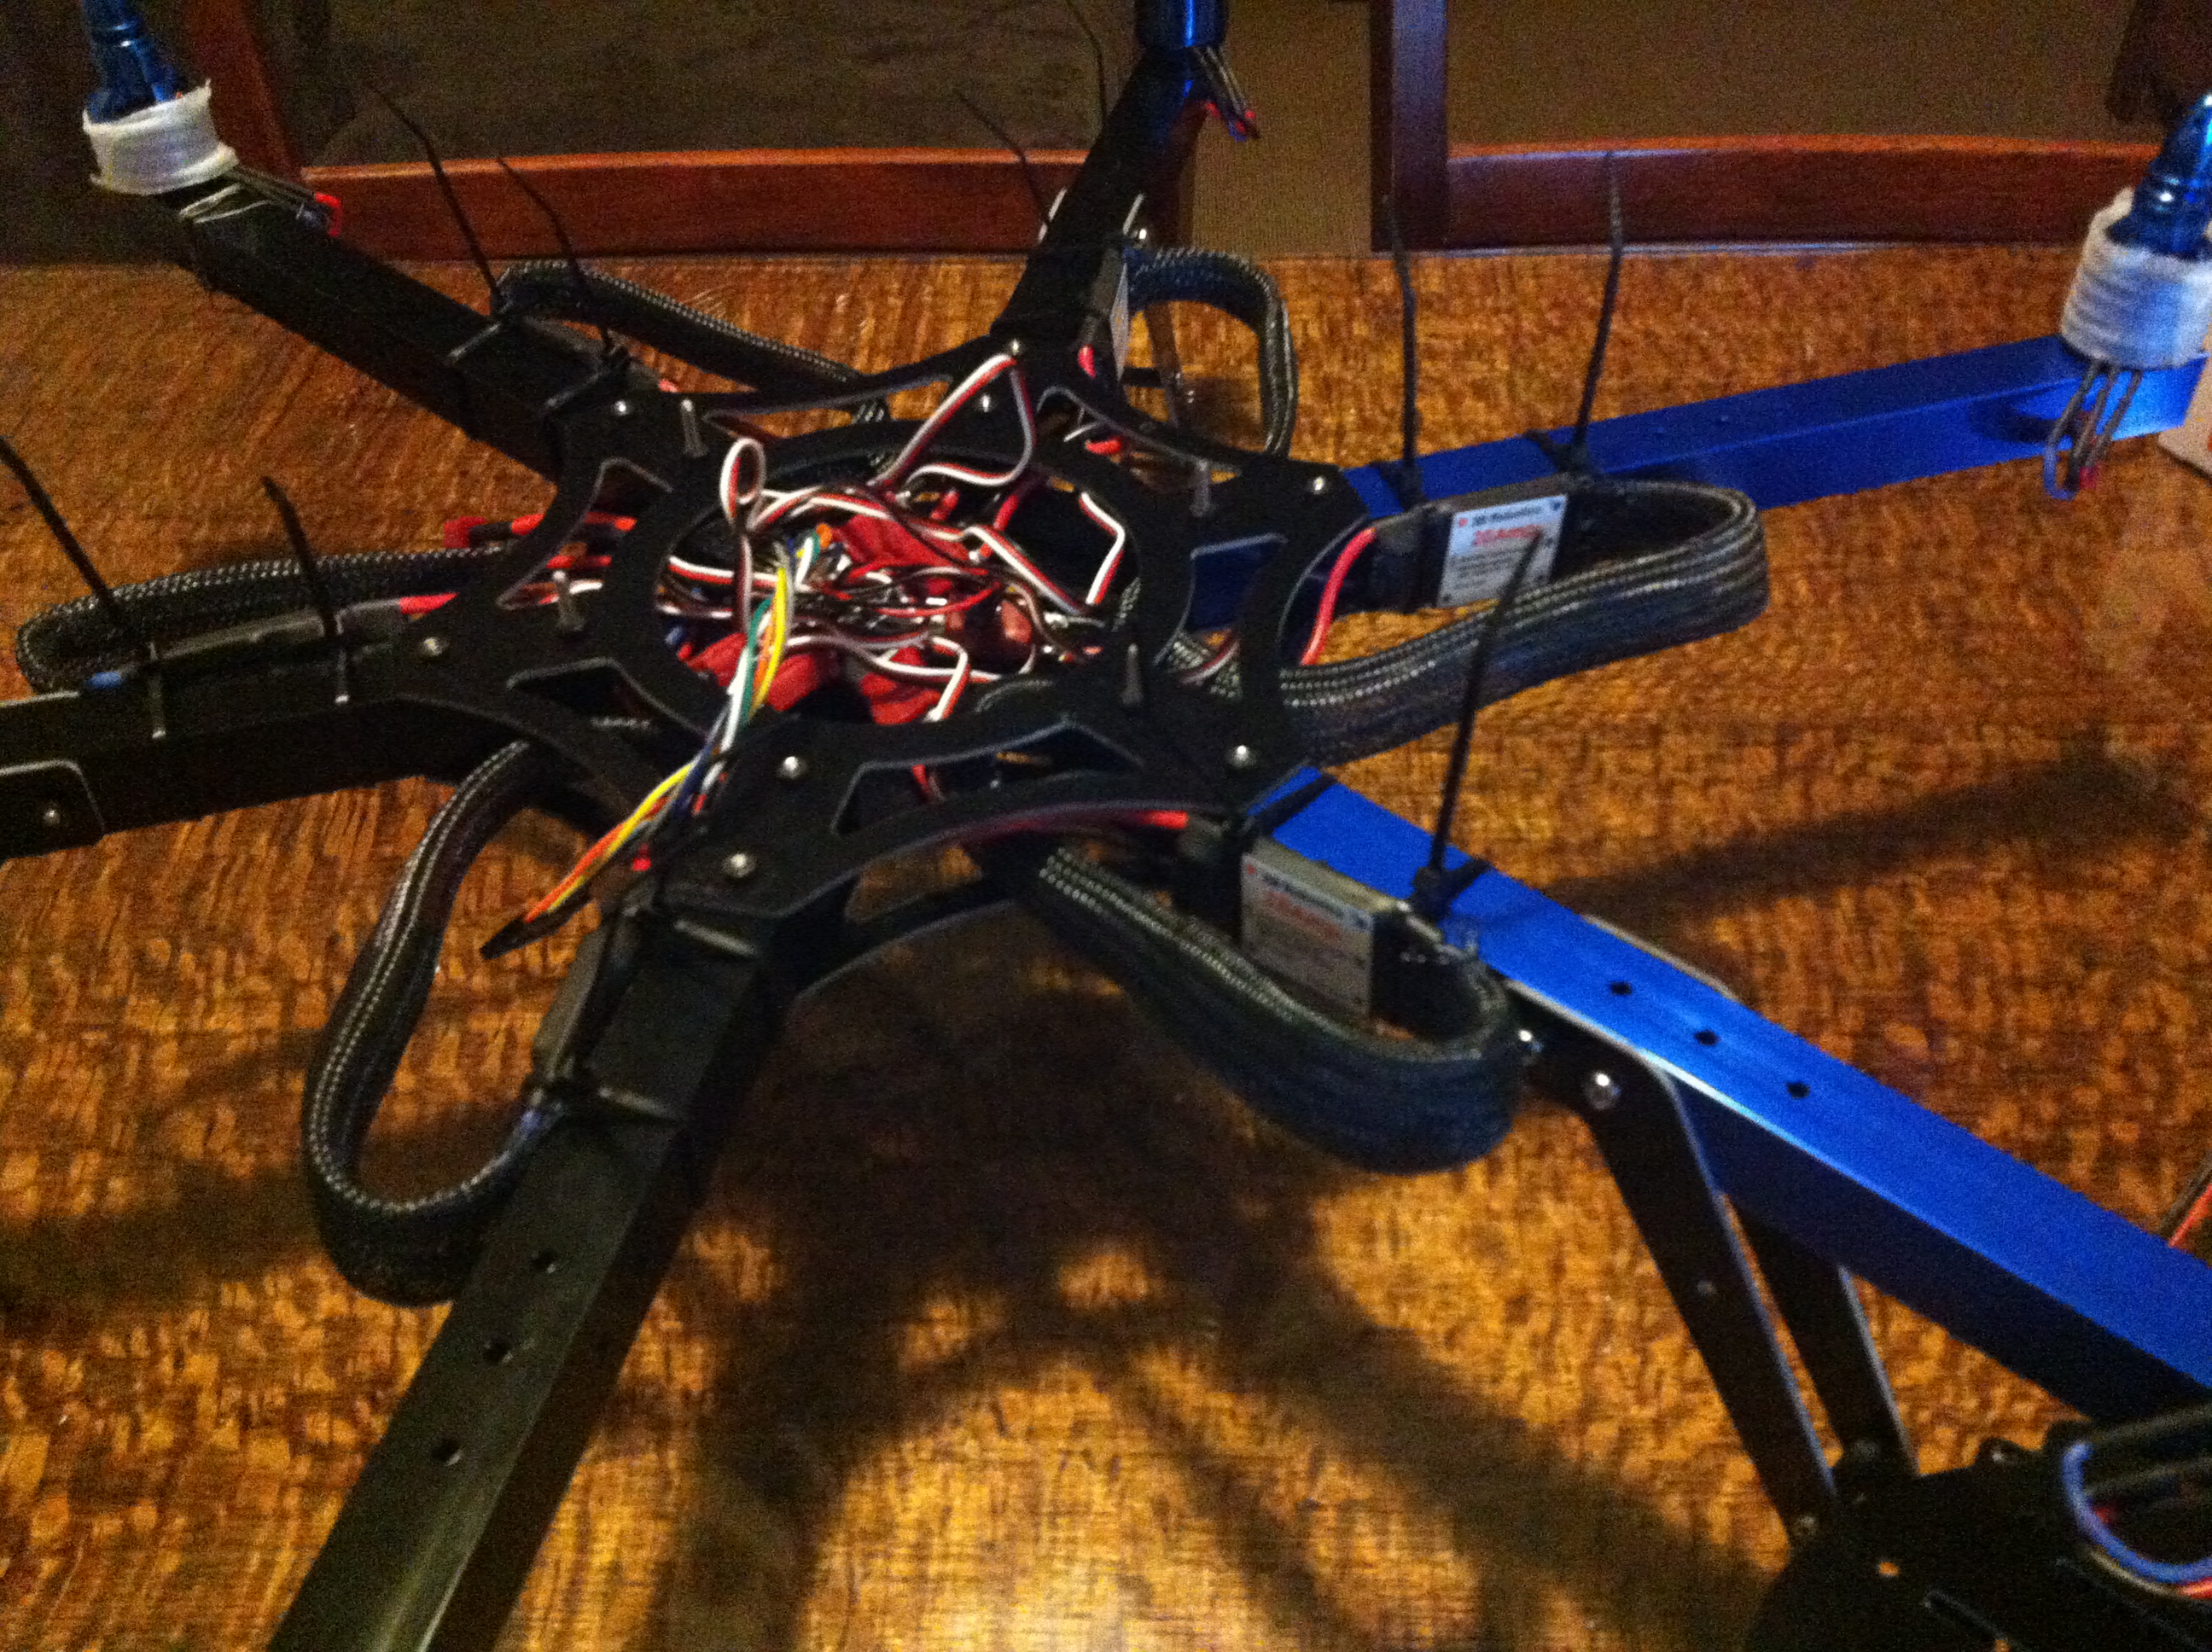
IMG_6531.JPG?width=750Electronics nearly installed.

It was at that stage that I had it suggested to me to try a local hobby shop and see what was available. In all honesty I hadn’t thought about that option – for two reasons. Firstly, this was a completely new field to me and so I didn’t/don’t know of many/any people doing it as so had assumed it to being a super niche market. Secondly, I often find myself going to shops and asking for items that are considered ‘specialty’ items and so walk out empty handed. This happened a few years ago when I wanted a shoulder mount/frame for my DSLR and went to one of the biggest camera places where I live. They didn’t have any stock or parts. So, what does one do in that instance? You go online and wait weeks… This was where I thought I was.
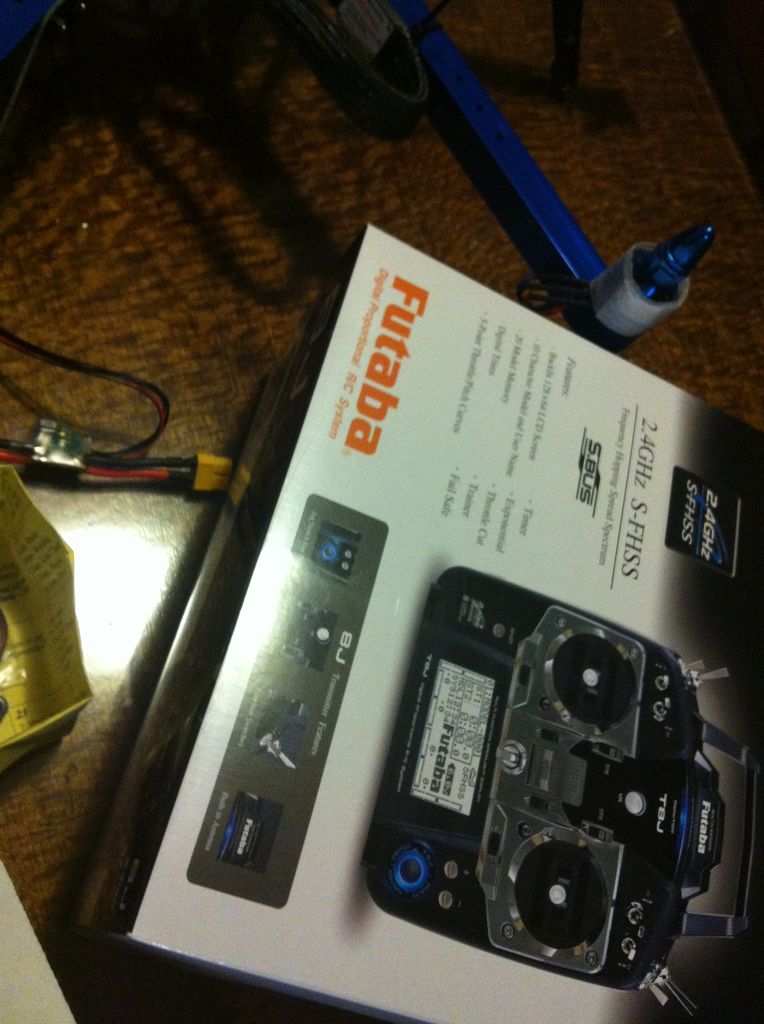
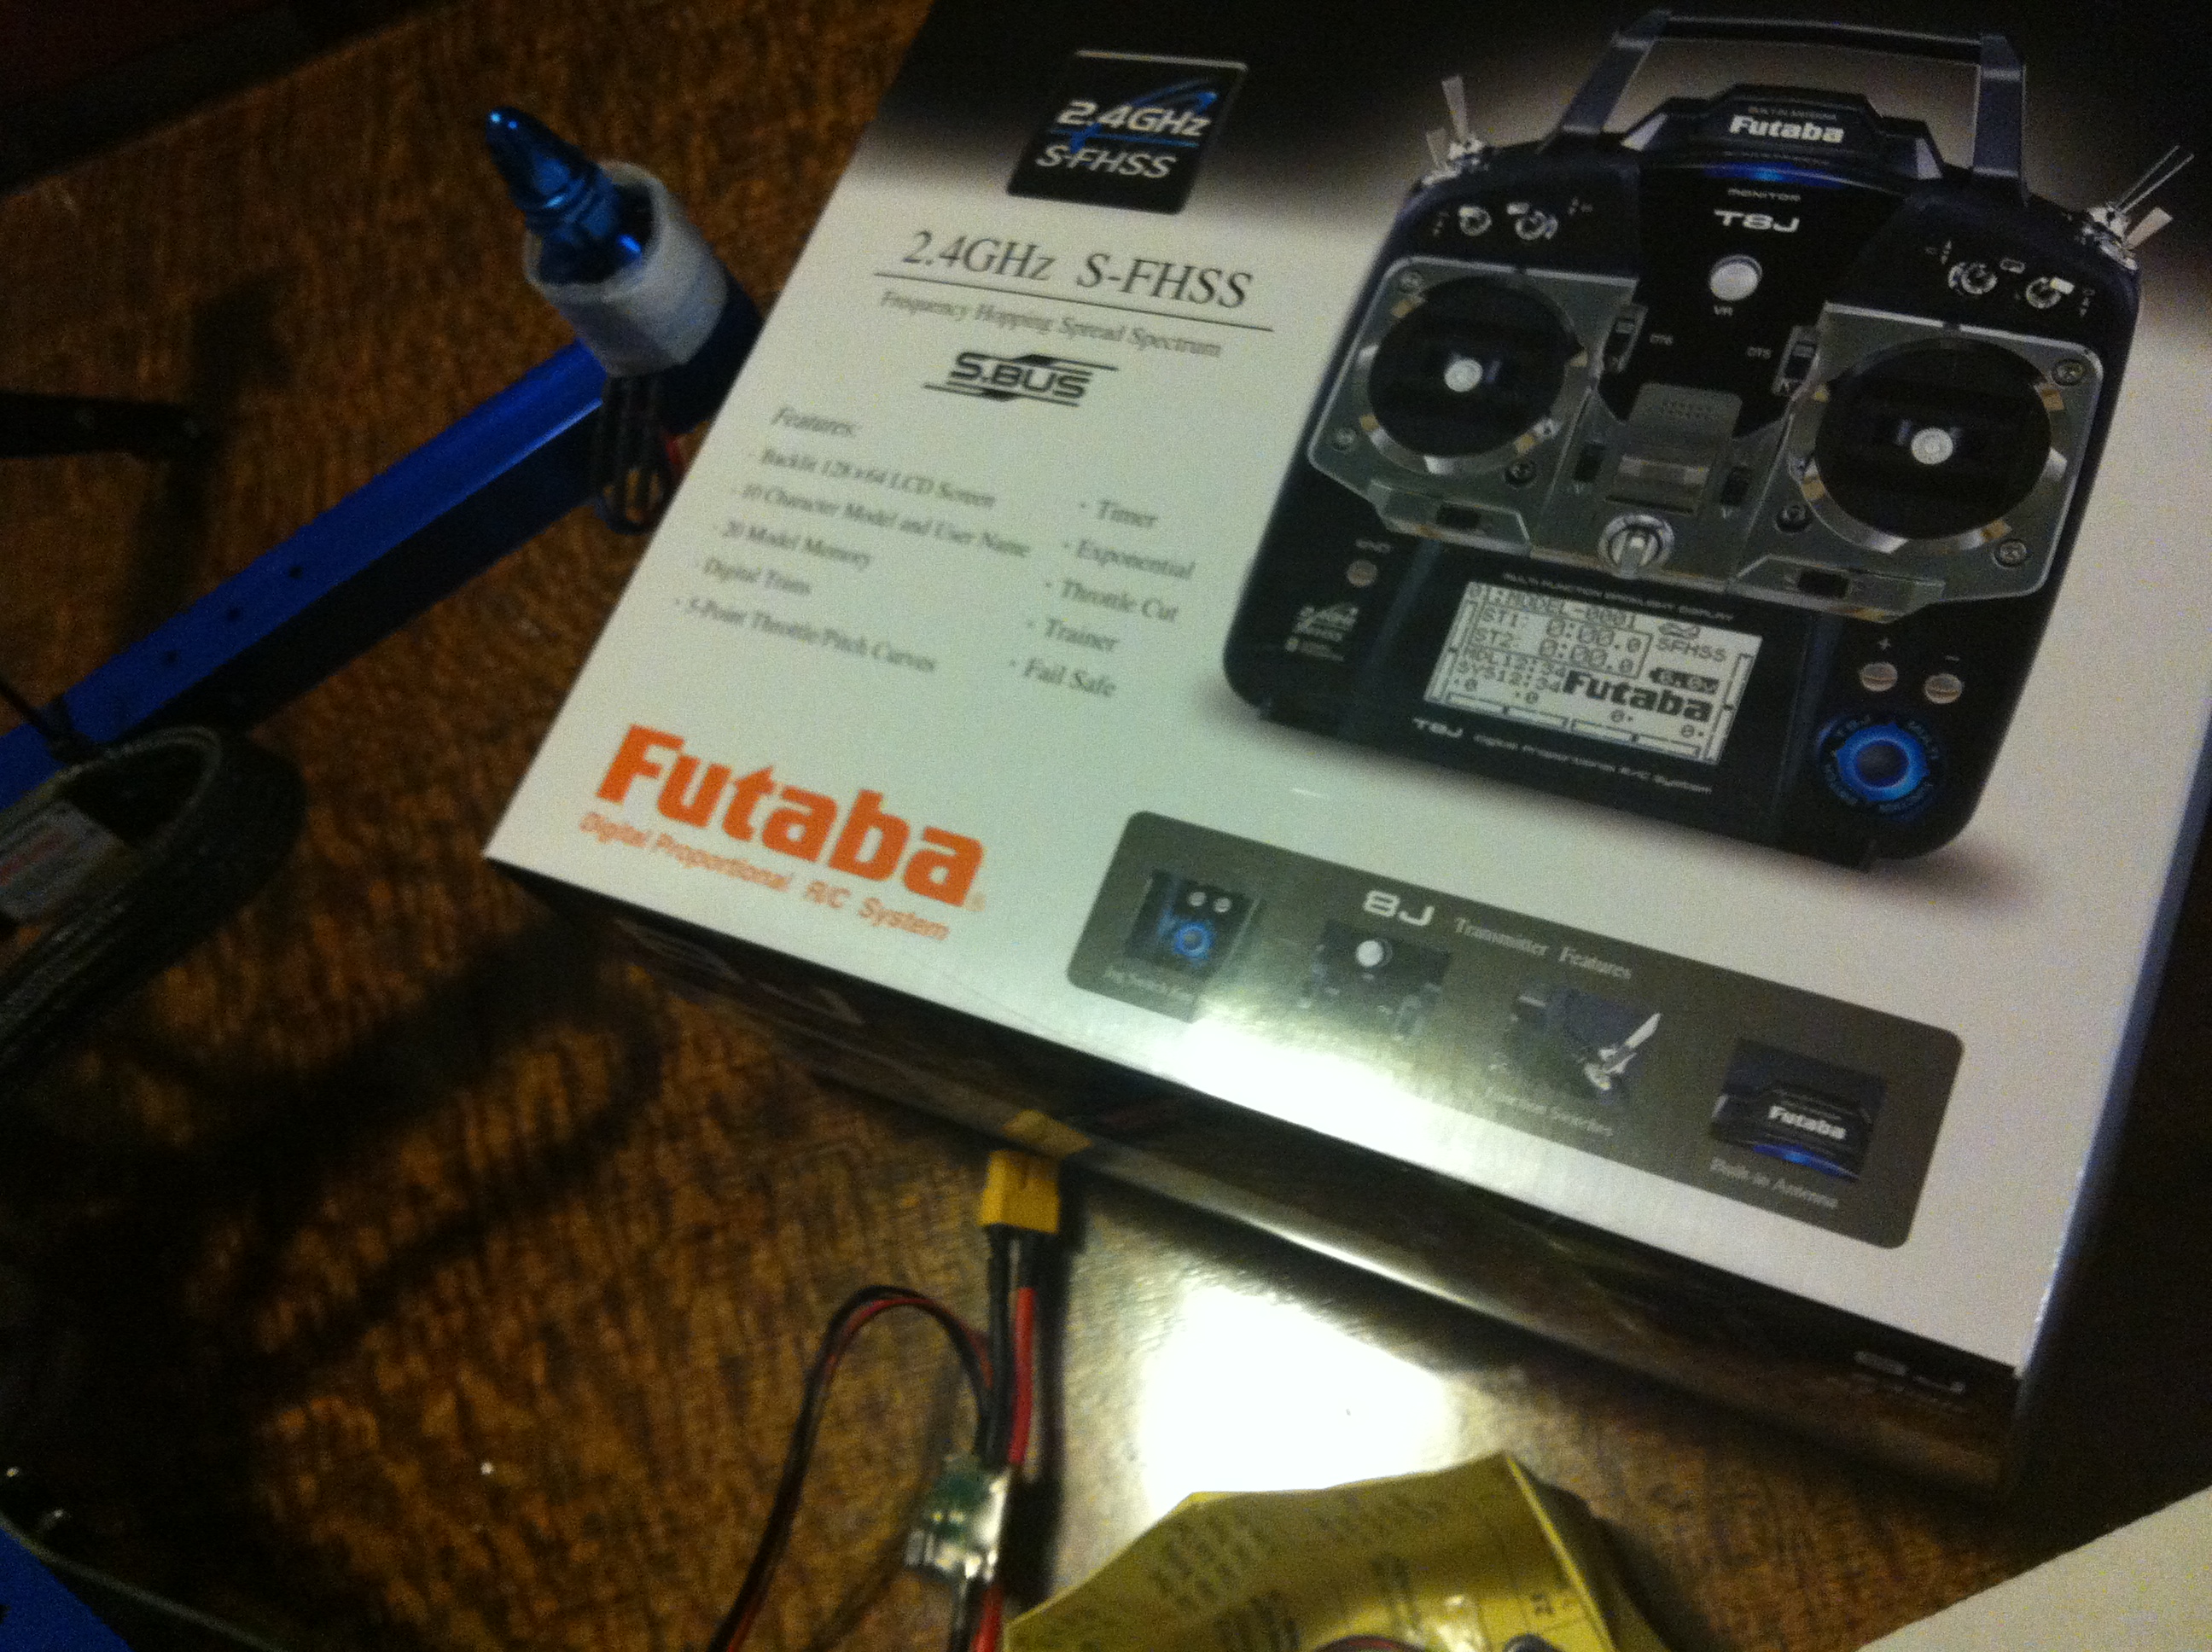
IMG_6535.JPG.jpg?width=300As it turns out, radio controlled gear (although as slightly specialist as it is) is reasonably common and not too hard to get hold of. So, off I went to the local R/C hobby shop. I grabbed one of the cheapest but full featured radio control units available a Futaba F8 unit – which includes a receiver, and it also runs on AA batteries; a big bonus. (Some transmitters have interchangeable transmitter packs for various frequencies and things).

When I had these new components with me and a big kid grin on my face and a hole in my wallet (because I’d just paid for a radio and batteries a second time – thanks HK), I was able to continue the build process and get things going properly.

It had taken me at least a few weeks to get to this stage, so I made minor tweaks to the initial and suggested look. I added some black braided plastic to conceal the wires on the six arms.

As soon as I brought the batteries home, I discovered I had a problem. I had initially ordered the wrong part. My battery had a T (Deans) connector on it. My power module unit from 3DR had an XT60 connector on it. Fortunately for me, a gentleman on YouTube has made 4 videos outlining various phases in the configuration of how the APM works and what goes where. It’s a good thing I’d watched them all and remembered about the little jumper pin video, as this was what saved my day. (https://www.youtube.com/watch?v=TFCmUuvcH04)

This basically meant I had to use the little jumper, because instead of using the 3DR power module, I'm now getting power from the ESCs to the APM. It's not a big issue, but just means the APM can't monitor the battery power and do an emergency landing if it runs out of juice.

The other videos in this mini series are also very good to give you enough information as well - Part 1, Part 2, Part 3 and Part 4.

One of the things I also did while waiting for parts and the construction phase was connecting the APM to my computer and loading the firmware required. After downloading the Mission Planner software, it was very easy to put the Hexacopter software on. There are plenty of tutorials out there about how to do this. I did however get excited to see the live telemetry data and the GPS signals coming through on my computer while the GPS module was connected. This was one of the main reasons for going down this OpenSource path.

When trawling through the wiki pages, also note that you are in the ArduCopter pages. The ArduPlane wiki pages are very quickly linked too as well and it's easy to mix up where you are. Most of the information is relevant, but at times it can be slightly conflicting.

For those wondering about how to connect the transmitter and other things, it's very easy.
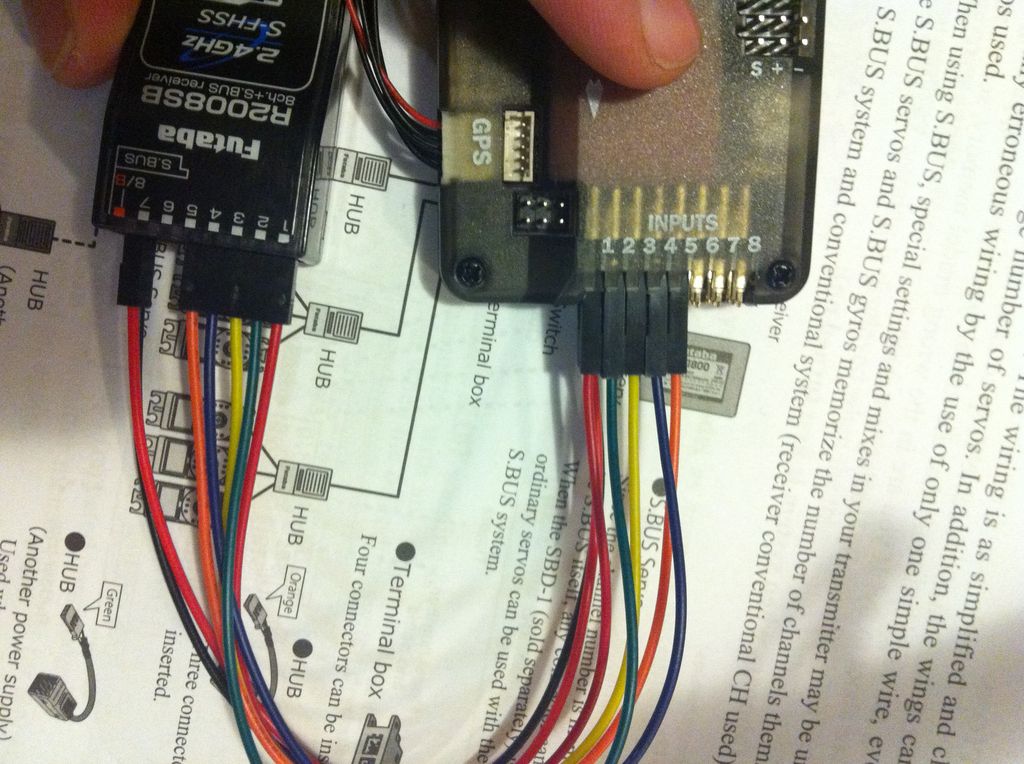
 

IMG_6543.JPG.jpg?width=750The connections on paper.


IMG_6538.JPG.jpg?width=750Nearly finished.


IMG_6556.JPG.jpg?width=750What the radio transmitter IN connections look like up close.
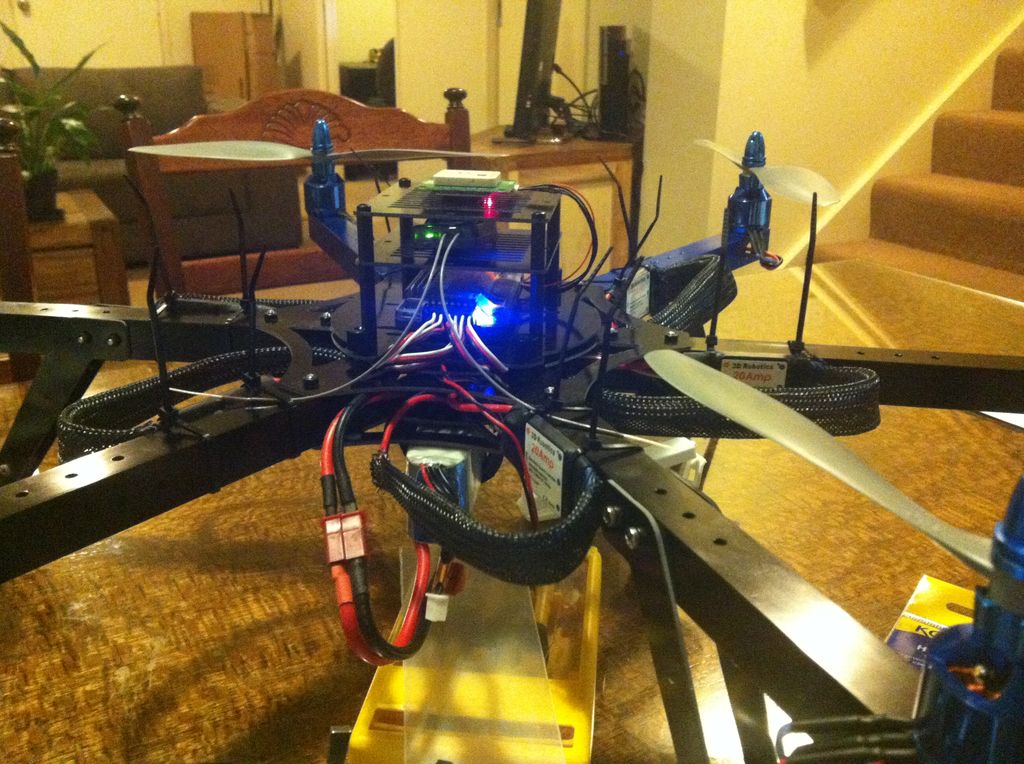
 

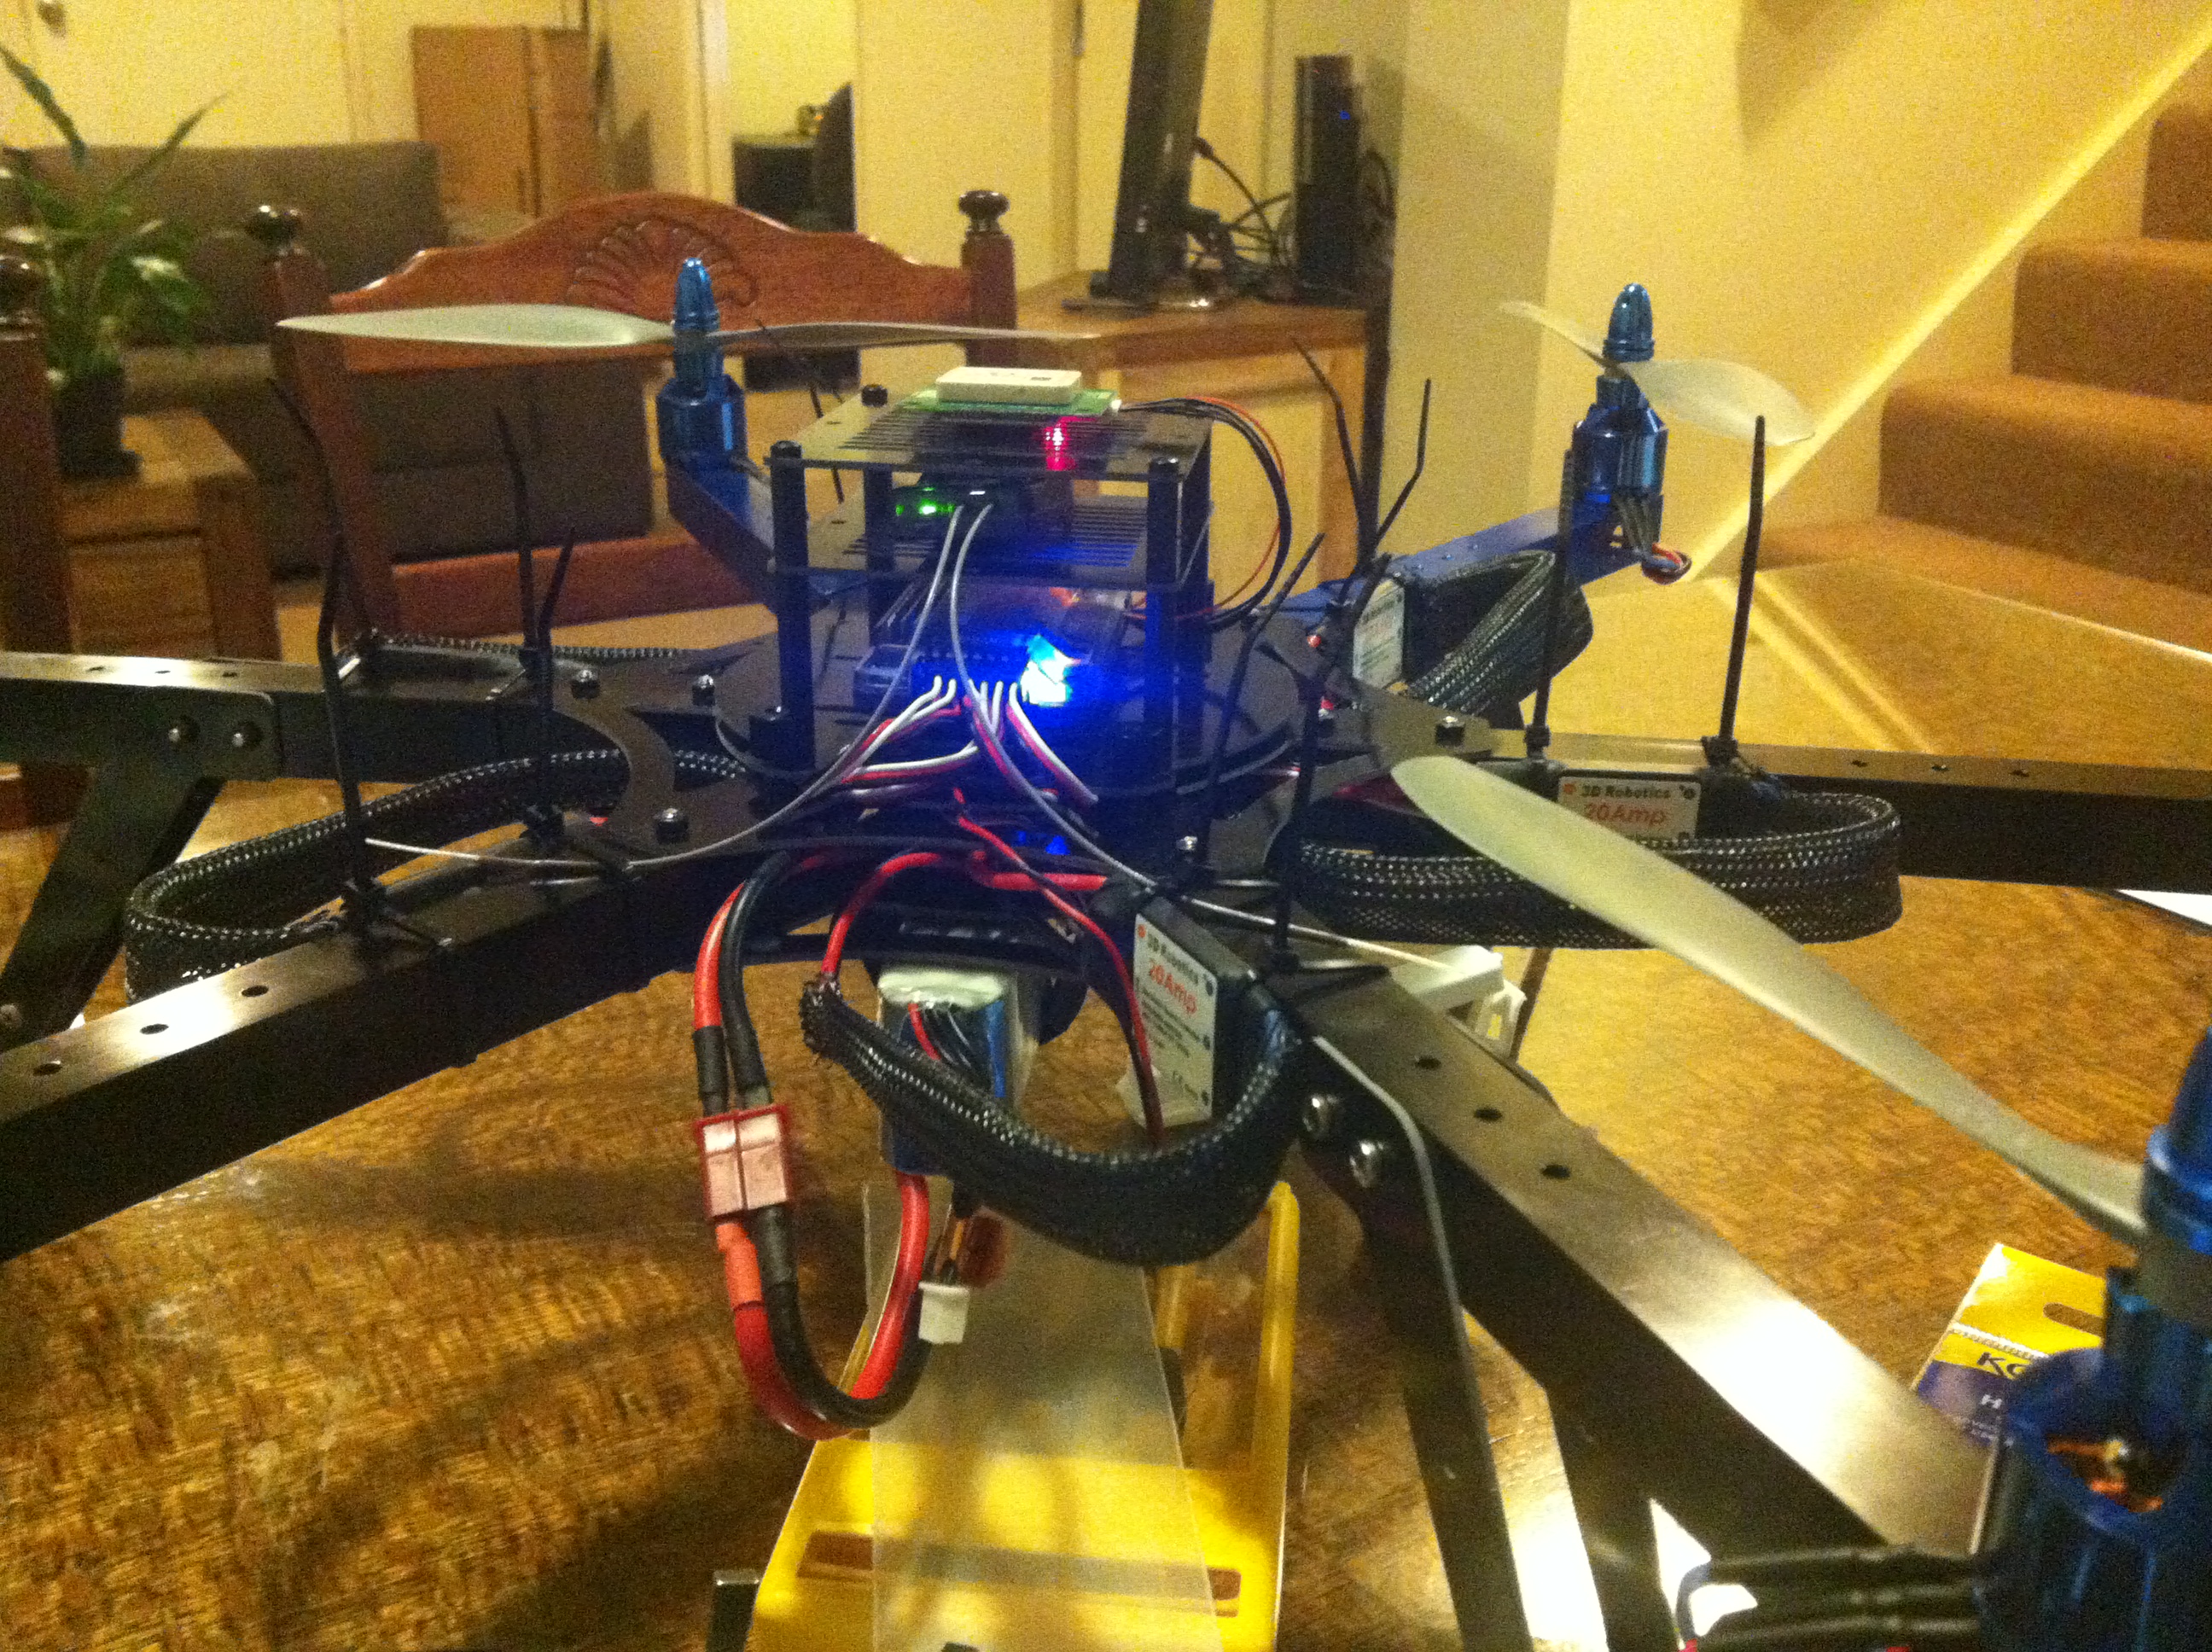
IMG_6552.JPG.jpg?width=750Completed!


One thing you may notice is how I ended up connecting the ESCs to the APM. I went directly from and skipped using the distribution board because a few of the connections had broken and after doing a couple of tests with my multimeter, I wasn't totally satisfied with how it was working. It was easier to remove the soldered cables and go direct.

Thanks for reading. There is still more to come however. Stay tuned...
Read more…

DIY Drones blog posts – March 2013

3689535578?profile=original

Hello,

(Similar, previous blog posts: January 2013; February 2013.)

You may be interested in THIS page that we made after reviewing all 243 blog posts of March 2013. We focused on unmanned aerial-vehicle systems (UAS) and unmanned aerial vehicles (UAV) to identify:

  • the posts that are closely related to a defined term or topic;
  • a list of sources of components, systems or services, as named in the posts;
  • other kinds of information from across the posts.

Next we will review the 226 blog posts of April 2013, followed by the remaining months of 2013 blog posts.

Because of the large number of links, the page may load slower than other pages on the DroneSpeak website.

- John (D.) Githens and Doug (R.D.) Starwalt

(DroneSpeak Administration)

Read more…
3D Robotics

3689535572?profile=original

Slate posts a podcast of the first lecture at the new Drone U, "a public education platform focused on the social, legal, and philosophical implications of drone technology" conducted in partnership with the New America Foundation.  The first lecture is by P.W. Singer, director of the Center for 21st Century Security and Intelligence at the Brookings Institution.

Here's Slate's summary:

As Singer discusses, the current debate around drones is comparable to the initial challenges posed by the introduction of the car in 1900. This technology brought strange new questions, such as how to protect people from them. The first fine for “speeding” came just a few years later, when a man was arrested for endangering the lives and property of pedestrians in downtown Jacksonville, Fla. He had exceeded the 6 mile per hour speed limit. “Horseless carriages” were a technology that once seemed alien much like unmanned aerial systems do today.

When we think about technologies like the Predator or Packbot, we need to remember that they are just the first generation—the Model T Fords and Wright Flyers. We are still at the “horseless” stage of this technology. Describing these technologies as “unmanned system” means we are focused on what they are not, rather than wrestling with what they truly are.

What the opening of the civilian airspace will do to robotics is akin to what the Internet did to desktop computing. Revolutionary technologies force us to ask new questions about what is possible and consider things that weren’t conceivable a generation before. But they also force us to relook at what is proper. They raise issues of right and wrong that we didn’t have to wrestle with before. With robotics, issues on the technical side may ultimately be much easier to resolve than dilemmas that emerge from our human use of them.

Read more…

Legs

3689535658?profile=original

You naughty scamps...you see a nice pair of legs, and the first thing you think about is what's between them. Pervs...:-D

Read more…
The winners of the Igor I. Sikorsky Human Powered Helicopter Competition will take home $250,000 and some serious bragging rights.
      Human Powered Flight             Click here to see this amazing image even larger.                 Ollie Bland

Even though scientists have dreamed of human-powered flight since the days of Da Vinci, it's really, really hard to pull off. Case in point: In 1980, the Igor I. Sikorsky Human Powered Helicopter Competition offered $250,000 to the first team to build a person-powered craft that can hover above 3 meters (or 9.8 feet) for longer than a minute. That prize went unclaimed for 33 years, until a team won it today.

The team of Canadians flying for AeroVelo launched their Atlas helicopter on June 13, and the flight--64 seconds, up to 3.3 meters--was just certified by the Sikorsky Prize judges. (We previously wrote about team member Todd Reichert's human-powered ornithopter project, too.) Here's a look at the flight:


Despite the prize going unclaimed for so long, the competition came down to the wire. The Atlas team was going up against two other aircraft, and one of them, the Gamera II, met the time requirement and came pretty close to the height requirement last year.

But lest you think this is the end of the three-decade-plus story, the American Helicopter Society, which oversees the prize, has announced "another grand challenge" coming soon.

http://www.popsci.com/technology/article/2013-07/after-33-years-winner-crowned-human-powered-flights-toughest-contest

Read more…


3689535353?profile=original

I am planning to use the RVOSD current sensor to measure the voltage and current of my system. Everybody knows that the power module from ardupilot is not compatible with 6s batteries. What I feel sorry. So i am interested to use the current sensor from a rvosd because is a really good one and can handle high voltage batteries. I will feed the APM with BEC, or will be even better if I can do both, power up APM and measure the batteries with the rvosd current sensor.Any ideas how to do it?


Read more…

PX4 on High Altitude Balloon

3689535148?profile=original

On Thursday July 18,2013 we are going to launch another balloon (2nd this year).

This time we are going to fly a PX4FPU and PX4IO board.

Along with our other stuff.

430 Mhz 3DR telemetry

900 Mhz 3DR telemetry

2 Byonics APRS tracking units. 10 watt output. See live track on APRS.FI and search for KE5VSH

Voltage, inside and outside temp sensors, output on APRS.FI

Live 1.5 watt video on 1.2 Ghz. Side outside view.

2 Muvie recording cameras. One pointed up the other down.

1 GoPro Hero 2 pointed to the side.

1 120 db sonaleart for location on recovery.

6 various size lipo batteries. 1000mwh to 6400 mwh

Fiberglass package made by our crew. Inside insulated with 1/2" foam.

BTW....can you believe I get PAID to do this ? (Student intern)

Package weighs about 9 lbs.

Balloon is 1500 gram. Filled with 2 big tanks of helium.

Here are some pics:

7/3/2013 balloon launch equipment

3689535394?profile=original

Some of the NEW 7/18/2013 launch equipment. Includes PX4IO and PX

3689535325?profile=originalMore pics of 7/18/2013 launch equipment:

3689535377?profile=original3689535349?profile=original3689535418?profile=originalI hope you enjoy the pics.

We will see if the PX4 holds up as well as the APM's that have flown before. Temps range from 90 F to 33 F inside and 90 F to -70 F outside. The balloon speed gets as high 107 mph on the last flight in the jetstream at ~ 35,000 ft. We have recovered all flight packages (11) so far. Hope to on this also.

Report after launch...and look on APRS.FI on 7/18/13.

Earl

Read more…
Moderator

T3 Season 2, The Model

3689486250?profile=original

Its T3 time again but first I have started tagging people that have entered T3 in the past on their member icons its a very small recognition for their valuable contributions which have driven APM forward faster than it might have without the competition. They have not only put their equipment on the line discovering new ways of doing things but countless hours as well.

Unsung heroes in the development of low cost autopilots for all.

So lets get into this round.

I waste far too much time on the most excellent GEFS there could be more 3D buildings laid on top of the Google Earth base layer. Lets change that.

The last T3 challenge "The Cube" bought some really outstanding results and the natural progression from this is automated flight around a building or natural point of interest and the creation of a 3D model perhaps in 123D catch of the subject. Last November Alan Sanchez showed us how. Improvements in the multirotor code that came into play at the Sparkfun AVC will help with the flying.

This could be achieved with a fixed wing platform with a little thought.

We should have some ground rules (pun intended) you must seek permission to make a model of the building, or natural wonder! You should fly no higher than 130m and the flight should be hands off all the way and you should stay visual with the airframe at all times. Please do not create a model of something in class A airspace unless it's at a recognized model aircraft field.

The flight must be at very least autonomous from just after take off to just before landing. If you can do it all autonomously bonus points! FPV entries will not be permitted.

If you submit your model to Google Earth and get it placed bonus points when it appears on GEFS for me to fly around it. In this case the model might be skinned with images taken from the air.

This is no simple task so it should remain open for six months. Normally I tack time on at the end so to break with tradition lets start the competition on the 1st of August and run all the way to 1st Feb 2014! That gives folks the extension weeks in advance!

Prizes to be announced when I have finished twisting CA's arm. As we know he always comes good.
I am also putting out a call for volunteer judges from the ranks of previous T3 entrants to help me decide. This one is I think going to be very subjective and how attempts are documented is going to be a big factor. 

There is no doubt automated building inspection will be a part of the future for sUAS.

Good Luck, be safe

GM

Now let the traditional but did you mean XYZ questions begin! Oh and if you are tooling around on GEFS as well look out for me as Gary sUAS News, often slope soaring ;-)

Read more…

In my past blog post "Tinkering with Neopixel LED-strips" and "Control high power LEDs (1W, 3W) from the APM 2.5 LED output", I have described a bit how to work with WS2812 Neopixel RGB lightstrips and how to control high-power LEDs with the APM. Yesterday night was the first latenight test flight with the installed system. The brightness of the Neopixel modules I made (3 LEDs each plus an 8 LED "360° beacon" on top of the copter) is pretty nice. At the front is a blue 3W LED (run by only a 1W driver to conserve energy and keep the heat in check) with a Flare lens from LEDIL. The flare lens has a very narrow vertical but a wide horizontal divergence. I mounted it turned 90° to serve as an indicator if the copter is heading straight towards me. Normally, the LED-driver's modulation input is connected to the APM's GPS LED output but for this test, I connected it to my light. controller.

If somebody feels the need to complain about safety because of me walking/flying on the road... I live in a residential area at the border of a 20,000 people small town in Finland. At 2345h on weekdays there are no cars driving or pedestrians walking here ever.

Read more…

22293(7).jpg

http://www.hobbyking.com/hobbyking/store/__42809__UAV_3000_Composite_FPV_UAV_Aircraft_3000mm_ARF_USA_Warehouse_.html

When I checked the "new items" page at Hobbyking yesterday, I almost fell from my chair...

A HUGE 3m wingspan fiberglass UAV kit for $263 - $284, depending on the warehouse For some reason, it's not available from the international warehouse but from all local warehouses... Some features and specs from the website:

Features:
• Glassfiber/Ply Fuselage
• Fully Sheeted balsa/ply 2pc Plug In Wing
• Plug In V-Tail
• Huge Payload Capability
• Large Front and Mid-Mounted Access Hatches
• Heavy Duty Under-Carriage with Steerable Nosewheel
• Adjustable Motor Mount
• Large Air Intake & Cooling Duct for ESC/Motor Cooling
• Aerodynamically Efficient Airframe
• Flaps for Excellent Low Speed Handing
• Fast and Easy Build

Specs:
Wingspan: 3000mm
Length:1580mm
Weight: 5200g~5400g
Wing Area: 48dm2
Wing Loading: 108~112g/dm2
5 Channel

Requires:
Your own 6 Channel TX/RX
4 x 12g~16g MG High Torque Servo's, 3 x Standard Servo's
50mm Brushless Outrunner
80A~90A ESC
13"~15" Prop
UBEC
5s~6s Lipoly Battery
FPV Equipment/Camera
80~82mm Spinner

Now I'm waiting for someone to buy it, fly it and talk about quality and stuff :).

Read more…
Moderator

Arduino Autopilot for Boeing 737

737.jpg?w=620&h=208

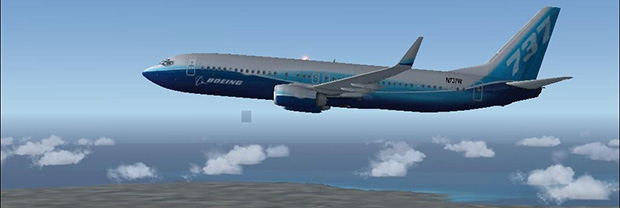
Well, for a simulated 737 at least.  via Hackaday:

[Andrea] didn’t want to dig around with the clunky point-and-click interface in FSX, so he created a virtual autopilot with a 2×16 LCD display and an Arduino to interact and set the most common autopilot settings such as altitude, speed, heading, and engagement. The physical interface is just three tact switches and a pot, while the interface to FSX is a custom driver that turns the USB out of the Arduino into actual flight commands.

Video at the link...

Read more…

World's First Drone Paint Roller

Ok, it is not a paint roller. That is just what I thought when I first saw this. Personally, I find the concept interesting, and I can think of some unique uses, including as a remote control paint roller.

But, seriously, I wonder how much flight times might be improved if a "mission" was mostly rolled around on the ground, with only short hops over obstacles? I may have to contact my friend at BG and see if they could send me an evaluation model for some testing.


Check out the specs further here.

Read more…

Flone, the flying phone


3689535202?profile=original

We are developing Flone: a interface that allows smartphones to fly.

Right now we are starting with the project, so first we design the airframe, it's a H quadcopter with space for electronics and free field of view for the camera of smartphone.

We would like to keep the design "mini" and easy to build.


3689535223?profile=original


At the moment we are using a Multiwii as flight board and a standard camera app in the smartphone.

Our plans is to develop an app than allows to fly with the onboard sensors and telemetry of the smartphone.

We plan to release the hardware with Creative Commons ShareAlike and the source code with GPL, so we would like to have the feedback of the diydrones community.

We published the airframe in Thingiverse, so you can already cut-it with a laser cutter, and we made a Instructables with all the instructions to build one yourself ;)


You can get updated about the project in our webpage: http://flone.cc ( In spanish )


One more thing... we would like to take advantage of this post to remember you that the last day to vote in Drones contest is coming, so if you like our project please vote us in Instructables ;)


Read more…

The Phantom Has Competition Now $496.99 RTF

Key Features

  • SAFE™ technology provides three flight modes with the flip of a switch
  • Smart Mode with GPS/altitude hold, stick relativity and the innovative SAFE circle
  • Stability Mode with flight envelope protection and GPS hold
  • Agility Mode for aerobatics and aggressive flying
  • Return Home function automatically lands at the home position
  • GoPro® compatible anti-vibration camera mount* included (camera not included)
  • Intelligent motor control automatically stops the propellers upon impact with an object
  • Ready-to-Fly out of the box with a Spektrum™ DX5E transmitter, 3S 2200mAh LiPo battery and charger
Read more…

(Re-posted from: http://conservationdrones.org/2013/07/10/conservation-drones-in-us-fish-wildlife-service-webinar-series/ )

3689535032?profile=original

Serge Wich from ConservationDrones.org (http://conservationdrones.org) was recently invited by the U.S. Fish & Wildlife Service to give a talk about the use of UAVs in conservation.

During the Q&A session after his presentation (also in this recording), questions from the audience indicate that they were all very positive about this UAV use, which was a pleasant surprise for us!

Read more…

APM data logging - some ideas

3689535104?profile=original

Hi all!

I’d like to start discussion about APM 2.5 and data logging. The reason for that is this graph:

Looks strange doesn’t it? I created it using Mission Planner after some flights, but lets start from the beginning:)

I'm new APM 2.5 user. I successfully completed several flights and I'm quite impressed how all this stuff works.  Only thing which concerns me is  data logging. It just looks strange to me. The way in which all the data is logged makes any further analysis difficult. When analyzing my logs I made some observations  which I’d like to share with you:


>> Current time is logged within GPS messages only - In my opinion all lines should contain time. It would be much easier to compare data using Mission Planner or just excel. As you can see at the graph in post header, data which are logged with different frequencies are hard to compare later. Why? Because we have line number on x-axis instead of time. Time is also useful when you try to check plane response to step disturbance and tune PID using control theory. Believe me – there are some users which just need it. We can log time since APM power-up - not necessarily absolute GPS time. Of course it is possible to estimate time for each line (based on logging frequency) and correct all in excel but it takes a lot of time and it is still guessing.


>> Not all telemetry data can be logged onboard - For some reason it is not possible to log some data onboard. I'm aware of memory limitations, but sometimes you want to log chosen parameters and need only let’s say 40 seconds recording time. I think it should be possible to choose every single variable and record it onboard (compare list of parameters available via telemetry and logged onboard). Most important data for me are: radio input, target parameters (altitude, orientation angles etc.) actual pitch and roll angles, autopilot output commands, airspeed GPS data, pressure altitude, ground course. It would be great to have possibility to log it!


>> It is not possible to connect serial port logger to telemetry port - Not all users want to connect 3d radios / x-bee modules . Sometimes it does not make sense due to limited range or interference which cause data loss. I’m wondering if it is possible to switch off 2-way communication with mission planner and simply connect serial port logger to telemetry port. It could be one more configuration parameter and simple solution for my previous problem.


What do you think? Does it make sense? Let me know your thoughts.


Regards,

Kamil

Read more…
3D Robotics

Autonomous boat crossing the Atlantic

From Hackaday:

While we may be waiting for unmanned drones to deliver a pizza, there’s already an unmanned ship plying the Atlantic on a transoceanic voyage. It’s called Scout, and it’s the product of about two years worth of work by a very close-knit group of friends.

Scout is a 12.5 foot ship constructed out of foam and carbon fiber loaded up with solar panels, electronics, an electric motor and a SPOT satellite tracker. The team has been working on Scout for the last two years now, and this last week the autonomous ship finally set out on its mission: a 3500 mile journey from Rhode Island across the Atlantic to Spain.

Right now, Scout is just over four days into its mission having travelled 90 miles from Rhode Island on its way to Spain. You can follow Scout on its journey on this very cool live tracking site.

Read more…