All Posts (11086)

Sort by

3689733969?profile=originalThe anti-drone market is segmented on the basis of technology into electronics system, laser system, and kinetic system. Among these technologies, the market for the electronics system technology is expected to grow at the highest CAGR between 2017 and 2023. The major factor responsible for this growth is huge investment by key players in electronics system-based anti-drones across

Military and defense vertical held largest share of anti-drone market 

The military and defense vertical captured the largest share of the overall anti-drone market in 2016. The use of drones for border trespassing, smuggling, and spying has increased. As a result, the demand for an efficient anti-drone system is expected to rise in the coming years in the military and defense sector. The commercial vertical accounted for the second-largest share of the overall anti-drone market in 2016.

Detection and Disruption expected to be the fastest-growing application in anti-drone market

The anti-drone market for the detection and disruption application is expected to grow at the highest CAGR during the forecast period. This is mainly due to the major applications of detection and disruption systems in the military and defense and homeland security sectors, wherein the unauthorized drones entering into the prohibited area of any country are detected as well as disrupted on the spot.

Americas is the major consumer of anti-drones

The Americas accounted for the largest share of the overall anti-drone market in 2016. Factors contributing to the growth of this market include increasing number of security breach incidents by unidentified drones and increasing terrorist attacks in the American countries, especially the US. This compelled the government to deploy anti-drone systems to ensure safety and security from drones in this region.

The report also profiles the most promising players in the market. The competitive landscape of the market is highly dynamic because of the presence of a significant number of big and small players. The key players in the market are Thales Group (France), Blighter Surveillance Systems Ltd. (UK), Lockheed Martin Corp. (US), Saab AB (Sweden), Dedrone Inc. (US), Raytheon Co. (US), Israel Aerospace Industries Ltd. (Israel), SCG LLC (Switzerland), Droneshield Ltd. (Australia), Theiss UAV Solutions, LLC (US), BSS Holland BV (Netherlands), Prime Consulting & Technologies (Denmark), Advanced Radar Technologies SA (Spain), Department 13 International Ltd. (US), and Northrop Grumman Corp. (US).

Read more…

WRISTBAND CONTROLLER USING PLUTOX

How cool would it be if we could control our drone just with our wrist movements.

I have used 2 Primus X boards in this project. One PrimusX is mounted on the drone while the second one is used to mount it on our wrist.

Now to control the drone with just the wrist movements all we have to do is map the values of Roll, Pitch and yaw of the wrist mounted PrimusX with the actual drone. The throttle control to the drone is calculated based on the velocity component of z axis. Thus with all the data about the Roll, Pitch, yaw and Throttle of the wrist mounted board, we can easily control our drone with just our wrist movements.

For that a connection has to be established between the 2 PrimusX boards. For this we create 2 AT commands, one for creating a socket and other to create UserID and password for the drone with which we want to connect. 

Various API's available on Cygnus IDE such as Angle, Msp etc make it really easy to code. 

To open drone experimentation to the world, Drona Aviation is crowdfunding for PlutoX on Indiegogo. 

Support us and help us bring it to life: https://igg.me/at/flyplutox/tinkerers

Read more…
3D Robotics

Thrust-vectoring monocopter

3689734004?profile=original

From Hackaday (this was actually posted by a community member first, but accidentally got deleted. Sorry)

We’re not entirely sure what to call this one. It’s got the usual trappings of a drone, but with only a single rotor it clearly can’t be called by any of the standard multicopter names. Helicopter? Close, but not quite, since the rotor blades are fixed-pitch. We’ll just go with “monocopter” for now and sort out the details later for this ducted-fan, thrust-vectored UAV.

Whatever we choose to call it — builder [tesla500] dubbed it the simultaneously optimistic and fatalistic “Ikarus” — it’s really unique. The monocopter is built around a 90-mm electric ducted fan mounted vertically on a 3D-printed shroud. The shroud serves as a mounting point for the landing legs and for four servos that swivel vanes within the rotor wash. The vanes deflect the airstream and provide the thrust vectoring that gives this little machine its control.

Coming to the correct control method was not easy, though. Thanks mainly to the strong gyroscopic force exerted by the rotor, [tesla500] had a hard time getting the flight controller to cooperate. He built a gimballed test stand to work the problem through, and eventually rewrote LibrePilot to deal with the unique forces on the craft and tuned the PID loops accordingly. Check out the results in the video below.

Some attempts to reduce the number of rotors work better than others, of course, but this worked out great, and we’re looking forward to the promised improvements to come.

Read more…
3D Robotics

From the University of Washington:

Drones use GPS to find their way without a pilot. But GPS signals can be easily blocked by tall skyscrapers or trees — leaving drones lost.

Now researchers at the University of Washington have developed a new method that gives aircraft a backup system in case GPS fails: An antenna on the ground that can tell a drone where it is. The team successfully tested their system in June.

“Right now GPS is the one ring to rule them all: Without it, tiny drones all the way up to commercial aircraft can’t do their jobs. It’s a huge liability,” said Christopher Lum, a UW research assistant professor of aeronautics and astronautics and the director of the Autonomous Flight Systems Laboratory. “Before GPS was widely used, pilots had myriad other techniques for navigation. Now we need to fall back to some of those older techniques to keep unmanned vehicles like drones in the air without GPS.”

The aircraft performing the flight test

The aircraft, Papaya, performing the flight test (top left). On the ground (left to right): Cory Cantey (piloting), Christopher Lum, Hannah Rotta and Joshua Brockschmidt.Credit: Autonomous Flight Systems Laboratory

The team’s unmanned drones carry transponders on board that send signals to operators and any surrounding aircraft about their whereabouts.

“A transponder is like Twitter for aircraft,” said Lum. “It blabs out information to anyone who’s listening, such as: ‘Here’s my GPS position, here’s my GPS position.’ Then everyone else knows where the aircraft is.”

Inspecting the aircraft

Cory Cantey (left) and Christopher Lum perform a pre-flight inspection to make sure the backup aircraft, Peach, is ready to take to the skies.Credit: Autonomous Flight Systems Laboratory

If GPS is knocked out, the transponder doesn’t know its location, but it will still send signals. So the team used a large ground-based antenna array to pick up the signals and then triangulate the position of the aircraft.

“The ground station is smarter than the aircraft at that point,” said Lum. “We’re just modifying the autopilot onboard the aircraft. Instead of using GPS information to navigate, it’s listening to this message coming from the ground to figure out where it is.”

On June 12, the team tested their system with the antenna array at the Columbia Gorge Regional Airport, just across the Columbia River from The Dalles, Oregon. The drone successfully completed its 1.25-mile flight path without using GPS. The only time it deviated from the designated path was due to wind.

While this is not the first technique researchers have developed to keep aircraft flying without using GPS, what’s new is the transponder.

“It’s the size of a pack of cards,” said Helen Kuni, an undergraduate student at the UW and the director of flight operations for the lab. “And the hardware that makes the system work is extremely simple. It’s really easy to stick it on an aircraft and make it work. It won’t add much weight to a small aircraft with weight limits.”

Prepping the aircraft

Cory Cantey (left) and Karine Chen prepare the drone, Papaya, for flight.Credit: Autonomous Flight Systems Laboratory

The ground-based antenna system, on the other hand, makes this technique cumbersome. Right now it only works when the team is flying a drone at an airport with that antenna system.

But the team has plans to expand the drones’ ranges. Starting this fall, Lum will partner with T-Mobile to try to use cellphone towers to perform the same function.

“T-Mobile has got that black magic to know where a phone is located anywhere within their antenna array,” said Lum. “So instead of being stuck in the Columbia Gorge region, our drones could use the cell network to get that location information anywhere there is cell coverage. It’s beautiful.”

Once the drones can fly larger distances without GPS, the team hopes to use them to help transport medical supplies to and from rural areas in the state of Washington.

The team with their aircrafts

The team holding Peach (left) and Papaya (right) in front of the Autonomous Flight Systems Laboratory’s ground station trailer and the antenna array. From left to right: Kelly Lee, Ravi Patel, Joshua Brockschmidt, Helen Kuni, Cory Cantey, Hannah Rotta and Karine Chen.Credit: Autonomous Flight Systems Laboratory

UW students who contributed to this project include: Hannah Rotta, Cory Cantey, Ravi Patel, Karine Chen, Kelly Lee, Joshua Brockschmidt, Tinnabhand Patana-anake and Jacob Longhurst. The project is supported by the Advanced Navigation and Positioning Corporation, Hood Technologies, Sagetech Corp, Insitu and the Joint Center for Aerospace Technology Innovation.

For more information, contact Lum at: lum@uw.edu.

Read more…
3D Robotics

Bicopter build

3689733913?profile=original

From Hackaday:

RCExplorer, or [David], or just ‘The Swede’, has come up with a bicopter kit. Yes, there are a lot of people making frames and kits for quadcopter, multicopters, drones, and so forth, but [David] is really the leader in weirdmulticopters. Now, we have the weirdest multicopter imaginable as a kit, complete with firmware that works.

[David] is one of the great unsung heroes of the drone and multicopter world. He’s famous for rocket knives, even though that really doesn’t have anything to do with drones, he bought an airplane for his front yard (again, little to do with drones), he was one of the first to take a glider up to 100,000 feet with a balloon, and he’s been one of the main forces behind tricopters as a superior — or at least cooler — platform for aerial acrobatics and camera work. There’s a lot of work being done to the various firmwares to support tricopters, and we have [David] to thank for that.

Like [David]’s earlier tricopter kits, this frame is made entirely out of carbon fiber plate, square tube, and threaded standoffs. It also looks like batman’s drone. The firmware — the real trick for a bicopter — is stock betaflight, and there are a few problems with the stock firmware. The bicopter doesn’t like flying backwards, tuning is fiddly, and it’s harder to fly than a quad on rails. That’s to be expected with a platform as weird as a bicopter, but this kit does open the door to firmware developers hacking and making the bicopter features better.

This is what delivery drones will look like, once the people who think delivery drones are a good idea learn physics.

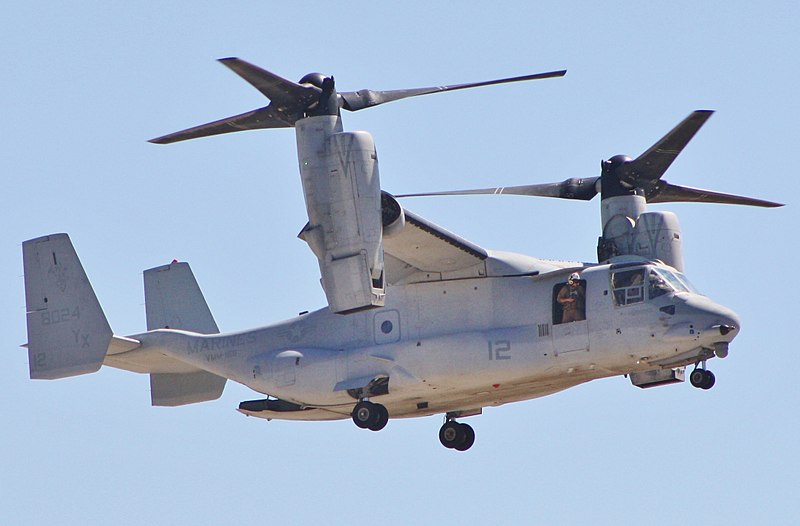
While pure bicopters are great, the release of what will surely be a popular bicopter with a good community of firmware developers means the door is open to a simple VTOL fixed wing, not unlike a V-22 Osprey.

Remember, San Francisco tech bros, if you need a delivery drone, you need three things: long range, VTOL capability, and payload capacity. A quad or hexacopter will not get you there, and fixed wings will give you lift for free. There is no Moore’s Law for batteries, and right now if you want to ship a bottle of shampoo 20 miles in 30 minutes, the way to do that is with a drone that looks like a V-22 Osprey. Please, delivery drone bros, learn physics, use a tilt-rotor, and learn to put the battery in the wing. This is how you found a company that will get an easy $100M valuation.

Read more…

Pixhawk 2 with Jetson TX2 Build

3689733877?profile=original

I have just completed my rebuild of The Groundhog hexacopter with a Pixhawk2  and NVIDIA Jetson TX2 companion computer.  This is in preparation for the coding blogs I am posting and further work integrating depth cameras and machine learning.  For those interested, details of the build are posted on my blog at www.mikeisted.com.

Read more…

3689733730?profile=original

Post-Processed Kinematic (PPK) technique is widely used for mapping with drones. In this scenario Reach RS/RS+ base on the ground and Reach M+ rover on a drone independently log raw data which is post-processed after the flight.

For mapping, it’s crucial to sync an onboard camera and Reach M+ rover. To ensure smooth and reliable synchronization of Reach and a camera, we’ve recently added a hot shoe adapter to Reach UAV mapping kit.  Also available from our distributors

3689733800?profile=original

You can get hot shoe adapter in the online store with UAV kit or purchase it separately

Learn more about our new product and read why synchronization of a camera and Reach M+ is important on our blog! We have also posted an introductory article about PPK, the guide will be useful to everyone getting started with PPK and UAV mapping. 

3689733745?profile=original

Read more…

Here I am again with a new tutorial. Find it on Youtube

Suggestions for further videos? >>> Write it down in the comments or on my YouTube channel

***** LINKS *******

- Github: https://github.com/tizianofiorenzani/...

- My company Xworks (home of the RDISt): http://www.xworkshd.com/

***** References ***

- Aruco Library: https://docs.opencv.org/3.1.0/d5/dae/...

- Aruco Marker online generator: http://keystone.umd.edu/html/markerge...

- Precision Landing project from GoodRobot: https://github.com/goodrobots/vision_...

- Ardupilot Store: https://shop.ardupilot.org/

- Rotation matrix to euler angles: https://www.learnopencv.com/rotation-...

***** REFERRED VIDEOS *****

- OpenCv setup on a Raspberry Pi 3: https://youtu.be/QV1a1G4lL3U

- Setup a Raspberry Pi 3 as Companion PC: https://youtu.be/cZVNndOaYCE

- Software In The Loop with Mission Planner: https://youtu.be/o6o5IcTAwgM

- Trajectory Tracking: https://youtu.be/yzeCuBjuEjc

Read more…

Tersus UAV PPK solution is coming

3689733348?profile=original

Tersus UAV PPK solution is coming.

Tersus UAV PPK solution is available on the website now: www.tersus-gnss.com

Tersus UAV PPK solution includes BX316R PPK Receiver, AX3705 Helix Antenna and Tersus GeoPix Software. BX316R PPK Receiver supports multi-constellation and dual-frequencies. It has in-built 4G memory for GNSS observation data recording. Very small and light AX3705 Helix Antenna is designed for UAV applications. Tersus GeoPix integrates the  functions of GNSS observation post processing. Event Mark interpolation and geotagging in EXIF, By clicking one button after input all necessary data, the software will provide the result directly as input for image processing software. 

Tersus PPK solution dramatically reduces time and costs. It can significantly reduce GCPs or even eliminate the demands for GCPs. There is no need of RTK correction in this solution, Tersus PPK solution combines forward and backward filter during post processing and it can provide more reliable positioning and higher fixing rate. 

Feature of Tersus GeoPix,

1.Simple software interface and simple workflow

2. Automatic processing GNSS data and geotagging images by one button click

3. Shows the result in trajectory plot and the images on online map

4. Provides PPK result in both EXIF and text file

5. The result can be directly used by image processing software,i.e.,Pix4D,Agrisoft,etc.

6.Supports Base station data from CORS or other brands GNSS Receiver,i.e.,RTCM3 and RINEX format.

Item list is shown in below picture:

3689733292?profile=original

Tersus PPK Solution is on sales promotion now. USD899 only until October 31st. 

Contact me if you have any interests or need any technical supports. 

Email: yunxia.hu@tersus-gnss.com 

3689733465?profile=original

Read more…

Task 3.1 : Biomechanical Equestrian simulation

Hello everyone,
Long time no see.

My animal-type drone research and development launched the new open institute "Varipon Institute" at Blender Network.

From now on, we will provide you modeling data of movement mechanism operating on land, at sea, in the air, and in the space using free 3D software Blender.

In the future, we will be able to analyze using these data with OpenCFD (purhaps OpenFOAM).

My efforts came to be known little by little.
State-of-the-art companies such as NVIDIA and Amazon comes to search for me on LinkedIn.

Task 3.1 : Biomechanical Equestrian simulation (above)

This biomechanical finite element analysis (BFEA) will contribute to increase the force of Equestrian sisters and brothers, as well as Development of animal type drones.

You can download the movement modeling data from the official page.
http://varipon.com/index.php/work-plan-3/task-31/
Let's try 3D simulation.

Varipon Institute first shares the modeling data of the horses movements as a Python program. The final release of all assets of the horse 3D model will be shared according to the release of Blender 2.8.

For the next time, I'll provide you the python script on blender for the fluttering biomechanical link mechanism of the wings of bats and insects.

See you again.

Best

Yutaca Sawai

Read more…

Coding UAVs with ROS. Subscribing to FCU data.

3689733401?profile=original

I have just published Part 2 of this series, designed to develop skills in Python and ROS so as to achieve flexible control of a UAV.  It's based on a Pixhawk FCU with Raspberry Pi companion computer.  The Pixhawk is running PX4, but it would also work with minor modifications with Arducopter.  

I have also re-released Part 1 with some important updates (necessary due to recent changes in ROS).

We are heading towards a system that will fly autonomously and recognise and track objects in it's vicinity using some machine learning.

Part 2 is on my blog site here.  I hope some may find it useful!

Read more…

FlightZoomer 3 is released!

Finally, after a long development time, I am happy to announce that FlightZoomer 3 is released!
To celebrate the launch of the FlightZoomer apps, the FlightZoomer 3 Cockpit-app is available at no cost from the Windows 10 Store. Be sure to get the app for free before the price goes up.
For those who don’t know FlightZoomer yet, get an impression of the capabilities in the video above.

What is FlightZoomer?
FlightZoomer is a special kind of a cockpit app (aka GCS), which runs on any Windows 10 tablet, notebook, or desktop PC.
The app, which is called FlightZoomer Cockpit 3, is connected with an ArduPilot flight controller either through 3rd party radio telemetry or through 3G and an onboard smartphone, that acts a companion computer and runs the FlightZoomer 3 Companion app.
As the name "cockpit" implies, FlightZoomer is a man-machine interface for pilots. The system supports flying and controlling an aircraft remotely probably better than any other hobby grade GCS. In fact, FlightZoomer offers FPV on a system and procedure level (besides being great for classical FPV too).
Unprecedented innovations are:
 
Autopilot modes
The autopilot offers more than a dozen modes, which are common on Boeing aircraft, but which have not been available for remotely controlled aircraft before. The Mode Control Panel allows to control intuitively the flight direction, turns, climbs, or descends in real time. The modes are:

TRK - track over ground
HDG - Heading
Turnrate - Turn radius
SPD - Speed
VS - Vertical Speed
FPA - Flight Path Angle
FLCH - Flight Level Change
ALT - Altitude
APP - ILS Approach
LOC - Radio Navigation Localizer
LNAV - Lateral Navigation (follow route laterally)
VNAV - Vertical Navigation (execute climbs, descends, cruise phases of planned route)

Control the flight using the Microsoft Surface Dial
In a real cockpit, autopilot target values are dialed in using rotary controllers. FlightZoomer offers this behavior by supporting the Microsoft Surface Dial. Using this nice rotary controller, you can select target values by turning the knob and jump from mode to mode by pressing the knob.
If you e.g. command a turn, the aircraft does not wait to start turning until the target value has been locked in. Instead it starts banking the moment you start rotating the dial. At the time you have intuitively and precisely set the desired new target direction, the turning aircraft will already be close to that direction so that the autopilot can gently terminate the turn.
Flying like that is hard to describe, you have to experience it! It is like setting the flight direction with a steering wheel.
See in this video, how this works.

Control the flight by voice recognition
Even another method, how the autopilot can efficiently and safely be operated, is by voice recognition. Hands-free flying becomes reality if you simply tell the FlightZoomer autopilot, what it shall do. By voice instructions, which follow a simple grammar, all the autopilot modes can be set. This feature offers the shortest intention-to-machine distance…
See in this video, how this works.

ILS - Instrument Landing System
In full scale aviation the procedure to fly ILS approaches is to capture first the direction (= localizer) to the runway, then capture the glideslope from below. With FlightZoomer, you fly approaches exactly the same. First you set a course, that will intersect the extended runway center line with 30° - 60° (e.g. assume a runway direction of 78°. To capture the localizer from the south, you would select 40° as target value for the TRK mode). At the intersection point (and with armed APP mode), the aircraft then gently and automatically would turn toward the runway. If you began the procedure at a suitable altitude, the glideslope should soon settle in from above, so your ILS approach would be fully established and the automatic descend would start.

Terrain map and Vertical Situation Display
Real glass cockpits usually provide excellent feedback about the elevation of the surrounding terrain. As an absolute novelty, this feature has been made available in FlightZoomer too. On the Navigation Display, you get a terrain map, which shows you areas that are sufficiently below the aircraft (colored in green), areas which are close to the aircraft altitude (colored in yellow) and areas which are higher than the aircraft currently is flying (colored in red).
This capability is very useful especially for drones and RC aircraft operations, as these types of vehicles typically fly rather low all the time.
It is fascinating to see, how your surrounding terrain slowly turns from red to yellow and then to green, while climbing out of a valley.
See in this video, how this works.

Real and synthetic FPV camera side-by-side
The FlightZoomer 3 Cockpit app offers a synthetic outside view, which is based on a 3D map, with aerial imagery and a correct representation of the pitch and bank angle. The synthetic FPV camera requires no video transmission and is working with telemetry data only. Enjoy the unrivaled experience when looking at the FullHD scenery even at times, when real FPV cameras run into serious limitations (e.g. at night, in fog).
Beside the synthetic camera, a classical (real) video feed can be embedded seamlessly or as an overlay in the FlightZoomer cockpit app too.
See in this video, how this works.

Layout, functionality, procedures, and terminology are borrowed from full scale aviation
Wherever possible, FlightZoomer is modeled after the cockpit of the Boeing 787 Dreamliner. This applies not only to the look&feel, but also to features and the handling.

In-built simulator
Using the in-built simulator, you can start exploring FlightZoomer right after installation. Flying with the simulator, the handling of all the mentioned features above works exactly the same, as if you would fly a real vehicle.
See in this video, how the simulator works.

Fresh from the press, you can also consult the new online documentation, which describes the installation and usage of FlightZoomer very detailed. Directly enter the documentation under this link.

General information can be found under flightzoomer.com.

Read more…

This might be interesting for all.. I spent a few weeks with the F2S all-in-1 flight controller, testing on a few planes and I think this is worth sharing.  Status: Unknown and underrated

  • Pros - can be installed and tested under an hour, multiple flight modes and comprehensive OSD
  • Limitations or maybe good - little customization or tuning available or needed.  Setup by radio, no computer required.

I placed it on an Eachine Mini Skyhunter Racer for his episode with a Mobius Mini. It does a nice turn on Return Home and circles in a 8 formation upon returning and begins to climb that 328 ft (100 m) preset. I have been flying this plane without Gyro, so at Manual mode, I still retain the full experience and know I can bail out at any time. The Mini Skyhunter is a fast plane, I noticed the Heading Mode seem to zigzag-drift occasionally, other than that, the rest is good so far. I get the most 11 satellites so far.  Price range about $80 all-in-one.

Find ✈ http://dronemission.com/find/f2s.php
Source at http://youtube.com/dronemission

Read more…

HYBRID DRONE

When you love drones as well as rovers you would want to have both of them together. Just by adding a set of wheels to my already existing PlutoX drone and with the help of some simple coding, I developed this hybrid drone.

What I wanted to do was to build a prototype that can fly and walk on the ground as well so in short a combination of drone and rover. That is when I decided to make my project using PlutoX controller which controls a drone and it also has an add on breakout board which i used to add extra functionalities like rover mode.

Due to small wheels it becomes difficult to keep the heading of the in straight direction for this I have used something called as AutoStabilization. AutoStabilization uses the drones magnetometer data and keeps the heading straight. Heading can only be changed using the phone(Controller).

3689733563?profile=original

3689733481?profile=original

Here's how i did it

  • FINALIZING COMPONENTS REQUIRED
    • PlutoX
    • 3D printed wheels and motor support
    • 400 rpm brushed motors
    • 600 mAh batteries
  • GETTING THE HARDWARE READY

            In this project I decided to use PlutoX drone due to it’s hardware modularity. Adding most structure is               easier. For my project I needed something that will hold the wheels so that I can use my drone as rover.

            Using this wheel support I can easily clip the motors for rover onto the frame

  • GETTING THE SOFTWARE READY
    • If the PlutoX is DISARMED (i.e in the Rover mode)
    • Check if it is Auto-Stabilized or not (AutoStablization helps the rover to maintain the direction with the help of Magnetometer )
    • If it is Auto-Stabilized, indicate by turning on the Left LED, get the heading from Yaw angle.
    • If not Auto-Stabilized, indicate by turning on the Right LED
    • Get the RC input and perform error correction(Error correction - only if Auto-Stabilized)
    • Set the direction and PWM input for motor M2 and M3
    • Motor Direction
    • Forward - M2 and M3 both forward
    • Reverse  - M2 and M3 both reverse
    • Right - M2 forward, M3 reverse
    • Left - M2 reverse, M3 forward
    • If the PlutoX is Armed it operates in Drone mode
    • Github link

    Auto-Stabilization - Using smaller wheels in rover mode sometimes becomes a disadvantage as it gets difficult for the drone to move in a straight line/forward direction.

    Auto-Stabilization uses the data from drones magnetometer and gets the yaw angle. Using this we can move the rover in straight line.

Read more…

3689733329?profile=original

We recently ran a 2-week UAV build and coding mechatronics Summer School at UWE Bristol for students from the Ecole des Mines d’Ales. Great students and a great venue made for a very successful course and much fun was had by all!

Huge thanks to @UWEBristol and of course the students themselves.

Drones were standard 450 frames, Pixhawk running Arducopter.  Companion computer was Raspberry Pi running Dronekit and a standard USB webcam.  All programming in Python.

More details at on my blogsite here.

Read more…

3689733306?profile=original

Drones have already been in use in the security and surveillance industry, bringing a significant change in how the operations are carried out. However, most current aerial security and surveillance systems are either tied to a particular drone hardware, or need significant manual intervention during operation. These solutions lack critical features and software capabilities, such as, AI and machine learning for automated alerts, automatic mission scheduling, compatibility with wide-range of drone hardware, etc. This makes it expensive, and often infeasible, to deploy the drone-based security/surveillance solutions at scale.

Drones have already established the value that they bring to the table, in terms of mobility, unrestricted bird’s eye view and accessibility. The focus is now on efficiencies and realising a meaningful return on investment for wide commercial adoption. This calls for integration of “intelligence” and “connectivity” with drones, to build completely automated and integrated workflows.

3689733359?profile=original

FlytSecurity offers a plug-and-play, drone-agnostic, SaaS platform to quickly deploy and scale drone-based automated security operations. This significantly cuts down the cost of development and time to market, translating into an attractive ROI for the drone security service providers. With a wide range of features, like, 4G/LTE connectivity over unlimited range, live video, control and telemetry, fleet management (for simultaneous coverage of a large, distributed facilities), AI/ML for automated alerts, automated mission schedules, FlytSecurity enables fully-automated 24×7 operations at scale. Compatibility with any drone hardware, further makes FlytSecurity easy to adapt to variety of customer requirements (large/small drone, long/short endurance, quad-planes/multicopters, thermal/RGB sensor, etc.), and makes it easy to upgrade hardware at any time.

For early access to FlytSecurity, please visit: https://flytsecurity.ai


Read how FlytSecurity is transforming drone security & surveillance operations

Read more…

UAV GCS design notes

3689733084?profile=originalIt’s probably time to provide some background to my blog posts on various ground control stations we’ve been designing and manufacturing, because our experiences over the years may give some food for thought for fellow UAV/USV developers.

Already in early 2010 it became clear that the multirotor revolution, the boom in FPV RC and especially various autopilot development projects like ArduPilot would eventually amount to something substantially different in this field. Even though there were thousands of companies starting to make birds at all levels of sophistication, everything was still controlled by toy or hobby grade remote controls and a seemingly haphazard collection of improvised devices with a crazy cable clutter. If we're honest about it, not an awful lot has changed in the general look of the ground end since then for many UAV development projects.

We have also tried to do our best with our own fold-up hexacopter and ground vehicle projects creating application specific integrated control units using whatever was available at the time, but it soon became apparent that hobby RC parts are not the way to go. Because our process control and CCTV history has already provided experience in serious industrial standards, the transition to a more robust and reliable approach was very much inevitable.

3689733116?profile=originalStill, looking back at the early years of specialisation in ground control stations we can't help but remember some mistakes that were made both in R&D and business development. There are some important lessons that we have learnt (and apparently still learning) in this process. One of these is that while it's always imperative to listen to your customers, you don't always have to take their word for what they think is right, or it is in fact what they actually want. It has to be said that earlier in the development the willingness to please has also driven us much towards accommodating sometimes even impractical or downright crazy customer requirements against our better judgement without putting up a decent fight.

Because most of the early customers were still in the vehicle development phase, hardly any of them had a clear vision of how their products will be used eventually, and neither did we, necessarily. Clients were also concentrating too much on demo flights, presentations and trade shows, not the actual final products or users themselves, simply because these demos were seen as the most important first steps for the initial sales or in attracting venture capital. This resulted in an overwhelming abundance of open application questions, way too universal control options and layouts, but most of all, ground control stations that were still too big, heavy and cumbersome.

Although most of our current clients already have a clear understanding of their specific UAV or USV application and their target customer, the big presentation screen issue is still around after all these years, and it doesn't seem to be going away any time soon. The main reason is nevertheless similarly flawed: The bigger the better.

While the need for huge mapping and video downlink displays can easily be accepted in static, container or large van-based stations, hauling around a 20-30kg GCS case as a "portable" unit just because the images may look better in big is just plain mental. If the necessary dimensional trade-offs are to be made at any component, it's clearly the screen size. Not only that monitors are the single largest devices in nearly all stations, but high nit sunlight readable panels above 10"-12" are horrible current hogs, so you also have to double or triple your built-in battery packs just to reach a decent level of autonomy.

3689733213?profile=originalSide-by-side large dual screen systems are also an ongoing concern for many end-users. Because there are a number of similar station examples out there for some time now, until you've actually used one of them, you would think that they are great for dual operator applications. Once you sit in front of one of those you soon realise that even if it's an extremely long rifle case, you just can't seat two people there without their shoulders touching. This is not a comfortable setup for any operator duo, because they will only see their screens at an odd angle while still continuously elbowing each other. Two screens in the same box can still be a great solution for some heavier applications, but they are both for the same operator nevertheless.

3689733170?profile=originalDual and triple operator scenarios require separate controls and displays for every crew member, but at least these can be fully customised, so the added ergonomy doesn't necessarily push the costs up. Out of a standard pilot-payload dual operator setup the latter will only need camera controls, the video downlink screen and maybe a map section view letting the pilot concentrate fully on waypoints, telemetry and direct flight controls. This considerably simplifies both units and makes a station setup extremely flexible.

Fully rugged industrial laptops or tablets were usually part of such huge rifle case stations, but their use for mission control is always an interesting option, since nearly all the features are seemingly built in there. However, the net weight, size and the connection ports placed all around the frame make these extremely hard to use as hand-held devices or even embed them in a full function GCS. There are some fully automatic UAV applications where they have their place, but direct manual controls are a must in the majority of cases and as emergency overrides, especially for regulatory reasons in many jurisdictions.

Of course, you can use a modified docking station to evade having to use the awkward individual frame mounted side connectors, but that still leaves you without direct vehicle or payload controls. Unless you seriously think that a touchscreen joystick is a professional option, there’s no way around making the entire unit a tad bit bigger to accommodate these controls.

3689733137?profile=originalAnother interesting general image of most current UAV operations is the crew standing or sitting outside with their big station on a portable desk and the antennas mounted on tripods beside them. If you've ever been involved in such a field day endeavour you know that just the preparation and the wrap-up itself adds at least an hour to the proceedings, while you are constantly exposed to the elements. If you already reach your field location most of the time by car or a van, why not keep your options open with a man portable size control station or a vehicle based built-in type that allows operation from inside the vehicle itself?

3689733234?profile=originalOf course, if your RF modules are embedded in your GCS, you have to opt at least for some mag-mount antennas on coax extensions, so you can get your signal out of the Faraday cage of your car, but that's really not the solution. Gigahertz signals are highly attenuated even on short stretches of coax, that's why antenna cable extensions should never be used in any GCS setup.

Unless you are only working at LOS ranges you should always be using a separate RF box, because the best position for the operator is never the ideal location for the antennas for obvious reasons. If your RF modules are installed in this compact external unit literally at a pigtail's distance from the antennas mounted on it, only digital and low frequency analogue signals have to travel along any length of cable. Being able to mount this box on top of your van, tripod, mast or even the pan axis of an antenna tracker gives you the real flexibility of a professional grade modular mission control station.

3689733259?profile=original

As more and more direct feedback comes from end-users, sometimes you must remind developers and manufacturers what operator preferences really are. It's always a tough job, because there are some egos involved, and you don't want to present yourself as a know-it-all, especially when you understand all too well that it's a continuous learning process on both sides.

Just our two cents worth...

The peRISKop team is a group of professional UAV-USV specialists heavily involved in remotely operated vehicle design and development since 2008. Coming from a technical security, RF, industrial control, imaging and speciality CCTV background we have soon realised that our efforts are best spent at concentrating on the missing or underserved areas of UAV systems development.

www.periskop.hu

Read more…