All Posts (14048)

Sort by
3D Robotics

Don't let these be you!

Photographer Searching For Lost Camera UAV In Oregon

Aircraft Lost During Documentary Production

A photographer working on a documentary focusing on Willamette Falls in Oregon has lost a UAV he was using to shoot aerial photos earlier this month, and some residents are taking s dim view of his search for the aircraft.

Questionmark-0311a.jpg

Brian Dalrymple was operating the Droidworx AD8 Heavy Lift UAS with a Canon EOS 7D camera attached when he lost contact with the aircraft. He says he was able to place the aircraft in "automatic land" mode before it got completely away from him, and it went down near a scenic overlook of the falls.

The 27-year-old photographer told Oregonlive.com that if it survived the landing and the batteries were intact an internal GPS should lead him to the aircraft, but so far he's had no luck finding it. The AD8 has eight "legs" and lifting rotors, making it look a bit like a flying spider. Dalrymple said he had about $16,000 tied up in the aircraft and camera gear.

A West Linn, OR police spokesman said some people who live near the falls have called to complain about the man asking to search their property looking for his UAV. Sgt. Neil Hennelly said that the people who are calling are being assured that Dalrymple is legit, and would just like to find his aircraft.

RC Accident Sparks Federal Probe

Model Plane Impacted National Archives Building In Waltham, MA

A wayward RC model airplane made an unscheduled arrival on the roof of the National Archives building in Waltham, MA, sparking a federal investigation which involved the FBI, TSA and Homeland Security.

FBI_logo-1209.gif

The unnamed owner of the three-foot RC aircraft reported it missing to local police Thursday evening, saying it was on the rooftop of the federal facility. In a prepared statement, FBI Special Agent Greg Comcowich said "a combination of federal, state and local agencies, including the Federal Protective Service, determined the plane caused little to no damage to the building and a preliminary examination of the plane indicated it did not carry any harmful material.
 
“Preliminarily, there appears to be nothing nefarious about the event.”

The Waltham News Tribune reports that local officials said there was no damage to any records housed in the Archives, and the only damage to the building appeared to be to a solar panel on the roof.

Still, Comcowich said the agency will do appropriate follow-up, but at this point, "it's a remote controlled plane enthusiast's plane gone awry."

(Thanks to Magician for the heads up)

Read more…
3D Robotics

3689438188?profile=original

We're looking to hire a full-time Director of Software Engineering at 3D Robotics (the company that makes APM and the other products in the DIY Drones store) in San Diego. They should have the following skills:

  • Experience with embedded programming, and ideally familiarity with the ArduPilot codebases
  • Deep interest in UAV/Robotics
  • Some Web programming experience
  • Project management skills, including ability to manage open source teams.
About half of the job is working with the five-person hardware engineering team that's already in place at the 3D Robotics factory in San Diego (factory floor shown above). The other half is project-managing the 50+ volunteers in the software Dev Team who are distributed around the world and bringing new members into that team in a way that helps them contribute effectively from the start. 

The package would offer a competitive salary, stock options and standard health care. It's probably a better role for someone with at least a few years of work experience, rather than a new graduate, but if someone has run large robotics teams in university, we'd consider them. 
If you're interested, please email your resume and a few lines about why you'd be perfect for this job to jordi@3drobotics.com, cc'd to chris@wired.com
Read more…

Releasing the Shackles Part 2 - Ground Testing

FATBOX_GPRSV2.JPGYou may have seen my earlier post "Releasing the Shackles - How far do you want to go"about doing long range APM telemetry over cellular links. For the last 4 weeks I have been testing and have finally cracked the nut. Read on for details..

Amplified Engineering in Australia produce 3 potentially useful products

  • Fatbox GPRSV2 - Serial Router with  GPRS (850/900/1800/1900) - 85kbps (Dual SIM)
  • Fatbox 3G HSDPA - Serial Router with HSDPA (850/1900/2100) WCDMA and UMTS - 3.6Mbps down 384kbps up
  • Fatbox HSUPA - Serial Router with HSUPA (850/900/1900/2100) WCDMA and UMTS - 7.2Mbps down 5.6Mbps up


The Fatbox is a heavy beast at 400+ grams. Removing it from its rugged steel case is straightforward and reduces the weight to ~120 grams. I ended up halving the case and using the bottom half as the mounting bracket in my plane.

Getting the Fatbox working on a network is fairly easy. You plug it into your LAN and configure it via its built in web server. There are all the standard settings you need to connect to any compatible cell network.

9401052001280_l.jpgThe most important thing is choosing the APN, by default most cellphones are setup to use an APN that is behind a firewall. A firewall prevents anyone from connecting to the device from the internet which is what you want for your cellphone, but not what you want for telemetry.

Here in NZ the default APN on most phones is internet.telecom.co.nz however if you call the Telco and ask for the details of a non-firewalled APN, they will tell you to use direct.telecom.co.nz. The same thing works on the vodafone network, you just use direct.vodafone.net.nz instead of internet.vodafone.net.nz. It might take a few calls and escalations before you can talk to someone who knows what they are talking about and what you want to do. You might also need to have the APN added to your SIM card depending on the provider.

If you use the right APN, you will get a public IP address that is fully routable on all ports. Perfect for Telemetry. It is my understanding that every carrier in the world has non firewalled APN's you just need to ask nicely to find out the details or do a quick google search. This costs nothing extra and although it doesn't give you a fixed IP address the address you get is fully routable and not firewalled so you can connect to it from any other computer on the internet with no restrictions. The fatbox has a built in Dynamic DNS client, so as soon as it is connected, it can update a DNS alias to point to its current dynamic IP address. This means you can register a DynDNS name such as myplane.dyndns.organd then connect to it without needing to know the IP address. If your fatbox drops its connection, as soon as it comes back up, it will get a new IP address and register it with DynDNS to allow you to continue operating (other dynamic DNS providers are supported).

This works in practice as well as it does in theory. After a power cycle, I was able to connect to my fatbox over the internet after around 12 seconds.

30010-dscn1391_ps.jpgThe next challenge was getting the serial port to talk to the APM. This turned out to be a little trickier than I expected.
I ordered a Sparkfun TTL level shifter but because of the way these work (voltage stealing), it didn't work at all. There were lots of dropped packets and CRC errors. I ended up ordering a Solarbotics DTE which I did get working reliably.

I connected the Fatbox up to the APM via the DTE converter, configured the Fatbox serial port to 57k and exposed the serial port as a server on TCP port 5760. Then I loaded up APM planner and changed the drop down list from the serial port to TCP. The host name is your DNS name (or the IP address if you know it) ie myplane.dyndns.org. The port stays the same at 5760.

It connected and I was able to do everything in the Mission Planner that you can normally do. Set waypoints, configure the APM etc.... I had to double check there were no cables in the line as I couldn't believe how well it worked - Woohooo.

On to even greater things...

The Fatbox also has two ethernet ports which can be routed at the same time as the serial port. I was interested in using one of the Ethernet ports for a Pan/Tilt/Zoom IP camera to give me unlimited range video (now you can see why I ordered the HSUPA version of the fatbox).


7121328.jpg?width=272I configured the second ethernet port as a DMZ and then opened pinholes in the Fatboxes firewall so that all the IP camera ports were exposed to the Fatboxes internet facing interface. I tried it with a Vivotek PZ6122 which is a great little camera (that is no longer made), it weighs 300 grams, has Pan, Tilt and 10 x Optical Zoom. Its hard to find a high quality PTZ IP camera in a lightweight package but this fits the bill nicely and I picked it up for a steal on ebay. This camera also works in low light and automatically changes to black and white in low light conditions. I reduced the framerate down to 15fps and set it to a fairly low bandwidth setting and it worked very smoothly over the cell link.

Now I have it all working on the ground, the next step is to get it airborne and see what sort of altitude I can get before I lose cell link. I'm fairly confident it will go to 400ft which is as high as I can legally go anyway, but more importantly, I'm hoping to get some very good range out of it. With the combination of high mountains we have here in NZ (which forces Telco's to be able to operate at altitude) dual antennas on the plane (with short cables) and the high bandwidth of the fatbox, it should be able to go significantly higher than 400ft. NZ has outstanding cell coverage so this should allow me to fly long range missions just about anywhere in the country. The Hugin airframe can lift a lot of weight so I should be able to load it up with 15,000mAh of 4S batteries for a 90 to 120 minute endurance depending on speed.

I am talking to the manufacturer of the Fatbox about maybe putting in an order for a few of these and customizing them for DIY drones use. The customized version would come without a case and have direct TTY level outputs to save messing around with a serial converter. Let me know how many people might be interested in this to see if it is worth the time.

My next post will be to report the success of the first cellular flight.

I'm also really keen to find a trustworthy person to try controling the plane from overseas once I have everything working properly, a pilot could operate it via the APM planner and see what is happening over the internet using the onboard camera. It seems like something that just has to be done!!

Read more…
3D Robotics

APM: the Universal Autopilot

3689438274?profile=original

I just had to a share a bit of pride that I got checking out the latest release (1.1.11) of the Mission Planner. Look at all those vehicles APM now supports!!! To say nothing of all the hardware-in-the-loop simulations at the bottom left of that screen. And ArduRoverArduBoat, and coming soon, ArduBlimp (successor to Blimpduino) and ArduTank (!).

I think we just need to add ArduSub and ArduRocket and we've got the entire world of vehicles covered. Not bad for $200 ;-)

This why we call APM the Universal Autopilot. As far as I know, this sort of one-autopilot-does-everything has never been accomplished before. So proud of the dev teams!

Read more…

My QuaXCopter Project.

3689438236?profile=original

Hi Everyone.

I've been working on my Quadrotor project for one year. My last attempt was not good enough to fly. The control board worked well, but... i had problem with the frame. The frame was not enough rigid to absorb the mechanical vibrations coming from the motors. So, the IMU reported inaccurate data. Knowing all these errors, i flew my Quadcopter just some centimeters above ground without success. 

Some months later, I decided to give the project another try, with new changes on the control board and definitely on the frame "the frame will be smaller".
Inspired by a Quadcopter frame made of Q10 material that I found in internet. The new design of the Quadcopter it will be of Q10. A good friend of mine will help me with on the QuadCopter frame.
Last weekend, I just finished my new Control Board. Powered by a ARM Microcontroller.
Hera are the Control Board Specifications:

  • Stellaris Cortex-M3 microcontroller (LM3S5749).
  • IMU sensor  9DOF sensor stick.
  • Wireless communication via Bluetooth or RF, (Bluetooth module UART and NRF24L01 module SPI).
  • Temperature Sensor.
  • Sonar Sensor.
  • USB connection. 

I would like to show you some pics of the control board:
3689438311?profile=original3689438173?profile=original3689438353?profile=original


The rest of this month and the next one, I will work it on the firmware development. Once everything on the control board is working properly. I will post specifications, schematics and code. I will keep you informed.


Would accept any suggestion or recommendations.

Regards.


Read more…
3D Robotics

"Merit Badges" for DIY Drones!

3689438158?profile=original

Our friends at Adafruit have been whipping up the best patches to show off your DIY accomplishments. Now their one for DIY Droners is available!

You built an educational mini UAV! Adafruit offers a fun and exciting "badges" of achievement for electronics, science and engineering. We believe everyone should be able to be rewarded for learning a useful skill, a badge is just one of the many ways to show and share. 

This is the "Educational mini UAV" badge for use at classrooms, workshops, Maker Faires, TechShops and around the world to reward beginners on their skill building journey! 

Read more…
T3

Vickers Wellington UAV


Vickers Wellington as UAV
Bi-motor airplane serving as test platform for FLEXIPILOT.
Used for testing single-engine failures and tuning.
Elevator, differential ailerons, no rudder.

Endurance 50min with one battery.
Cruise speed 50km/h.
Shown loiters at low altitude since at typical cruise altitude of 200m it is almost impossible to track a flying object on the sky with zoomed camera.
The plane is a custom construction, only one in existence in this scale and make (bought on a polish web auction, made by experienced RC modellers from Gdansk, Poland, refitted with autopilot by me).
The weather was a little bit windy, pity it didn't looked as majestic as usually - a few nervous autopilot reactions were inevitable trying to hold constant circle patter over ground.

Why all this? Because it can be done. Testing is the best thing.

Read more…

AttoPilot International End of year sale

Hello to all and Happy Holidays!


We wanted to express our thank you to all those who made this year AttoPilots most successful yet. Because of this we wanted to offer high percentage discounts on multiple products we offer.  

3689438215?profile=original

3689437992?profile=original


Reality is we are trying to get a DIY based group interested in purchasing AttoPilot IMU systems and utilizing the extensive command set available to interface with AttoPilot. The abilities are limitless with a little imagination and some micro processor education, code writing and computer programing. We have had 4 Master degrees achieved from individuals using AttoPilot for the core part of their thesis testing. 3 GCS programs have now been produced based off the extensive command set as well.


We have priced the IMU system as low as possible to break just over even. The extensive calibration procedure with 72hrs of torture testing with temperatures ranging from -30C to +90C. The IMU also accepts airspeed inputs along with being "G" force corrected. Combine this with an incredibly low drift and a hermetically sealed sensor packet and you get one of the highest accuracy 6DOF IMU systems available at a achievable price point.


Included in this special are two of our foam sUAS complete system. These aircraft are capable of completing missions for possible SAR or work missions as well as serve for great development packages for high schools, tech schools, Universities and hobbies. All our aircraft come completely flight tuned and ready to fly upon arrival. Included in the package is complete ground control station with small tracking antenna system, live or still video system, laptop, charger and transportation box.


Please feel free to contact us anytime at order@attopilotinternational.com or you may contact me directly at chris@attopilotinternational.com


You can find the website at : www.attopilotinternational.com 

Read more…
Moderator

RiteWing Zephyr II + APM maiden flight


IMG_2375.JPG?width=300Had a great time maidening Andreas' new RiteWing Zephyr II with the APM.  The Zii flies very nicely, and works well with APM.

We flew in manual, stabilized, fbw-a, and auto modes.  We reduced the default speed from 45 to 35, which gave a nice smooth flight with a comfortable airspeed for our flying site.

There's some onboard video as well.  It's interesting to see the differences in turning in manual, fbw-a, and auto mode.

Next up: try using APM in conjunction with FPV.

More details and videos here:

http://eastbay-rc.blogspot.com/2011/12/ritewing-zephyr-ii-ardupilot-maiden.html

a4491952-128-photo%281%29.jpg?width=400

Read more…
3D Robotics

Could domestic drones spur tougher privacy laws?

3689438146?profile=original

Excellent article by Evan Ackerman at IEEE Spectrum. It's worth noting that in the US, at least, law enforcement already needs warrants to inspect private property beyond what would normally be visible from the street, to protect citizen's "reasonable expectation of privacy" in their own back yards:

Have you ever been spied on by a surveillance drone? No? Are you sure? Maybe it looked like a hummingbird. Or an insect. Or maybe it was just really high up. Maybe there's one looking in your window right now, and if so, there's no law that says it shouldn't.

In a recent article in the Stanford Law ReviewRyan Calo discusses how domestic surveillance drones would fit into the current legal definitions of privacy (and violations thereof), and how these issues could inform the future of privacy policy. The nutshell? Surveillance robots have the potential to fundamentally degrade privacy to such an extent that they could serve as a catalyst for reform. 

Domestic surveillance robots aren't as much of an issue now as they could be, thanks mostly to the stick-in-the-muddedness of the FAA that keeps unmanned aircraft from doing anything exciting. But eventually, that's going to change, and there are already precedents (legal ones) for how domestic agencies might (read: will) start using robots. Basically, there seems to be essentially no legal restrictions which would prevent the police from having drones flying around all the time, watching people.

Clearly, this is something that we as a society should discuss, and we may decide this kind of surveillance should be illegal, or at least restricted to some extent, especially since it's getting easier and easier to build or buy camera-capable flying robots. In the near future, celebrities (like me) will be constantly surrounded by a swarm of face-reading, photo-snapping autonomous robots that will necessitate the development of anti-surveillance drone drones, loaded up with little miniature air-to-air missiles, which themselves are little flying robots.

Of course, all this goes beyond surveillance and drones. We've got these same sorts of legal issues popping up all over the place with regard to to robotics, as technology fast outpaces the limited amount of foresight that was employed when coming up with policies meant to manage current technological issues as opposed to future ones. And as we've mentioned before, there's a risk that reactionary (as opposed to proactive) policies could seriously undermine the robotics industry, which is why forethought is so important.

You can read the rest of Ryan Calo's article, "The Drone as Privacy Catalyst," at the link below.

The Stanford Law Review article is here

Read more…

MK Frame + Photoshipone Camera mount assembly

I decided to put the camera mount and frame together to get some sizes on the boards that hold the APM and flight electronics. Obviously being a MK frame, its suited for the MK boards, with regard especially to the MK escs.

Im going to have to make a small plate for the PDB, then two plates above for all the other electronics. Also I had to add silicone to the ball mounts to make them stiffer for an 800g camera.

Here are the pics:

3689437930?profile=original3689438070?profile=original3689437951?profile=original3689438091?profile=original3689438122?profile=original

Read more…

My DIY Tri

3689438035?profile=originalInspired by this series of DIY videos, and a little wary of over-spending on yet another silly flying machine, I've decided to have a go at building my own Tricopter. The idea is to see just how cheaply I can build the whole thing from start to finish. If you watch at least the first video in the link, the whole idea is QSC - Quick, Simple and Cheap. I'm not necessarily following the videos above step by step, rather just using them for some ideas and inspiration.

Wanting a certain amount of precision, and not having access to any fancy CNC or laser cutting machines, I started playing with Inkscape thinking I might want to send off some jobs to Ponoko. With Inkscape, I made the template above, and printed it off on my printer to check the scaling. I got lucky and it seems that my printer is pretty true to the measurements of the software, so printed templates being taped/glued to the wood is how I'm going to try and keep things as precise as I can when working by hand.

So off I go, deciding on materials. The QSC video mentioned before calls for 3/4" pine. Ick. It seems like it would be too bulky and probably heavy. Narrow pieces of pine that's been properly dried  to avoid twisting could pose a problem, so I considered balsa, because it's light and readily obtainable. Then following this suggestion, I looked at basswood. Basswood is heavier than balsa, but balsa is spongy (bolting it together compresses the wood and misaligns things), it also splits, flakes and chips when you try to get it apart after putting it together. 3/8" basswood is stocked in large quantities at a local hobby place, and it's cheap. 24" lengths are 1.19 each. Score 1 for cheap!

3689437913?profile=originalI asked about sheets of ply, hoping they would have something decent and thin-ish in a 12x24 sheet. At ~30$ for a sheet, that seemed to go against the 'cheap' part of the whole idea, so I opted for some 1/16" 4x36" strips. 3$ each. Score another point for cheap!

The one drawback to thin sheets of wood is that it flexes along the grain, where ply is much more rigid. The simple solution to this is to make sure that each layer of wood used has the grain perpendicular the layer below it. If need be, I'll use some CA glue to glue two layers together and make my own ply.

3689438057?profile=originalArmed with a fresh hobby knife, a few leftover screws, my templates and a cordless drill, I set about building my first test frame. It's sloppy, but the idea is to see what works and what doesn't. I messed up the first set of holes on one side of the sandwich, having drilled them both with the wood grain in the same direction, so I had to drill a new set. Then I discovered just how hard it is to drill 9 holes all perpendicularly through narrow bits of wood, using only a handheld cordless drill. If the holes aren't absolutely perpendicular, things get skewed, and maintaining an accurate symmetrical Y shape is completely impossible. You can see the result, where my rear arm is a few degrees off, because one of the nine holes I drilled in the wood went through at just a little bit of an angle. That's going to be setting myself up for all kinds of yaw and balance trouble later on, once I start teaching my cheap bits of wood to fly.

Cheap is going to take a hit here, because I may drop an extra $60 to invest in a workstation for my dremel. The nice thing about having one is that I'll be able to use a cutting bit for shapes and cutouts into the wood, rather than the tedious and exhausting process of etching them out by hand. I'll also be able to make replacement parts when the ground decides to jump up and attack my poor tri! ;)

I still have to sort out motors/props/ESCs I want to attach to this thing, and then there's the wait time for a fresh-baked APM2. In keeping with the idea of 'cheap' I thought about picking up someone's used APM1 1280, but the general asking price is in the area of $100. I would still have to get a GPS and Magentometer, plus shipping, which all in all comes out to more than a new APM2. Excruciating, but... I'll wait!

APM2: $200+ shipping

Motors, ESCs, yaw servo, Rx and other electronic stuff: $120+shipping

Wood, CA glue, miscellaneous scews, wire and other stuff: $50

Grand total: $370

So even with the new equipment, I'm hoping to keep the cost of the whole thing under $500.

With two weeks off during the holidays, it looks like it's going to be a very DIY Christmas. For now, if anyone has any suggestions or pitfalls to watch for, I'm looking forward to reading them.

Read more…
Developer

ArduCopter v2.1 firmware: Full test flight

In this video you will find a full test of the ArduCopter v2.1 that I have done with my QRO (Quad Rotor Observer) done on december 17, 2011.

3689437747?profile=original

3689438012?profile=original

Congratulations to All the DIY Drones Dev team.

You may download the tested firmware AC v2.1 setup with my full PIDs parameters here

Regards, Jean-Louis

more infos at: http://diydrones.com/profile/JeanLouisNaudin

Read more…

Magnetometer again

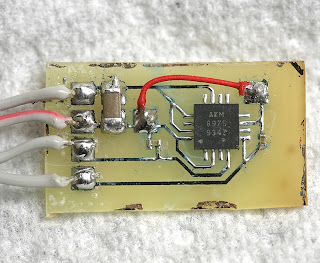
akm8975_01.jpg


It turned out to be an 8975 instead of an 8973.  By some contact lens malfunction or erroneus Goog search, we thought it was an 8973 all year.   The 8975 has a completely different pinout than the 8973.  The power pins were shifted around.  An SPI interface was added.  The reset pin was removed.


The magnitude of the changes, number of revisions, & fact that it's used in the iPhone lead us to believe Steve personally required many minute changes of a cosmetic nature.

It was the chip in the iPhone 4.  It requires no external components.  It's not sold to private individuals, but it was free.

After banging on it for a while, finally caved in & built a 2 channel oscilloscope for USB.  It captures 2 channels at 130,000 samples/sec with DC coupling.  It can do a single channel at 260,000 samples/sec.  Much better than the soundcards we've been using for 10 years, but disappointing that 11 years of working didn't produce enough money for a proper oscilloscope.

That immediately showed our I2C was generating a 0 for the ACK where it should have been generating a 1 & the problem was solved.  Electronics are a lot easier with an oscilloscope.  The only other chip using I2C was the IDG3200, which didn't work in bulk transfer mode, so it ignored 0 ACKs.

We don't use hardware I2C unless the bandwidth requires it.  The restrictions on what pins to use are too severe.


Now another item which was delayed way too long.

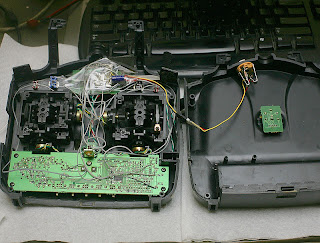
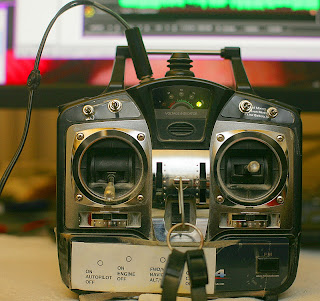
hitec13.jpg

hitec14.jpg


It finally runs on USB instead of its own, always dead, NiCd.  It seems to work on just 5V instead of 9.6.  It turns out it uses the 9.6V to bias an LM324, which amplifies & lowpass filters the pots to 0-3.6V.  This op-amp has a pretty bad dropout voltage, so 5V is cutting it pretty close.

Making the transmitter run on USB was really needed for long duration bench tests.


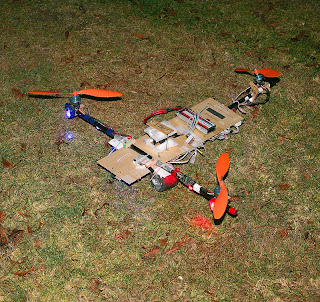
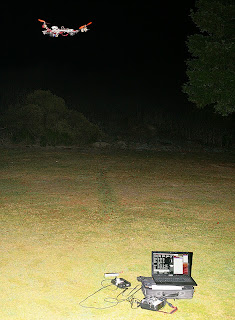
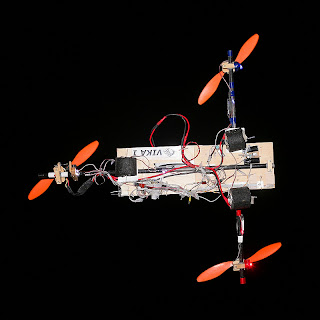
vika1_19.jpg


All 8 degrees of freedom, GPS, & barometer reloaded.

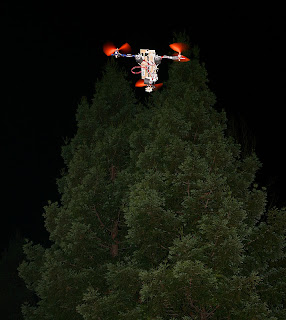
vika1_20.jpg


All was as it was in July 2009, when we last flew with a magnetometer. Neither did it feel like the matter was making us fall in love with a golfing Air Force major, as we felt after July 2009.

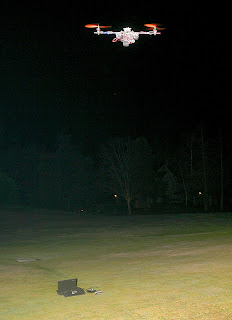
Now we have attitude hold in manual mode.

vika1_21.jpg


Barometer was too close to the edge, making for less stable altitude.

vika1_22.jpg

vika1_23.jpg


Going with the pure gyros & no magnetometer was possible, but never the most stable.  This is the maximum stability.

vika1_24.jpg


Not going for automated takeoffs because we're broke.  Those caused a lot of crashes.  If anything doesn't work in an automated takeoff, it's gone.

That was it.  There's nothing yet to be discovered with Vika 1.  She's going to stay a standard autopilot.


The time for a real oscilloscope may be coming near, as we have dreams of custom software radio to receive the space station.  The current rig can get AM below 130khz.  Maybe a custom AM radio could overcome the urban environment barrier.

The way we see it, the great task in a custom space station receiver is making a 145Mhz local oscillator.  An alternative could be multiple conversions with readily available oscillators.  Do 1 with a 100Mhz, another with a 40Mhz, & another with a 5Mhz.  Sample the result with a 1Mhz ADC.

The other thing on our mind is launching something into space.  The way we see it, the most a private individual can afford to get over 62 miles up is a single bacteria or maybe something slightly larger.  Bacteria are manipulated using photonic pressure all the time, under a microscope.

The mane problems are detecting where the bacteria is, in order to aim the laser, & overcoming wind.  Bacteria can fluoresce or reflect the light of the manipulator beam.  This can be detected by a large enough telescope even if it can't be imaged.

The wind couldn't be overcome, so the manipulator beam would only be able to increase altitude, following it wherever the wind blew it.  Once high enough, the manipulator beam would be able to add horizontal velocity.

The only real benefit from this excercise would be to show the light received on a telescope was indeed from an object that you put in orbit. 

Read more…

I know how I am spending this weekend

3689437617?profile=original Woke up this morning and saw my shipment was sent...20 min later fedex at the door. I just received my new APM 2.0. One of the perks of living in SoCal is fast shipping from DIYDRONES. I got 2x so one is going into sim mode and the other one is sitting on the bench waiting for permission to board my 3DR.

Get Stoked,

Ryan

Read more…

Georeferencing pictures

3689437588?profile=originalHere is my memo: How to save gps-coordinates to picture files with Geosetter program. The coordinates are saved to the picture exif-data, and these go with picture all the time. In exif there are already data from camera model, exposure time, lens focal length etc, now we add there gps coordinates.

For example here is picture info in Irfanview program. Coordinates and also altitude are there. You can also look picture place in Google Earth or several other map services.

3689437642?profile=original

GeoSetter

I have used free GeoSetter program. You can get it from here: http://www.geosetter.de/en Program needs also free ExifTool, and it loads and installs it automatically.

Fly and take pictures. Download datalog from plane with APM planner. After downloading you have also GPX-file in Logs directory.

Start Geosetter program.

  1. Select picture directory
  2. Select one of the pictures that you know where it was taken
  3. Load gpx-file from the flight
  4. Select the place from the list where the picture was taken. Place is shown in the map.

3689437701?profile=original

Press Images / Syncronize with Gps Data Files. Put selections according to the picture. In this picture camera and gps times differ -2:59:06 hours. Press Ok.

3689437601?profile=original

Then select all pictures: Images / Select all. Press again Images / Syncronize with Gps Data Files. Time should be same as in previous screen. Press Ok.

Now all picture places can be seen in map. Click individual pictures and check that places are ok.

(Optionally: You can add your copyright and email addresses to files: Images / Select all, then Images / Edit data, and fill columns Artist and Copyright, then press Set current values for All Selected Images)

If everything is ok, select Images / Save changes. Program creates new pictures and add there exif data. Original pictures are in the same directory, they have extension jpg_original. Probably it is wise to create directory Original and copy these to there.

Now you know the time difference between pictures and log. In the next flights you can also use APM Planner: Press Control-f and select button Geo-ref images. (I have not yet tested this. We have very bad weather, and sun is over horizon less than 5 hours...)

Most of these picture were taken from paramotor. Where is this kind of labyrinth?  (Hint: Click picture, then load original picture to your computer, open it in some program and look picture data.)

3689437705?profile=original

Read more…

Successful Maiden Flight of the Nova

The Nova Flies! And quite well at that!

Added 10 oz of weight in the nose to make sure it was nose heavy for the maiden, and that turned out to be much too much! Skipped off the grass on take off! Took out 4 oz, and will be taking out even more as I get a better feel for what works.

As it’s designed to be a FPV/AP airplane, the nose weight will be replaced by FPV/AP equipment.

I’ll be adding the build plans and instructions on my website http://www.MyGeekShow.com later next week for those interested in building one.

Equipment Used:
Motor: http://www.hobbypartz.com/75m42-optima450-2220-950kv.html
ESC: http://www.hobbyking.com/hobbyking/store/uh_viewItem.asp?idProduct=13429
Batt: http://www.hobbyking.com/hobbyking/store/uh_viewItem.asp?idProduct=6306
Servos: http://www.hobbypartz.com/topromisesg9.html
Prop: http://www.hobbyking.com/hobbyking/store/uh_viewItem.asp?idproduct=5437

Stats:
Weight: 32 oz
Thrust: 21 oz
Wing Area: 3.33 square feet
Cubic Wing Loading: 5.3 oz per sq ft

Make sure to visit the forum on MyGeekShow.com to get additional details about the airplane and episode.
Read more…