All Posts (11086)

Sort by
3D Robotics

New APM-powered ready-to-fly FPV plane

3689604937?profile=originalThis looks like a good deal from Nitro Planes: a EasyStar-style camera plane with APM already installed, ready to go for $469, or with RC for $519. 

The AeroSky RoboSurfer is designed for pilots who are looking for all the benefits of a large wing spanned aircraft that is inherently more stable and can stay in the air longer. It is also an excellent platform for FPV pilots due to the abundance of FPV specific features. 
 
The RoboSurfer is designed for supreme gliding and provides an excellent FPV platform. It has a wing that stretches 78inches. A large clear dome takes place on the nose of the plane for camera mounting. The clear dome has impressive clarity and low distortion . The power system consists of a an efficient 1200kv brushless out-runner motor juiced by a 30amp ESC and 11.1v lithium power system.

The RoboSurfer is a unique machine. It comes equipped with an APM 2.5 flight controller that delivers flight enhancing systems such as gps, auto pilot function, return home function, loiter, air speed sensor, altitude sensor with altitude hold, and self stabilization mode. All these features come installed and ready to go once the user has completed initial calibration. 

The RoboSurfer will never get lost with its GPS and auto pilot system. With the assistance of GPS, the RoboSurfer is fully capable of returning to its starting point on auto pilot. To activate the GPS home function all you need to do is hit a switch on the transmitter.

The self stabilization mode acts like a gyro and allows the plane to fly extremely smooth and stable. Tired of flying the plane and just want to focus on your mounted FPV system? Utilize the loiter function and allow the aircraft to patrol a specific area on its own, have a large property and need aerial surveillance, the Robosurfer is the platform. The on board system will utilize airspeed, altitude and GPS positioning to achieve this feat.  
 
As the old saying goes, the bigger they are, the better they fly and with a large wing span, the RoboSurfer provides a high lift and stable aerial FPV platform thanks to its generous wing area and effective pre-installed flaps. The powerful brushless out-runner and 8 inch prop combo offer an excellent climb rate while the effectively control surfaces provide precise control at varying speeds. This incredible model delivers an excellent FPV/Camera platform in a simple to build format that is totally affordable and perfect for pilots of all skill levels. 

Features:
Tough EPO construction
APM Flight Controller
Airspeed Module
Power Module
GPS Device
Easy to build configuration
Large wingspan ideal for flight in varying conditions
Clear and distortion free nose mounted dome
Pre-installed electronics
Pre-installed flaps
Large magnetic canopy
Powerful and efficient brushless out-runner motor
Large payload capacity

Specifications:
Material: Durable EPO
Wing span: 2000mm(78.7in) 
Length:1350 mm(43.3in) 
Weight:1350 g(47.6 oz.) 
Height:285mm(11.2in)
Total surface area: approx. 46.3 dm2
Prop Size: 8*7  2 Blade 
Battery:11.1v 2200mAh(20C)  (Li-polymer battery Maximum 11.1v(3s) 8000mAh battery)
Servo:6*17g,1.8kg/cm,0.18s/60
Motor:3536-KV1200 Powerful Out runner Brushless Motor
ESC: 30A Brushless ESC

Read more…

3689604827?profile=original


Indiegogo campaign for Navio is about to close in 14 hours. Emlid team would like to thank DIYdrones community for the support to our project - your feedback was very helpful to us.

For those who have missed our previous posts about Navio - it is a shield for Raspberry Pi that gives it all the necessary capabilities required for autopilot applications: MPU9250 IMU over SPI, MS5611 barometer, U-blox NEO-7M / NEO-6T GPS module, ADS1115 4-x channel ADC, PCA9685 PWM generator with 13 servo channels, PPM input, DF13 ports for extensions.

It’s main goal is to provide a convenient platform for development and promotion of drones with Linux control. But Navio can be used for any other tasks that require navigation and servo control.

Detailed description can be found on our Indiegogo page.

We have reached several stretch goals, and our supporters will receive additional accessories: a pack of DF13 jumper wires for connecting extensions and active GPS/GLONASS antenna. Also, all Navio boards will get an additional chip - FRAM memory for reliable non-volatile storage.

After the campaign we’ll keep our supporters updated on the manufacturing process.

Links:

Our website - www.emlid.com

Navio’s page on Indiegogo


Best regards,

Emlid team


Read more…

ANP-24608253.jpg

Today an article appeared in one of the Dutch news papers (NRC Handelsblad, warning: Dutch language) in which was written that the Dutch Ministry of Justice is looking for ways to take over control of drones, jam the frequency on which the targeted drone is flying or locate the pilot of the drone.

Ministry of Justice started a tender (warning: Dutch language) on which companies (and private persons?) can make proposals to achieve the above. Below the introduction (Google translate) of this tender.

Unmanned systems are now relatively cheap and easy to buy. A typical example is a 'unmanned aircraft' or 'drone'. The Ministry of Security and Justice, along with the Royal Military Police and the National Police, looking for innovative solutions that can be used to protect against cell systems used. For example, they are thinking of solutions that control checks take over the system or interfere mislead or indicate the location of the driver of the system. However, any other part of a solution that contributes to the detection, identification or the controlled removal of an unmanned system is welcome. This SBIR focuses on developing protection against flying, driving and sailing systems. Systems that are commercially available or can be produced from commercially available components. Relatively easily assembled

Google translated version of news paper

Google translated version of the tender

Read more…
Moderator

3689604782?profile=original

For some spurious story board reason that I have not padded out properly Wimbledon has ball delivery issues!

The T3 task this time is to deliver as many tennis balls as possible using only one 5000 maH battery, to both power the plane and autopilot. Fly between two virtual Wimbledon tennis courts. Take off from Number one and Land and deliver to number two. Then fly back to number one to pick up more balls. Repeat until the battery is flat.

3689604740?profile=original

The courts are roughly 20 X 40 m.

Number one and two courts are 300 metres apart.

You will have to soar over centre court, the roof of centre court is 16m above the playing surface so your craft better achieve at least 30m altitude to avoid flags and furniture in its transit between the courts. You could choose to fly around centre court but your KML must show that you virtually missed it!

For the sake of this exercise I will ignore the sides of 1 & 2 courts.

As ever 3DR will provide prizes TBA.

This challenge is open to fixed wing and rotary entries. Take off and landings must happen within the 20 X 40m court.

Autonomous take off and landings will score higher but are not essential. The transit must be autonomous.

No doubt folks will find very light tennis balls but they should be at least 6.7cm wide. 

Honesty is key in the T3 and sillyness often brings points. This might be a great competition to try and fly with other DIYD members. I feel bonus points for every team in those groups coming on. A well documented attempt is also looked upon favorably. 

Lets make the closing date December 30th 2014. There should be enough spring and autumn weather for each hemisphere.

This idea is loosely based on the BMFA heavy lift challenge, it gets pretty serious.

Now bring on the questions, I am bound to have forgotten something.

There are plenty of cargo planes out there to build http://www.rcgroups.com/forums/showthread.php?t=1124466

3689604804?profile=original

Read more…
3D Robotics

3689604729?profile=original

Remember a year ago when Randy used an ArduCopter to autonomously drop a rover on a freakin' volcano? Good times. 

Well, now the European Space Agency has done the same thing, but this time time they have ridiculous music, a massive budget and a bunch of German university researchers. They also say it's for a Mars rover, which will be quite a trick for the quadcopter, since the Martian atmosphere barely exists (it's 0.6% the density of Earth's atmosphere, which means copters wouldn't work). Let's assume they know this, and if they actually do drop a rover on Mars, the dropship will have rockets, not props. 

You can read the whole over-the-top press release below. But really, the music in that video has to be heard for full comic effect:

Watch the video HERE (it won't embed for some reason)

The dramatic conclusion to ESA’s latest StarTiger project: a ‘dropship’ quadcopter steers itself to lower a rover gently onto a safe patch of the rocky martian surface.

StarTiger’s Dropter project was tasked with developing and demonstrating a European precision-landing capability for Mars and other targets.

The Skycrane that lowered NASA’s Curiosity rover onto Mars showed the potential of this approach, precisely delivering rovers to their science targets while avoiding rock fields, slopes and other hazards.

“StarTiger is a fresh approach to space engineering,” explains Peter de Maagt, overseeing the project. “Take a highly qualified, well-motivated team, gather them at a single well-equipped site, then give them a fixed time to solve a challenging technical problem.”

This latest team was hosted at Airbus Defence & Space’s facility in Bremen, Germany, joined by engineers from the German Research Center for Artificial Intelligence, Portgual’s Spin.Works aeronautics company, and Poland’s Poznań University of Technology Institute of Control and Information Engineering.

Starting from scratch for the eight-month project, the Dropter team was challenged to produce vision-based navigation and hazard detection and avoidance for the dropship.

It has to identify a safe landing site and height before winching down its passenger rover on a set of cables.

Flying to a maximum height of 17 m, the dropship comes gently down to 10 m above the ground, where it begins lowering the rover on a 5 m-long bridle, coming lower until the rover touches down. Then it returns to a safe altitude.

Flight testing took place at Airbus’s Trauen site in northern Germany, which back in the 1940s was the scene of spaceplane pioneer Eugen Sänger’s rocket experiments.

A 40 m by 40 m Mars-scape was created, littered with hazardous rocks, where the dropship had to pick a safe spot to deliver its passenger.

Dropter team

The dropship was customised for the project from commercial quadcopter components, with a smaller drone used for preparatory indoor testing.

Using GPS and inertial systems to fly into position, it then switched to vision-based navigation supplemented by a laser range-finder and barometer to land its rover autonomously.

This demonstration having proved the concept, the dropship approach is now available for follow-on development by planetary missions to come.

About StarTiger

StarTiger, a pioneering ESA initiative in technology R&D

StarTiger stands for ‘Space Technology Advancements by Resourceful, Targeted and Innovative Groups of Experts and Researchers’ working within the Agency’s TRP Basic Technology Research Programme.

It brings team members together on a single site to work on a set challenge, aiming to produce a working prototype by the end of the project’s time limit.

Read more…

Aerial Survey and Photogrammetry with X5 & X7

3689604397?profile=original

We have been working to develop a well oiled solution for Aerial Survey and Photogrammetry over the last few moths. While there are a number of off the shelf solutions out there which produce great results, we are looking for something that will cover larger areas at a higher resolution. We started with the X5 as it could be hand launched and was a good platform that flew at higher airspeeds and could progress us into the X7. Here is some of our progress;


3689604515?profile=original

The X5 is running on APM 2.6 and has prove extremely reliable and stable. The camera used is a canon IXUS 132 running CHDK and shooting on an intervalometer script. The main purpose of the X5 was to learn about vibration dampenning and apature and ISO settigs to produce clear images. This took a significant amount of effort, however we are at the stage where 2 out of 3 images are photogrammetry quailty.

3689604569?profile=original


Our test baby has had a few hard landings (things were laid out a little neater when we started) . We are very excited about the recent interest and work being done on laser altimetry in recent months. We are also currently testing one of these devices as flying wings are extremely hard to land manually (especially when they are loaded up with gear). You can see the APM in the middle of the plane, 5.8GHz live video and 900MHz telemetry transmitters, and the IXUS 132.


We found the X5 reasonably easy to hand launch WITH A WELDING GLOVE (it will cut your hand to shreds - not if...when). You can see the camera poking out of the front of the plane. Images are good, however, to get the plane to navigate the survey grid well, it becomes a little twitchy which means that a high number of the images are not taken pointing straight down. Navigation accuracy (Nav Constants and Pitch and Roll constants)  v's image quality is a trade off. Others may have found the perfect solution..we haven't. (Yes we are investigating some of those gimbals). We found the ideal cruise speed with a 4S 5000mAh battery was about 12m/s and we are getting about 30 mins of flight time. 

3689604536?profile=original

We have been using Agisoft Photoscan which works really well and appears to be more flexible than Pix4U. We have no surveyed ground control in the images, and we have no geotags in the photos as we were running an intervalometer script. However, it was great practice flying and processing, changing settings and trying again. You cans see that you lose images when the camera is not pointing down and loose some of the survey area. We have found that it is better to not use bad images and have gaps, rather than use them and distort the good data.

Once we had some confidence in what we were doing, we unleashed the BEAST!

3689604582?profile=original

First of all, the X7 is more streamlined than the X8, but doesn't have anywhere near the same room for hardware. If we were to do another flying wing, we would try the X8. We are running the X7 on Pixhawk and have a nikon J2 taking photos. The J2 is triggered from the Pixhawk via an infrared LED shutter controller. 

3689604703?profile=original

The Nikon is snug in expanding foam with its lens fitting nicely into the camera hole in the X7.  With decent batteries and a big camera, you simply can't launch the X7 by hand, so we have built our own heavy duty catapult powered by 4 spear gun rubbers;3689604657?profile=original

It took a while to settle down the nav and flight constants for the X7 but it flies beautifully once tuned. It cruises at around 15m/s and is far less twitchy than the X5. Photos are higher resolution and a lot sharper. We love it as an aerial photogrammetry platform, however landing is still an issue. As well, as we are only running 4s batteries, it's always touch and go as it comes off the end of the catapult. We are still playing with battery/motor/prop combos to get the optimised take off and duration. 

Again, using Agisoft Photoscan, (with Geotags, but no ground control), the results were extremely pleasing;

3689604603?profile=original

3689604678?profile=original

We are still playing and tuning, but our focus at the moment is;

1) ground control -we are looking at a network gps system where you can drop a bunch of transceivers around the survey area and have them log back to a central PC where only one of the transceivers is located in a surveyed location.

2) AUTO LANDING....WOULDN'T IT BE NICE ! 

3) We have purchased a 757 Ranger to try slower speeds, but significantly longer endurance to see if it improves the sharpness of the images. 

Anyway, this is what we are up to. Would love to hear comments from anyone else out there chasing photogrammetry.

Read more…
Moderator

Mayhew, in an interview conducted by email, said a user on an Internet forum reported him after seeing flight statistics online. One video by Mayhew says a drone reached an altitude of more than 3,600 feet.

“The local FAA office contacted me via certified letter. I responded by phone and had a good conversation with the front-line manager,” he said.

In a statement, the FAA said it had investigated a report that an unidentified drone operator flew an unmanned aircraft up to an altitude of 4,200 feet northwest of the airport.

“The FAA spoke to the operator who agreed to fly the unmanned aircraft below 400 feet, which is the maximum altitude for model aircraft flights, according to FAA guidance,” the agency said.

Mayhew said he is now limiting the altitude of his drone flights.

http://atlanta.cbslocal.com/2014/07/03/high-altitude-drone-flight-prompts-faa-warning-at-airport/

Read more…
3D Robotics

3689604772?profile=originalFrom an op-ed in the Washington Post by Gary Shapiro, the head of the Consumer Electronics Association. Good to see leaders in the overall technology industry recognizing the commercial potential of civilian drones.

With its history of aggressive innovation, the United States should be a leader, not a laggard, in adopting new technology. This should be especially true with drones, which have so much potential in such diverse fields as moviemaking, newsgathering, agriculture, defense and public safety. Just consider how great U.S. companies such as FedEx, UPS, Dominos andAmazon have changed how we get products. If drones are to be a part of breakthroughs in distribution, shouldn’t we want that innovation to occur here? We need the spin-off jobs, industries and benefits that drones will provide.

We cannot wait years for Congress and the FAA to approve regulations governing drones in our airspace. If we do, other nations will leapfrog us as innovators. Prolonged delay in the face of rapid technological change also means that rules risk being outmoded the day they’re issued. What is needed as soon as possible is a clear and straightforward policy framework that fosters innovation in this emerging industry.

In November, the FAA issued a road map laying the groundwork for integrating drones into commercial aviation. This is an encouraging sign, but it is not enough. Drones will transform the way we live. They can boost the economy and create thousands of jobs. All it will take is for the government to get out of the way and allow innovators to do what they do best.

Read the rest here. 

Read more…
Moderator

Forbes Magazine has an update on the recently posted fireworks video, indicating that it may have been flown in violation of a Coast Guard established "safety zone."

"The video’s caption indicates that the flight took place in West Palm Beach, Florida.  If it was a large Fourth of July celebration, the Coast Guard likely established a safety zone....

"There’s no way to know when the video was taken, but most major fireworks demonstrations will have a Coast Guard established safety zone.  The punishment for violating a safety zone is a whopping $40,000 fine and for willful violations it is a Class D felony, punishable by at least 5, but no more than 10 years in prison!"

http://www.forbes.com/sites/gregorymcneal/2014/07/04/video-shows-drone-flying-through-fireworks/

Read more…

3689604375?profile=original

We've just installed the Pi in the Sky telemetry board in our Vulture 2 spaceplane, and while it's primarily for High Altitude Ballooning (HAB) missions, we're using it as part of our onboard Raspberry Pi rig.

It's a nifty bit of kit, combining GPS and radio transmitter. As well as beaming lo-res Raspberry Picam images from aloft via SSDV (Slow Scan Digital Video), it also allows hi-res stuff to be recorded to the Pi's SD card for later recovery.

3689604344?profile=originalHats off to Dave Akerman and Anthony Stirk for this handy board, and there's more on our installation here.

Read more…
3D Robotics

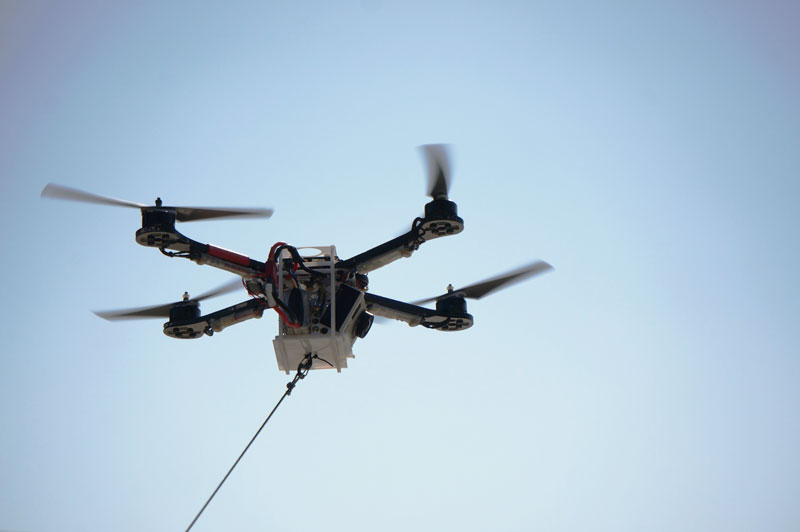
3689604284?profile=originalRobohub has a good update on Fotokite, which uses a copter-on-a-string approach to Follow-me:

Although I am amazed with UAVs and their versatility, I must admit that having a flying camera zoom by – and zoom in on me – can be intimidating. Not because the drone has a camera, but because I don’t always knowwho is behind that camera. If the drone operator were immediately identifiable, however, I would have no problem. That is exactly the issue Fotokite tries to solve.

The idea was developed around the following premises:

  • The regulatory picture is murky and evolving – note that the FAA will likely miss the 2015 deadline for setting a UAV regulation, and that tethered aircraft are exempt from these rules
  • Accountability is important – most people are not happy to be the target of camera that is being flown by an unseen operator

The solution is a tethered, GoPro-fitted quadcopter with onboard algorithms that let it fly instantly and virtually under any conditions, without relying on piloting skills, GPS working or wifi failing.

Fotokite is designed to be launched and fully operational in one minute. To the user, flying the camera is as simple as holding a kite, and framing the picture is as easy as rotating your hand-held monitor. The tether provides visual accountability for bystanders and property owners.

Fotokite_Sergei_Lupashin

Fotokite. Credit: Robert Ladig
.

The man behind the project, Sergei Lupashin, is a TED Fellow with 10+ years of autonomous systems experience and has assembled an impressive team that includes robotics heavy-weight Raffaello D’Andrea as an advisor. The project is supported by the Swiss National Centre of Competence for Research in Robotics (NCCR), which is also a supporter of the Flying Donkey Challenge.

Already there are several concepts that enable a drone to autonomously follow and film a moving object (AirDogand Hexo+). However, the Fotokite seems particularly well suited for use in media, to provide birds-eye view while allowing those around the device to immediately identify the camera operator. Though its price is still unknown, it seems like a  cool tool that will surely be added to many reporters’ inventory one day soon.

Read more…

Hobbyking releases HKPilot 2.7

Looks like no one posted this yet. Good to see some innovation and improvements from HK

3689604227?profile=original

http://hobbyking.com/hobbyking/store/__56052__HKPilot_Mega_2_7_Flight_Controller_USB_GYRO_ACC_MAG_BARO.html

Improvements:

1) 100uf cap in Vcc and 10uf tantalum capacitor added to stop 3.3v bad gyro health issues

2) Replacement of the (not used/redundant) 1.0mm 6p GPS port with df13-4P I2C external compass port, putting the GPS and external compass ports next to each other, making for easier connections.

3) Multifunction MUX port added in the old I2C port location, this lets users select an output from the bonding pad (Uart0, Uart2, I2C, OSD “default is OSD”. This new layout makes data transmission more stable with an isolation resistance.

4) 3.3V and 5V Dataflash/Flashrom swapped trace problem corrected to the AT45DB161.

5) External Compass enable/disable jumper added, verses having to cut a trace wire.

Read more…
100KM

https://www.youtube.com/watch?v=JnmOMfmBZbY

It has been our goal to find out how we can train a user with no radio control airplane experience to operate our drone safely in the shortest time possible. In our experience, all who come for the training do not have experience in radio control. Some of them even not aware of such a hobby before they start thinking of using drone system to do their work.


As most researcher or user do not have the luxurious to spend a few week with us, our training is confine to 3 to 5 days. Therefore the normal radio control coaching method which we have been used for years to train up a new hobbyist is not suitable for our time constraints students.


Before radio control flight simulator become popular, a beginner will start with a trainer plane, the instructor must help him to set up and trim the plane to ensure it will not have any bad habit. Then with a trainer cord connected between their transmitter, the instructor will flip a switch and let the student take control of the plane. Usually it will not be too long, most of the time, in 20 seconds or less, the instructor will need to take over the control again. Depends on individual talent, it may be a few months of Saturday and Sunday hardworking before a student earn his/ her wings. Fast forward today's situation, we need a better and faster flight plan.

3689604106?profile=original

Prof Edward Webb from National University Singapore still hold the honour as the only pilot who land his plane on the FIRST flight

For a radio control airplane beginner, the most difficult part is eye hand coordination and the prospective model airplane view in the air relative to his fixed ground position. Radio control flight simulator has been in the market for more than 20 years and today's flight sim such as the latest Real Flight 7 had great graphic and realistic physics. The fact that you can practice without worry about crashing the plane is a great help too. We have been using it to train beginner hobbyist with good result.


For best result. we have been evaluating using helicopter instead of airplane for the student to start the training. Over the years, I have noticed that if a student start flying with airplane, in simulator, he may able to fly randomly for sometime. But actually he had very little control over the airplane. A lot of bad habit will quickly develop in this stage if the student did not get good advice. It will take more time to undo those habit then learning a good one. Therefore, before the student come for training, we request them to buy a simulator and try their best to hover a helicopter, preferably 60 size. The main objective is to train up their eye hand coordination.


Our student is not come here to prepare for their next world RC aerobatic championship, the focus is how to safely take off and land the airplane. More time will be given to practice landing as we have develop our " semi auto " take off and APM auto take off command also pretty reliable now.


The training is divided into two part. Flight simulator and field practice with our Skywalker 2012 trainer equip with an APM 2. ( that is our first APM with build in GPS, should had travel thousand of mile and still perform like new ) In both flight simulator and actual flying, only 4 maneuvers are require to prepare the student for their first landing. That is left hand traffic pattern, right hand traffic pattern, low pass ( 20 meter ) and full power go around, horizontal figure 8.


A typical training session start with computer flight simulator. Once the student demonstrate he can somehow hover a heli, that means he had develop the eye hand coordination require to fly a radio control airplane, the instructor then fly a maneuver, say right hand traffic pattern for the student to let him see how to properly execute the said maneuver. Pay attention to maintain altitude and correct flight path. It is important to train them to fly in both direction as soon as possible so they will not bias to one particular direction.


A few hours of simulator training will usually sufficient for the student to try their first ever radio control airplane flight. Flying the same maneuver learned from simulator, they will feel the real thing is much easier, that is because we had them fly in FBW A mode. In this mode, the student will be concentrate to control the flight path and altitude ( about 100 meter ) while the APM keep the airplane stable. We try to limit the training to about 15 minutes per session. Longer flight time will counter productive as student will lost concentration.


Once the student can fly a reasonable traffic pattern with constant altitude, we can gradually reduce the altitude to about 50 meter and continue to fly a smaller traffic pattern. Pay attention to maintain a parallel flight path with the runway. Once the airplane pass the pilot, apply full power, full up elevator for go around. The final goal here is to be able to fly about 10 meter above the runway and a reliable go around. Because of engine or motor torque, the airplane may turn to the left side while apply full power at lower air speed, so one should prepare to compensate with aileron or rudder to avoid fly toward the cloud.


To set up for a landing, the student must be very confident to fly at low altitude, using throttle to control altitude and able to perform go around safely. Start from a downwind leg about 60 meter away and parallel to runway, student should gradually reduce throttle to lower the altitude, make a smooth turn for the base leg, continue the turn and adjust the bank angle so the nose will point directly into the runway for the final approach. Most student will be having difficulty at the initial stage to set up for a correct final approach, this is where the instructor come in to give verbal instruction and hopefully the student will follow. There is not much time to save the plane at this stage.


If the student successfully point the airplane into the runway, all he have to do is cut off all power and let it glide in for a landing. As training progress, student can learn to use throttle to adjust the landing point and using rudder to adjust the flight path so the plane will land in the centre of the runway.


Figure of 8 in both direction is the final maneuver for the student to practice. This maneuver will prepare for the student to be able to fly the airplane in all difference angle relative to him. He will have confident to take over control from auto mode in all position.

https://www.youtube.com/watch?v=-U85kAZ0JZk

We have been fortunate enough to have talented students come for training. Most of them make their first radio control airplane landing in their first training day. While we cannot guarantee everyone can do the same but we are confident in the third training day, one should able to land it in one piece or this may not your game.

3689604205?profile=original

Mr Yoon from Seoul, Korea after a training session 

Fly by wire mode is really a game changer for radio control airplane training. A well set up plane such as our Skywalker 2012 is very easy and safe to fly. With Geofence enable, one is impossible to crash the plane during practice except mechanical or electrical failure. A training use to take a few months now can reduce to just a few days.  This has opened up the door for more researcher to implement UAV technology in their field work. There are certainly endless of potential for UAV, especially low cost and easy to use UAV system. But we feel that proper training is essential for effective and safe UAV operation. We share our experience here and hope for more input toward better training idea and method.


May the number of landing and take off always be the same.

Read more…

Robot Ground Vehicle Chassis

3689604168?profile=original

Robot ground vehicle, just add brains. See it running at:

http://youtu.be/C4cI62gy3lU

I thought I would like to start building ground vehicles & high powered servos and offering them for sale. This is the first attempt at a large rolling chassis - it happily carries people around for rides and has a wheelbase of approx 865mm (a bit less than a yard).

It is:

- 24V with 12V and UBEC available on board

- Large slow revving brush motor that is ultra reliable and very quiet

- Massively powerful steering servo

- Simple RC inputs for steering and motor drive

- Forward and reverse controlled by transmitter stick position

- Heavy duty 25mm frame to carry sensors, arms, manipulators, etc

Cost? Somewhere around the sort of price you would expect to pay for an RC car at your local hobby shop.

Read more…

Navio: PPM to PWM on Raspberry Pi

3689603892?profile=original

To be used in autopilot applications Navio needs to decode RC input. Measuring each PWM channel requires multiple connectors and plenty of wires. PPM sum signal combines all PWMs from the receiver in one sequence, which could be transferred over single wire.

Most modern receivers output PPM, but if you have an older RC gear with only PWM output an encoder can be used. For the S.Bus receivers we are preparing a separate driver, however a S.Bus to PPM converter exists.

In case you want to run the code on Raspberry Pi without Navio please note, GPIOs on Raspberry Pi are not 5V tolerant. A divider is required to lower the voltage of the signal.

We use pigpio library that is capable of sampling GPIO with 1 microsecond resolution over the DMA. The application makes time marks of all edges both rising and falling and measures the delta time between them. If that time is the size of a sync pause, then it is the start of the cycle. After the start of the cycle it measures pulse lengths and stores them.

The acquired PWM values can be used in an application or transferred to the Navio’s onboard PWM generator as it is shown in the video.

PPM decoder GitHub

Navio Indiegogo campaign(Only 6 days left!)

Read more…

Robot vs. Tiger

I ran into this on Youtube and thought, I'd share it. For once, it's no flying thing for a change and second, I think, among all this politics and regulation stuff which recently dominates this site, it would be nice to see some really cool (and cute) usage of robots again.

Read more…
3D Robotics

3689604012?profile=originalNo surprise, but good to have it confirmed by the Inspector General. From The Verge:

The Federal Aviation Administration likely won't be ready to let commercial drones take to the skies in September 2015, despite a recent law directing it to do so, a government audit has found. The report, released last week by the Department of Transportation's inspector general's office, found that the FAA is "significantly behind schedule" and that there are still "significant technological, regulatory, and management barriers" preventing the FAA from integrating drones into the national airspace.

Those barriers include: failing to create standards that would allow drones to detect and avoid other aircraft, as well as ensure reliable connections with their controllers; not yet determining regulatory requirements — such as certifications and air traffic procedures — for managing drones;  not ensuring that all issues with drones are reported and tracked; and generally remaining disorganized with regard to how it oversees drones. "Until FAA addresses these barriers," the report says, "[unmanned aerial vehicle] integration will continue to move at a slow pace, and safety risks will remain."

For its part, the FAA seems to accept the report, agreeing to all of the recommendations it makes in its conclusion. Those recommendations will have the agency publishing an annual report, beginning November 30th, detailing its work toward safe drone integration. They'll also have the agency setting up timelines and concrete goals for meeting many of the barriers that the DOT's inspector general identified. Even so, the report's conclusion isn't bright for the immediate future of drone use. "Until FAA is successful in establishing these standards and adhering to a comprehensive integration plan with other public and private stakeholders," the report reads, "it will remain unclear when, and if, FAA can meet its goals to safely integrate [unmanned aerial systems]."

Read more…
3D Robotics

3689603884?profile=original

From Motherboard:

An article in the Journal of Field Robotics describes the first tests of the GimBall, a drone that appears pretty indestructable, even during flight. The drone is designed to literally collide with objects and continue moving. To make this possible, the team trades obstacle-detecting sensors for a spherical rigid frame that can roll on and around obstacles while in flight, protect against debris, and propel it along the ground. It looks like this: 

Image: Journal of Field Robotics

The drone was also tested in a series of pre-programmed autonomous flights in a fairly thick forest. The algorithm ordered GimBall to fly up to an altitude of a meter, then to head north until the "end of [the] experimental area." As you can see in the video below , its a terrifyingly efficient bushwacker, even with its roll-cage being made with polygons that are too wide to protect against thin branches.  

3689604068?profile=original

The engineers originally debuted the tech last year, but have a few plans for GimBall V2: They plan to tighten up the roll cage's openings, adding thin force sensors to the cage itself, and further optimize the mathematical collision program to enable GimBall to efficiently drive on the ground or ride along an uneven surface. All of these are changes are inching towards a drone that can stay in the air, no matter what.

It's a design that's already making its way into commercial drones, on a rudimentary level, at least. Parrot's new mini drone features a roll cage—the drone can travel on the ground and bump off walls with no problem. It's not nearly as sophisticated, however, as the GimBall, so let's take a look at its inner workings. 

The team, led by Adrien Briod and Przemyslaw Kornatowski, of Switzerland's Ecole Polytechnique Federale de Lausanne, had to design a frame with geometry that could keep the drone stable, airborne, and controllable when ricocheting or powering through something. 

Briod's team uses an internal frame that's made from a type of free-rotating camera-stand, called a Gimbal System—hence the name. On the inside of the drone's Gimbal System's there's a propeller, stabilization system, and camera, and on the outside, there's a roll cage. The whole thing works because, when it hits something, the outside frame rotates and absorbs shock, while only minimally affecting the orientation of its propeller. When a collision happens, the propeller only rocks enough to slightly impact its flight path. 

Read more…