All Posts (11086)

Sort by
Developer

3689669278?profile=original

FIND MY DRONE - The #1 iPhone app for Lost Drones has been updated and published to the App Store. It supports connection to MAVLink  compatible drones using WiFi (LTE/3G) including 3DR Solo, so you can easily find it when its hiding in long grass (avoiding the FAA and the DOT no doubt)

FIND MY DRONE also works with autopilots that are mavlink compliant or you can manually enter the last known location and FMD will give you bearing and distance to your errant robotic friend.

FIND MY DRONE Map View also has mini dashboard showing current status of battery, mode, speed and heading.

Download here ( https://itunes.apple.com/us/app/find-my-drone/id649232029?mt=8 )

Happy Finding... :)

Support here http://www.communistech.com/support/

Read more…
Moderator

amarabbit.jpg New Task Force to Develop Recommendations by November 20

WASHINGTON – U.S. Transportation Secretary Anthony Foxx and FAA Administrator Michael Huerta today announced the creation of a task force to develop recommendations for a registration process for Unmanned Aircraft Systems (UAS).

The task force will be composed of 25 to 30 diverse representatives from the UAS and manned aviation industries, the federal government, and other stakeholders. The group will advise the Department on which aircraft should be exempt from registration due to a low safety risk, including toys and certain other small UAS.

The task force also will explore options for a streamlined system that would make registration less burdensome for commercial UAS operators. The task force may make additional safety recommendations as it deems appropriate. Secretary Foxx directed the group to deliver its report by Nov. 20.

“Registering unmanned aircraft will help build a culture of accountability and responsibility, especially with new users who have no experience operating in the U.S. aviation system,” Foxx said.

“It will help protect public safety in the air and on the ground.” Every day, the FAA receives reports of potentially unsafe UAS operations. Pilot sightings of UAS doubled between 2014 and 2015.

The reports ranged from incidents at major sporting events and flights near manned aircraft, to interference with wildfire operations.

“These reports signal a troubling trend,” Huerta said.

“Registration will help make sure that operators know the rules and remain accountable to the public for flying their unmanned aircraft responsibly. When they don’t fly safely, they’ll know there will be consequences.”

While the task force does its work, the FAA will continue its aggressive education and outreach efforts, including the “Know Before You Fly” campaign and “No Drone Zone” initiatives with the nation’s busiest airports.

The agency also will continue to take strong enforcement action against egregious violators. At the same time, it will continue working with stakeholders to improve safety to ensure further integration and innovation in this promising segment of aviation.

Secretary Foxx was joined by representatives from the following stakeholder groups:

The Association for Unmanned Vehicle Systems International Academy of Model Aircraft Air Line Pilots Association American Association of Airport Executives Helicopter Association International PrecisionHawk AirMap/ Small UAV Coalition Consumer Electronics Association

Read more…

EASA European regulation proposal

3689668992?profile=originalBeside the US regulation attempts also the EASA has released a proposal for drone regulations, for which the period to make comments has ended on september 29.

More official information here:

The proposed regulatory framework can be downloaded here (PDF, 41 pages):

While the US rules seem to be quite restrictive, complex and drone adverse the EU ruleset at least partially aims to balance better between conflicting interests (freedom for RC hobbyists vs aviation safety vs public privacy).

The ruleset acknowledges the economic importance of drones, their innovation potential, the fragmentation of the industry as well as the diversity how drones are used. At least the agency seems to be willing to not lump together all these things.

Some quotes from the document above:

"Drones need to be treated as new types of aircraft with proportionate rules based on the risk of each operation."

"Innovative and diverse: the drone industry is extremely innovative and the risk that regulations are superseded by new developments will be always present."

"Finally, it should be kept in mind that using drones to inspect buildings or power lines could also improve safety because the consequences of hitting the building or the power line are likely to be material only compared to a manned aircraft where injuries to persons are to be expected."

"This regulatory framework is based on the risk posed by drone operations. Another choice would have been the classic approach used today for manned aircraft."

"Even very small drones can quickly fly high enough, thus posing a severe risk to aviation safety. As mentioned in the Riga Declaration: ‘Drone accidents will happen’. The challenge is now to find the balance and means to ensure appropriate safety while not hampering the market considering that a zero risk approach is not practical."

"Even if certification and licensing conditions were kept as ‘light’ as possible, the traditional manned aviation approach is likely to produce a too heavy approach to drones, especially to the small-drone market. The level of rigour applied to safety management in manned aviation (involving strict controls of aircraft design, production and maintenance; pilots; operations with (in most cases) ex ante licensing and continuous monitoring) is disproportionate to the risk posed by many drone operations."

"Overburdening low-risk operations lead to a climate of indifference or to illegal operations adversely affecting safety."

"Models are normally manually controlled and don’t carry a GPS unit or similar on board; there must be a clear benefit to mandate future drone technology and there is definitely a limit towards simplest, low-risk operations where it is not proportionate to increase costs without benefit (e.g. to install a GPS on a tethered balloon)."

"It is not the intention to create a licence, but merely to develop learning objectives or an e-learning tool."

There are also some quite interesting technical proposals, like low tech registrations comparable to how SIM cards are registered, smartphone based solutions, on-the-fly generated no-fly zones which are published over an open web interface which must be queried by drones before flying, temporary dynamic geo fencing e.g. to "create a safe bubble around a rescue helicopter when landing at the accident site"...

Sooo, what do you think?

Read more…

CICADA Y6B

cicda

You know what’s better than flying? Hovering, just levitating mystically through the air and keeping it still. And it’s one of the reasons why the multi-copters enrapture me to certain a degree more than the other flying aircrafts.

Few days back I started to work on one such multi-copter with goals to make it capable  of way-point navigation and carrying a gimbal with head tracking functionality. Though I chose a hex frame initially-for payload requirements, but later chucked the idea out realizing that I can get almost the same thrust with a Y6 configuration without sacrificing the control sensitivity and the extra hours of work. For multi-controller I chose APM 2.5, since it is really simple to use and comes with pre-written firmwares which you can just flash onto your controller EPROM and you are good to go. Besides it’s easy to interface it with the optional hardware like gimbal unit, payload latching mechanism etc. But primary reason which motivated me to use APM was that it was the only controller I had available with me at the time.

Although Y6 configuration has better control sensitivity as compared to the hexa, here is the rub. With a Y6 configuration you lose on efficiency since the rotors are aligned co-axially. The aerodynamic view point would be that the bottom rotors pull in the the wake released for the top rotors, messing with the efficiency. Also since the incoming velocity increases, the effective angle of attack of the bottom rotors becomes low and it needs to function at even higher speeds to get the same lift; one more reason for inefficiency. All in all, the net efficiency decreases by almost  15-20% as compared to the hex configuration, for the coax props of same size and pitch. But hey, who cares when you are still getting the required flight time, better control sensitivity and a wider field of view for your camera. And anyway that problem can be solved to a certain extent if you are a bit of aerodynamics nerd. How? Well you can use blade element+momentum theory (google it, I am not going to spoon-feed) to optimize the pitch and diameter of bottom prop for the highest possible efficiency.  Generally the pitch and dia of the bottom prop will be higher than that of top one. Higher pitch will compensate for the reduced AOA and bigger dia will ensure that your tip doesn’t stall due to wake from top prop. I will share the Matlab code for optimization soon.

The Y6 configuration, itself has two versions A and B. Except the tail rotors, all the top rotors of Y6a has clockwise motion, while bottom rotors move in opposite direction; for the tail rotors top one is clockwise and bottom one counterclockwise. However, for Y6b, all the top rotors move in clockwise and the bottom ones move in opposite direction. I prefer Y6b over Y6a since it offers better yaw stability. Below is the pic of the configuration.

After having flown with this config several times, I can attest that the controls and stability are just fine and it flies like a dream.

Frame construction

I wanted the frame to be as lightweight  as possible- obvious, isn’t it? I had a 3D printer at my disposal; thanks to the awesome Aerodynamics club at the campus which I am part of, you can like our facebook page https://www.facebook.com/AeroD.BITSGoa?fref=ts . Now, I had few options available for the the arm rod material-aluminum, wood and unidirectional carbon fiber rods. I chose CF rods since the specific strength is much better than that of aluminium. Only problem with unidirectional CF rods, unlike the woven ones, is that the strength is really low in radial direction and you can split the rod just by pressing it between your hands. And the problem with the 3D printed parts is that they are really weak in axial direction(perpendicular to the layers) and strong in radial direction. But if you cap the ends of the unidirectional  CF rods with 3D printed parts, voila, it will be adamantium strong; okay, may be a bit less. So the frame is mostly made up of 3D printed parts and  unidirectional Carbon fiber which is cheap. The total weight of the frame came out to be 230 grams- pretty lightweight, right?

Here are the specs:

Motors- 6, 1200KV                                                                          Power distribution board-1

Batteries-3, 3cell, 2200mah (3s, 3p)                                        Net weight -1670 (with gimbal)

ESCs- 6, 30 Amps                                                                              Payload Capacity- Upto 1 Kg

Multi-controller- APM 2.5                                                              Throttle at take off- 30%

cicada 2

Problems faced with Gimbal

3D printable gimbals are a bit problematic because if you mess it up, they tend to vibrate a lot. The trick is to place the COM of all the moving parts of gimbal as close as possible to the primary servo- the one which is stationary w.r.t to the body, while designing it. If you don’t, it will create significant moment around  the gimbal-servo joint and result in huge amount of vibrations.  Also you have to get the thickness of the gimbal parts right, if you don’t they will tend to bend a lot.  Instead of designing or printing gimbals, I will advice you to make it using balsa, it will give you high stiffness and low weight. You don’t need to worry about the strength, you can stick two pieces of balsa such that the fibers are perpendicular to each other- it gives you really good strength.

Magneto-meter problems

Ahh! A lot of magnetic interference due to the the wires going to power distribution board. I am getting 50% interference at 55% throttle. That’s the reason why there is a provision for an external Magnetometer. But since I am trying to get the cost of the whole copter down, I will figure out first how to do without an external one. One idea is to use a ferromagnetic sheet between the APM and Power distribution board and create a magnetic shielding which will reduce the intensity of magnetic field lines from the wires, near the APM. It will be extra weight of course but not sure how effective it will be. Hmm..  will need some calculations. Other idea is to simply mount the power distribution board farther away from the APM, won’t do much change in COM position but will have to redesign it- not a big deal I guess. I will probably go with the later one; will post updates soon.

Read more…

A44 EagletTesting

We took the A44 Eaglet out for some pre-production testing on a beautiful day downunder and couldn't help but tell the rest of the world about it. We're soooooo proud of this little plane.

Read more…

New Outback Challenge Group!

 uavc_me_2016_logo-02.png


I have started a new group for discussion and sharing of information concerning the Outback Challenge, I feel it is important to share as much as possible here in a centralized location in order to help everyone. I have started a discussion concerning Deliverable 1 my hope is to get as many as possible posted for future people to see what they look like and to see the wide array of ideas that are presented, and just to share with others to get feedback.

Read more…

Hijacking drones with a MAVLink exploit

3689669085?profile=original

From Shellintel (via Hackaday)

Recently some of us here at shellntel have been building quadcopters and autonomous vehicles for fun.  We are big fans of the Pixhawk flight controller for its awesome autonomous capabilities.  We are also big fans of privacy.  As much as we like to build and fly these drones, we realize doing so in an irresponsible way can cause concern. We started looking into the various drone communications and discovered a design flaw that allowed us to take control of any drone flying with a specific telemetry protocol.

Telemetry allows the drone to exchange information and commands wirelessly with a ground station. This includes sending/receiving GPS coordinates, waypoints, throttle adjustments, arm and disarm commands, pretty much anything, including a serial shell.

The design flaw is not unique to PixHawk, but rather with the Mavlink protocol. Mavlink is used by many companies including:  Parrot AR.Drone (with Flight Recorder), ArduPilot, PX4FMU, pxIMU, SmartAP, MatrixPilot, Armazila 10dM3UOP88, Hexo+, TauLabs and AutoQuad. All of these companies make great products, but if they adopt the Mavlink protocol as is, it may be possible to hijack their drones (and any other drone using Mavlink).

According to its documentation, each Mavlink radio pair is setup with a NetID or channel.  This is done to prevent two radio pairs from interfering with each other.  By default this value is set to 25, but the user can change this setting. To hijack one of these drones, all you'd need to do is set your transmitter to the same NetID as the target drone.

Looking at the protocol spec, each data packet sent by the radio includes the NetID in its transmission!  This means that all we need to do is listen for a single packet within the frequency spectrum, capture it, carve the NetID, and set our radio to use it.  This, is surprisingly easy.

Using these radios, we can modify the OSS firmware to simply do this.  The following changes were made to  radio.c which when compiled is flashed to the transmitter.

Original Code:

 // decode the header     
errcount = golay_decode(6, buf, gout);
if (gout[0] != netid[0] || gout[1] != netid[1]) {
// its not for our network ID
debug("netid %x %x\n",
(unsigned)gout[0],
(unsigned)gout[1]);
goto failed; }

Modified Code:

// decode the header         
errcount = golay_decode(6, buf, gout);
if (gout[0] != netid[0] || gout[1] != netid[1]) {
// its not for our network ID
/* Modified by __int128 */
// Set our radio to use the captured packets NetID
param_set(PARAM_NETID, gout[0]))
// Save the value to flash
param_save();
// To read the new value we need to reboot. Rebooting
RSTSRC |= (1 << 4);
/* End of what was added by __int128*/ }


The variable gout[0] is set earlier in the radio.c; which is populated with the NetID of all captured packets.  This block of code is only hit when our radio hears a packet from another radio set on a different NetID from ours (which is good because don’t want to reboot each time we hear a new packet).  Anyway, that’s it, 3 lines of code is all it takes to hijack any drone using Mavlink.  Compile it, flash the radio and you’re good to go.  It works surprisingly well and is super quick.  

Read more…
3D Robotics

Anti-drone tech jams GPS

The Drone Defender directionally blocks GPS signals, on the assumption that the drone will land when it loses GPS (which is the case with 3DR and DJI products, but can be disabled)

From Popular Science:

The Battelle DroneDefender is a rifle made for electronic warfare, as first reported by Motherboard. The gun looks like a hodgepodge of science fiction props strapped together. Despite its appearance, it’s not made to fire any projectile. Instead, the DroneDefender works by jamming the communications of commercial drones, causing them to lose control and, ideally, land.

The DroneDefender s weighs less than 10 pounds and can be mounted on any existing weapon with a picatinny rail—a fairly standard mount found on military rifles.

The attachment jams GPS signals, as well as radio signals normally reserved for industrial, scientific, and medical radio communications (the ISM band). It’s primary targets are small commercial drones flown in places the federal government doesn’t want them to be: the radio bands it uses to disrupt drone signals are restricted, so this isn’t a product for everyday consumers annoyed by their neighbors quadcopter. Not to mention the fact that currently, the cost hasn't been publicized.

Read more…

UAS Response to Amtrak Vermonter Derailment

drone-photo-amtrak-derailment.jpg?width=750

On Monday October 5, 2015, Amtrak's Vermonter train struck fallen rock and derailed just outside Northfield, VT.  The diesel locomotive and several passenger cars tumbled down an embankment.  There were many injuries, but thankfully no fatalities.  The location is "extremely rural", cut through dense forest, with very limited access.

The Vermont DOT immediately called the Vermont State University Spatial Analysis Lab for assistance.  A team of volunteers responded to the scene with an sUAS (The SenseFly eBee). 

Within 30 minutes of the call, they had airspace coordinated with the FAA and departed their lab. Upon arrival, they were airborne in 20 minutes and landed 20 minutes later. A KML in the hands of Incident command 20 minutes after that.  The incident commander had a 280 image based high resolution KML in his hands within an hour of their arrival!  After returning to their lab, they created a ortho mosaics to go along with it.

Outstanding work. Safe, fast, and free!

All of this is available on their blog about the response. 

Also covered on Slate: http://www.slate.com/blogs/future_tense/2015/10/09/how_vermont_used_drones_after_an_amtrak_derailment.html

Read more…

3689669149?profile=original

Recent scientific research has shown that aerial imagery captured during a single 20-minute UAV flight can take more than half-a-day to analyze. We flew several dozen flights during the World Bank’s humanitarian UAV mission in response to Cyclone Pam earlier this year. The imagery we captured would’ve taken a single expert analyst a minimum 20 full-time workdays to make sense of. In other words, aerial imagery is already a Big Data problem. So my team and I are using human computing (crowdsourcing), machine computing (artificial intelligence) and computer vision to make sense of this new Big Data source. Click here to read more.

Read more…

3dr Solo Review from a Long Time DIYer

I've been a long time DIY Droner right back to the APM 1, mainly on fixed wing platforms but more recently quad-copters.

There is surprisingly little info and discussion on DIY Drones about the 3dr Solo, despite the fact that it is ripe for hacking and modding.

The Solo launched with quite a few issues and the actual release was less than stellar so many of the initial reviews out there are somewhat patchy. Most of the reviews are also from people with no experience of DIY droning so there is very little evaluation of its modding potential.

I wanted to take the time for myself to evaluate the Solo trying to look at it from a consumer point of view but also keeping an eye on how good it will be for modding and hacking.

I plan on doing a series of further videos to explore how far you can go with the Solo to spec it up and improve it from stock with as little money as possible.

Read more…

WebRTC video over internet hobby solution

3689669102?profile=original

Hello,

I have prepared two simillar tools for fun and hobby real time video stream from an android phone or a PC supporting WebRTC and view it anywhere.

https://video.robotplace.com  - a minimalist web page using free TURN servers

Sellect video size and start stream

https://live.robotmonitor.com - a nice web page using our own TURN server

Find "MAKE CAMERA" choices and click.

1) Using this, you don't need to setup any IP address and router to connect video stream.

2) You need the internet connection (4G or wifi)

The main purpose is to generate URL link for source camera and a URL link for a viewer. URL links can be integrated to any web page as an iframe.

Important note 1: This is not a server for masive live streaming. Only for hobby use. All the video streams are connected to the source camera. A masive live streaming can be done using the ustream app :-)

Important note 2: This is for "video over internet by WebRTC" use only. Video over radio, wifi, gstreamer or other solutions may fit more in environment without mobile 4G or wifi connection.

No registration required to "Make camera" and to get URL links. Registred users can save URL links.

Try it for free if anyone interested, I would like to get some feedback on its function, bugs and improvement tips.

What service of the two works better?

I hope some of you find it useful.

Thank you all for comments,

Petr

Read more…
3D Robotics

Autodesk Research is doing work on "generative design", which creates shapes the way nature would. The software is given some simple constraints -- some physical attachment points and strength/weight targets -- and then it "evolves" a shape that is nothing like the one a human would design. See this article for more: 

Structures built in generative design “tend to have a highly complex, sometimes organic shape,” Erin Bradner, a research scientist from Autodesk Research, says. That’s because generative design uses algorithms to calculate the best design for a product based on both the functionality the designer wants, and the environmental constraints and forces acting on the object. With fewer straight lines and planes than traditional computer modeling, the process “is more akin to something like bone growth,” Bradner says.

Here are some photos of the 3D print in real life. It's incredibly strong!

3689668695?profile=original3689668855?profile=original3689668816?profile=original

Read more…

Boundary Layer Part Two

burin.jpg?width=750

Turbulent Taylor-Couette flows with endcap rings

This is the second part of boundary layer miniseries.

The Reynolds number can be used to predict a flow pattern. The onset of very fascinating flow patterns, for example vortex streets (Tutorial here) can be detected with the use of Reynolds numbers. 

The Reynolds number is the ratio between inertial and viscous forces. A low Reynolds number indicates that inertial forces are overwhelmed by viscous forces. Conversely a high Reynolds number indicates that inertial forces are driving the flow. We can distinguish three principal flow patterns: laminar, transitional and turbulent.

We have a laminar flow when the fluid flows in parallel layers, each layer having little interaction with the adjacent layer. In a laminar flow it is possible to distinguish parallel flowing streamlines. An extreme example of laminar flow is shown on the following video.

Video 1 - Laminar flow twisting and untwisting

This flow has a very low Reynolds number, well below unity. As the flow is strongly laminar the operator can rewind the system to a state visually identical to the original state

Turbulent flow is characterized by an apparent randomness, circulation, eddies and high Reynolds number.

A transitional flow is somewhat in between the two previous cases: some parts of the fluid can have a laminar behavior and some others a turbulent-like behavior. Determining the Reynolds number for each pattern in the transtional flow is not trivial, but fortunately for many notable cases there is an approximate math model. In the next video a complete transition between laminar and turbulent flow into a pipe is shown.

Video 2 – Transition between patterns 

In the relevant literature, one of the most well-studied boundary layer patterns is the one formed by a flow over a flat plate. Under some assumptions, the boundary layer expression can be analytically found, for example there is the Blasius solution. Have a look at Figure 1. One important thing to observe is that the boundary layer is developing along the plate \(x\) coordinate, on the horizontal direction of the image. The Reynolds number expression is \(Re=\rho Ux/\mu\) and \(x=0\) corresponds to the leading edge of the plate or the beginning of the boundary layer itself. Initially, the flow is laminar and as \(x\) increases the Reynolds number increases as well. At some point, the boundary layer transforms into a transitional pattern and finally ends with a turbulent configuration. If one is able to increase \(x\) at will, the flow will become turbulent sooner or later. Depending on many factors, like fluid type and plate roughness the transition to turbulent flow will happen at a different Reynolds number. A plausible interval of values is from 1e5 to 3e6. 

Figure%2B1%2B-%2BBoundary%2Blayer%2Bover%2Bflat%2Bplate.jpg

Figure 1 – Boundary layer over a flat plate

The larger the x-coordinate of the section we examine is, the wider the corresponding boundary layer will be. Given a section at a coordinate \(x\), we observe that the thickness of the corresponding boundary layer decreases as the free stream speed increases. We can observe the relationship between freestream speed and boundary layer thickness on the following video.

Video 3 - Boundary layer experiment water tube

In the video, the transition to turbulent pattern is triggered by an aerodynamic obstacle. Pressure gradients can cause transitions of boundary layers. Pressure gradients are likely to occur on external air temperature probes inside the diffuser section. You can see the geometry of a Kiel probe here. 

In the general case, boundary layer shape is time and position dependent and thus no overall closed form solution is available.

In the next article we will investigate in more detail the simplest ways that pressure gradients affect boundary layers and we will examine a numerical example.

Further reading:

Frederick H.Abernathy, Fundamentals of Boundary Layers, Hardward

Video for the above document

Read more…

DRONE-1672x1254.jpg?width=600

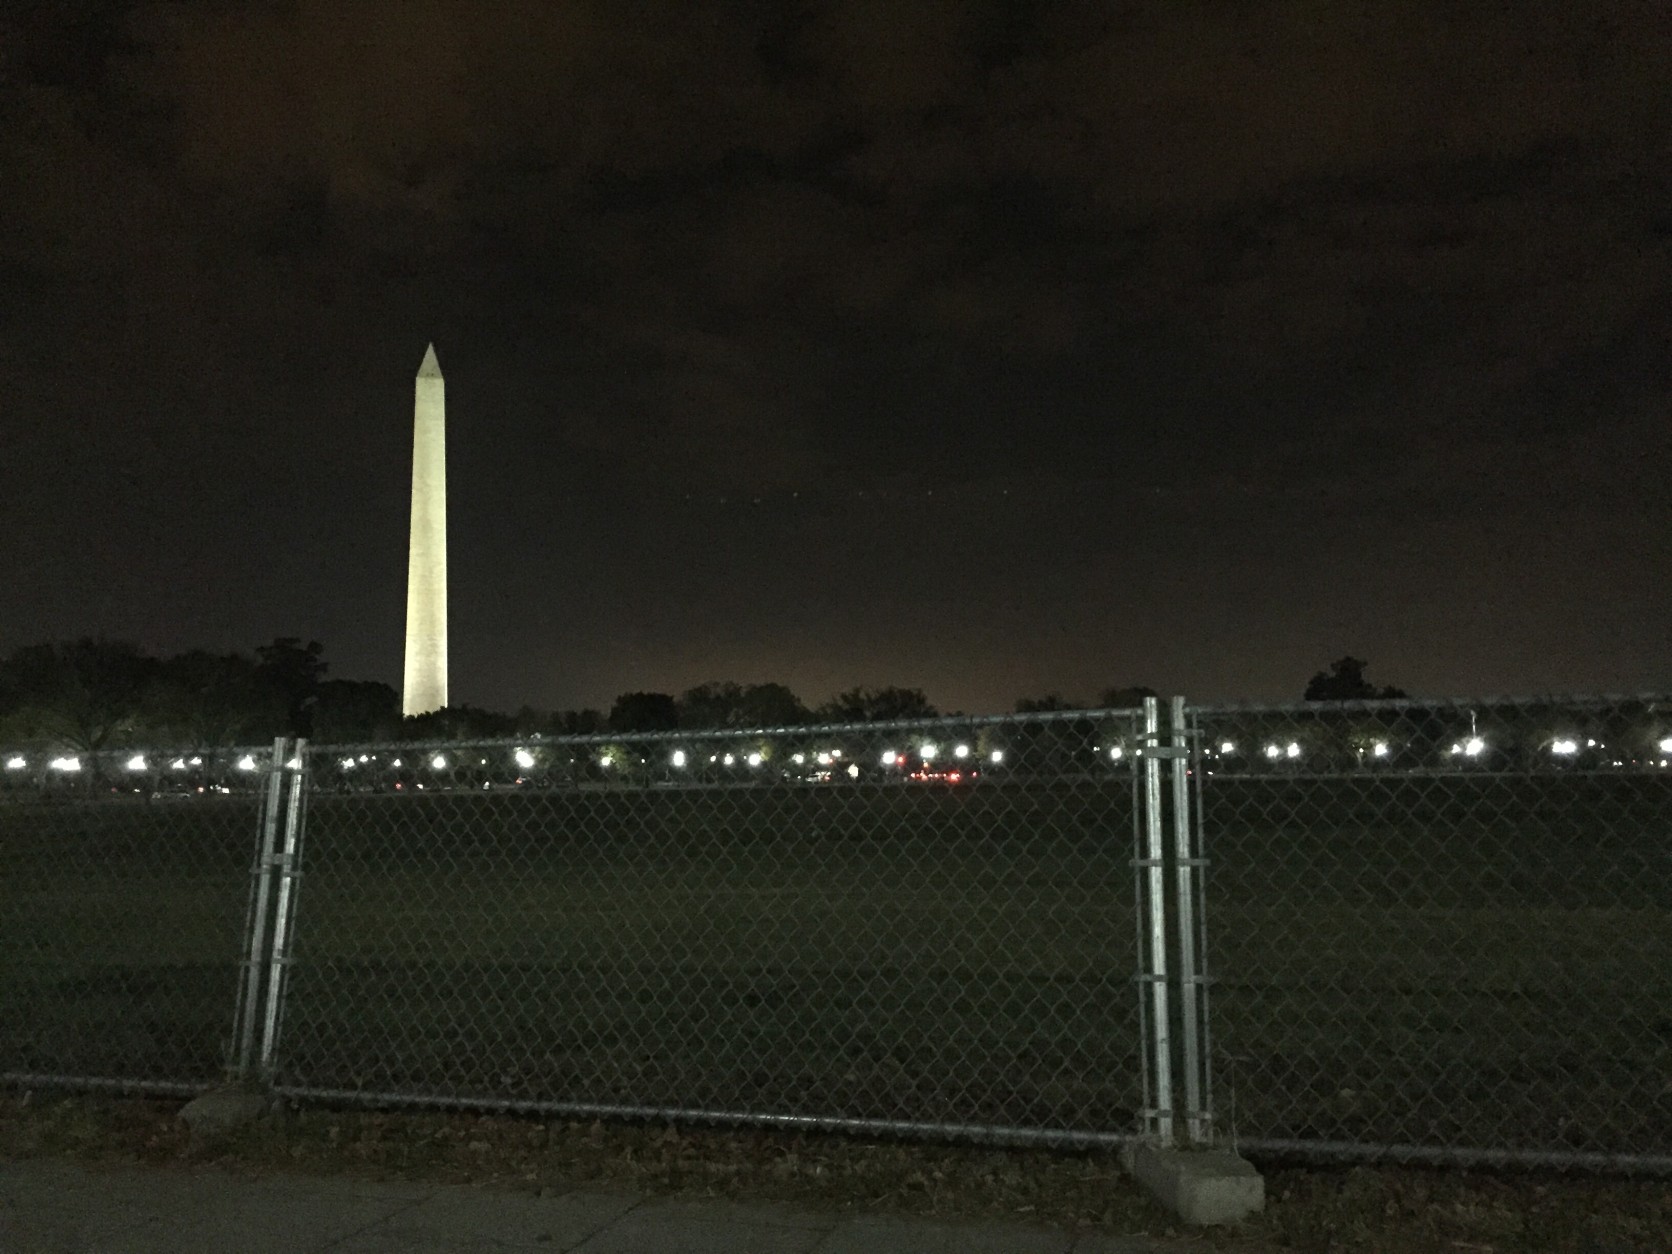
Another unwitting newbie with their shiny new toy, totally oblivious to the rules.  I do not know what brand/model it was, although we can probably all make a rather educated guess.  The big take away here is existing laws were applied and the owner was cited appropriately by local police. Gloating politicians everywhere are in tears.  Finally, another good example of why we don't need a bunch of fat suits in an office to make up new laws for something that is already covered by existing laws.

It's also nice to see the media not losing their mind over it.  Although that may come as the morning progresses.

http://wtop.com/dc/2015/10/drone-crashes-on-ellipse-near-white-house/

WASHINGTON — U.S. Park Police have confiscated a drone that crash-landed on the Ellipse, near the White House.

A police representative says the small drone was being operated from the grounds of the Washington Monument early Friday morning.

The drone crossed Constitution Avenue and crashed on the Ellipse, the grassy area between the Monument and the White House grounds.

Police confiscated the drone and issued federal tickets to the operators, whom police did not identify.

Airspace in downtown Washington is the most restricted in the country for passenger aircraft and unmanned vehicles, including drones, according to the Federal Aviation Administration.

It is illegal to operate a drone within the Beltway without special permission.

Read more…
Developer

Copter-3.3 released!

After months of testing by the beta-testing team and no significant issue during the soft release, Copter-3.3 has been released.  You can load this version onto your vehicle using the Mission Planner or APPlanner2's Install Firmware screen.

As mentioned previously, this version and all future versions of Copter only work with fast CPU boards like the 3DR Pixhawk (and compatible) boards, VRBrain, NAVIO+, etc. Slower CPU boards (i.e APM2.x) can continue to load Copter-3.2.1 from the MP/AP2.

Support issues should be reported in the APM Forum.  Enhancement requests and confirmed bugs should go into the GitHub issues list.  The wiki has been mostly updated but if you spot missing items please report them to the wiki issues list.

The full set of changes can be seen in the Release Notes but the highlights are below.

Known Issues/Warnings:

  • users will need to re-calibrate their accelerometers because of 5c (accelerometer range increase).
  • FrSky telemetry users must set SERIAL2_PROTOCOL to "3" and reboot the board to enable FrSky telemetry like in previous versions
  • this version corrects a long standing issue in the HDOP reporting so values will appear about 40% lower than previously but this does not actually mean the GPS position is better than before.
  • TradHeli is still in beta testing so it remains on AC3.2.1 for now.

Changes vs Copter-3.2.1
1) EKF replaces DCM/InertialNav for attitude and position estimation which provides more feedback and robustness in case of sensors failures
2) Control improvements:
   a) battery voltage compensation should maintain control as voltage drops
   b) current limiting can be used to reduce the maximum current requested to reduce strain on battery and ESCs
   c) air pressure compensation should reduce need for re-tuning when flying at different altitudes
   d) improved throttle curve should reduce wobbles during descents
3) AutoTune for yaw
4) Cameras & Gimbal improvements:
   a) SToRM32 gimbal support
   b) do-mount-control mission command allows controlling absolute camera mount angle during missions
5) Vibration resistance:
   a) real-time reporting of vibration levels by clicking on Vibe field on HUD (also recorded to logs)
   b) noise weighted average of accelerometers used to weight IMU towards the one exposed to less vibration
   c) accelerometer range increased from 8G to 16G to allow use in higher vibration environments (i.e. reduced "clipping")
6) Other:
   a) improved landing on slopes
   b) retractable landing gear support
   c) channels 9 ~ 12 can be used as auxiliary switches (like ch7, 8)
   d) PX4flow (optical flow) support in Loiter
   e) Brake flight mode (stops vehicle quickly but requires GPS)
   f) allow GPS, Telemetry, SToRM32 gimbal to be connected to any telemetry/serial port
   g) Lidar-Lite V2 support
   h) bug fix to RCMAP - remapped channel's MIN, MAX were taken from incorrect parameters meaning all channel ranges had to be the same
7) Tricopter tail servo parameters (MOT_YAW_SV_MIN, MAX, TRIM, REV)
8) Safety items:
   a) crash check triggers with 30deg lean angle error (for 2 sec) even if pilot's throttle is non-zero
   b) modified pre-arm checks to ensure good quality GPS and compas data
   c) lost copter alarm (hold both sticks down and right)
   d) motor interlock & emergency motor stop features on auxiliary switches (ch7 ~ ch12)
   e) RTL_CLIMB_MIN parameter allows forcing vehicle to always climb a few meters at beginning of RTL
   f) LED flashes green quickly if disarmed with 3D lock and SBAS

Thanks to Marco and all the beta testers who risked their vehicles so we could iron out issues and ensure a more reliable firmware for the wider community. Here are some of their videos:

ChrisN #1, #2, Paul Atkin #1, #2, #3, Gervais #1, #2, #3, Gleb Falaleev #1, #2, Pomaroli, Michael, Robert Baumgartner, De Le, Robert Baumgartner, Robert Navoni, Maciej Karpinski

Read more…
3D Robotics

3689668679?profile=original

Solo is now available with gimbal included, and the latest 1.2 firmware update (automatically loaded by the app) has made major improvements to its wireless range, video quality and GPS (with more to come soon). 

On of the best things about Solo being a connected device is that we can deliver continual improvements and features for free, and why your Solo will only get better with time.

We’ve also been committed since Solo’s release to keeping an ear to the ground and listening to what our users have been experiencing. These updates will not only deliver new features and improvements from our end, but will directly address things on your end as well.

An accompanying app update for iOS and Android that adds more GoPro control, including video/still switching and other settings along with better video and photo recording on the phone, is coming soon.

Here’s a brief rundown on Version 1.2, which is available now

  •      Smoother gimbal performance at all tilt angles
  •      Improved gimbal initialization
  •      New gimbal motor protection algorithm—you can push its limits further
  •      Networking improvements to increase range in crowded WiFi environments
  •      Automatically shut down the GoPro with Solo’s power button
  •      Smoother controls in and out of Smart Shots
  •      General reliability improvements
Read more…