All Posts (14049)

Sort by
Admin

3689520553?profile=original

NEW YORK (CBSNewYork) — The use of drones in overseas conflicts has been the source of growing controversy over the years, and now, police are using them to hunt down criminals.

In the world of warfare, the drones are guided on combat missions remotely by pilots and computers thousands of miles away. But now, anyone can buy a drone — without the weapons — to fly here at home.

As CBS 2 investigative reporter Tamara Leitner reported Wednesday, that trend has a lot of people worried. The use of domestic drones has raised some serious safety concerns and is said to be a big threat to privacy.

While not as large, civilian drones are nearly as sophisticated, using high-definition cameras and GPS devices.

Some drones can fly as far as three football fields away, recording and streaming video the entire way.

Sameer Parekh of Falkor Systems programmed a drone to follow a T-shirt Leitner was wearing. He could actually see the drone following her.

“As you’re moving around, the camera could see our company logo and then follow you around,” Parekh explained.

Another custom-built drone provided a spectacular view nearly from 200 feet over Brooklyn.

The drones are loud on the ground, but barely detectable to the eye or ear in the sky. That is exactly what has critics worried.

They say it is one thing to fly a drone in an open field and a controlled environment, but even enthusiasts have concerns about one of these machines potentially being abused.

“My concerns relate to safety, because we don’t have the technology right now for drones to fly safely in crowded environments,” Parekh said.

http://newyork.cbslocal.com/2013/05/01/cbs-2-investigation-beware-of-domestic-drones-the-high-flying-spies/

Read more…

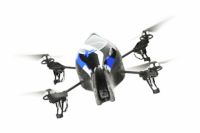
Honey, I shrunk the Parrot AR Drone.

3689520239?profile=originalI may have found my next toy. About a year ago, elsewhere on the internet, I predicted RTF sub-$200 FPV quads would soon hit the market, and the hobby would really take off, no pun intended. Recently, I wrote about the Walkera Ladybird FPV RTF quad, which broke that $200 mark (by a penny, depending on where you purchase). Not letting grass grow under their feet, Walkera has pulled in a sub $100 FPV quad. Let me give you a moment to digest that. 

OK, now, here is the catch. The Walkera QR W100 requires you to own an iPhone, or other iDevice. To get the price below $90, Walkera has pushed some of the work off to a WiFi connected phone, using it as a controller, and a video screen for the feed. In short, they have built a smaller, cheaper AR Drone, but with a nice feature I will mention in a moment.

From my research, and a couple inquiries, I have determined that this quad has three axis accelerometers, and three axis gyros. With these sensors, the quad can be set up as a rock solid, self-righting flyer, or it can be switched into a performance mode with those features turned down, or even off. The iPhone app is supposed to allow the camera to be viewed and recorded in HD, but I sometimes think the true meaning of HD gets lost in translation somewhere over the Pacific. The video quality will remain to be seen. Now, for the added bonus. The QR W100 can be flown with either the phone, or a Walkera DEVO controller. This means an actual RC controller can be used with this quad, and the iDevice used only as a video screen. The lower end DEVO 4 runs about $20 bucks new, and could possibly be found cheaper if someone has one lying around from a beginner helicopter or quad.

So, for the princely sum of $110, you can have an FPV quad with an actual controller, assuming you own an iDevice. And, unfortunately, that caveat is very important, for now. Currently there is no app for Android. I asked. One is said to be in the works, but I wouldn't buy one on the hopes the Android version is in the near future. While I have an Android phone for my personal use, I have a company issued iPhone I might give this a try with. Also, as with the AR, the possibility exists for a WiFi interface on laptops. This would be amazing, and open some interesting possibilities. I would love to see Walkera go this route themselves, although I imagine someone will work on a solution either way.

I hope to get my hands on one of these to review in the near future. Maybe I will sell a little plasma to get it on the quick boat from China. ;) If anyone else has experience with this quad, feel free to share your feedback.

Read more…

3689520182?profile=original

I recently upgraded from my trusty old Turnigy 9X to a shiny new Turnigy 9XR, and had to figure out the channel mixing for it to work with my APM.

There are a few resources on the internet on how to do this (including here on diydrones), but non specifically for the 9XR.

I managed to set my transmitter and APM up such that I have 3 separate switches.

  1. The ELE D/R is now my Emergency RTL switch, which overrides all other switches. (This connects to CH7 on APM and is assigned the RTL function.)
  2. The AIL D/R is my Auto mode ON/OFF switch, which overrides the 3-way switch.
  3. The 3-way switch allows me to switch between flights modes Stabilize/Alt Hold/Loiter.

(Of course you can re-assign the modes to anything you like. But this arrangement works well for me!)

You then have to connect receiver CH6 to APM CH5 for arducopter (or APM CH8 for arduplane). And connect receiver CH7 to APM CH7 for arducopter (I don't believe arduplane has an assignable CH7 for RTL mode, although it ought to have).

Hope this helps someone!

-LPK, ConservationDrones.org

3689520212?profile=original

3689520302?profile=original

Read more…
3D Robotics

The great Robots Podcast is especially worth listening to this week. From the description:

Robots: Controlled Flight of Insect-sized Robots - mp3

In this episode we hear from researchers at the Harvard Microrobotics Lababout the Science paper published today reporting on the first controlled flight of an insect-sized robot. The amazing high-speed video below shows the robot taking off, hovering in place and steering left and right. This work is part of theRobobees project that aims to make swarms of insect robots. You can read our full coverage on Robohub.


Kevin Ma, Pakpong Chirarattananon and Sawyer Fuller
Kevin Ma and Pakpong Chirarattananon are graduate student researcher at the Harvard Microrobotics Lab working with Prof. Robert Wood (listen to Wood’s podcast here). Kevin studies the design and manufacturing of very small-scale robots while Pakpong’s work focuses on flight control strategies for flapping wing robots. Sawyer Fuller is a postdoctoral researcher with experience in the control and sensing of biological and robotic flies.

Read more…

An Arduino Micro Clone

3689520113?profile=original

Hello, my name is Jordi. I'm currently a high school senior, but I will be graduating in a few weeks, after which I will be attending university with a major in Electrical Engineering. I've been a long-time follower of the diydrones community and have made a few posts in the past. In August of last year I made a blog post entitled "Introducing Glowduino!". I had created a board that was designed to control multicolored LEDs on various unmanned vehicles. I ordered the boards and assembled them, but made the stupid mistake of using a TQFP ATMega328 and not including an ICSP header. I had known this would be a problem, so I also designed some small breakout boards for programming. I simply pressed the chip onto the board to program it, and then soldered it to the Glowduino. Once everything was assembled I plugged it in and...it didn't work. After a good deal of searching I realized that I had accidentally flashed the wrong Arduino bootloader to the chip. I was using a 16Mhz crystal, yet I flashed a 8Mhz crystal-less bootloader. I don't have a hot-air rework station, and desoldering it didn't work so well (believe me, I tried). With the board bricked and my hopes dashed, I put the project aside to focus on school work.

3689520017?profile=original

3689520061?profile=original

    A month or two ago I decided to come back to the project and see if I could at least get it into a working state. I designed and ordered some breakouts for the various chips that are used on the project and began breadboarding the design (I know I know, I should have done that first :)) and writing some code. I soon realized that the entire concept behind Glowduino might be more successful if the system were more modular. This got me looking into viable Arduino-compatible microcontrollers, and I soon came across the Arduino Micro. While all of its features are very well suited to my needs, I didn't really like the form factor, among a few other small things. For these reasons I decided to set out to create a 'better' Arduino Micro. I barely changed anything from the original design. The only changes I made were to include higher capacity regulators and to shrink the size of the board. I shrank the width by 0.1" and the length by 0.3". This meant that instead of having two rows of 17 pins it now has two rows of 16, and they are 0.5 inches apart (1 row closer together on a breadboard). I also rearranged the order of the pins to better match the larger Arduino Uno and Leonardo pinouts. All this came with a price, however, and no matter how hard I tried I simply could not route the board on two layers.

3689520140?profile=original

3689520033?profile=original

    I only have the free version of Cadsoft's Eagle which only allows the creation of 2-layer boards. I had heard of Kicad and it sounds awesome, but after weeks of trying to migrate all my libraries and design files over to it I realized that I would be forced to stay with Eagle for the time being. After laying this project on the shelf for a bit I remembered that I had a friend who owned the full professional Eagle software. I asked him if I could use it and he agreed, and after a long bit of routing, ripping up, and re-routing I had a 100% routed 4-layer board that could be purchased from OSHPark. This time, however, I didn't immediately order the boards. Instead, I bought an ATMega32u4 and breakout from Futurlec and set to work breadboarding the project. I have made all the necessary connections and I am currently trying to get my usbasp to talk to the chip so that I can flash a bootloader. I haven't made too much progress on this front yet, tho, as AP Tests are coming up, final projects for my classes are due soon, and I am acting in my school's current musical.

3689520076?profile=original

3689520153?profile=original

In the above photos, the purple board is a breakout for the TLC5947. It is larger than my final Arduino clone will be :)

    With the completion of this new microcontroller the Glowduino has been turned into a 'shield' for it. The idea is that the system will be super modular, with the option for more 'shields' in the future. In fact, it would be almost trivial to create an adapter for using preexisting Arduino shields with this microcontroller. Users could have the option of only installing one shield on each vehicle and simply plugging the microcontroller into whichever one they wish to use. Additionally, expansion boards could be designed that extend the Glowduino's capabilities, such as the ability to control EL wire or LED matrixes (thank you Jonathan Lederer!).

3689520044?profile=original

    I know I will at least make a few of these boards for my friends and I, but this is where I would like some feedback. Is this a good idea? Would you buy it? What ideas do you have for something you could do with it? Is there anything you'd like to see? What is a reasonable price-point? I'm completely into open-sourcing everything, so the design files, schematics, bill of materials etc. will all be released completely once the project is finished. I will be updating my flickr (which is currently quite sparse) with photos soon, here's the link: Flickr Photostream. I would love to be able to actually build these in the future, and I very much appreciate your feedback. Thank you!
Read more…
Moderator

Hunter arrested

hunterardrone.jpg

By MBONGISENI NDZIMANDZE

MBABANE – Private Investigator Hunter Shongwe has been arrested for using a spy aircraft without a valid licence or permit.

The gadget operates as a ‘floating’ camera and takes pictures of people and places without raising suspicion.  The owner of such an aircraft operates it using a hand held remote control.

Shongwe was arrested by police officers from the Hhohho Serious Crimes Unit (Lukhozi) on Tuesday afternoon.

He is alleged to have contravened the Regulations of Aviation in that he operated the aircraft without having obtained a licence.

Police Public Relations Officer Superintendent Wendy Hleta confirmed Shongwe’s arrest.
She said Shongwe is expected to appear before court today. Information gathered is that he is currently kept at the Mbabane Police Station.

According to the Swaziland Civil Aviation Authority (SWACAA) Act of 2009, all people who need to fly an aircraft for whatever purpose are supposed to obtain a licence from SWACAA. This is the same gadget which Shongwe once alleged had gone missing while flying in the direction of Somhlolo National Stadium where members of the League of Churches were arriving for the Easter services.

The small aircraft was allegedly on a mission to record everything that was happening at the stadium and surrounding areas during the services.  In a previous interview with the Times SUNDAY, Shongwe said that the spy aircraft was worth E20 000.

http://www.times.co.sz/News/86969.html

Read more…

Looking for Amateur Journalists!

3689519987?profile=original

This is the News Team for DIYDrones.com! We are just getting things set up so please be patient with us during the first couple weeks.  We're looking for amateur journalists who are interested in writing Drone News Articles that will be published on the front page on a daily basis.  If you're currently in college for journalism it will be an awesome thing to be able to put on your resume!  Also if this team is successful enough we are lined up to get our articles put in a few newspaper outlets in the Tech Section!!!

If you're interested in joining The News Team please let me know!

(More goals will be added once the "Short Term Goals" are met)

Short Term Goals:

  • Find journalists interested in writing articles
  • Get The Team and Group all set up and functioning 
  • Post 1 Article from the Team each day in a blog
  • Set up the journalists on DIYDrones with a DIYDrones Journalist title across the bottom of your profile picture (Very Easy to Do like how mine says Assistant Administrator Under my Photo)

Intermediate Goals:

  • Create a FREE downloadable, printable, weekly newspaper featuring the groups articles to allow DIYDrones members to enjoy the Team's articles while on the Go!3689519941?profile=original
  • Create a DIYDrones Android & Apple app for the News Team that will allow us to Link all of our news and articles onto a easy to use news app for our members and journalists

Long Term Goals:

  • Create a fully function DIYDrones News Team that consists of paid journalists based off of pay from newspaper company compensations

Read more…

I've been using Multiwii but i wanted to test MegaPirate, so i uploaded the code and probably i'll never come back to Multiwii :D

Very stable flight with a homemade Octo with Crius AIO Pro. Testing Altitude Hold, Loiter (AltHold and Position Hold) and Return to Launch, great performance! I tuned the PIDs for Rate Roll, Rate Pitch and Stabilize Pitch, all other PIDs are default.

No software stabilization used in the vídeo.

I carried a GoPro and the video recorded by the octo was very stable! :)

If you have a Crius AIO Pro, I highly recommend MegaPirate!

https://www.youtube.com/watch?v=ailGlrk8uyg&hd=1

Read more…
3D Robotics

3689519831?profile=original

From the team's page:

The Industrial Design senior class is working on a project in collaboration with the Geography and Archeology departments to commercialize remote sensing UAVs (unmanned aerial vehicles) for surveying terrain. We've broken down the different aspects of the project to allow every student to be involved in the process. There are four groups; user experience, packaging, launch & recovery and documentation. 

Some more pics:

3689519927?profile=original

3689519970?profile=original

3689520002?profile=original

Read more…
3D Robotics

3689519909?profile=original

From the IndieGogo project, which has already passed its $3,500 goal:

DroneShield: A low-cost, easy-to-use device that alerts you to nearby drones.

DroneShield is a device that detects the presence of nearby drones (including RC helicopters, quadrotors, etc) and issues alerts via email, sms, and/or a flashing light. The goal is to help preserve your privacy from low-cost remote-control air vehicles with video cameras.

The DroneShield team consists of makers, engineers, and developers collaborating on a device that can detect small drones well before you can hear them. We have a collaboration website atwww.droneshield.org with links to free software and hardware specifications. Free software and hardware specifications are free to download for do-it-yourself-ers. We also sell assembled devices at-cost.

How Does It Work?

DroneShield has a microphone that listens for sounds of drones. Each DroneShield contains a database of common drone acoustic signatures to reduce false alarms (IE ignores lawn mowers and leaf blowers) and in many cases the type of drone is also included in the alert.

Technical Specifications

Our initial target platform is the Raspberry Pi. Other components include a microphone, power supply plugs (also works with a micro-USB battery pack, not included). Wifi connectivity is required for email and SMS alerts. Signature database updates can be downloaded and updated via the RPi SD card.

What’s the Plan?

The goal of this campaign is to create a low-cost device that will help protect privacy against RC helicopters with video cameras; we already have a working prototype running on a laptop. This campaign will port that code to a small low-cost hardware platform that you can plug in and forget about. If you like you can periodically update the signatures of the drones we scan for, or even contribute your own signatures to the database.

Our goal is to port our existing code and database to the Raspberry Pi platform and bundle that with peripherals into a stand-alone product that can be operational right out of the box with absolutely no technical knowledge needed. The funds will be used to buy hardware in bulk (reducing prices) and the developers will donate their time to assemble the hardware and port the code. 50 units are needed to get the first price break in bulk discounts for many of our components.

We hope that there will be enough interest to justify further development to reduce costs in future generations; we believe ultimately we could get the cost down to the $20-range at scale. Future plans could include moving to an open-source 'sourceforge' type development environment and teaming with 3rd party hardware makers.  We could also envision a smart-phone based platform for portable applications.

Qualifications

Our team has over 20 years of combined experience working on science and engineering projects including machine learning and acoustic signal processing. We have advanced degrees in engineering and computer science, including MIT and UMD graduates, and a proven track record of finishing projects on time and within budget for our customers.

Read more…
Developer

[Update] DroidPlanner v0.8.0

Another update on DroidPlanner, now it has a parameter screen. The new app (v0.8.0) will be on Google Play shortly.

3689519808?profile=original

The new version has the following updates ( v0.8.0 over v0.7.5):

  • Parameter screen, with the ability to read/write/save parameters from an ArduPilot board

  • Camera screen, virtual sticks to control a camera gimbal

  • Follow-me mode

  • Better handling of the MAVLink connection, which means les crashes and a more continue experience through the app.

  • Map type selection

Use all the new features with caution, since they haven't been totally tested (that means no complaining to me if you break anything). Now let me give some advice on how to use the new features.

Parameter screen

This is the screen in the image above. Just connect to your drone and hit refresh, it will load all the parameters. If you change some parameter it will turn red, meaning that it's different from what is on the drone. Pressing Write will send only the modified parameter to the drone.

A good use for this screen (besides tweaking your configurations on the field) is to just load the parameters and hit save when you will start your day on the field. That will generate a configuration file that you can use for backup.

Camera screen

This screen is just like the RC override, but it's designed to control a camera gimbal. Channels 6 to 8 are overridden in this way:

Joystick - RC Chnnel - Camera Output
Right Tilt - CH6 - Camera Tilt
Right Pan - CH7 - Camera Roll
Left Pan - CH8 - Camera Pan

A possible configuration of your ArduPilot is showed on the next image.

3689519785?profile=original

It will not work with a plane since it overrides CH8 (which is the mode channel on ArduPlane).

Follow-me mode

This is just a beta test of this mode, it's disabled by default so if you want to try it go to your settings menu. To use it make sure you have GPS enabled and set your default altitude correctly, to enable go to "Follow" on the Flight Data screen menu.

Be very careful!

More info

For more information I suggest the DroidPlanner Wiki page ( for info on how to connect, what device to use, how to develop ...). Or older posts on DiyDrones. For an alternative way to install the app download it here: DroidPlanner_v0.8.0.apk (but is better if you download from google Play).

As always if you want to help consider donating for the project by buying this app, joining the development team, or reporting a issue/bug/improvement on GitHub.

Your feedback is very important.

Read more…

Firmware update: now it's flying!

Hi everyone!

First I would like to thanks to all the people that commented, see, and shared my work. I'm really happy you enjoyed it.

Now the important part. I've been very busy on the firmware and the flight software. The board is still the same :D. T he system is doing very well and the attitude autopilot is working great. Here is a video of the last version working:

https://www.youtube.com/watch?v=0g7EVm_jZZo


The system is doing these things concurrently:

  • 200 Hz update of the PIDs. 3 are for angular rate control of the 3 axis, and 2 more are added on the pitch roll axis to control the attitude. (the magnetometer isn't used right now so I have no reference of true north and that's why I've decided to only control angular rate on yaw axis)
  • 50 Hz reference input axis via xBee. The GS sends the setpoints for the pitch and roll angles and the yaw angular rate. Also it is controlling the collective (altitude) control manually and it also sends the dead man switch signal for the watchdog.
  • 20 Hz telemetry download via xBee. Including: gyros, attitude in Euler angles, controls outputs, motors mix. Later I will add altitude (barometric and ultrasound) and battery level. Also any other usefull sensor.

As I promised, here is the schematic

FLC_v2_0-SCH.PDF

Note: I have to add a small fix for connecting the MPU data ready signal to one of the IRQ based input of the extra sensor inputs of the board. Also a capacitor was added on the reset line of the MCU.


I'm now fully focused on finishing my thesis, but I hope in a month I will be back again and will upload the source code to Github, and other related stuff too.

Also if you would like to use a PID controller in your embedded project (arduino too) you can check my qPID control library. It lack a user manual yet but I added an usage example file that I hope is self explanatory.

https://github.com/akharsa/qpid


Read more…
Admin

UAV for you and me

3689519860?profile=original

They’re making drones, but not shooty-shooty death-death drones. UAVs (Unmanned Aerial Vehicles), otherwise known as drones, are remote control operated mini airplanes with cameras attached to their bellies, or noses, or both. These are not the drones you’re looking for—well, not if you want to remotely control a gun, that is—but these little beauties will help in aerial mapping for geography, filming for entertainment and sports events, tracking for police chases, and even emergency collection for emergency situations like natural disasters.

Here at CSULB, the Anthropology department uses UAVs for research by gathering visual data. Unfortunately for them and the budget, each unit is really pricey when bought from currently-existing retailers, and the only two feasible options are to fork over the money and hope the budget can survive it, or make one themselves.

This is why the Anthropology department approached the Industrial Design students about creating UAVs that were not only easy DIY drones, but also were units that were cheaper than, say, $15,000 per plane. The concept behind the UAV project was to create a system so that hobbyists with no engineering experience could use and assemble one functional enough for professional and scientific uses, and be cheap enough so it’s accessible for university and personal funding.
Read more…

Well, it was not exactly the real maiden as I did a bit hovering in the yard before but it was the first "real" flight in open area.

Setup:

  • MF450 frame from eBay (also available from BEVRC)
  • 4xTurnigy NTM28-30s 800kv (short shaft)
  • RCTimer noname 10x45 props (BIG pack :D )
  • Zippy compact 5000mAh 4S LiPo
  • APM 2.5 / ArduCopter 2.91b
  • Hobby King Wing Camera mounted on sixfold stacked double-sided foam tape

The quad is yet untuned. From my perspective, it looked pretty stable in the air with the default settings when I was hovering. From close up, I noticed constant small fast oscillation in pitch and roll which also show pretty clearly in the video. On the maiden itself, I noticed mainly huge problems with altitude hold. The copter would lose altitude over rather short time and generally be not very precise, as can be seen. Additionally, when switching to alt hold (I put alt hold to an override toggle switch), all motors go low, almost off for a sec and then spin up high. VERY scary, seeing the quad falling a foot or so after switching...

Now, about tuning. I have read around and I don't fully understand the tuning procedure yet. Well, physics class is 20-something years ago :). One issue is also that this little thing has amazing power and I don't feel comfortable holding it in my hand while tuning. I tried once shortly but when I tuned the RATE_P up with CH6, the motors suddenly spun very high and I almost let go, so no joy there.

I was hoping that somebody might have a similar setup and somebody could generally give some advice what do do about the fast oscillations and the alt hold problem. Right - forgot - it was a bit windy today. Wind was between about 0 and 2.5m/s.

My goal is to have a rather conventionally (read: boring) tuned quad for video and photo purposes. No aerobatics or wild FPV chases intended. Just mostly slow and stable flying and hovering.

Read more…

I finally got around to the X-8 maiden flight.  Nice day, gentle breeze, batteries charged and ready to go.  Things went as well as they could for a first flight.  The plan was to take off in manual, trim things out, then try stabilize and maybe even RTL.  Unfortunately when I switched to Stabilize the plane leveled then seemed unresponsive to my control inputs.  I quickly switched back to Manual before it flew into the ground and continued to fly.  I also had a few radio glitches for some reason which caused the APM to Failsafe to "Circle" mode.  Is that normal?  I should probably change that to RTL.


Here comes the bad news.  My "helper" was to film the ground to air footage for this video.  After the 6-7 minute 1st flight, I landed and he hit "Record", the whole flight the camera was on pause.   WHAT! @*%$!  Now my dilemma, the wind is picking up but I want some nice footage from the ground.  It's getting too windy to hand hold both the radio and X-8 with one hand each so how about this, I'll have my helper hand launch the plane while I man the radio?  After some brief instructions and a wind check, it was time for flight #2.  As you will see from the beginning of the video, things did not go as planned.  When he went to toss the plane he left his hand up and in the way and it was struck by the prop causing it to nose over into an uncontrollable dive.


So far the only damage I can find is both plywood wing flanges where the little screw goes through broke and I got a pitot tube full of mud.  I didn't like the wing attachment set-up anyway so now I have a reason to fix them.  By the way, he's alright and he only suffered a couple small scratches on his fingers.  Very lucky!


Moral of the story is, don't be rushed to make a flight if ANY of the conditions aren't right, always make sure the cameras are rolling and don't put un-trained personnel on the end of expensive equipment.


Hope you enjoy and if anyone has any comments on the Stabilize non-control issue please let me know.

Google Earth file-2013-05-01%2009-46-24.tlog.kml

T-Log- 2013-05-01%2009-46-24.tlog

Read more…