All Posts (14049)

Sort by

The next few posts in our tutorial series cover the setup of the PX4 autopilot for flight. The first step is to set up RC and telemetry. Here is a RC calibration video with Mission Planner showing the interoperability (due to MAVLink 1.0) of PX4 and APM.


The video is very short and basic and should just illustrate the route PX4 is taking towards maximum interoperability with MAVLink 1.0 and existing platforms and tools. If you have further questions about the platform or if you're unboxing it in the next days, please use PX4 Answers to get solid answers from the core developers and real-life tips from other users. We will reward active contributors to the answers and wikis with a community award and hardware.

Read more…

I2CXL-MaxSonar®-EZ™ Sensor Line Released!

MaxBotix Inc., has now released the I2CXL-MaxSonar-EZ ultrasonic sensors for sale to the public.

3689471483?profile=originalWe are excited about this new product offering especially in regards to the multicopter community. These are now the best sensors we have available for your application. The new sensor models still have the calibrated beam patterns that you may be familiar with.

New Features Include:

  • I2C bus communication allows rapid digital control of multiple sensors with only two wires.

  • Readings can occur up to every 25mS (40Hz rate) for up-close objects and every 67mS (15Hz rate) for the full 7.5 meter range.

  • Some increased noise tolerance over the standard XL-MaxSonar-EZ models.

These features are now available in addition to the low power requirements, small-light-easy mounting, high acoustic power, long range, and wide operational temperature already available on our other products.

You can learn more about the new I2C sensor or take a look at code examples in the product datasheet.

Link here: MaxBotix I2C Ultrasonic Sensor

Enjoy! Keep up the great work everyone!

Best regards,

Carl Myhre
Systems Engineer
of MaxBotix Inc.
Phone: (218) 454-0766
Fax: (218) 454-0768
Email: info@maxbotix.com
Web: www.maxbotix.com

Follow us on Facebook at: http://www.facebook.com/pages/MaxBotix-Inc/125159384204938

Read more…
100KM

Techpod maiden voyage

7-30-12

10:00 am

I wake up get some coffee have some eats and go down to the garage . check the batteries , double check CG and control surfaces . go over everything one last time .

11:30 am

got the car packed and head off to get my friends Ken and Greg . the plan is to have Greg launch and ken video while I fly .


12:30 pm

arrive at the field . It was sunny with clouds and a 5-10 mph wind coming from ssw . I plugged the wings in , did a range check , everything looked good . me and greg walked to the east side of the runway and we launched it . It climbed quickly without any dip . a quick wiggle  of the ailerons to check responsiveness and  i climbed to ~ 100 ft and cut the throttle a bit . I turned the upwind leg of the pattern . the nose dipped a bit when it transitioned to a tail wind situation . I added throttle and it quickly recovered . defiantly nose heavy but i did that on purpose to help stability. got it through the downwind tun and checked for trim at about a 30mph cruise . It was dead on . no trim needed . I completed a few more laps and brought her in for a landing . I came in low over the east end of the runway with ~1/4 throttle i cut the throttle as it came over the runway . I let it settle in for a nice smooth belly landing . WOOT WOOT !!


 3689471283?profile=original

here are the videos ken got for me on his phone .


Read more…
Developer

Here a video of a full autonomous test flight of my Easyglider e-Glider piloted by the firmware ArduPlaneNG v2.x R4 and an AIOP (All In One Pro) full IMU board.This is a porting of the official ArduPlane v2 firmware with special addons and improvements for the AIOP board that I have added.
The flight was very stable in spite of the gusty wind conditions, the wind was blowing at 18 km/h gusting 35 km/h..
3689471261?profile=original

3689471413?profile=original

3689471342?profile=original

Below the setup used:

  • IMU board: All In One Pro (AIOP) v1.0
  • GPS: Mediatek MT3329
  • AirSpeed sensor: MPXV7002DP
  • firmware ArduPlaneNG V2.x R4 by JLN
  • e-Glider: Multiplex EasyGlider
  • brushless motor Himax 2815 3100 kV geared
  • propeller Cam Gear Prop 11x8
  • Lipo: 3S EVO25 2650 mAh
  • Receiver: Turnigy 9X8C v2
  • Transmitter: Turnigy 9x
     

3689471428?profile=original

Read more…

PX4 Toolchain Introduction Video

To make getting started with PX4 a bit easier, we've compiled an installation video for the Windows installer. The setup instructions for Eclipse are also valid for Mac OS and Linux.

Note that toolchain means a packaged selection of individual standard software required to develop software for a platform. We do not claim to have developed our own Integrated Development Environment (IDE), we just packaged what we needed into one redistributable file. This also implies that this development environment is not just usable for the PX4 platform, but for almost any other ARM-driven micro controllers.

The video runs through all setup steps, starting with the installation of the toolchain, downloading the PX4 Firmware the first time and finishing with Eclipse setup and board flashing. The toolchain can be used to build firmware for PX4FMU, PX4IO, PX4FLOW and any other ARM7, ARM9, ARM Cortex-M3 or ARM Cortex-M4. Functionality-wise it is similar to YAGARTO or CodeSourcery. Of course the credits for this go to MSYS, ARM and all other people porting the GNU toolchain to Windows, we just wrapped everything into an installer.

It contains:

  • ARM GCC (the official ARM GCC build, the only one we tested successfully with enabled M4 FPU)
  • GDB
  • OpenOCD
  • Python
  • GNU / MSYS tools (make, sh, genromfs, xxd, etc)

Developers have the choice to either use the Eclipse IDE and build with double-clicking make targets, or to use plain Makefiles on the console and their preferred text editor. There is a SublimeText 2 project in the Firmware folder, for users preferring SublimeText.

3689471526?profile=original

3689471555?profile=original


3689471462?profile=original


Read more…

iPad Ground Control Station

Just wanted to share some progress on an iPad Ground Control Station app I've been putting together for a little while. Here's a quick introduction:


As the video shows, the (non-jailbroken) iPad is hooked up to a Digi XTend radio modem via a RedPark iPad-Serial cable and a RS232 Shifter, with the radio modem powered off a UBEC. It communicates with the APM via MAVLink just like the regular APM Mission Planner.

Have also used the iPad-Serial cable with a XBee and XBee Explorer Serial board with my other UAVs, which makes for a simpler hook-up.

Just a personal project at this stage, particularly as use of the RedPark cable limits the redistribution options available (i.e. not permitted on the App Store at present), but have a laundry list of features I'm hoping to add over time, and we'll see what happens on the device interface front - would like to make the app accessible to all if there's sufficient interest.

Thanks for reading - looking forward to any comments you might have!

Read more…
Developer

Arducopter 2.7 Auto-Flip


A while back Jose Julio built a simple state machine for doing copter flips. I integrated it into AC 2.x a long time ago but never flew it. Then, once I built the Flash simulator I could finally test it without doing too much damage or loosing my quad to a fly away.


The original code was quick and dirty which lead to a few issues, one of which was a tendency to turn the my quad into an air to ground missile. The new code which is in 2.7 added a few items:

  • an emergency exit from the state machine (roll or pitch hard to exit)
  • a rate controlled loop rather than a using momentum for the second half of the roll


The state machine takes control of the throttle, roll and pitch until the flip is complete. It breaks up the flip into 4 main steps


  1. Gain altitude - up the throttle for 1 second
  2. Roll hard until we go past 90°
  3. Maintain 400°/s roll until we are 90° from level
  4. Stabilize with a desired angle of 0° for a nice controlled return to level


3689471366?profile=original

The mode is enabled by setting the CH 7 option to Flip. Bringing CH 7 high while flying any mode will trigger the flip, but you must be armed and flying to get the flip code to trigger. You must return CH 7 low, then high again to reset the state machine and do another flip.

Jason

Read more…
3D Robotics

Free Willy is actually a Falcon ROV

3689471395?profile=originalWilly the Whale is actually driven by a underwater Falcon remotely-operated-vehicle (ROV) in the fourth remake of the film, says Saab. (There have been four Free Willy movies????)

The biggest challenge, according to Marine Solutions director, Kevin Bey-Leveld, was to make the Orca whale, with its large body, look like it really was swimming along.

The success of the project, says Kevin Bey-Leveld, helped keep down the cost of filming.

“The way the Falcon flies, combined with trained ROV pilots, allowed the director to film the sequences in a relatively short space of time, in terms of normal filming,” he explains.

 Although small and compact, the Falcon was powerful enough to manoeuvre in both swimming pool and the open ocean − the trick, explained Kevin Bey-Leveld, was to balance the buoyancy to compensate between sea water and fresh water.

3689471332?profile=originalIt is not the first time the Falcon has starred in the movies. In the Bollywood film, ‘LUCK’, also filmed in South Africa, it was strapped under a 4.2 metre long latex and polyurethane replica of a tiger shark and used to replicate the realistic swimming motion of the shark and its violent attacks on hapless swimmers.

The Falcon is owned and operated by Cape Town based Marine Solutions. The ROV’s worldwide success across a range of industries, has come from its power to hold steady in strong cross currents, and its distributed intelligence control system that allows up to 128 devices to be connected together on a single RS 485 serial network. This means different equipment can be easily added and changed as needed.

(Via UAVSI)

Read more…

3689471200?profile=original


First of all – thank you for the warm welcome into the DIY drone family. I am very grateful that so many people spent some time on reading my first blog post about the USAV.

So the idea of what exactly the USAV is, is starting to form, and while there are a lot of practical stuff to work on (changing frame, gluing nuts and bolts, deciding which configuration to fly), the more abstract thoughts about what the USAV should do has to be developed alongside.

One of its features should be the possibility to give it some kind of task, and let the brains of the USAV solve the task. This may sound very AI, but even AI is in its heart a bunch of formulas and computations.

The USAV could in some regards be seen as an autonomous satellite, with a bunch of sensors on it, which it should utilize to solve the task at hand. We have camera, magnetometer, accelerometers, Wi-Fi radio, GSM/GPRS radio, microphone etc… and could be equipped with even more sensors. Also remember that internet is available during the operation.

As with all life (even Artificial Life), life must have a purpose.

So today I would like to ask this wonderful community for ideas of what kind of tasks the USAV could be asked to perform. Any suggestions are welcome, fun, useful, technically demanding….

To start you off – here are some of my own ideas

  • Find all public WiFi’s in the area. Requires: Built in Wi-Fi to located public accessible Wi-Fi and measure the signal strength
  • Measure GSM signal strength in the area, find dead spots. Requires: Built in gsm radio
  • Find a red car. Requires: Built in camera + pattern recognition
  • Follow me – The USAV follows the persons every move. Requires: Person to broadcast his position to the USAV
  • Fly to (some address). Requires: Functionality to resolve addresses to gps coordinates, built-in camera + some intelligent way of determining a good landing spot.
  • Map area – use onboard camera to create a detailed aerial image. Requires: Camera and some image stitching functionality

Please leave a comment describing

1)      The task

2)      Special requirements (sensors, setup etc..)

Read more…

GPSProfile.JPG?width=300Graupner is a popular vendor of RC equipment here in Europe. I thought it would be great if we could use they telemetry protocol for ArduPilot. And here it is, HoTT v4 for use in ArduPilot for everyone. It's still fresh code and it's tested with ArduCopter v2.7 on APM2 only, but it works fine since few weeks. There are many possibilities to use HoTT in ArduPilot project, at least for people with HoTT RC equipment :)

For more details about HoTT and the implementation visit project homepage.

Here a sample screenshot:


Hope you like it!

Regards

 Adam

Read more…

bixler2-sub1.jpg

A few weeks ago Hobbyking revealed in a picture on their facebook that a new version of the Bixler was supposed to be coming. Today they listed it an ARF version on their site.

While keeping the features of the first Bixler (the plane is named after one of the Flitetest presenters) Hobbyking has managed to improve flight times by giving it a bigger wing area (wingspan of Bixler 1 was 1400mm, version 2 has a wingspan of 1500mm) and other design improvements. The Bixler 2 in ARF form comes with a lower kV motor that can handle bigger props (7x5 for this version, was 6x4 for the 'old' Bixler. By enlarging the canopy area you are more versatile in the FPV equipment you want to use or use a larger flight battery. Also, the canopy is clear plastic now (was black foam).

Flaps are optional. Although the plane comes with a provision to add flaps, you don't need to use them. If you still want to use them, then you need 2 9 gram servo's and a servo reverser to your cart.

The price for the Bixler 2 ARF is US$ 69.99 while you can still get the old Bixler in ARF form for US$ 49.82. It's unclear what that price difference is coming from, maybe they want to sell out the previous Bixler.

For more information and specifications see: http://www.hobbyking.com/hobbyking/store/uh_viewitem.asp?idproduct=24474&aff=5361

Read more…

"T Drone Update

Hi Guys I got the wing covered With Ultra Cote from a roll I bought 25 years ago when I first got into R.C.and added flaps and Ailerons out of solid Balsa. mounted with 1/2 inch nylon hinges with a brass cotter pin I put black markings on the bottom of the wing so I will know if it is right side up or not I am debating putting 1 3/4 inch slats 3/4 of an inch ahead of the leading edge to give it "STOL" performance I think I will leave it the way it is for now and finish the build I still have to iron it a couple of more times to get all the wrinkles out. It is not professional Quality but it is certainly stronger than the wings on my radian pro the wing root is aluminum and the ribs are 1/16 inch balsa and a carbon fiber reinforced leading edge the voids between the ribs are filled with 666 psi high density spray foam it is 78 inches by 9 inches(702 Sq in) and weighs a pound and a half  There are 2 metal gear servos for the flaps and ailerons in the middle it will be attached to the fuselage with 4 bolts with a nylon angle of incidence" wedge" in between. Here are some pix of the build. You guys have a great day!3689471049?profile=original3689471112?profile=original3689471133?profile=original3689471155?profile=original

Read more…
3D Robotics

3689471083?profile=original

Now that uDrones is a 3DR subsidiary and we've moved half of the electronics production there, uDrones is able to lower prices and provide the latest 3DR electronics. That means that the ready-to-fly ArduCopter Quad now comes with APM 2.5 and the new, awesome 3DR uBlox 6 GPS for $799 (assembled and ready to go; just add your own RC gear and battery)

3689470689?profile=original

The RTF ArduCopter Hexa, also with APM 2.5 and the 3DR uBlox 6 is $899.

3689471094?profile=original

And ArduPlane, also with the upgrade to APM 2.5, is now $50 cheaper at $599.

Read more…
Developer

jDrones News: jD-IOBoard goes MAVLink

jD-IOBoard_MAVLink_sml.JPG?width=500

jDrones NEWS: IOBoard goes MAVLink 1.0

Time has come to make another exciting release. New software has been released for our mini IOBoard. With this software you are not anymore depending on static flashes, blinks and other patterns.

We made blog post about basic jD-IOBoard few weeks ago and you can read it in here. Now it just get's better and better.

jD-IOBoard now listens full MAVLink 1.0 protocol and acts depending on flight modes. Currently we are supporting ArduCopter and ArduPlane style flight modes but more has been planned. Basically all MAVLink compatible systems works fine with this.

Big thanks to Michael Oborne for his great jD-IOBoard Confgurator program that allows users easily to configure and test play different patterns. Michael is the man behind Mission Planner and also OSD Configurator. 

jD-IOBoardConfigurator.JPG?width=500

On configurator you can create 16 step patterns and 8 patterns that can be binded on different flight modes. On right hand side of every pattern you have Test box where you can simulate your pattern. Just click Test and then change on/off positions to get your desired outcome. 

With Configurator you can also upload our latest HEX files from Arducodes repository.

Here is quick demo video of how it works in real-life with 3 different patterns. 

Currently we are only allowing REAR pattern to be changed but in future there will be others coming too. 

You can always find latest HEX and other files from our: Arducodes repository (jD-IOBoard 1.4 MAVLink. HEX)

Latest Configurator can always been downloaded from our: Software repository  (Setup.EXE). Setup file is available on our Arducodes repository too.

Configurator has builtin update feature installed so it will make sure that you always have latest version of it. Source code is on our repository.

jD-IOBoard can be found from our store at http://store.jdrones.com and also from our distributors around world. 

Have fun with your flashing lights. Evenings are getting darker but planes and copter more brighter.

Regards,

Jani / jDrones

Read more…

3689470892?profile=original


It was a productive weekend: MP up and running on my shop PC, aircraft firmware loaded into APM2, radio connections troubleshot and calibrated, Wow! There's my house with a graphic quad hovering over it! (I am not worried about giving away my coordinates. Come on by but call first, please.) After performing the leveling cal I even was able to watch the artificial horizon roll correctly, the compass indications were correct, and all in all it was just plain cool!

The Configuration -> Radio Calibration section of MP is great. Graphically you can see if your transmitter outputs need inverting and also if they are centered well. This is a great benefit if your transmitter does not have this feature but it is more important to the operation of the aircraft.


3689470955?profile=original

I hit a wall when it came to calibrating the ESCs. 3 hours of frustration and a day later, the short version of the story is: Triple check your wiring of the *output* of the APM2 if you can run the ESCs one at a time off the receiver throttle output. I messed up and had the ESC output cable on the wrong end of the header. Output 8 - 5 DO NOT drive the ESCs. I now have a gold star on the top of the cable plug and oriented to remind me of how it is supposed to be installed. The picture below shows the cable, on the right, installed incorrectly.

Tonight I succesfully performed the 'all at once' ESC calibration and ran all four motors up under APM control! Then my ESCs decided to inform me that the battery had drained sufficiently to allow them to refuse to operate. The indication was a "1-2-3" (increasing pitch) beep series followed by "1-1-1-1-1-1..." (same pitch at 0.25 sec interval). Low battery. Onto the charger it went while I do this post.

Spektrum DX6i note: Part of the troubleshooting yesterday involved figuring out why Ch 5 was following inverted to the throttle input. This was simultaneous and proportional. Ah yes, the hand in the back.. Mr. Sikorsky? Very good! You must set up your Spektrum DX6i (or what ever DX you have) in ACRO (fixed wing) mode. Somewhere this was not clearly explained to me. I suspect this is true for any of the programmable RC transmitters. If you think about it, there is no such thing as a multirotor RC transmitter mode. I suspect that soon enough the maufacturers will provide multirotor graphics to make those of us who are obsessed about that kind of thing happy. Until then, the airplane graphic will do just fine.


3689470928?profile=original

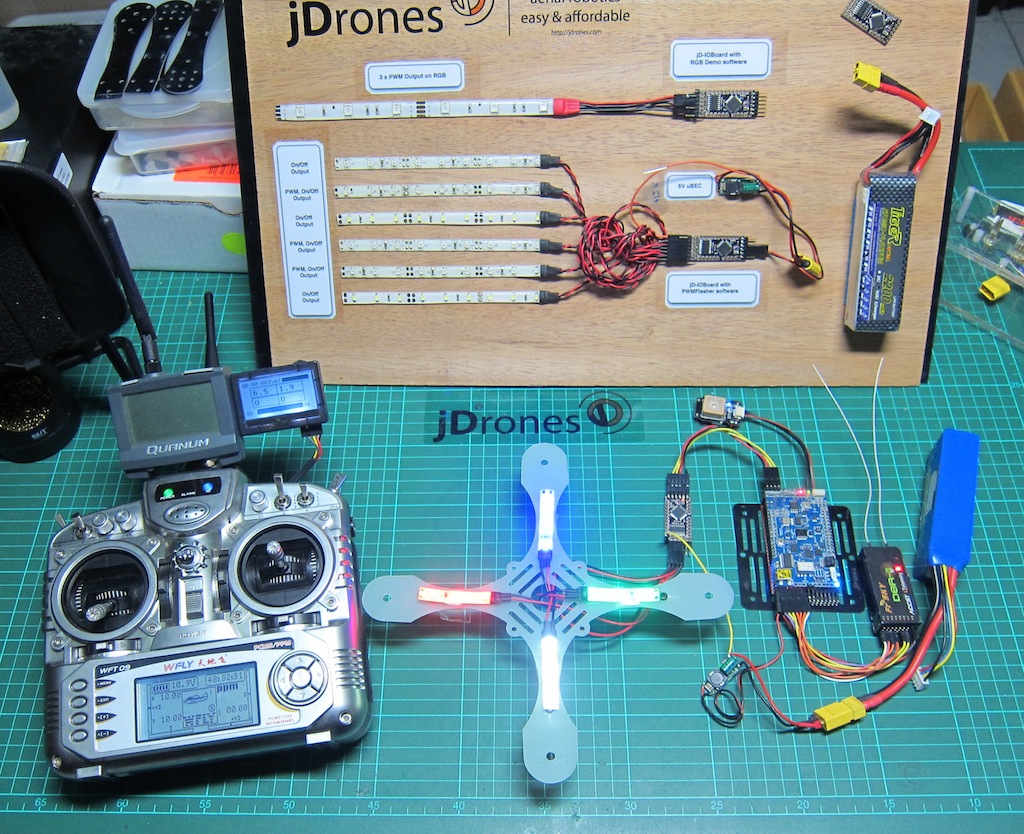
As mentioned in a previous post, we need some form of kill switch to make system power isolation easier than pulling a stiff connector off the battery. My right thumb is nearly raw from all the efforts. Yes I am whining but there must be a better way. A rework of my battery mount is also in order. The sticky foam being employed does not stick to itself very well. The double velcro straps work but if the foam slides, so does the battery. A multi-connector manifold for Deans, EC-60, etc connections would also be cool. That way most any battery I have could be employed. Most have Deans but in the pic above you see the EC-60. The PDB has an XT60. Connector proliferation has struck in spite of my efforts to not allow it!

In short, my soldering job seems to be good and now that the wiring is sorted out and basic functions and calibrations were performed, a maiden flight, though probably short, is very near.

This means more time with FMS and the DX6i.

Read more…

The High Tech Line

What is the High Tech Line? Wingsuit base jumpers call the tracks they fly down "lines". The High Tech Line is what you see here ... lines that are flown with high tech equipment. Little lower, little better glide angle ... and a little less dangerous :)

Read more…
3D Robotics

3689470905?profile=originalIt flew about as well as you'd expect (60-second flight time, no tolerance for wind) but what a cool bit of mechanical design! No idea how that "laser beam" control works. From Engadget

Back in the '70s, the CIA needed some kind of miniature flyer to deliver an audio bug, and after considering (and rejecting) a faux bumblebee, decided that a robotic dragonfly would be the best option. The wee UAV used a "miniature fluidic oscillator" as a motor and was propelled by a small amount of gas. It was somehow guided by a laser beam, which served double-duty as the "datalink for the audio sensor payload," according to the CIA Museum. Unfortunately, the insect-based mech proved too difficult to control, especially with any degree of wind, and was eventually scuppered -- all that's left of the now-declassified project is in the video after the break.

Read more…