All Posts (14048)

Sort by

Lipo battery calculator

3689458013?profile=original

Introduction

A LiPo battery consists of multipe cells. These cells deliver approx. 3.7 Volts. A 4S LiPo would therefore supply 14.8V.

Apart from the cells, a discharge rate is defined by the letter 'C'. Most batteries cases say something like "25C to 40C" discharge rate. This means that 25C is the nominal discharge rate and 40C is the maximum burst discharge rate. It's advisable to stay on or below nominal discharge level to preserve battery future life. Not all brands say something about the peak discharge rate on the battery itself. For more on that, I suggest to read the manual or ask your supplier.

The battery's capacity is defined in mAh. mAh means milli-Ampere per hour. A battery with a 1000mAh capacity can deliver 1 Ampere (1000mA/1000) for 1 hour. Or 1mA for 1000 hours. The battery capacity, together with the LiPo battery's discharge rate will define its maximum current output (Ampère, A). This fact is very important to keep in mind, when choosing a LiPo battery. The combination of capacity and discharge rate is what you will need. It's important to know that the battery cells don't count up for maximum current draw. The amount of cells only determine the voltage (V) of your LiPo, as needed for your equipment.

Example calculation of discharge rate:

A 3S 2200maH 40C LiPo pack will get you this: 2200mAh x 40C = 88.000 mAh discharge rate 88.000 mAh / 1000 = 88 Ampere constant discharge rate.

So, a 2200mAh / 40C LiPo can only handle an Ampère draw of 88A at max. So that's why the combination capacity/discharge rate is of such importance for selecting the right LiPo for you project.

Example calculation of max. flying time:

A constant current draw of 20A from a 2200mAh LiPo will get you:( 2200mAh /1000) / 20A = 0.11 x 60 = 6.6 minutes flying time.

Please notice that current draw depends on your way of flying and external factors such as resistance, weight and wind. Preferably, always use a LiPo low battery warner on your RC device. This will warn you when the battery is drained before it's fully empty (20%). Don't push the LiPo. They don't like to get discharged to the bottom. And you won't like your multicopter falling down from the sky suddenly either.

Charge rate

Most LiPo vendors will tell you what the maximum charge rate of the battery is. If not, keep in mind a maximum charge rate of 1C. So, a 4000mAh LiPo can be charged at a maximum rate of 4000mAh / 1000 = 4A. Please use a special build LiPo battery charger and NO OTHER! Overcharging can cause your LiPo to catch fire and burn your belongings to Kingdom Come.

http://multicopter.forestblue.nl/lipo_need_calculator.html


Read more…

The-Reciever.jpg

Motors:

Motors come in two variants: Brushed motors, which have small brushes that switch the power through the coils, and brushless motors, which need an external controller to do the switching for them.

Brushless motors are usually more efficient, can handle higher speeds and torques, can handle huge amounts of power, and are longer lasting because they do not have brushes to wear out. they usually come in out-runner or in-runner styles. Outrunners have the permanent magnets on the outside, and their housing spins with the axle. Inrunners have the permanent magnets on the inside and have a non-rotating housing. Outrunners have more torque, but less speed, and are usually used with larger propellers. Inrunners have less torque, but can reach very high speed, and are therefore used in geared applications, such as RC cars, or with small propellers.

Motors in the RC world often have an interesting rating called Kv. Although one would expect this to mean Kilovolts, it actually means rotations per minute per volt. A 300Kv motor would, in theory, rotate at 900rpm at 3 volts. the lower the Kv rating, the more torque but the less speed a motor has, and the higher, the more speed but less torque a motor would have.


When looking for a suitable propeller, the prospective buyer may be confronted with such things as "1247" or "12x4.7". These define the propeller's size and pitch. in this instance, one would be looking at a 12 inch diameter, 4.7 inch pitch propeller. Pitch is defined as the distance a propeller would move in the air under ideal conditions in one full rotation. Propellers are also often classified into "slow fly" and normal propellers. Slow fly propellers are usually for geared applications or low speed applications, and have a curved leading edge for more efficiency. Normal Propellers have a straight leading edge for better efficiency, and are usually used with faster motors.

Gears in the RC world are usually only sold as a replacement for RC car gearboxes. they are never sold by diameter, but only by the pitch (spacing of the teeth) and the number of the teeth. A Spur gear is usually a large gear, that is turned by the pinion, a smaller gear directly attached to the motor. 

ESC:

Motor controllers, also known as ESC's (Electronic Speed Controller) are very simple to use. Their purpose is to take a low power input signal in the form of ppm, and the battery voltage, and convert it into something useful for the motor. They also have a voltage output through the signal wire, and are often used to power the receiver.

There are essentially two types of motor controllers: brushless and brushed controllers. Brushed motor controllers only work with brushed motors, and send them a PWM, a Pulse Width Modulated (not PPM, Pulse Position Modulated) power input. These are simple and cheap, and can also be used to control lights and anything else that requires DC power. Brushless motor controllers are quite different. They switch power between the three combinations of two of the three poles of a brushless motor, and modulate the speed of this according to the PPM signal.

The difference between Car ESC's and Airplane ESC's is that car ESC's usually come with a power switch, heat sink and a reversing ability, while airplane ESC's have no reversing capability (Switch any two of the motor wires to reverse spin of the motor), no power switch and usually only a minimal heat sink.

ESC's are also programmable, usually through a programming card or through the reciever and transmitter. This will vary depending on the ESC, but usually they have programmable braking, starting, and battery voltage cutoff settings.

Batteries:

Batteries come in many different Shapes and sizes, chemistries, and ratings.

The two most common chemistries for RC applications are NiMH or NiCd and Lithium polymer batteries.

NiMH (Nickel metal hydride) and NiCd  (Nickel-Cadmium) batteries are heavy, weak and outdated. the only benefit is that they may be marginally cheaper, and less sensitive to shock, vibration, overcharging, and deep discharge.

Lithium Polymer Batteries are lighter, smaller, can deliver huge currents, and have a very large capacity for their size. A 5000mAh Lipo battery is about as big and heavy as 2500mah worth of NiMH batteries. however, if pierced, discharged too far, or charged too far, they will "puff", or expand. This means that the battery is close to exploding. do not use this battery anymore, and dispose of it safely. If you keep going, it will most likely erupt in a large ball of flame and launch chemicals and burning things everywhere. Never short these batteries, they will most likely explode.

Charging: get yourself a good charger, I can recommend the Turnigy Accucell-6. Most chargers do not come with a built in power supply, so make sure you have an adequate power supply for your charger. Follow all the charging instructions that come with the charger, and place your battery in a fireproof container or bag. Never leave it unattended while charging.

Batteries have a number of different ratings:

mAh or Ah:  Stand for milliamp hour or Amp hour. this is the capacity of the battery. 1Ah=1000mAh, which means a battery can supply one amp for one hour (or 1000milliamps for an hour)
S and P:       Stand for number of Series cells and number of parallel cells. the number of cells in series determines voltage, parallel determines capacity.
C ratings:     This is how much current the battery can give you. Multiply the battery's capacity in amp hours by this rating to get the current in amps.  There are usually two specified. the lower one is the continuous rating, and the higher one is the pulse discharge rating.

http://multicopter.forestblue.nl/lipo_need_calculator.html

http://ecalc.ch/xcoptercalc_e.htm?ecalc

I usually use one standardized connector for all of my batteries, so that I can use any battery with any device, and can interchange them easily. It doesn't matter what you use, I use the XT60 connectors, just make sure that you have one type of connector for all of your batteries.

Get some silicone wire for your power connections, because it is a flexible, multi-stranded wire that will in general make your life many times easier.

Also often abbreviated as Tx, this is the thing that actually takes your commands and sends your receiver the commands for the servos and the motors.

There are many Transmitters available on the market nowadays, and the low-cost ones start around $30. However, remotes for RC airplane or helicopter pilots, with programmable features, model memory, and computer simulators can start around $150 and go to nearly $3000.

All RC Remotes have a certain frequency that they operate on. Older, analog remotes operate on lower frequencies, which were determined by a crystal. Modern, digital, remotes usually operate in the Gigahertz Range, often at 2.4GHZ.

RC airplane and helicopter remotes have control sticks, which are mostly self explanatory. Usually, one of the two control sticks on an airplane remote is the throttle control stick, and is not spring loaded in the vertical direction, which means it will not spring back when you let go. Remotes are usually available with this stick on either the left or the right side, and are sold as mode 1 or mode 2. RC car remotes have a trigger and a knob to control different things.

Most RC remotes have something next to the Control sticks called the trim. this basically slightly alters the position of your control sticks, and is useful for finely altering the position of the servos, or the starting point of a motor controller. Transmitters also often have reversing, which reverses the output signal of the control sticks. this is usually controlled by a series of switches at the bottom of the transmitter.

The number of channels a remote has shows how many things it can control. For example a three channel remote could control three things, such as three servos, three motors, or a combination of any of those. Motor controllers and servos receive the same type of signal.

Expo, Telemetry, Limited travel and Model memory are all things seen on better, more expensive transmitters, but are not necessary for the average project. Expo stands for exponential rates, so that linear movement of your control sticks will result in an exponential output signal curve. Telemetry transmits information from the vehicle (such as battery voltage, altitude, motor temperature, etc.) back to the transmitter and displays these on the transmitter. Limited travel means that by moving your control sticks to their maximum will only send out a 30% signal, or whatever you set it to. both of these features are beneficial to sensitive mechanisms and airplanes, so that one can maintain better control over them. Model memory simply allows you to store your trim settings in the transmitter, so that you can recall them for later use, or eliminate the need of having to readjust with every time if you have multiple devices. RC car remotes are often equipped with dual rates, expo, memory, and even telemetry.

Most Transmitters need to bind to your Receiver to ensure proper communications. How to do this depends on your Transmitter/receiver.

Many transmitters need 12v to operate, usually supplied by 8AA batteries. this is 8 batteries too many for me, so i got a small, 0.8Ah battery and hooked it up to my remote, so that i only have one battery to worry about, instead of 8 small ones.

A cheap, beginner-level Transmitter that i can recommend from personal experience is the HobbyKing 6S.

The receiver, abbreviated as Rx, receives the signals of the transmitter, and sends them out to the individual channels through PPM, or Pulse Position Modulation commands.

The Receiver must operate on the same frequency as the transmitter, and the two will usually be sold together.  Replacement or extra receivers are commonly available, so that they do not need to be switched out if one has more than one devices requiring a receiver.

The receiver usually receives power from a motor controller, simply by plugging it into one of the signal ports. Servos receive power from the receiver.

The Polarity of the plugs is usually found out by trial and error, in one way it will work, and the other way it probably will show a flashing light or something similar. Make sure to never connect one wire one way and another with opposite polarity to that wire, because depending on what those two things are, they will most likely be damaged, because one is going to be reverse polarity.

Some servo or motor controller connectors have a small plastic tab on them, and can therefore only be used with RC car receivers that can easily be removed with wire cutters.

Be careful with the antennae of digital receivers, because they are rather difficult to reattach.

Read more…
Wiki Ninja


At Maker Faire, Chris said auto-land is a hard problem. While I don't have much to contribute to that yet, I did want to try deploying a ballistic parachute mid-air to bring a plane down. A few others have 
shared successful parachute systems before.


So obviously the parachute shock cord just ripped straight out. The lesson is you can't use that simple paper shock cord mount design you glued into little model rockets as a kid to slow down a 3 pound Bixler mid-cruise.


I am kind of surprised that the ignitor circuit worked on the first try, and that the Sugru + masking tape tube mounting held!


I was also surprised at the pitch moment; I guess I could have computed it beforehand. I didn't think the rocket's moment arm against the vertical CG would cause it to flip forward that much. Also, the parachute was slightly burnt. I should switch to that "dog barf" fiber insulation instead of using recovery wadding.


Here's the pre-fail overview.


If I get around to finishing a lighter and more reliable parachute deploy, I might try using my MaxSonar to detect an approaching object (like the ground) and deploy it automatically.
3689457994?profile=original

Read more…

Alfred Riopel

[ In tribute to Alfred Riopel's passing, the Moderators will hold new blog approvals for today, so as to keep this blog on top.  Please feel free to leave a note of condolence, to remember one of our members. And do feel free to post new blogs, which will be approved tomorrow.]

20120517-203707-pic-102619511.display.jpg?width=400

We have just been informed that one of our members Alfred Riopel has past after following a "protracted battle with cancer."  

His obituary can be found here.

Some snippets from the article: 

In a recent note from one retired NASA engineer regarding Alfred's input to the Energy & System Design Group UAV (Unmanned Aerial Vehicle), he commented, "Al was an integral part of the recent development of the EyeFly coaxial helicopter UAV. Not only did Al use his flying expertise to do check-flights with the UAV, but was instrumental in helping with the preliminary design of the stability and control system necessary to obtain successful flight status for this unusual flying platform. His technical input, friendly guidance and expert flying capabilities will be sorely missed."


Alfred's social life revolved around his life-long passion for radio control (RC) hobby vehicles and aircraft (and, of course, his "big boy's toys"). He delighted in sharing others' excitement of discovery and accomplishment, as well as his own, and is remembered by many as a mentor and friend. Indeed, he also viewed many of his colleagues as mentors and friends, particularly the members of the Newport News Park RC Club (NNPRCC), his "second family."


For those in the Newport News area:

At the invitation of Al, himself, and with the kind cooperation of the Newport News Park RC Club, in lieu of a funeral service, come to the Al Riopel Memorial Fun Fly on June 2, 2012, at 8 a.m., at Newport News Park RC flying field, located off Richneck Road. Full military honors will kick off the event. Bring your RC planes and helicopters, fly, have fun and remember Al!

Thank you to Robert Riopel for taking the time to let us know.

Read more…

Higher and Faster

More good weather to test the FPV on my quad. I'm quite happy with the GoPro as both the recording and FPV camera. I just need to invest in a better mount with added roll stabilization. Also, as always the copter needs tuning. It has spontaneous wobbles that I need to figure out. I always dread the tuning process since some things seem to have no effect until they do. :P I have logs from the 4 flights I made in the video if anyone has some spare time and would like to look at them. Otherwise, enjoy.

Read more…

In preparation to adding an APM & FPV gear we tested the Shrike after some minor adjustments to CG and trim, and conducted weight testing by adding 130g of dead weight, and then 250g of dead weight (which represents our APM2, FPV gear, and an extra battery). 

It took the weight no problem, and our adjustments allowed the plane to fly perfectly without assistance.

Whats next? PUTTING ON THE APM!!! We can't wait...

-Trent and Nick

--Shrike--
Tx: Flyer9x with er9x firmware by ParkeFlyer http://parkeflyer.com/
Battery: 4.4Ah 30C 3S http://www.hobbypartz.com/77p-sl4400-3s1p-30c-3333.htmlidProduct=6306
Servos: T-Pro 9G http://www.hobbypartz.com/topromisesg9.html 
Motor: Optima 450 2220-1800KV http://www.hobbypartz.com/75m55-optima450-2220-1800kv-2.html
ESC: Exceed RC Proton 30A http://www.hobbypartz.com/07e04-proton-30a.html

Produced by Trent & Nick in Arkansas, USA
Main Camera: Panasonic HDC-TM900K
Video Editing: iMovie

Read more…
3D Robotics

3689457908?profile=originalOnce again, the 3D Robotics team is going to have a big DIY Drones area at Maker Faire in San Mateo this weekend (picture from last year shown--we've got brand new banners this year ;-)). Come meet the team and Arduino leader Massimo Banzi (speaking at 3:00 on Saturday) and me (speaking about multicopter UAVs at 1:00 on Sunday)

We'll all be in the Expo Hall. All the new 3D Robotics goodies will be there and you can chat with the designers. We might even put some birds in the air, space permitting. It's the highlight of the year, so if you're in the Bay Area, don't miss it!

Here's part of the booth, with the new logo/banners:

3689457793?profile=original

Read more…

1st spinning camera footage

motor17.jpg

motor18.jpg

esc02.jpg


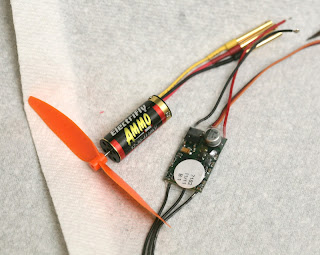
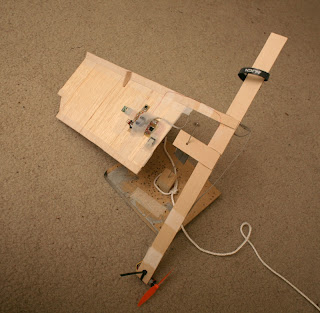
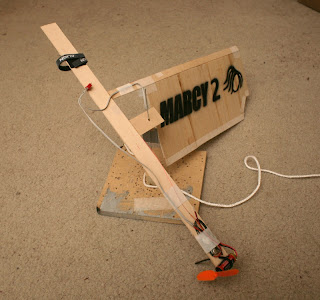
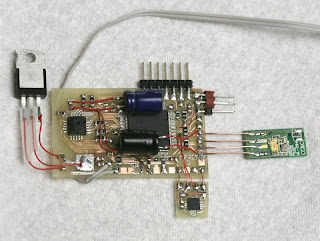
Marcy 2's power plant is overpriced junk from Tower Hobbies.  They didn't send the $1.50 of Dean connectors ordered.

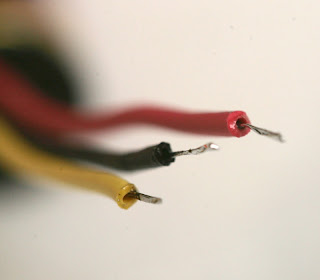
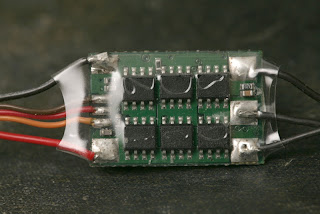
The Castle Creations 6 is really badly soldered.  The 12-30-4110kV Electrifly has incredibly flimsy wires.  It's obviously high flex cable & I should have left the bullet connectors on, but they looked heavier than they were & they easily broke off.

marcy2_34.jpg

marcy2_33.jpg

marcy2_32.jpg

marcy2_35.jpg


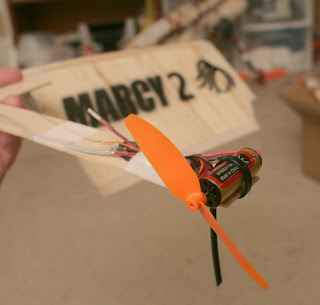
She does indeed fly.  Video points nearly sideways.
images01.jpg


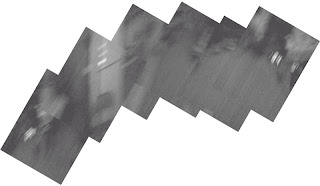
 The 1st images at flight RPM were pretty bad.  A refrigerator & chair are visible.

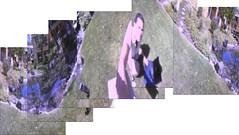
Instead of hitting head on, the camera scanned diagonally, causing sheering in addition to vertical compression.  At the highest shutter speed, it was still pretty blurry.  Each revolution has 6 frames, so forget about lining up a frame on the same spot.

The test harness was pretty unstable.  A stable attitude would give better results.


marcy2_36

  
images02

 Camera rotation improved matters.


images03


Increasing the camera to 30fps, letting it drop 1/2 the frames, & letting it drop magnetometer samples got more overlap.  If there was a way to automatically align everything, this might work.  Slow scan 640x480 was useless.  The trend is towards lower resolution & higher clockspeed.
images04
images05

Next, we have 160x240 with every frame sent twice to reduce dropped frames & full magnetometer data.  A lion is clearly visible.

images06

Finally, a shot in color 160x240 at 24fps, with 1/2 the frames dropped.  More detail is recognizable to a human, but probably not to a computer.


It's hardly the sharp daylight footage envisioned, but this is a matter of the size of the lens & the sensor quality, not available technology.


Ride on a monocopter

Since the camera is going to point diagonally, it's hard to envision a target it could use for navigation.
mane_attack.jpg

Trying to spin up Marcy 2 outside resulted in the wind taking her off & the mane immediately being attacked.  Untangling required destroying the propeller, since press-on propellers can't be removed.


images07

At least it showed daylight improved the picture quality & a monocopter could be very useful for imaging outside.

 Automatic placement didn't go so well.


images08

 Rotating manually matched a little better, but since the camera was pointing diagonally, it only needed 90 degrees of rotation.  If it pointed straight down, it would rotate 360 deg.
Playing with the Marcy 2 cam showed the realtime 360 deg panorama isn't going to happen.  There's no way to align all the frames fast enough & the information is too noisy to convert to an altitude & position.
Next comes shooting 1 frame per rotation at the highest framerate possible, so the 1 frame can be as close to the same position as possible & capture the highest resolution in the direction of rotation. 

There's no way to trigger the camera at any random time. The nearest frame jumps around a lot more as the framerate decreases.  The extra processing for color slows it down by nearly 1/2.
A slower framerate to increase the span of each frame by widening the line spacing was disastrous.  It really needs the tightest line spacing possible.
It can probably go higher than 42fps if only 1 frame per rotation is captured & the frame buffer is diabolically hacked.  40Mhz is the maximum that any home made solder traces ever did.  It's currently doing 42Mhz to get 42fps.
If there was any advantage to using a custom board instead of http://www.8devices.com/product/3/carambola/specs it was the ability to get very high framerates from the camera interface.  A USB webcam on the Carambola would be real slow. 

  The coning angle is a lot steeper than expected, making pointing straight down hard.

Now some useful commands for accessing Marcy 2 without compiling a wireless network driver on every computer.

iptables -t nat -A POSTROUTING -j MASQUERADE
echo "1" > /proc/sys/net/ipv4/ip_forward

on the computer with the network driver.

route add 192.168.0.1 gw amazon

on the computer with the ground station.
marcy2_31.jpg
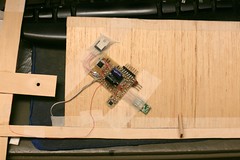
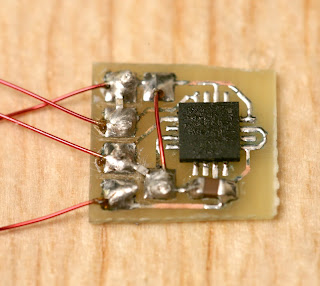
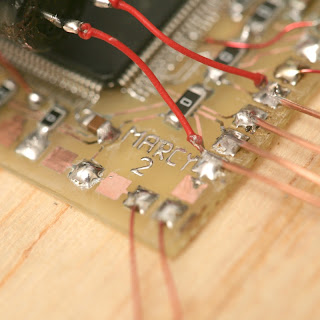
That there is a board so badly designed, it's nothing but rework.  The mane shock was a TO-252 had the lowest current capacity of all the LM317 packages & this board uses a lot of current.  If money was infinite, a low dropout regulator would be used. 
mag27.jpg
marcy2_28.jpg
After many experiments, it turned out the STM32F4 I2C core sux.  Software I2C solved the timeouts & it may be ignoring the ACK was the key to RF robustness.  Software also went a lot faster.  The hardware I2C may have added delays somewhere, to comply with the spec.

No matter how high the clockspeed, hardware I2C never could get over 64 samples/sec.  Software could do 120 samples/sec.  Video framerate had to drop & the DCT needed a lot of I2C polling between those raster lines.  10k pullup resistors were necessary.  The STM32F4 has 50k pullups.
screenshot01.png

  There's something you never thought would happen.  Full telemetry & video over wifi.  Depending on the video detail, it'll go up to 4 megabits.  It's not as much telemetry as a quad copter, but the 2.4Ghz bitrate is slightly higher.

Read more…
3D Robotics

3689457883?profile=original

From New Scientist (via SAUSNews), a report on the fatal UAV accident in South Korea last week:

In a statement supplied to New Scientist, Schiebel says its Camcopter S-100 drone, a 150-kilogram rotorcraft capable of 220 km/h flight, should have coped in any case because GPS can be lost for many reasons, such as an inability to access the positioning satellites due to obstruction by high buildings. The Camcopter has multiple inertial measurement units that “allow safe operation and recovery in the absence of GPS signals” the firm says.

“All information recovered to date indicates that after a loss of GPS signals to the aircraft’s receivers incorrect handling and omissions over a time period of a number of minutes, resulted in an unfortunate chain of events that ultimately led to the crash,” the statement says. Emergency procedures “to ensure a safe recovery in such a situation” do not appear to have been “correctly and adequately followed” it alleges.

The Schiebel aviation engineer who died – a 50-year-old Slovakian with much experience of the technology – was assisting two remote pilots working for one of Schiebel’s South Korean partners. He was not in control of the aircraft, the firm says. It’s thought the Camcopter was being tested for new duties in border operations.

The accident aircraft had been used by the South Korean authorities since 2008 to police major events – such as the 2010 G20 summit in Seoul, says a Schiebel spokesperson.

Read more…

FPV Blessing in Rio


I don't usually post my FPV videos here, but I think this one is special and worth sharing.


I think I've been dreaming about flying around Cristo Redentor since I started FPV. Based on the comments I got, I was not the only one... But I began to plan it seriously when I moved back to Rio a few months ago.

The plan and wait was worth it: this was one of the most exciting flights I have ever done! The weather was great and I was lucky enough to find the right amount of clouds to make it more mystic without compromising the light.

About air traffic:
- I was authorized to take off by the helipad operator, after confirming by radio that no other aircraft was in the area. 

- The flight was very early in the morning, before air traffic begins. So the absence of aircrafts in the area was not by chance.

- I flew within 500 feet of the ground/mountain at all times, where manned helis and airplanes are not allowed to get;


The airplane is an electric foam Skywalker with GoPro Hero Camera, Eagle Tree OSD Pro with Artificial Horizon Indicator and emergency Return to Launch, Futaba PCM RC on 72Mhz, video link on 1.280Mhz and Fatshark video Goggles. I had over 200 successfull flights with this gear, before daring to go there.


Cheers! 

Read more…

UAV FAQs for Canada


ccuvs_small.png

I put together an overview of what we found when looking into the legalities of UAV use in Canada.  Our hope is that as a community we can have a rough outline for each of the countries that the members are from.

Notes: I'm not a professional I've just collated what I found.  Please let me know of any mistakes or changes.


Q: Are UAVs legal in the Canada?

A: Unmanned Aerial vehicles are permitted to fly in Canada when they meet "Model aircraft" conditions set out in the Canadian Aviation Regulations or the operator has a Special Flight Operations Certificate(SFOC).


Q: What makes a UAV a model aircraft in the eyes of Transport Canada(TC)?

A: "Model aircraft" means an aircraft, the total weight of which does not exceed 35 kg (77.2 pounds), that is mechanically driven or launched into flight for recreational purposes.  By definition a UAV is no longer a model aircraft when:
- Owned by a company not an individual.
-Used for profit.

Link


Q: I just put a Camera on my model plane/copter and started making money selling the photos/videos, is this allowed?

A: As described by TC as soon as you make money or become contracted to use you model aircraft it no-longer qualifies as a model aircraft.  Your model aircraft is now a UAV and requires a Special Flight Operations Certificate(SFOC) to fly.


Q: I’m using my UAV for profit or it’s vital to the success of my business, what do I need to know?

A: You need a Special Flight Operations Certificate(SFOC) every time your UAV is in Canadian Airspace,  Yes even testing and development outdoors requires an SFOC.  Fear not as obtaining an SFOC is common place in Canada, and as of May 17th 2012 it’s free.  This is because the law strictly prohibits UAVs without these certificates.

602.41 No person shall operate an unmanned air vehicle in flight except in accordance with a special flight operations certificate or an air operator certificate.


Q: How do I get an SFOC?

A: The procedure for obtaining an SFOC is listed here.  The most important in preparing your SFOC application is that you prove to Transport Canada that you will not be putting the public in danger nor will you be disrupting air traffic.

- Please see the TC staff guideline, PDF, when creating your submission, thank you goes to Bertrand Duchiron for finding this.


Q: What does it cost to applying for an SFOC?

A: For UAVs there is NO COST involved in applying for and obtaining an SFOC. As of May 17th 2012.  However there is a prerequisite of liability insurance, the TC staff mentioned this however I could not locate this.


Q: Do I need to get a different SFOC for every day that I fly?

A: No! As it was explained by Transport Canada you can apply for to get an SFOC that indicates a range of dates and times. 


Q: How big of an area can I apply for in my SFOC?

A: As mentioned above the primary purpose of an SFOC is to ensure the safety of the public and air traffic.  Your SFOC application will be individually reviewed by Transport Canada staff specific to the region.  As long as you follow outline all the prerequisites outlined here


Q: Can you give us some of the examples SFOC applications provided by TC?

A: The example was of an established RC pilot contracted to take an aerial photo of a farmer’s field every Friday during the growing season.  His application would look something like:
- Between May 18th to September 28th 2012, Every Friday between 9am and 11pm.  
            - Alternative date for flight will be the Friday between 4pm and 6pm.
            - Alternative date for flight will be the next Saturday between 8am and 6pm.
- A note from the local RM indicating they have no objection to the flights.
- A description of his craft.
- A note from the farmer indicating that there will be no people or equipment on his field during any of the operational times (Security).
- An aerial/satellite photo for the area of operations.
- On this photo/map he will indicate takeoff and landing zones. Also noting any obstacles between the takeoff and landing zones.
- On this photo/map he will indicate the boundaries of where he will be operating.
- He will then indicate the projected flight path will photos will be taken.

This isn’t all of the points outlined here.  Please note that all these points need to be completed and submitted. 

Each SFOC is individually reviewed.  It was mentioned that TC will work with you, within reason, if your application is missing certain points.  They may also request a demonstration of you and/or your crafts abilities.


Q: I plan to take photos of sports games to promote the team/field/league, what do I need to know?

A: TC advised that a 100 foot horizontal buffer between a crowd and itself.


Q: What do I need to know about operating in semi populated to populated areas?

A: We were advised that you must always have a safe place to land your UAV upon mechanical/operational failure.  This specific example was of a multi-rotor craft taking photos of a sporting event, if the craft looses power it will fall like a dart, even if the receiver/controller has redundant power.  This is why there’s the 100ft rule for crowds.  From here you must prove that if you lose power you have a bailout plan.  The next example was of an RC plane doing a highway survey. If power was lost the operator could attempt to land the craft in a ditch. (Outlined in the operational presentation)


Q: I’m using my craft for recreational use.  What kind of restrictions are in place for non-commercial, recreational crafts?

A: The letter of the law states: (We make no interpretations of this)

602.45 No person shall fly a model aircraft or a kite or launch a model rocket or a rocket of a type used in a fireworks display into cloud or in a manner that is or is likely to be hazardous to aviation safety.


Q: What about universities and other students. Are there any exemptions for them?


A: As previously mentioned any craft is considered a UAV when used for non-recreational activity.  The university, students, project lead, will need to submit an application for an SFOC for your use.  You may want to start small, say a small safe area with a low altitude just for testing and training for specific days for 6 weeks.  Then when ready to expand you’ve already proved the operation is safe, even if it’s only 2 weeks into the first SFOC.


Q: What if I break the rules?

A: Well, for starters, we don't want to hear about it here!  Section 602.41 as a designated provision, has an individual penalty in the amount of $5,000.00 and a corporation penalty of $25,000.00.


Q: Okay, I'm obeying all the rules. Are there any other guidelines for safe and responsible “Model Aircraft” operations?

A: Yes. In the USA the RCAPA (the RC aerial photography association) has some excellent guidelines that are a great place to start.  Common Sense too.

Q: Where did you get all the information?

A: I compile all this information from:

http://www.tc.gc.ca/eng/civilaviation/regserv/cars/part6-standards-623d2-2450.htm#623d2_65_d

http://www.tc.gc.ca/eng/civilaviation/standards/general-recavi-uav-2265.htm

http://www.tc.gc.ca/eng/civilaviation/standards/general-recavi-brochures-uav-2270.htm

I also contacted the regional Transport Canada office and was transferred the team in charge of SFOC applications.  Some of what we discussed was added to this FAQ. 


We found that in 2007 there was Work Group formed:
EXECUTIVE SUMMARY 
This document represents the Final Report of the Unmanned Air Vehicle (UAV) Working Group, established to develop a regulatory framework for the operation of unmanned air vehicles with respect to terms and definitions, aircraft registration and marking, flight crew and maintainer licensing, maintenance, airworthiness and continuing airworthiness, operational flight rules and operational approval. The Unmanned Air Vehicle Working Group was a joint government and industry initiative, convened by Transport Canada, General Aviation in December 2006 to address the increasing volume and complexity of applications for unmanned air vehicle Special Flight Operations Certificates (SFOCs).

[http://www.tc.gc.ca/eng/civilaviation/standards/general-recavi-uavworkinggroup-2266.htm]

[http://www.tc.gc.ca/eng/civilaviation/standards/general-recavi-uavworkinggroup-2266.htm#14]

There appears to be a section for UAV pilot licensing.  However none of this was mentioned by the TC rep.

Private communities/sites:
Canadian Centrefor Unmanned Vehicle Systems

Air2You


Read more…

Tricopter made by dummies [Part 1]

Prelude :

3689457648?profile=original

Hi folks

This is the short version of a very long story about how to create a Tricopter from almost nothing. A story of trial and error, frustration and hard time. Maybe this story will allow future people to make less mistake than I have done myself (with some help by a friend).

Before the Tricopter Project

Before the tricopter project, I have tried to create an RC Airplane from scratch by using Pine Wood and plywood. All my « flight  hours» were made by using an RC flight simulator, it's difficult to find other RC pilot where you live far away from civilisation, so it make that easy to find desert place to do RC safely. Sometime we need to learn how to run before knowing how to walk.

This Twin Motor was an epic fail, it flew almost 10 seconds so that was funny the time it flew. Also I cut myself seriously with the propeller (meaning 1:30h of road + wait 4h at the hospital at 10 P.M (tip : ensure the motor is correctly fixed before playing with throttle ;)    ))

3689457710?profile=original

Tricopter, the genesis

After this fail, it remain all material from the first project so because of my extraordinary manual handcrafting skill I decided to make something that need almost no skill.

  1. ¾ inch square wood bar

  2. A strange plastic (from a friend)

  3. Arduino Mega (not bought for this project)

  4. A 6DOF IMU3000+AD345 IMU Fusion I2C

  5. 15 kg/cm Servo Motor (a little bit overkill I agree)
  6. 3S 5A LiPo
  7. 3x Tower Pro 180 Watt Motor
  8. 3 x Tower Pro 25A (no I2C modification)

LED strip (yes, I love that)

Tricopter, the frame Mark 1

3689457548?profile=original

Second ugliest thing you have ever seen in your life

3689457726?profile=original

Third type encounter (this photo is also a strange piece of luck)

Tricopter, the onboard electronic


That's the first time I'm using an I2C board, I hope it will work the first time ..... I was fool, after an impossible quantity of trial and connection test it worked but I don't know why so it work since this time. I also lose hour trying to get data before I have realized the sample code was buggy (char instead of byte, I feel so stupid).

The hard part is done, the easiest part begin, write a stabilization software (evil laugh from the hell .... ;)  ).

Okay, the only way to get PPM from receiver is by using interrupt, according to the Arduino Mega documentation there are only 6 interrupt pin on almost 54 pins (yes that's before discovering ISM work on every pin, arduino documentation was written by evil people :)    unfortunately, I'm not an electrical engineer (far far farrrr)).

Generate PPM pulse, I'm using Servo.h modified for 100 HZ update rate. I have discovered we can use Timer to generate PPM so what I have tried didn't work so I have another idea to make it work better. I still use servo.h for Mark 1.

Stabilization software

After reading many thread on the Internet, I have discoved PID controller, easy to code but less to tune. According to the IMU documentation, it is 65 RAW/deg/s so .... that's not true. I have tried hour and hour to find why my code do not work before discovering a lost text somewhere that explain MEMS documentation represent perfect value that may change between two identical IMU chip because of manufacturing process. Okay .... a good thing to know.

I'm using an homemade filter (variable trust complementary filter) for IMU values. I tested it by using a C# program that simulate data with noise, at high noise value stay acceptable so I conclude the algorithm is probably good.

Test phase :

We have a little problem, no one of me or my friend has ever pilot an RC helicopter or see someone in real so like I have already said, sometime we need to learn how to run before learning how to walk ;) (Tony Stark told something like that too about Mark 2). So we need to find a way to test PID without killing ourself (IMAO it's better to keep our structural integrity, but it's just my opinion ;)    ).

Those test happened before I have discover problem with gyroscope

First test :

The power is supplied by 12 volt battery for motors and USB for arduino (still not plugged directly to the battery) It is also attached to avoid killing someone by mistake. (video is down here)

http://youtu.be/DmtETvjz3Z0

Another test :

Having no experience with PID, we have decided to test it by holding the Y using 2 hands and one who control the throttle, we expect to get the tricopter auto sustaining itself in air. Only one motor is running during the test (others are simply not powered)

https://www.youtube.com/watch?v=l3Rvnr1ZQ08&feature=relmfu

Another test :

Roll over, arduino connection were smashed but still functional. We discovers that vibration were too high (very high) motor even with no propeller create hard vibration. Motor do not become hot while running so the motor base become very hot, also one motor suddently stop (no matter the ESC) when it is stressed (fast high/low throttle). I suppose that those motors are not good quality and maybe bearing are bad ?

Conclusion  :

 - Frame is fat (1.45 kg including 3S 5A battery)

 - Motor are bad (very bad quality, just check how they were build)

 - IMU vibration isolation is ........ not good

 - As beginner, we need more protection for propeller

How to fix those problems ?

We have destroyed this frame and we have made a new frame :

 - Using 1cm pine wood 60 cm long arm (9 inch remain to protect propeller in case there is too much tilt)

 - 3 new motors (http://www.hobbyking.com/hobbyking/store/uh_viewItem.asp?idProduct=18229)

 - Improved IMU filter

 - IMU is isolated by using a sponge

 - A real tilt mecanism (inspired from RC Explorer), I was previouly glued directly on the servo motor.

To be continued .... same bat-time, same bat-channel

Preview :

3689457763?profile=original

We can rebuild him...we have the technology

It will be better, faster, stronger

3689457823?profile=original

This is what happen if you crash tricopter very hard on a tree

PS : Thanks to Robert Sinclair for his support ;)

Read more…
3D Robotics

"How to become a police UAV pilot"

3689457639?profile=original

From PoliceOne.com: an article on how to prepare for the new career of Police UAV Pilot. Includes advice from Curtis Sprague, a retired SWAT Officer and former Federal Air Marshal who now serves as director of the aviation division for a company called Tactical Electronics. TE offer a vertical take-off and landing (VTOL) system known as Remote Aerial Platform/Tactical Reconnaissance (RAPTR; shown). Sample:

“First, inform thyself,” Sprague explained. “There is a lot of information to sift through on the subject of unmanned aircraft systems. Subjects range from types of UAS, how to fly, cost, FAA regulations, law enforcement applications, peripheral equipment, training... the list goes on.”

The best way to gain this information, Sprague said, is to get involved in hobby flying RC aircraft. Although this hobby “can be addictive and expensive,” it is the best way to quickly educate yourself in the UAV/UAS operations.

Read more…
Moderator

Click on the photo to view

3689457678?profile=original

Western Australian companies COPTERCAM & Pixelcase team up to produce an Aerial 360 of Perth in just 60 minutes


COPTERCAM is Perth's only licenced UAV aerial photography company.  www.coptercam.com.au


Pixelcase is Australia's premium virtual tour company.

www.pixelcase.com.au

Read more…

Some FPV with the 3DR - Testing the Quad


Finally managed to get everything together in reasonably working order. Lucky for me, the weather has been mostly perfect as well. The video is taken at about 9:30 pm, with plenty of sunlight to spare. Gotta love Alaska!

I figured the parking garage at the UAA campus would be a decent place to fly around. Not many people, no wind, good view - a good way to get some FPV experience. I'm not sure the seagull was too keen on the idea though...

Read more…

Successful Shrike Re-Maiden


We successfully re-maidened the Shrike! Turns out that our elevons had excessive throws, we had insufficient expo's and the wing mounted too far to the nose causing a tail heavy environment. 


It's still a little tail heavy, but we're getting closer! Anything you notice that demands to be fixed/improved?
 
See you Saturday,

-Trent & Nick

--Shrike--
Tx: Flyer9x with er9x firmware by ParkeFlyer http://parkeflyer.com/
Battery: 20C 2.2Ah Sky http://www.hobbypartz.com/77p-sl2200-3s1p-20c-3333.html
Servos: T-Pro 9G http://www.hobbypartz.com/topromisesg9.html 
Motor: Optima 450 2220-1800KV http://www.hobbypartz.com/75m55-optima450-2220-1800kv-2.html
ESC: Exceed RC Proton 30A http://www.hobbypartz.com/07e04-proton-30a.html

Produced by Trent & Nick in Arkansas, USA
Main Camera: Panasonic HDC-TM900K
Video Editing: iMovie

Read more…
3D Robotics

3689457607?profile=original

This is just a good journalistic summary by IEEE Spectrum on the research posted here earlier today. (Note that the aircraft already has the map preprogrammed; it's not doing SLAM and learning the space as it flies. But still: super impressive!): Excerpt:

Two weeks ago, we posted about quadrotors that were able to autonomously navigate outdoors, relying solely on IMUs and simple vision systems. What we found notable was that the robots didn’t need either GPS or a motion tracking system, implying that they could go out and do their thing in what some people like to call “the real world.” At ICRA 2012 yesterday, MIT’s Adam Bry presented a paper (and video!) demonstrating a micro air vehicle capable of the same sort of self-contained navigation, but indoors and impressively fast.

The background here is that whenever we see “aggressivemaneuvering” by an aerial vehicle, there’s almost always a motion tracking system involved to provide constant feedback as to the exact location of said vehicle. There’s nothing reallywrong with that (besides that it’s sort of cheating), but practical applications are limited since you’ll never get it to work outside of your lab. On the other hand, when you get autonomous aircraft navigating around outside on their own, they’re either moving very slowly, or their owners have taken care to set them loose as far away as possible from anything that they might accidentally smash into.

Researchers at MIT CSAIL have decided that slow and obstacle-free flight is boring, so they’ve come up with a way to get MAVs navigating at high speed, indoors, around obstacles, without needing motion tracking or GPS or beacons or any of that nonsense. All they need is a little aircraft that can carry a planar laser rangefinder, an IMU, and a pre-existing 3D occupancy map that the MAV can localize itself in, and you get results like this (the good bits are towards the end):

More from the MIT group here.

Read more…

As a huge follower of Fabio and his excellent FreeIMU I thought it time to post an update. I am looking forward to playing with the final release. For those who don't already know Fabio, he is a pioneer and well worth following.


Extract from the blog...

First flights of FreeIMU v0.4

The testing of FreeIMU v0.4 is proceeding nicely.. finally my friends Tilman and Warthox received their boards and as soon as they could they mounted them on their quadcopters for some flying tests. They used the brand new MultiWii software which me, timecop and Alexinparis have produced... the result?

Judge it by yourself..

p.s.: huge thanks to Warthox and Tilman for their time in testing the boards and making the videos!


Read more of Fabios blog here

Read more…