All Posts (11086)

Sort by
Developer

IMG_20160313_103828.jpg?width=600After the unfortunate crash of our last QuadPlane build with a failed ESC CanberraUAV wanted to build a new version with more redundancy in the VTOL part of the build. The result is the above OctaQuadPlane which we successfully flew for the first time yesterday.

When we were first designing a large QuadPlane we did consider an octa design, but rejected it due to what we thought would be a high degree of complexity and unnecessary weight. Needing wiring for both 8 vertical lift motors plus 4 controls for fixed wing flight, and extra controls for ignition cut and auxiliary functions like remote engine start, choke and payload control we worked out we'd need 15 PWM outputs. The Pixhawk only has 14 outputs.

After the failed ESC on the previous plane lost us the aircraft we looked again at an octa design and found that it would not only be possible, but could potentially be simpler for wiring than our last aircraft and be lighter as well, while having more lift.

IMG_20160313_101855.jpg?width=600To start with we looked for motors with a better power to weight ratio than the NTM Prop Drive 50-60 motors we used on the last build. We found them in the t-motor 3520-11 400kV motors. These very well regarded motors have a considerably better power to weight ratio, and back-to-back mounting of them was extremely simple and light with the above clamping arrangement.

To manage the complexity of the wiring we added support in ArduPilot for high speed SBUS output, and used one of these SBUS to PWM adapters embedded in each wing:

http://www.hobbyking.com/hobbyking/store/__24482__SBD4_4_Channel_S_BUS_Decoder.html

that allowed us to have a single wire from a Y-lead on the SBUS output port of the Pixhawk going to each wing. We modified the BRD_SBUS_OUT parameter in ArduPilot to allow setting of the SBUS frame rate, with up to 300Hz SBUS output. For a large QuadPlane 300Hz is plenty for multi-rotor control.

IMG_20160313_101845.jpg?width=600The arm mounting system we used was the same as for the previous plane, with two 20x20x800 CF square section tubes per wing, mounted on a 300x100x1 CF flat plate. The flat plate is glued to the wing with silicon sealant, and the CF tubes are glued to that plate with epoxy.

For ESCs we used the HobbyWing 40A, which has a burst rating of 60A. That is well above our expected hover current of 15A per motor. Combined with the redundancy of the OctaQuad and the better reputation of HobbyWing ESCs we were confident we wouldn't have a repeat of our previous crash.

IMG_20160313_101903.jpg?width=600For batteries we switched to 6S, using one 5Ah battery per wing. That gives us over 4 minutes of hover flying time while keeping the weight well below our last build (thanks largely to the lighter motors and ESCs).

For this initial test flight we had the fuel tank mounted horizontally unlike the previous vertical arrangement. This was OK as we only filled it a small amount for these test flights. We will be converting to a vertical arrangement again for future fights to reduce the impact of fuel slosh causing CoG oscillations. We may also fill it with fuel anti-slosh foam as we have done on some other aircraft (particularly the helicopters).

Overall the build came out about 1.5kg lighter than the previous build, coming in at 12.5kg dry weight. With a full load of fuel we'd expect to be about 13.5kg.

We did three test flights yesterday. The first was just a quick hover test to confirm everything was working as expected. After that we did the first transition test under manual control, which worked very nicely.

The copter part of the tuning could definitely do with some work, but we thought it was stable enough to do a full auto mission.

It was a short mission, with just two full circuits before landing, but it nicely demonstrated autonomous VTOL takeoff, transition to fixed wing flight, transition back to hover and auto landing. The landing came in within a meter of the desired landing point.

We had set the distance between the transition point and landing point a bit short, and we hadn't included a mission item for the plane to slow down before it transitioned which led to a more abrupt transition than is really good for the airframe. Going from 100km/hr to zero over a distance of 77 meters really puts a lot of stress on the wings. We'll fix that for future missions. It is nice to know it can handle it though.

The transition to hover also caused it to climb a fair bit which meant it spent more time in VTOL landing than we would have liked, chewing through the battery. That was caused by it having to pitch up to slow down enough to achieve the stopping point in the mission which caused it to climb as it still had a lot of lift from the wings, combined with a high angle of attack. It didn't help that we had a slow slew rate on the petrol motor, reducing the motor from full throttle to zero over a 3 second period. We chose a slow slew rate to reduce the chance of the engine cutting due to fast throttle changes. We can fix that with a bit of engine tuning and a longer transition distance - probably 130 meters would work better for this aircraft.

The climb on transition also took the aircraft into the sun from the pilots point of view, which isn't ideal but did result in a quite picturesque video of the plane silhouetted against the sun.

The full flight log is available here if anyone wants to see it. The new features (new SBUS output support and OctaQuad support for quadplanes) will be in the 3.5.1 plane release.

We're not done yet with QuadPlanes. Jack is building another one based on the Valiant, which you can see here next to the Porter:

IMG_20160313_120838.jpg?width=600

Combined with the GX9 tradheli build that Greg has put together:

IMG_20160312_100830.jpg?width=600we are all set for lots of VTOL fun!

Many thanks to everyone who helped with the build and as always to CMAC for providing a great flying field!
Read more…

Updates on HYBRiX multi-rotor by Quaternium

3689684310?profile=original

It's been a while since I published the last update about HYBRiX. We are very excited about how the development is evolving and more than happy with customers response.

For the past few weeks we have been working on finishing our MVP. it has a new look, new frame, more fuel tank capacity, quick release arms...

There are 2 versions, one  with 25 inch propellers and the other with 30 inch propellers. Some people seemed concerned about stability issues with big propellers, but I have to say that we are not detecting any issues and both configurations work really well.

In fact, last weeks we had very windy weather here and it is not a problem with Hybrix. It is very stable also with wind.

We are using Pixhawk as a flight controller and making it ruggedized! Aluminium enclosure and military connectors. It looks pretty awesome. We have done some RTL landings and automatic modes seem to run smoothly. We have solved all problems with vibrations.

Next step is to install a long-range system for 25km that we have been previously testing on Spidex and start carrying out some serious missions!

Read more…

Super cheap autonomous cargo "drone".

3689684138?profile=originalWe've all been there - a rainy afternoon, bored, and need something to do. This is my effort. Trawled the parts bin and drawers for old and discarded parts to build this - my smallest and cheapest cargo delivery drone.

I normally build 2-8kg units for customers; our latest EPM-based unit is rated for 30kg. But today...it's somewhat less than this. And somewhat cheaper too.

This little 450 size unit can carry about 400-500g a range of 2km and back on a single 5000mah 3S. Just. You'll be on the alarm...

Ok, so parts:

Frame: A cloner F450
Motors& ESC's: A combo pack of 2212's and 20A ESC from Hobbyking. They're awful. But they work.
Props: 1045 CF RCtimers (balancing nightmare btw)
FC: APM 2.72 + 3DR 6M (road rashed) + 3DR PM + 433 telemetry/OSD combo. (telemetry useless beyond 40ft btw).
Payload system: EPM 2.5 + our carbon mounting plate and camera boom
Cameras: 2x PZ0420
FPV Switcher: Hobbyking cheap and cheerful
Receiver: Frsky D4R-II (PPM mode)
VTX: 5.8, 200mw + ibcrazy antenna.
5V BEC: Polulu.

All in all...about $300 in parts. Your mileage may vary, depending on how much you have to buy new.

Configuration:
FC: Arducopter 3.2.1

It's a basic quad config, with two changes:

- A10 is either CH8 passthrough or EPM control, depending on whether you're doing manual or autonomous drops

- A9 is straight passthrough for CH6, for the FPV camera switcher (to switch between flight and bomber cams)

FPV:
2x cameras on a switcher. Flight cam has OSD.

Payloader:
- EPM powered from 5V Polulu,with PWM connected to A10* (see below)

3689684171?profile=original

3689684203?profile=original


Performance:
Ok, don't expect miracles here. It can do an out and back payload drop of a small medical pack (pictured) to around 2km and back again on a single pack, at 1'c ambient @ 800m ASL. Limitation is the battery, not the radios - both control and FPV are still working well at this range. You need a 5-8 turn helical on the ground for the video though.

Gets really sluggish in stabilise or Poshold with the load on. Hover is about 65%.


Other notables:
- EPM command still executes way too early in auto mode. You need to adjust mission to ensure EPM command happens after a waypoint. Also, on some runs, the EPM is still firing when it returns home.

 - I lost an entire evening debugging the Payloader PWM. It refused to work. Only to discover I had it in A9 (and the FPV switcher in A8). Facepalms all round.

This unit will now be "retired" - it's retirement duties will now revolve around dropping the CEO's dogs toys during walks...

Read more…

Design & Analysis of a Flying Wing

I made this video to show how to design and analyze a small flying UAV using my 3DFoil software.

I wrote this software several years ago using a vortex lattice approach. The vortex lattice method in the code is based on vortex rings (as opposed to the horse shoe vortex approach).  The vortex ring method allows for wing twist (geometric and aerodynamic) so a designer can fashion the wing for drag reduction and prevent tip stall by optimizing the amount of washout.  The approach also allows sweep (backwards & forwards) and multiple dihedral/anhedral angles.

Another thing I designed into the software is the capability to predict profile drag and stall.  The is done by analyzing the airfoil sections with a linear strength vortex panel method with a boundary layer solver and then using that information to predict the locations of the transition and separation points.

The software user interface is based on the multi-surface approach. In this method, the wing is designed using multiple tapered surface where the designer can specify airfoil shapes, sweep, dihedral angles and twist. With this approach, the designer can see the contribution to the lift, drag and moments for each surface.  Towards the end of the video, I show how the multi-surface approach is used to design effective winglets by comparing the profile drag and induced drag generated by the winglet surfaces.

Thanks for reading.  The video is available on Youtube.  The software can be found at http://www.hanleyinnovations.com/aerodynamics.html ;

Read more…

CanberraUAV presentation to RAes

Last week CanberraUAV gave a presentation and flight demonstration to the Canberra branch of the Royal Aeronautical Society (RAes).

This covered the history of CanberraUAV in competing in the UAV Outback Challenges in 2012 and 2014, the group's purpose and past/current R&D activities. This also included an introduction to the world of open-source UAV development by Ardupilot developer (and CanberraUAV member) Andrew Tridgell.

At the end there was a flight demo of a quadplane, showing off it's autonomous flight modes.

Read more…
3D Robotics

In case you've missed this, HobbyKing is now selling a RC transmitter designed for APM/Pixhawk, with all the flight modes mapped to knob settings with mode LED indicators. Just $58!

The Quanum i8 8ch 2.4GHZ transmitter has primarily been designed for the popular multi-rotor market, and has been mapped and matched to APM and PX4 flight controllers, bringing ease of use and programming to a normally complex product. It can however also be used with helicopters, fixed wing aircraft and gliders.

The Quanum i8 transmitter has 8 channels, the first 4 channels being the 2 dual axis sticks. The 5th channel is a 6 position rotary knob which is perfect for different flight modes on a multi-copter, the position of this switch knob is shown by the 6 LED's on the front of the transmitter. Channel 6 is a 3 position switch and channels 7 and 8 are slide switches. The stock radio programing is matched to APM and PX4 flight systems in channel mapping, direction, Aux channels and the 6 flight modes via the detent rotary knob for a plug and play solution. The i8 is a fantastic radio for other Multirotor FC systems with map able Aux channels, channel reverse and other custom features. Included with the system is a set of labels for labelling the various flight mode LED's.

Read more…

Have you ever wonder how to easily launch and recover a drone from a confined space, map a relatively large area, obtain high res RGB and NIR imagery from the same flight, and process the imagery automatically and quickly, at half the cost of other solutions out there?

 Here is a quickly shot video of the Aeromapper Talon and its great capabilities for confined areas. Thanks to its impressive climb rate and parachute landing, which has a 100% success rate and the most forgiving packing method. Unless other UAVs with complex parachute deployment systems that depends on “parachute ejection” methods and sometimes dual chutes, the Aeromapper Talon uses gravity for its deployment which rarely fails  J

It has an endurance of 80 mins, covering 6 km2 at 3 cm/pixel at 125 m agl.


The Aeromapper Talon is the ultimate agricultural tool.  It is ready to host the new Multiespectral camera from Parrot, the Sequoia which will be available from April 2016.

The Sequoia is a multispectral camera specifically designed for agriculture, with great features at approximately half the price of similar products offered.  The Sequoia captures calibrated wavelength, Green, Red, Red-Edge and Near Infrared at 1.2 MP and RGB imagery at 16 MP.

The Aeromapper Talon also has the unique ability to carry both the Sequoia and its standard 24 Mp RGB camera simultaneously, offering very high resolution images plus vegetation data.

The Sequoia will be offered as an optional addition to the Aeromapper Talon very soon.

More information on the Parrot Sequoia is available here.

For even tighter budgets we also offer a converted 24Mp Sony camera to NIR, available as a "swap and fly" setup.


The Aeromapper Talon can also be optionally purchased bundled with the Pix4DMapper Professional Aeromao Edition, that enables an inexperienced user to process thousands of images and quickly obtain survey-grade accurate orthomosaics, DSMs and Point clouds in a few clicks, for two separate computers and fully automatically.

Agisoft Photoscan Pro is also available, offering two different turnkey solutions for every budget.


More information on the Aeromapper Talon can be found here.

Read more…

3689683967?profile=original

I wanted to bring attention to the work that Tridge and the rest of the CUAV team have done to demonstrate the possibility of flying a Helicopter with a standard FBL controller handling the rate control duties.  They have been testing gas powered helicopter for next round of the Outback Challenge which will require a long-range VTOL aircraft.  Helicopters are a natural target for this mission of course.

Several of the CUAV team are experienced RC helicopter pilots, but not as familiar with installing a Pixhawk on a helicopter which can be difficult, especially in the case of gas engine helis.  As such, they were more comfortable having a normal Flybarless Controller handling rate control. In this case, the Skookum Robotics 540.   Tridge has made changes to the code which allow for a pure control pass-through from the RC Rx, through the Pixhawk, and straight to the FBL controller. This pass-through occurs in Acro mode, whereby the Pixhawk running ArduCopter has no effect on the flight control, so even if the Pixhawk should have a major AHRS/EKF failure, the helicopter is still controllable. 

3689683895?profile=original

Of course, the Pixhawk is capable of controlling a Helicopter without any FBL system, and this is the most common arrangement.  But the possibility of running an FBL controller in series with the Pixhawk helps lower the barrier to entry for many existing RC Helicopter pilots.  And also offers helicopters similar failsafe-function to airplanes, where they can survive the loss of the autopilot.

Read more…
3D Robotics

The IndiGoGo campaign kicks off on April 6th

From Dronelife:

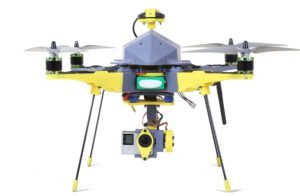
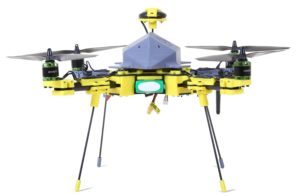
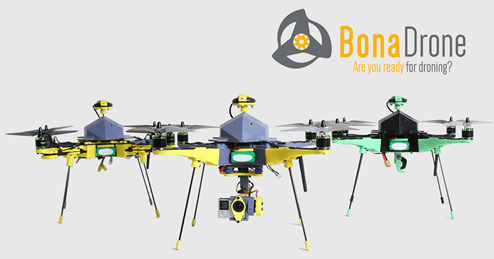
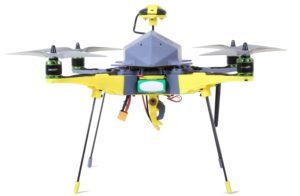
BonaDrone, based in Barcelona and set up by a team of five tech entrepreneurs, offers a different way for UAV enthusiasts to engage with their passion. The aim, according to BonaDrone, is to bring the technology and knowledge behind drones closer to end users, promoting creativity and encouraging people to get more involved in the design and building process. Mosquito + hookMosquito + gimbalMosquito + Carbon Fiber

BonaDrone’s first UAV is called ‘Mosquito’. Because it is 3D printed, buyers are essentially able to create a drone according to their wishes and needs. There are three levels of customization. the first is based on the appearance of the Mosquito. Users can choose to change the colors of any part of the drone. Second is accessories. Buyers will be able to choose from a range of accessories to build a drone with a specific functionality. These include camera gimbals, or even hooks for carrying objects. Finally, users can choose to upgrade certain parts of the drone to improve performance. This could mean replacing part of the frame for carbon-fibre, changing the flight controller or transforming the quadcopter into an octocopter.

Buyers will also be able to choose whether to receive their drone pre-assembled or in pieces, so you can have all the fun of putting together your own drone if that’s what you want.


The IndieGoGo campaign kicks off on April 6th

Bonadrone are launching a crowdfunding campaign on IndieGoGo on April 6th to bring the project to life. They plan to increase the amount of accessories available and will ask backers to suggest possible alternatives, which they will then put into production.

Read more…

Hello Guys

Ever wished to write an intelligent script using Computer vision to play with your drone? I did. In fact yesterday I started working on some basic thing and came up with a small drone game.

Drone will climb up 1m when it detects a blue object and will climb down 1m when it detects a red object. Thats it!

It took me about an hour to put together everything and get this demo onboard a 460 size hexcopter running FlytOS on FlytPOD (includes autopilot and odroid XU4) and Sony PS3 Eye camera.

After few initial searches I came across a nice python script on instructables to detect a round object with specific color. I modified it to track two objects of different color simultaneously and selected Blue and Red dishes as two colored objects for the game. With the logic handling unwanted situations like no object or both objects at a time, I was good to go. And went on to integrate it with drone, using FlytOS python APIs.

Then I took off the drone and switched to offboard mode(FlytOS taking over from me here). And started playing :)

To replicate this demo all your need is a drone with pixhawk, odroid XU4, web cam.

For information on putting together all the hardware, watch this, read this.

To get the flytOS go here.

Download above code from here.

If you face any issues post on forums.

CC users group on DIYD is a great resource for companion computer users.

With FlytOS it becomes very easy to command any drone from simple python scripts. It also exposes high level APIs in CPP, ROS, RESTful, Websocket,etc. A day or two more and you can have some mobile app for your application using flytOS.

Join the Flyt users group on DIYD to get posted of new demos.

Enjoy!

Read more…

Process Maps, NDVI and 3d Models for Free

3689683946?profile=original

With the Drone Data Management System™ officially out of beta testing, I thought it would be helpful to go through and show new users how they can still use it to process orthomosaics, NDVI maps and 3d models with imagery from any drone for free. This isn't intended to be a comprehensive guide to mapping techniques, but I'll go through the basics for the sake of those with no experience. If you already have some data you're ready to try, skip to the post-processing section below.


Data Collection

First of all, to make any map, you need to collect the right kind of imagery. For a drone, that means collecting images that point almost straight down and overlap at least 60% with its nearest neighbors front and back as well as side to side. In other words, if your camera has a field of view of 100 meters on the ground along the path of travel, it should move only 40 meters between shots. In general, 60% is an adequate overlap balancing coverage and avoiding excessive data collection, which slows down processing.

Planning for overlap and sidelap for Pixhawk vehicles is straightforward if you use the Mission Planner Survey (Grid) function. You can read more about that here: ArduCopter Wiki

DJI doesn't provide planning tools for surveying missions, but some third parties do offer these features for the Phantom 3, 4 and Inspire 1. The UgCS app, for example, lets you plan a mission on a PC and then load it onto your drone. UgCS is free for private use and supports automated survey mission planning with camera and drone presets for DJI vehicles.

If your drone doesn't have a gimbal, do your best to fix the camera pointing straight down. This might mean aiming a little forward to compensate for a multirotor's pitch in flight. Most drones in ordinary weather conditions should be able to maintain adequate overlap. DDMS compensates for small angles off vertical that may be in some images.

Once you've collected all the raw images, give them a quick look. Make sure they aren't blurry, don't have part of your drone in frame, and that they appear to have significant overlap. It's not necessary to geotag your imagery before processing, but there are advantages to doing so if you can. It speeds up processing, scales your map, reduces warping artifacts and makes it possible to take measurements from your orthomosaic. If your drone is running on Pixhawk and you've triggered your camera using the distance trigger function, DDMS can automatically geotag your images if you upload the telemetry log (.tlog) with your images. DJI drones automatically add geotags to each image.<br><br>


Post-Processing

Uploading to DDMS is simple. First, sign up here using just an email address. Then log in and click Create Mission. Enter a description for your mission and select the images and supporting files (.tlog) from your flight. Then just click Upload. At this point, your job is done, leave your browser open on this page until it prints a message that all images have been uploaded successfully!

To add NDVI or a 3d model to your mission, open the Missions Page in a new browser tab, select your mission and click the Analyze Images button. Be sure to leave the upload page open until it finishes. On the Analysis page, you'll have the option to add NDVI and 3d Model generation. More apps are available with a paid membership.

AppsPage
Sample "Analyze Images" Page, Select Apps Here


Our NDVI process is optimized for NGB (NIR, Green, Blue) converted cameras such as our own custom filters/cameras and similar options like those from MaxMax. Some converted cameras, particularly the small, cheap ones, have serious problems with rolling shutter distortions. These distortions make stitching much more difficult as they aren't consistent like the distortions from a lens, so try to check out some sample imagery before choosing a camera.

DDMS will take all your images and automatically process them into a 10cm/pixel geotiff (higher resolution available with paid memberships). If geotags are included, the mosaic will be georeferenced. It also automatically tiles your map for viewing online using Map Viewer. You can download the raw geotiff and NDVI mosaic for offline viewing by clicking Access Downloads on the mission page. Often times these files are too large for ordinary picture viewing software to open. QGIS or GlobalMapper are good options for offline viewing of geotiffs, but it's almost always slower to work with these large files offline.

The Analyze Images page also shows you the status of each step of processing as it progresses. When each step reaches 'Ready' status, you can access the result by clicking directly on it. In Map Viewer, toggle between the ortho-mosaic and NDVI results by selecting the layer from the upper-right corner and adjusting the opacity slider.

WinterWheatSidebySide
Composite of two Map Viewer Windows, Raw NGB Orthomosaic on Left, NDVI on Right


DDMS also recreates a 3d model of each mission. Select the 3d Model app and download the files to explore using Sketchfab, Meshlab or another modeling package. Although the beta period is over, we are still actively seeking feedback from the community. We see a lot of users doing things we didn't expect them to do with drone maps and we want to keep encouraging that kind of experimentation!


You can read more about the Drone Data Management System™ here. We have more apps available for the Pro and Advanced tiers, like DVI, 3d PDF, DSM, KMZ, Volume Calculation and Point Cloud Exports. Let me know what you think, what would be useful for you?

See the original post on Droneyard.

Read more…

Free in the Google Play store to generate flight plan for areas mapping.

Planning UAVs flights using height, lateral overlap and selected camera. After the plan generation, data can be exported to Mission Planner and DroidPlanner. Instructions for use in www.microvant.com.br. Especially useful to perform the mapping of rectangular areas with drone, UAV.

UAV Flight Plan creation for APM and PixHawk using Mission Planner and DroidPlanner

Read more…
3D Robotics


3689683904?profile=original

Just $34. Backed!

The internal box is 9.5x6.5x4 inches. The  external dimensions are 12x9x7 inches.

Three ViewThree View

The flame arrester is placed in the box lid by design, as the act of opening and closing the box ensures a clear area around the exhaust holes to further help prevent the chance of a house fire.

Flame arrester principleFlame arrester principle

Prototype testing

With this box you can charge lithium batteries at home unattended in complete safety. To prove my point I set the BAT-SAFE in a cardboard box full of tissue paper to verify that even in this extremely flammable environment the box would perform as designed.

Box buried in paper tissueBox buried in paper tissue

And it worked. In the testing process, I have deliberately overcharged dozens of lipo batteries to the point of exploding. This included batteries of all shapes and sizes, from small to very large. As the design deprives the fire of oxygen, the temperatures inside the BAT-SAFE are reduced further helping to prevent a home fire.

Battery blowing up inside the BAT-SAFEBattery blowing up inside the BAT-SAFE

Video link to battery blowup inside the BAT-SAFE

Read more…

Here are some thrust results for triple-blade propellers. I ordered and gathered as many as I could of available triple-blade props. I used an EMAX RS2205-2300KV motor and 4S LiPo batteries. My thrust stand is not the most accurate device, but for comparing propeller and ESC/motor setups it does an acceptable job. I have recently ordered the RCBenchmark 1520 thrust stand for future tests.

Hope these tests results may be of some interests to you: 

Check out the video description for links to Excel spreadsheet with test results

https://www.youtube.com/watch?v=BLbPrg-hMDY

Read more…

Decoding the iLap Racing Transponders

3689683838?profile=originalIf you've been out racing, or used cleanflight, you've probably heard of the iLap racing transponders.  These racing transponders allow racers to be timed around the track using infra-red.

The open source community has begun producing free lap timing solutions because many of the commercial options are quite expensive, but as always there's a will for open systems to at least be able to register iLap transponders as they whizz past the gate given many people have them.

We've analysed the infra-red protocol they use and documented it here so now all gates can be iLap compatible .

Read more here

Read more…

DBX Drones: Progress so far

3689683691?profile=original
Hi there! This is the DBX Drones team. Some time ago we presented you our design concept for a hybrid cargo drone. and since then we have been working on the idea and two months ago we decided to start working full time in this project and found a start-up: DBX Drones! During these last two months we have been creating the team, moving to a start up incubator, Lanzadera in Valencia, and starting to test our controller.

Right now we divide our time into two main objectives, the business team, trying to learn what do our future clients really want to have, and the engineering team, that is developing the flight control system and testing the platform so our client desires are satisfied.

After the last survey we made, we realised that people prefer to avoid touching low level code and have plug and play solutions, but at the same time have access to the inner workings of the system. For the time being, we have decided to go with Pixhawk autopilot due to the big community behind it, because it is open source, and because we would like to learn enough to give some knowledge back to the community. We have had to redesign the vehicle concept several times, due to unwanted vibrations that were resonating along the structure. You can se above, the evolution and different design proposals. We have decided to add an additional carbon fibre tube to increase rigidity during the multicopter mode flight tests.

Software wise, one of the principal efforts has been put into developing a good model of our platform, in order to test the control schemes as much as we can before performing the risky, time consuming (and deeply satisfying when they are successful) tests. Since our main idea is to be able to fly with different cargo weights, we have chosen to implement a model following neuro-adaptive non linear control, this way we are aiming to minimize the time we spend reconfiguring and retuning anytime we change something in the drone.

Here you can see an attitude test from the last month. We were thinking about what video to post from this last month, we chose this one because it was the first time we were testing our nonlinear controller. We were expecting it to turn wild, the obtained performance wasn't expected given that we hadn't tuned the controller at all. To give you a rough idea the controller thought the vehicle weighted 3kg more than it really did. The vehicle was capable of maintaining the attitude despite the lateral wind, the torque the straps produced and the severely damaged yaw mechanism we had at that time. We are now actively working in obtaining a good measurement of the ground speed so we can implement a speed loop control scheme. The next step will be testing the platform as a fixed wing and finally process to the cumbersome yet exciting transition tests!

We would love to have any feedback you can give to us about how we can improve our vehicle, development process or business. We are happy to learn everyday from the huge diydrones community and to be here doing what we like the most.

Please take our SURVEY so we can make something you like!

Thank you and see you soon.

Read more…