All Posts (14049)
Sort by
Hi ya'll. With the kind help of a number of testers, wiki writers and users it seems like Andropilot is now out of beta. So if you'd like an Android based ground control station I think is is basically ready for general deployment. You can download it from the Play store as "Andropilot".
See our group here (link includes feature list, required hardware and getting started guide)
And the very nice wiki user manual curated by Peter Meister (please help by adding to it). There are a few missing features, but the daily new releases are basically over. Every couple of weeks there should a minor release.
If you have questions, please start a new thread in the group and hopefully someone can help you. (I'll be mostly away from the forum for the next couple of weeks)
Hello,
I was inspired by some simple commercial 2 axis camera gimbal to create my own, fully transparent in acrylic. For those who are interest I share the SVG file I drew to have the parts laser cut. See attachment below.
The pictures below show different views:
You can download the SVG file here : gimbal1.zip
Edit : other dowload link for those who have problem with first one : gimbal1-alt%20svg%20format.zip
And a PDF version : gimbal1.pdf
Cu
Hugues
 After it took about forever to get 2 small level-shifters, I could start integrating FrSky telemetry into the project.
In addition, the control station can now display all flight parameters in metric, imperial or imperial-nautical units. To change the display units, touch the indicator in the status bar. The setting is stored in EEPROM. Also, screen brightness setting and the selected screen are now stored in the EEPROM.
The status bar now shows the APM custom mode in addition to the MAVLink basic mode and it shows RC and telemetry RSSI indicators.
FrSky integration at the moment is still in an .ino-file but I will move it into a library as soon as possible so it can be used also in other projects.
The New Skywalker 1900 has been around for sometime. I just finish mine and test fly it last Sunday in strong wind condition. I barely able to trim for straight and level and P gain in stabilized mode.
It feel more or less like my old Skywalker 1900 but the rigidity of the tail section had been much improve. No more flimsy/Shacking tail boon and stabilizer.
Although it was advertise as modular/easy to dismantle and install at field, but I doubt the durability of those orange plastic. For better reliability, glue the stabilizer and tail boom may seems a good option.
For me, the best improvement over the previous version is the enlarge fuselage. Now I can put my camera inside the fuselage with proper orientation. ( Horizontally relative to wings ). The only issue is now I had to add about 90 gram of ballast in the nose for proper CG because of the main battery sit right under the wings with no room for CG adjustment.
A lot of user reported the left turning tendency but I didn't notice mine had this problem. Some of them suggested a twisted wings but if that is the case, than most properly all the wings should be the same because it was made in the same aluminium mold. May be I just lucky to get a good set of wings.
Nothings much to talk about the build. It is fairly simple and straight forward. I had good success with my old Skywalker so I just transfer all my equipment, i.e motor, ESC, APM 2 with 2.63 firmware to the new one. For telemetry, I use RDF900. Hopefully with this long range data modem, I'll had full connection through out the mission within a few KM.
I'll update the flight performance after I had it trim out. My flight gear as below:
Servo : Servox SH0257MG
Motor : T motor 2814-8 1000KV
Prop : APC 9X6
ESC : Hobbywings Funfly 60 A
Autopilot : APM 2. 2.63
Telemetry : RDF 900
Battery : FlightMax 4S5000mah. for motor. 2S 2100mah for avionic equipment regulated by Castle Creation 10A BEC
As is customary and traditional, we celebrate every new 1,000 members here and share the traffic stats. This time it's 35,000!
There were 2.1 million page views this month, which is a new record (we get over 70,000 page views a day). It took us just 21 days to get this latest 1,000 members--we're averaging about one new member every 30 minutes.
Thanks as always to all the community members who make this growth possible, and especially the moderators who approve membership applications and blog posts and otherwise answer questions and keep things ticking here. We've got about 70 moderators now, but if anyone would like to join this group, please PM me. If you've been here for a while and have been participating, you'll fit in great.
Here is an update for the development of the Droidplanner app, the first post can be read here.
What I have done so far is:
- Auto-waypoint generation (hatch filling) just like Mission Planner.
- Codded a MAVlink v1.0 parser in Java, including a python script for the MAVlink generator to generate the necessary Java classes.
- TCP communication, all handled in an android service with the MAVlink packets being delivered to the U.I. via messages. (This structure is based on Bart's code). The entire communication is logged to a *.tlog file on the SD-card.
- HUD screen, just added the HUD designed by Bart.
- Fight Data screen with the current GPS position and heading of the drone overlayed in a map (the drone rotates). (I hope the designer of the icons on Mission Planner doesn't complain that i used them, where else would I find such nice graphics)
- Waypoint sending and receiving to the APM board (by the way i use a APM1 board)
How to test it
- First download the app from DroidPlanner_v0.2.apk. Now you should be able to use all functions that don't require communication to a APM board.
- To setup communication a Serial-to-TCP re-director is necessary, I'm using Pira CZ Remote COM (on Win7) with the following configuration. (Just set COM3 to the serial port of the APM board). When done, click on Run!
- Now on the app go to Menu->Settings, and set the Server IP (the IP of the computer witch has the board connected)
- Use the connect button on any of the screens and you should receive the MAVlink data. (I suggest using the terminal screen since it show the last received packet).
- Other option is to use the SILT simulator. And to test the TCP connection first with Mission Planner.
Note: The app is in development, and I haven't yet tested it on the field. I take no responsibility from any damage.
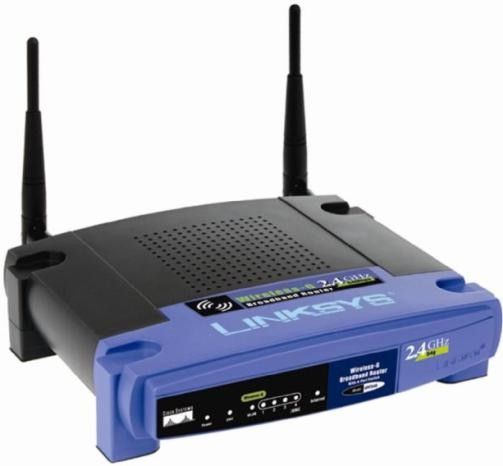
I like the idea of WiFi because it's a wireless connection to a tablet (and available on all android devices), all that is needed is a WiFi router (really cheap these days, and could be used for other purposes in the field) and a Serial-TCP bridge. This adds the possibility of using multiple GCS on the network.
Other options for the Serial-to-TCP bridge are (I have not tested any of these yet):
- Chinese Serial-to-TCP bridge from ebay ($20).

- Chine Serial-to-Wifi module

- Custom board (really DIY stuff, but it was a nice project), with could be designed to include servo outputs to control a tracking antenna. If there is interest i could explore this possibility.

- A Raspberry PI board.
- A modified WRT54GS router.

How to Collaborate:
- Download the source code from GitHub. (I changed it to it's own repository, to avoid messing up with my ardupilot repo, but in the process I lost the commit history)
- Read the read-me on the project folder, it's really simple to start developing (Just importing the project to eclipse basically).
- Chose something to fix or improve and do it.
The big question!
When I started this project there was no other active project on DiyDrones for developing a Android GCS. There was Bart copter-gcs, but since there was no more support (and because I don't have Bluetooth on my tablet, what was necessary) I decided to start codding a app. (even without much knowledge of Java).
Soon after my release, Kevin Hester released an app he was developing: Andropilot. Thanks to his amazing codding the app is great.
I keep developing my app for two reasons:
- I had just started learning Java and the Android SDK, Andropilot is written in Scala. This would greatly complicate my beginner life.
- I wanted to keep the project in a state I could support it all. And that it could be easily maintained by others, in the hope it could join the DiyDrones codebase. (Currently all that is needed to develop is the android SDK)
So my big question is in fact two:
- What language is easier to be maintained for this community?
- Should I drop DroidPlanner, and start developing with Kevin?
Hi Guys
I wanted to let the DIYDRONES members know we have released the New G-frame and will start production this week. We were able to get a great rate from our CNC partner and have passed this on to everyone here. The price for the complete G-frame (G10) is $149.99 at the FPVQUADS.COM website on pre-order. We expect to ship the first units in 2-3 weeks. The price includes the complete G-Frame, Built in Gimbal with servos and all hardware. Just drop in the 3D Robotics ARM 2.5 and some FPV gear and your all set. We have a small video here and will post several more over the next few days. We have tested with ARM 2.5 (2.9.1) and with DJI Naza GPS and both units perform fantastic. Just the cost of most GoPro gimbals is more that the complete package. Flight times we are getting with the test units is coming in about 14 mins with 4S 4000MhA @ 80% battery use. Let me know if you have any questions and we are always very happy to help. We think the cool design with arms functioning as landing gear and the new ESC housing located under the motors offers a clean and functional unit.
Previously I Crashed my X8 due to bad power module soldering.
Fuselage nose was broken and needs some attention to be repaired.
I'm going to put together all pieces that came off during a crash.
After that I'm gonna add some 0.15mm fiberglass to the front side of the fuselage to protect it from the minor dents due to hard landings, for example on the ice.
In the same way I'm going to reinforce elevons, as they are strongly bent at maximum deviationthat negatively affects the handling.
According to my estimates used dry fiberglass weighs about 80 grams, so with the resin, the total weight of the aircraft will increase by approximately 160 grams.
A lot, but is there a better choice?
Next I'll post some photos of the processes
Above: Crashed plane on a tree itself. Duct tape was added for rough landings. Didn't help, ha :)
Camera place was knocked out by the main battery
Here you can see a particular point of impact. Piece of the foam was strongly bent inside and almost came off...
Here is it after disassembling all the electronics. Three main parts have to be put together and couple of small cracks have to be glued too.
I used kleiberit pur 501.
It sticks to the foam very well, It turns into foam for 30 minutes and can be sanded in a couple of hours depending on the humidity in the room (the adhesive is cured by water from the air).
First I glued the camera place and most of cracks. The last piece was bent so I decided to make it fit when the fuselage will not be as flimsy.
After all it all was in it's place. Toothpicks were removed later.
Update.
Next few pictures after the plane was covered with fiberglass.
As a result, weight increased by 120 grams.
As is happening all across the country right now, politicians are drafting knee-jerk legislation against domestic drones. Sadly they often write vague definitions of "drones" without really thinking of the ramifications their rhetoric could have.
Case in point: Two bills were recently introduced to the Oregon legislature which will immediately criminalize every consumer and hobbyist who owns a toy or model aircraft capable of capturing images of people or objects. But don’t take my word for it – read the Roswell Flight Test Crew’s very extensive analysis here. Or watch their great video above.
So PDXDrones members are coming together Thursday to organize ourselves against and respond to this misguided legislation. We'll be working with the AMA and Roswell Flight Test Crew to produce a video petition to send to our legislators, as well as other collateral we'll gladly share with other pilots going through similar situations.
If you live in the Portland area, we need you to attend this meeting. If we don’t act as a group, to let our own representatives know the grave mistake they are attempting to make, then we might all become criminals.
 The last post was almost laughable as ArduCutter barley got off the ground and certainly didn't do much in the way of entertaining. Well, it still isn't ready for Vegas however I've been feeling pretty good about the progress especially since the project was started with a strategy of hope. In the past week or so I have successfully put this quad through many of the basic flight modes and everyone walked away with no broken bones and no blood spilled. A few props went six feet under but that is to be expected for just about everyone flying these drones. The bottom line is that I've had tons of fun and learned a lot about the tools and practice in general. Hopefully I can convey the process in some manner to seed interest in others and help answer questions for others that are new to drones! Here are the highlights from my recent activity:
APM Planner Running Under MAC OS X 10.8.2 (and Ubuntu 12.10) with Mono:
- Downloaded and installed Mono Framework for OSX.
- Copied an already installed (under windows) APM Planner directory over to OSX. Wine installation fails (on MAC, not so with Ubuntu) without any activity. I messed with Wine 1.4/5 a bit before moving to Mono. Wine never would work, always aborting during install.
- In the terminal I issued: mono ArdupilotMegaPlanner10.exe and here is the result after connecting to ArudCutter:

- The result isn't as usable as the native Windows version however I can load missions, monitor stats and download logs which is the majority of what I'm using APM Planner for at the moment. One drawback is "Browsing Logs" and graphing does not work. This is easy enough to accomplish by uploading log files to Google Spreadsheets then filtering and graphing there. I suspect when I get deeper into log analysis this will be very handy to share log files to the DIY Drones community and ask for help!
- For Ubuntu 12.10 I found this helpful post from Gerrit Jan Baarda. I installed mono-runtime and libmono-winforms2.0-cil and achieved basic connectivity and functionality however I have not tested this version thoroughly.
PID Adjustment - Suspension Rig:

- Following this video and tutorial (thanks Dave C) I attempted to fine tune the PIDs. I must admit, it wasn't very easy to get used to at first, the quad jumps all over the place.
- After a few hours of adjustments and learning the process I arrived at the following final values:
- Rate_P: .161
- Rate_I: .554
- Rate_D: .008
- Placing the quad in a suspension rig such as this really saved the day. During the process something happened and the quad went full throttle all on its own. Radio link LEDs were indicating no loss of signal so I'm not sure what caused this. However I suspect for some reason it went into failsafe mode and tried to RTL (Return to Launch) which was 20 or so meters away. There wasn't anything I could do except wait for the battery to die so I could grab the battery and unplug which I was able to do after two of the four props stopped spinning. Scared the heck out of me, I thought the thing was going to take off and carry the dressers it was tied to away. "The Beast" might be more appropriate than "ArudCutter" at this point.
Flight Modes: (This is not an explanation of the modes, only my log of activity.)
- Stabilize: The basic mode, I've been through 15 or so batteries just in this mode getting the feel, making adjustments and having some fun.
- RTL: This mode was first tested after I built a short "Auto" mission with only a few waypoints with the last instruction set as RTL. Just as I had hoped, the quad was .5km away on the last waypoint and when RTL hit, it came screaming home in all it's glory.
- Auto: This is where I got really excited. Planning a mission of all sorts of activity for the quad (Loitering, delays, waypoints, turns, RTL), flip a switch and simply watch it do what you told it to do. I assume I was lucky in that my first few missions completed without total disaster.
- Loiter: This is another very basic mode in which I just wanted to ensure I was seeing the proper tight loiter radius, all was fine here.
- During one Auto mission the wind was gusting to around 32Km/h and after providing some "Loiter_Turns" commands I noticed the mission wasn't executing as expected. I gave the switch a flip to RTL mode and enroute the motors began to cut out. Large swooping circles above launch position ended in a flat drop from about 10 meters in order to save the small crowd and the quad. I still have some digging through the logs to find out what happened here. You can see this activity in the video.
Andropilot:

- Browsing the Google Play Store I found this gem: Andropilot. This is basically a version of APM Planner for your Android device.
- Using my Nexus 7 and this USB 2.0 Female to Micro B Male Adapter I successfully connected my 3DR ground radio and I'm 100% ready for flight testing.
- I just got these together and functional yesterday so I have yet to test them however the first goal will be test the follow me function.
- My testing so far consisted of using my Nexus 7 with Andropilot installed and the 3DR ground radio (I did purchase and install the 3DR radio for telemetry, the USB cable got old fast.) connected then tethered to my Nexus 4 for Internet connectivity and maps to work properly. By next weekend I'll have video of me running up and down the field with a death trap chasing me. It should be good fun!
Flight Log Analysis:
- I'm still learning the best use of all the data that comes from each flight. The fact that flight logs are available with all the rich data is just awesome. I'm trying to focus on this a bit though due to the few strange things that happen during flight, the more I know about the logging and analysis of them the better I can understand and troubleshoot. I highly recommend starting here and watching the 22 minute video posted at the end of this wiki.
- In addition to the log analysis, the Google Earth integration (output of .kml files) is extremely fun to dig though and analyse. Just about anything you can ask for to be plotted in Google Earth is available from APM Planner flight outputs. The wiki linked above describes this in detail. Check it out!

FPV Rig:
- Just a quick update on my FPV setup: I have all the gear setup and configured, ready to mount on the quad. I'm really only waiting until I feel comfortable enough with piloting and troubleshooting so my first FPV will be super fun instead of a sad story I write about after an accident.
Video Update:
- I threw together this quick video to show off some of the highlights discussed here.
Following on from this mornings post about delivering cupcakes I thought I'd post a talk I gave last week at the Bootstrap Business Club in Manchester, UK.
The main conceptual difference between the many Cupcake/Taco/Burrito Copters (including the Matternet idea http://matternet.us/ ) and the Pigeon Post is the former are all point to point systems and the latter uses (or will use) an IP like packet switching set up. Anyway, take a look at the two videos below for more info and please give us your feedback! Thanks.
Main Talk is above,
Q and A Session (most of it anyway)
 The out test team together with users every day suggests new functionality for PitLab FPV System including OSD and Autopilot. Now we have pleasure to announce version 2.09 with many new features and correction. Full description can be found in the Download page of the FPV System project.
In last days was finished PCB for beta test version of ground station and send to manufacturing. This version will be manufactured in limited volume only 15 pcs for beta tests purposes. It looks like below:
Click on the board picture to enlarge
Ground station will have big LCD on the front, tracking antenna driver, 2 channel video diversity, SD card for telemetry logging and measuring of current consumption on the ground. Will be mounted inside plastic enclosure.
Join to our community and help to create best FPV system ever!
We have threads on RC Groups and on our biggest national FPV forum: OSD, Autopilot and Ground station threads. Threads are in PL, but English is also welcome.
Back then, Kickstarter allowed people to use conceptual designs and rendered videos to capture eyes of backers. So our strategy was to do a quick research and evaluation on the technical feasibility of making such a drone and our competence of delivering it if we successfully raise the fund with a rendered video.
The answer to that research and evaluation was positive. So we decided to make a quick prototype, shoot the video and then post the project on Kickstarter within 2 month, which means in original intention we planned to raise fund for HeX on Kickstarter at the middle of October,2012. And in the fears of funding goal not being met, we lowered our expectation to somewhere around 15,000 USD and were hoping the difference between that number and the actual cost of developing a real one be capitalized by angels or VC.
So we made the first prototype out of some second-handed components like the X shape body frame and adopted the way of DIYing a flight control from MWC. We brought a Panda board, which we hope is going to be customized and minimized in size in future as an airborne computer, to test our tracking algorithm as well.
However, approximately during the middle of September last year, we found we had to do more than what we had planned. Kickstarter introduced some regulatory policies in the answer of public questioning the integrity of its business model because some heavily funded projects were facing the allegation of deceiving people for money. Notable policies include project approval process and denial to rendered videos and pictures.
We didn't want to give up because of those new regulations. So we went on to have the second prototype built. We 3D printed the whole hexagonal body frame in a costy but high resolution-guaranteed way (the body frame costed us nearly 8,000 RMB). After finding there are still many flaws in the flight control we DIYed, we bought a more sophisticated one from the market to give the second prototype a stable performance. (We're pretty sure we can improve our flight control and make it as sophisticated as others people can find in the market. It's just not worth the time and money doing it now before the money we could raise).
We had been pretty sure that with the second prototype we could shoot a video and make an intro that could meet the cafeteria of Kickstarter. But things just didn't go well as we expected. The second one is a little heavy than we thought. The time it could fly is short around 5 to 10 minutes and people without any experience of flying a drone before will find it not that easy to control it. Small accidents happened almost every time we took it out to fly and shoot videos. More lethally, the 3D printed body frame is so fragile. After several times of fixing it with black duct tape, it finally broke into pieces in a terrible and deadly crash without fulfilling it destiny which was to help us have the intro video done. (I still remember the guy's face after he crashed it).
The scene of crash
OK, this wasn't the way to do it. But what's the solution to make a drone not afraid of being crashed?
One is that the body frame needs to be crash-proofed. Two is that it's not crash-proofed but it is ridiculously cheap. But either way, we needed to find out how?
After weeks researching on the ways of manufacturing in mold choosing, shape forming, material choosing, we finally figured out a way: purchasing our own CNC router, 3D printer, laser cutter and glass fabric boards to build it. Because anything other than this is not affordable or incompetent in skill for us.
So we redesigned HeX making the hexagonal look able to be assembled by components that can be made out of CNC router, 3d printer, laser cutter. And that's how we have built the third prototype. By doing so the cost of the body frame dropped dramatically to 5% of the its previous ancestor. And we can quickly and affordablly build several copies of HeX or spare parts. If it crashes again when we take it out for video shooting, no worries, we just fly another one or quickly replace its broken parts. We found our solution in personal manufacturing.
The whole process makes us realize we still want to take on the path of making a perfect drone but with a different approach.
Before assembly
the Assembled Dynamic Unit
To Be Continued......
Two Bay Area hackerspaces are conducting a robot-delivered cupcake contest. Clearly drones will be the winning technology. Fortunately, there's already a website for that.
From Ace Monster Toys, an Oakland-based makerspace:
Overview
In the interests of inter-hackerspace collaboration, Ace Monster Toys is building a robot to deliver delicious delicacies to Noisebridge. We understand Noisebridge has a robot too, and we are preparing to defend ourselves against any robot-delivered treats it may attempt to deliver to our space.
The Rules
Whichever hackerspace delivers a tasty snack to the other first is the more awesome hackerspace, forever.
Any technology can be used to control the robot, although some kind of cellular radio is the most likely option.
Use of public transportation to carry the robot over the Bay Bridge is allowed.
A human minder can accompany the robot, but can't control it.
No exploding cupcakes.
Hi,
I have measured very good Zaccel vibrations with this mounting system. It consists of a suspended acrylic base plate (3mm thick) on which a silicon pad (6mm thick) is placed. The APM case is placed on it with a little pressure from a velcro band.
The O-rings go through holes on each corner of the acrylic plate and are attached to the black nylon spacers. In order to avoid that the o-rings would move up/down the nylon spacers, I used flat metal nuts to block the o-ring (it is screwed between the first 10mm spacer and the bigger 30mm spacer).
The acrylic plate is suspended about 2mm above the fiberglass mounting plate. In order to shield the EMI interferences that could come from the PDB/ESCs, I added special EMI tape on this bottom fiberglass plate.
I show below the obtained results with motors 100% throttle:
This AccelZ measurement in the logs show an average of maximum 0.5g deviation, which is I guess quite good!
Other pictures:
Hugues
I'm about to start out with my first fully autonomous build. I go to school at the University of North Dakota and am majoring in Unmanned Aviation. The classes that i take in order to get this degree all combine in for a project that requires me to build my own fully autonomous platform. The whole project is designed around the idea that we (the students) should be able to create or choose the correct UAS platform for the task at hand.
The scenario that is as follows.
Fire fighters are working on controlling a large forest fire. There are crews spread all over the place and they are unable to have a coordinated approach to the fire. They decided to use a UAS platform to survey the area. What is required?
-An easy to fly platform, they are most likely not trained pilots so the easier to fly the platform is the easier they will be able to gather the necessary recon.
-Persistence, the platform need to stay aloft for extended periods of time, this allows the firefighters to concentrate on the fire opposed to recovery of the aircraft.
- Stability, in order for untrained observers to gather the necessary information from the cameras it will be paramount that the images are on a stable platform.
Time aloft- Going back to persistence it the aircraft will have to be able to be aloft for an extended period of time. The thermal activity that comes off of forest fires is more than adequate to provide a lifting action. It will be necessary for the platform to have a high aspect ratio, low wing loading, moderate to high soaring capabilities as well as a way of finding and riding thermals.
What i have decided to use.
PLATFORM
Multiplex Cularis- This platform provides all the aforementioned qualities, quality space in the nose, it has a good amount of durability, and the EPO foam will allow me to cut out more space necessary for the equipment.
MVVS 25 3.5/960
Jeti Eco 40
Pro Lite G6 TP3300 3S
APM 2.5 915 mhz
Mediatek GPS
Futaba 8ch radio and receiver
Sony HAD CCV camera
GoPro Silver Edition
Hitec Servos
I am rather excited to get this build going. I have been doing some reading about a thermal hunting firmware that is being created by another person who posts on this site. I would really like to implement this into my platform, if i am able to integrate this into my system it would allow for some very high aloft times further accomplishing my goal for this platform.
More posts to come, pictures as well!
So,
I recently posted in a forum about how to add 3G uplink to a UAV model. This project seems really fun to me, so I'm thinking about writing the software to make it happen (a little web server and some new features for Andropilot).
However, the bummer is that some uses wouldn't be legal in the USA (given the current harsh FAA interpretation we need to operate under - <400 ft, visual range of control).
To make sure this app/feature was used 'correctly', I would have it check to see if you are in a 'long range control is legal' country. If not legal, I'd have it automatically send a mavlink RTL command if you got more than x (1?) km away from the home location.
My question:
- Are there countries where unrestricted long range control are legal?
- If you are in such a country, are you willing to put a (cheap) android phone into your plane and give this a shot? If you are, I'd probably be willing to make the software/servers go.
Kevin
I have done this power layout to ensure power failsafe if something goes wrong.