All Posts (14056)

Sort by

AGV Chassis change


Yup, it now has 2 platforms instead of that plastic truck shell.


Here is a picture to remind you what it looked like


Here are some photos of the building of the dual platform. Its made from lexan, each platform measuring 12"x5.5". Holes were drilled for the spacers and for the pegs that hold the platform to the chassis.


3689366169?profile=original


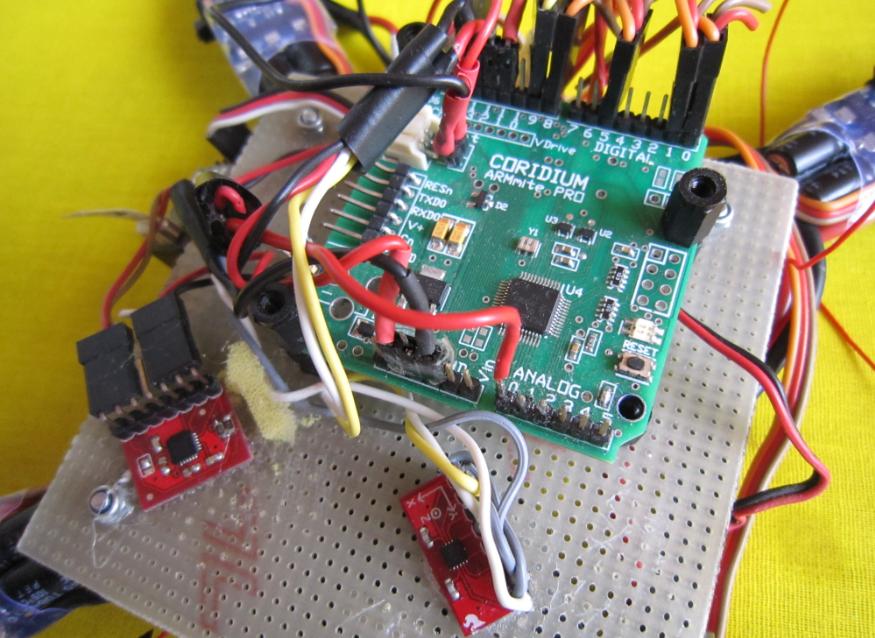
It is still the same old setup (compass, GPS, and my custom board), but i am trying to think of things to add. If you have any ideas, please leave a comment. The compass is mounted on the top deck with a custom bracket made of polymorph plastic.


Read more…

Senior Telemaster UAV Drone

Senior Telemaster UAV Drone[Mechanical Part]

Participants: Jinwoo Baek, Rufus Cochran, Patrick Duncan & Matt Runchey

Parts:
- Ready Built Senior Telemaster, Yellow (OVERSIZE) / Product #: HLA007 / URL:
- SuperTigre SUPG0235, 11003544, G90 Ring w/ Muffler / ****
- Exacto Knife / Joe's Hobby Barn
- Gripper Pads / Menards
- Drill / Amazon.com
- Sharpie / Menards
- Hangar 9 / Heat Sealing Iron / Joe's Hobby Barn
- 1/16'' Drill bit
- Philip screwdriver
- #8-32 Stove Bolt, 2 1/2" Long x 5/32" Diameter Round Head, Qty. 6 / Menards
- Tool Shop High Speed Steel Drill Bit, 5/32" / Menards
- #8 Flat Washer Zinc / Menards
- #8 Lock Washer Bronze / Menards
- DU-BRO Cat. No. 158 / Steel Landing Gear Straps / Joe's Hobby Barn

- DU-BRO Cat. No. 690 / 32 oz. (950cc) Fuel Tank / Joe's Hobby Barn

- DU-BRO / Pushrod Connectors / Joe's Hobby Barn

- Master Airscrew / 15x6 in. K Series Propellers / Joe's Hobby Barn

- DU-BRO Cat. No. 257 / Heavy Duty Hinges / Joe's Hobby Barn

- Futaba S3004 standard size servos / Joe's Hobby Barn

- EXRA115 Expert Electronics/ Servo Extension 12" Standard / Joe's Hobby Barn

- SIGSH710 / Easy Hinges / Joe's Hobby Barn

- DU-BRO Cat. No. 125TW / 1-1/4" Dia. Tailwheel / Joe's Hobby Barn

- SIGSH709 / L.G. Retaining Straps with screws / Joe's Hobby Barn

- DU-BRO Cat. No. 257 / Heavy Duty Hinges / Joe's Hobby Barn

- DU-BRO Cat. No. 376 / Tailwheel Bracket / Joe's Hobby Barn

-

Building the Senior Telemaster ARF

Step 1: Landing Gear

Our team made changes with the strap material. We were concerned about the original strap material because during installation stress fractures were observed, which is illustrated on Figure 1. So, we substituted the plastic straps with the Gripper Pads found in Menards. The Gripper Pads, shown on Figure 2, material is more flexible, variable in size and easy to manipulate. Also, due to concerns of its strength, we increased the number of straps from 4 to 6 as shown on Figure 3.
Figure 1: Stress fracture on the original strap

Figure 2: Alternative material for strap

Figure 3: Display of changed straps


unchanged recommendations:
- 2.60mm Aluminum screw replaced with Metal Material screw

Step 2: Installing the Glow Plug Engine

We decided to use the SuperTigre G90 engine considering the heavy payload of camera system, communication system, and sensors, over the SuperTigre G60.

There were various concerns that were brought up in the process of installing the glow plug engine on the plane. According to the instruction manual of the engine, it requires us to keep the Fuel Pick-up line no lower than 3/8" from the high speed needle. This creates various issues in installing the engine. After searching the web and asking experts in building RC planes, our team concluded that the muffler's pressure fitting into the vent of the fuel tank would be enough pressure to overcome any fluid-dynamic discrepancies for a smooth supply of fuel to the engine. So, after drilling a set of four holes in thinking to mount it up-side down as shown on Figure 4, we finally came to install the engine on as shown on Figure 5. Both #8 lock and flat washers were used on the #8-32 stove bolt that was cut into size.

Figure 4: Failed attempt to mount the engine inverse

Figure 5: Final engine mount

Step 3: Installing the Tail

Read more…
3D Robotics

Review of the production Parrot AR.Drone


I've now had a chance to fly the production-model Parrot AR.Drones enough time to have a good feel for how it it flies under a range of conditions, and how it differs from the prototype that I've been flying for six months. Here's a brief review:

The package: The box comes with the AR.Drone, indoor and outdoor bodies, a 1,000 MaH LiPo battery and charger, plugs for various country electrical outlets, and a target.

Indoor flight: This is where the AR.Drones shines. Press one button, and the props spin up, then shift into high speed for a rock-solid take off. It then hovers at about three feet, waiting for further instructions. In n00b mode (right button), you can rotate and go up and down. In pilot mode (left button), you can fly forward and back, left and right. Combine the two, and you basically have a full range of control.

The optical-flow position hold works best on a textured surface, like a patterned carpet or tiled floor. On a totally featureless floor (concrete or smooth, unpatterned carpet) it can tend to drift a bit.

As you fly over furniture, the ultrasonic altitude hold can get confused. Sometimes it goes up as you fly over a sofa, say, and sometimes it goes down. Sometimes it gets so confused the AR.Drones goes to the ceiling. But in general, it does a quite good job.

Total flight time is a bit less than 10 minutes in my experience.

Outdoor flight: This is not the AR.Drone's strongest suit. For starters, it won't fly higher than 15 feet (the range of its ultrasonic sensor). Also, the position hold really only works when there is no wind. Once the wind picks up, the AR.Drone has to tilt and shakes, and the optical flow camera loses its lock. Sometimes that means it just drifts, other times it will scoot off in a random direction after a wind gust.

But if there is no wind, you can fly as far as the wifi connection will let you (I've tested up to about 100 feet)


iPhone interface:


iPhone interface: The iPhone software is significantly updated from the prototype. As mentioned above, the right button is the equivalent of rudder and elevator, while the left is ailerons (if you'll forgive the plane metaphors). If you release the buttons, the AR.Drone will hold position wherever it is.

My video was laggier than the video shown above; I estimate a .5 to 1 second delay.

One cool thing about the software is that it will update the AR.Drone's onboard firmware if there is an update available (this had to be done with a special USB cable with the prototype).

The current version of the iPhone software is still a bit buggy. About half of the time it falls back to the iPhone's desktop rather than launching the AR.Drone interface.

Gameplay: I haven't tested this. But I do have two AR.Drones, so I'll try to borrow a second iPhone/iPod Touch and give it a try later and update this review.


Read more…

Batto - Testing the MAV I built for mapping

Ok, I didnt build it all myself, credit goes out to my mate Kim who cut holes and spent a fair bit of time with me on the build :)

So anyway, I wanted a UAV that did something... useful...

Live video is a pain, really easy to do if you dont go the legal route, but when it comes down to it, 10mw is just no fun in the city.

The next best thing has got to be mapping, strap a camera and trigger the shutter, too easy.

Other than that I wanted something under 1kg which isnt too much of an ask if you plan the build properly.

So here is a list of the parts which I ended up using for the aircraft:

  • WindRider EleBee Flying Wing
  • High power metal gear servos... cant remember the name unfortunately
  • MicroDan motor
  • Castle 25A ESC
  • Castle 10A BEC
  • Xtend900 Radio Modem
  • AttoPilot v3.0 AHRS IMU
  • Samsung WP10 digital camera
  • Futaba R319DP RX
  • 2100mAH Lipo's

So after flying it manually we went down to some farmland to try autonomous, test the Millswood GCS / data link & give the autopilot some photo triggers.

All went very well but the photos were rather bland, blurry and meh.

I wasnt expecting too much from that camera, I thought I may have picked the wrong type. The lens was internal and small but it was shock and dust proof.

Regardless, the flight went great and as expected.

Up early the next day to go flying with the guys, brought along Batto for another test. Exactly the same flight plan as yesterday, but today the AttoPilot was setup to cut the motor, level off & snap the picture every 70 meters.

Video below.

So, very happy with the results today!

The uncompressed 12meg photos from the camera look fantastic, alot better then I would have thought.

Hopefully ill get a chance to head out to a friend’s property and let Batto loose over his crops.

If anyone can think of a better canopy than the coreflute one ive installed let me know, it works great but looks very cheap :)

Max

Read more…
3D Robotics

I've now had a chance to compare the old 63" Nitroplanes Predator with the new 98" Reaper, which is finally in stock. There's no comparison. Compared to the awesome Reaper model, the Predator is a toy. The new Reaper has a fiberglass and balsa/ply body, solid fittings and landing gear and about twice as much internal room. Very solid model and tremendous finish quality.


Here's another shot (I haven't assembled the Reaper's steerable nose gear yet)


Here's the cockpit view (I haven't put the servos in the Reaper yet, but you can get a sense of the size difference. Also note how much room there in the big canopy):


I haven't flown the Reaper yet, and my only concern is that it's very short-coupled (like all Predator models) and may be pretty twitchy in the pitch axis. But I sure feel more comfortable putting it in the air than I did with the little one, which had a bad habit of tip-stalling. I think the flaps on the Reaper are going to help a lot with solid landings.


I probably won't fly this until Sept, since it needs the servos and motor installed. But it's looking good so far!


Read more…


Last week in Colorado a 46% scale RC plane flying a demo at a charity event at a private airfield got clipped by a full scale biplane with two people in it. Apparently, the video has been taken down from Youtube but there is a short article and a copy of the video over on Jalopnik (I have attempted to embed the video above). You should probably watch the whole video and read the article to get a sense of the event and the airfield before jumping to any immediate conclusions regarding blame.

I think this is a decent indicator of the complexities and responses you can expect when incidents like this eventually occur that involve amateur, unpiloted vehicles...the general aviation guys will say "get those toys out of our way!" and the UAV people will probably say something equally one-sided.

You guys with a lot of experience at managed RC events will probably see a lot of things that I don't see. The FAA is investigating, of course, and I imagine that there will be plenty of blame for just about everyone involved by the time the report comes out. A few feet one way and it would have been a near miss we might never have heard about and a few feet the other way would have produced multiple fatalities that might have defined the future of this hobby.
Read more…

My UAV project in the works, pt. 2


Hello all, (relative) newcomer here. I'm working on a FPV project with abit of a different control mechanism, that I hope to piece-by-piece get up to "UAV" status. Instead of a traditional RC TX/RX setup, I decided to go with a USB joystick ran through one of of sparkfun's USB host shields. This goes to an arduino, which does the USB processing and sends control commands over an Xbee. A picture is worth a thousand words:


What's inside the box, you may ask? Just an ATX power supply. Sadly, there wasn't even room for the arduino in there along with it... oh well.


Things are going well for my project though, and I hope to be putting in my order for the easystar sometime next week. Let me know if you have any comments or suggestions.

Read more…

More uBlox 4 U


There it is. The cheapest $47 bare board uBlox-5 available + $14 shipping.


As flimsy as it is, the hope is it'll be obsolete by the time it falls apart. The helical antenna only has 3 solder points, so the $90 brand name version probably wouldn't last longer. Knowing the wars about diydrones product offerings, we're not going to tell you where to buy the $47 special.


Voltage regulator attached.

Now your 1st look at the helical antenna. The rubber enclosure slides right off, revealing:


Is it a revolution in lighter weight, omnidirectional reception or another gimmick like fiber optic servo cables?

Unfortunately a killer commute & difficulties with the Air Force have this myth inching along. Have some commute footage instead.


Read more…

Netduino for a tricopter

Finally got round to getting some time to work on a uav, decided to start with a tricopter as it should be the easiest to work on indoors for now. Initial plan was to go with a couple of boarduinos or an atmega but stumbled across the netduino which is an open source board and software for the micro.net framework, and its available in the uk for around £24 which is a bargain considering its running on a 32 bit arm microcontroller and at 48mhz should give about 40mips so plenty of processing power. Given that I code in C# daily I'm going with the netduino (come pay day next month!)

The advantages seem to be:
Plenty of cpu power
Plenty of ram (70k)
Real time debugging
.net - and all its benefits, e.g. Threading, ease of coding, event handlers
All open source
Somewhat compatible with arduino shields (though won't be using any)
Plenty of digital inputs and two serial

The disadvantages seem to be:
Not realtime - though is this a disadvantage I'm not sure it is?
Only 4 PWM (should be okay, but maybe need to add in a driver)
Hard to design a custom board later on (100 pin package on the chip!)
Not as many analog inputs (only 6)
Only 128kb left for code (rest is taken up by .net micro and netduino code) - same as atmega though.
No existing uav code to base code on

Just installed the netduino sdk and got my class structure set up and starting coding the main thread for managing all the processes....
Read more…
3D Robotics
A few quick updates about the site and projects:
  1. We've added "Leaderboards", so it's easier to see what/who is hot in any given week. You can see all the leaderboard categories by clicking on the Leaderboard tab at top right, or just the content list in the sidebar at right.
  2. We've reorganized the ArduPilot Mega SVN repository to adhere to SVN conventions better. If you're using it, please delete your folders on your own PC and recreate them with new structure. It's a one-time thing, and doesn't take long, and it will help us keep this better organized going forward. (Thanks to Michael Smith for doing this and helping us make the project more mature in countless other ways)
  3. As Jason Short mentioned the other day, ALL software bug reports, feature requests and other issues should now be submitted via the Google Code Issue tracker. Here are the ones for ArduPilot Mega, for ArduPilot, and for ArduCopter. If you post an issue in the forums or comments on a blog post, the dev team probably won't see it. So please, start using the Issue Tracker and help us push these fixes through as fast and effeciently as possible.
  4. We're shooting for a public Alpha Release of APM this weekend. If that goes well, we hope to release a public Beta by Sept 1. The ArduCopter code is still in internal development, but the team is working really fast. It's looking like a September public release of an Alpha, too. Because it shares so much code with APM and inherited very solid code and tools from AeroQuad, the feature set is far more complete than a new project would normally be at this stage. It should launch with full UAV functionality, not just RC mode.
Read more…

MatrixPilot 2.5 Released

09980-01b_i_ma.jpg

Just in time to run on your new UDBv3, the UDB development team is excited to release version 2.5 of MatrixPilot! This version adds tons of new features, including inverted stabilization, camera targeting, more configurable waypoints, wind speed estimation, dead reckoning, and hardware-in-the-loop simulation. Big thanks go out to everyone who has written and submitted code, tested bleeding-edge versions, found bugs, and asked and answered great questions.


More info over at our wiki.


What's New in MatrixPilot 2.5

  • IMU based "dead" reckoning.
  • Support for waypoints at absolute positions, relative to startup, or relative to a fixed location.
  • More configurable waypoints / flight patterns.
  • Stabilize inverted flight.
  • Stabilize vertical / hovering flight.
  • Beginnings of automatic landing.
  • Camera stabilization and targeting.
  • Support for automatic detection of, and adjustment for average wind speed and direction.
  • Support for using a magnetometer for yaw stabilization.
  • Improve robustness of waypoint following when losing the transmitter signal.
  • Hardware-In-the-Loop simulation using a UDB and X-Plane.
Read more…
T3

Invensense gyros in the UAV DevBoard

UAV Devboard users,

The UAV Devboard, version 3, is now available from SparkFun. It is the same as version 2, except it replaces the LISY gyros with Invensense 500 degree gyros, which are practically vibration proof. Also, now you can use higher rotation rates in your flights without saturating the gyros. The previous gyros had a maximum range of 300 degrees per second.

The board has been flight tested by the team. All firmware for the UDB2 will work on the UDB3 without changing any parameters except the board type.

In MatrixPilot, you should select RED_GREEN_BOARD (even though the board is entirely red!) as the board type. If you are using any of the heli firmware, the board type depends on what version you are running. In the latest heli firmware, set the board type to INVENSENSE_BOARD. In either case, the configuration file that should be pulled is "IXZ500.h"

The "bigger and better" version of the UDB is still in the design pipeline, and is expected to be available in the spring of 2011.

Best regards,
Bill
Read more…
Developer

Ardupilot Alpha/Beta Testing

Since we have a few major pieces of software being developed at the same time I wanted to make a few points about how you can help.

1. Even though the dev team provides excellent support, Doug, myself and the Arducopter team do this on the side and are only paid in the satisfaction of seeing Ardupilot code in the air on your planes. I really mean that. We like to hear about successful integration and flights, not just bugs.

2. We are moving to the Issues list on Google code. Only issues listed will be addressed. This is simply the best way to track everything and it's open to to view by everyone. Please only put bugs in there and keep questions for the Forum posts.

3. If you are using Beta software, please understand there will be bugs. That's the point. What we really need to solve a problem is

- your header file
- pics of your HW setup if applicable
- DETAILED steps to reproduce the issue
- Example Code Fix to fix the issue - we really love getting code.

4. It's great to discuss issues in the forums, but please don't assume the dev team will read every post. Please use the issue tracker to ensure it is dealt with. Again, if you have a fix, please post the code to the issues list and not just the thread.

5. Alpha code will no longer be posted as a Zip archive. Get an SVN client such as Tortoise SVN. Changes happen daily/hourly.

6. We will be Tagging major updates so you can easily access older builds - as soon as we figure out how to do that ;) Michael is a pro at this and will be setting us up.

We are aiming for flyable Mega code to be Alpha by the 20th.


Read more…
Hi all,
my Name is Mike, living in Berlin Germany. Rc flying now 2 Years. Some Koax Helis and Jan 2010 to now Quadrocopter. The Conrad Quadrocopter 450. A good cheap Device to start . What you all programmed here and can handle its amazing. But most ready Quadrocopters ARF have Gyros already integrated and fly good.
But there is now the wish to have Position & Altitude Hold Device for my CoCo. I have no expirence to programming and so. But you Folks can made it happen. All these ArduPilot , UAVDevBoards confuse me a little.
Can someone programm , I think the ArduPilot will work, it so that i can connect 4 Sevochannels in and out to my Mainboard. Throttle / Nick / Roll / Yaw . Then when switch the Ardu via a 5 Ch on, it controls the Position and altitude ? Nothin more. NO Comming home, NO Map Route flying and and............
We, I mean all simple Quadrocopter Pilots are still waiting for that.
A UPAHD ( Universal-Position-Altitude-Hold-Device )

Mails welcome rc_heli_halle@freenet.de


Michael Abraham German
Read more…
3D Robotics

Using drones to monitor water use? Why?

Fast Company has an article about an Israeli water-use monitoring company, and for some reason they tie it into drones. I've read the piece twice and visited the company's website, but can for the life of me figure out why you'd use drones for this. Surely you'd use direct wireless links for this? If they're too far apart for wifi meshing, just use GPRS. The data size is tiny; it?s a perfect app for texting on cellphone networks.


Can anyone explain this?


Excerpt from the article follows:


"The word drone may conjure thoughts of sci-fi flicks, or images of attacks carried out remotely on hostile lands, or even your high-school biology teacher's voice. You certainly don't expect a drone to help save water, but that's what Arad Metering Technologies intends to do. The Israeli company's battery-operated drone is one of the novel tools it's deploying to help consumers and companies conserve H2O -- and to make money.

That such an idea would come out of Israel is no coincidence. The country is poor in water and rich in tech innovation, much of it born of constant military conflict. Israel pioneered the use of unmanned aerial vehicles after it lost many fighter jets in the 1973 war. But Arad's drones don't fight: They read data from the company's patented water-meter system to detect leakage or, in irrigation systems, drought.


The World Bank estimates that water wastage costs utilities $14 billion a year worldwide; in developing countries, 200 million more people could be served by the water lost to leaks and theft. Arad CEO Dan Winter says this is largely a consequence of how the business works in places where water is cheap or untaxed: "You train people to abuse water because they pay very little."


This broken system created an opportunity for Arad, which has deep green roots. Its parent company, the Arad Group, began making water meters in 1941, after prescient members of Kibbutz Dalia saw how the devices could help save water. Winter says his tech-centric unit seeks "to bring an added value" to both the core business and customers. Its technology can find irregularities -- a pipe failure, an unusually low flow rate, or a too-constant one that could indicate a leak -- in a few hours, rather than every 60 days as with a typical meter reading.


Arad's system is built around what looks like a standard meter. The difference is on the inside, where you'll find 3G wireless technology, a microcontroller, and 20-year batteries. Every 11 to 30 seconds, the system transmits data, which can be picked up by a drone (best for quickly covering big distances in remote areas) or by a drive-by or fixed-base reader. The data are then analyzed by computer to gauge how much water has been consumed, how much was lost, and even where tampering may have taken place. As a result, companies can save both water and man hours.?

Read more…